
Related Manuals for Extron electronics DTP HD DA8 4K Series


Summary of Contents for Extron electronics DTP HD DA8 4K Series
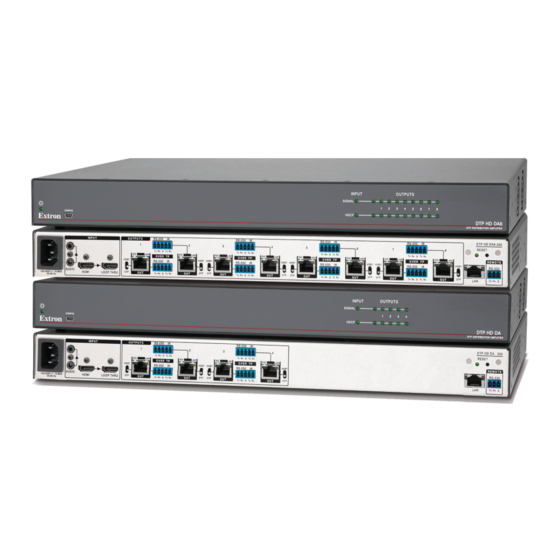
- Page 1 User Guide Video Products DTP HD DA 4K Series DTP HDMI Distribution Amplifi ers 68-2545-01 Rev. E 01 19...
- Page 2 Safety Instructions Safety Instructions • English Istruzioni di sicurezza • Italiano WARNING: This symbol, , when used on the product, is intended to AVVISO: Questo simbolo, ,quando viene utilizzato il prodotto, serve alert the user of the presence of uninsulated dangerous voltage within ad avvisare l’utente della presenza di tensioni pericolose non isolate the product’s enclosure that may present a risk of electric shock.
- Page 3 安全記事 • 繁體中文 안전 지침 • 한국어 警 告 若產品 上使 用此 符 號 , 是 為了提 醒 使 用者,產品 機 殼內 存 在 著 경고: 이 기호 가 제품에 사용될 경우, 제품의 인클로저 내에 있는 접지되지 않은 위험한 전류로 인해 사용자가 감전될 위험이 있음을 可能會導致觸電之風險的未絕緣危險電壓。...
- Page 4 ATTENTION : Risque d’explosion. Ne pas remplacer la pile par le mauvais type de pile. Débarrassez-vous des piles usagées selon le mode d’emploi. Copyright © 2018 Extron Electronics. All rights reserved. Trademarks All trademarks mentioned in this guide are the properties of their respective owners.
- Page 5 Conventions Used in this Guide Notifications The following notifications are used in this guide: CAUTION: Risk of minor personal injury. ATTENTION : Risque de blessure mineure. ATTENTION: • Risk of property damage. • Risque de dommages matériels. NOTE: A note draws attention to important information. TIP: A tip provides a suggestion to make working with the application easier.
-
Page 7: Table Of Contents
Contents Reference Information Introduction ........21 ............1 Using the Internal Web Pages ......21 DTP HD DA 4K Series Description ...... 1 Accessing the Internal Web Pages ....21 Features ............. 1 Setting Up the Device with the Internal Application Diagrams .......... - Page 8 Extron DTP HD DA 4K Series • Introduction viii...
-
Page 9: Introduction
This guide describes the function, installation, and operation of the DTP HD DA4 4K and DTP HD DA8 4K series of distribution amplifi ers. Unless otherwise stated, the terms “distribution amplifi er” or “DA” refer to any of the products in the series. - Page 10 • Supports multiple embedded audio formats — The DTP HD DA 4K series is compatible with a broad range of multi-channel audio signals, providing reliable operation with HDMI sources. • Remote powering of DTP receivers — The DTP HD DA 4K series can provide power to four or eight DTP receivers over the twisted pair connections, eliminating the need for separate power supplies at the remote units.
-
Page 11: Application Diagrams
Application Diagrams The diagrams below show typical applications for the DTP HD DA 4K series. Extron Tablet Laptop Laptop Laptop TLP Pro 320C iPad 3.5" Cable Cubby TCP/IP TouchLink Pro Combined LAPTOP DISPLAY ON Network DISPLAY OFF Touchpanel MUTE DOC CAM VOLUME More Video... -
Page 12: Installation And Operation
Installation and Operation This section of the guide describes the following topics concerned with the installation, setup, and operation of the DTP HD DA 4K series of distribution amplifi ers. Mounting the Units Front Panel Features Rear Panel Features Connecting the Input Source Twisted Pair Recommendations for DTP Communication Wiring for RS-232 Control Mounting the Units... -
Page 13: Front Panel Features
• Reduced air flow — Installation of the equipment in a rack should be such that the amount of air flow required for safe operation of the equipment is not compromised. • Mechanical loading — Mounting of the equipment in the rack should be such that a hazardous condition is not achieved due to uneven mechanical loading. -
Page 14: Rear Panel Features
Rear Panel Features 100-240V 1.0A DTP HD DA4 330 INPUT OUTPUTS RS-232 RS-232 RESET Tx Rx Tx Rx Tx Rx Tx Rx LINK LINK LINK LINK REMOTE OVER TP OVER TP HDBT HDBT HDBT HDBT HDBT RS-232 RS-232 RS-232 HDMI LOOP THRU 50/60Hz AUDIO... - Page 15 for more information). ATTENTION: • Do not connect these outputs to a telecommunications or computer data network. • Ne connectez pas ces appareils à des données informatiques ou à un réseau de télécommunications. RS-232 Over TP port — To pass bidirectional serial control between DTP-compatible or HDBaseT-compatible devices, connect a control device to the 5-pole captive screw connector.
-
Page 16: Connecting The Input Source
Control on page 10 for more information). Connecting the Input Source Use an HDMI cable to connect the input source to the female HDMI socket on the rear panel Follow these instructions to secure the input and output HDMI connectors to the unit with the LockIt HDMI lacing bracket provided: Figure 7. -
Page 17: Twisted Pair Recommendations For Dtp Communication
Twisted Pair Recommendations for DTP Communication Use the following pin configurations for shielded twisted pair cables. Pins: TIA/EIA T 12345678 568 B Wire color White-orange Orange White-green Blue White-blue Green White-brown Brown TP Wires Figure 8. Twisted Pair Wiring Diagram Supported Cables The distribution amplifi... -
Page 18: Wiring For Rs-232 Control
Wiring for RS-232 Control RS-232 communication between the distribution amplifi er and a host PC can be used to update Command and Response Table for fi rmware or confi gure the unit using SIS commands (see SIS Commands on page 16). The computer connects to either the rear panel 3-pole RS-232 port ( page 8 ) or the front page 6 ) of the distribution amplifi... -
Page 19: Sis Commands
The copyright message is displayed upon connecting to a DA via TCP/IP or Telnet or after a power cycle via RS-232. An example is provided below. (©) Copyright 20yy, Extron Electronics, DTP HD DA8 4K 330, Vx.xx, 60-xxxx-01 Mon, 6 Feb 2017 11:27:33 20yy Vx.xx... -
Page 20: Symbols Used In This Guide
Symbols Used in this Guide When programming in the fi eld, certain characters are most conveniently represented by their hexadecimal rather than their ASCII values. The table below shows the hexadecimal equivalent of each ASCII character: ASCII to HEX Conversion Table Space Figure 10. - Page 21 0 = Auto (default), pass through if HDMI sink, force TMDS output format DVI format if DVI sink 1 = DVI HDMI RGB “Full” HDMI RGB “Limited” HDMI YUV 444 “Limited” HDMI YUV 444 “Full” 6 = HDMI YUV 422 “Limited” 7 = HDMI YUV 422 “Full”...
-
Page 22: Error Messages
Error Messages E01 — Invalid input channel number E10 — Invalid command E13 — Invalid value E24 — Privilege violation E28 — Bad fi lename / File not found EDID User assigned mode In user assigned mode, the user can select from 55 factory loaded EDID fi les, each categorized by rate type (PC or HDTV), video format (DVI or HDMI), audio type (2-Ch or Multi-Ch), and native resolution. -
Page 23: Dtp Hd Da 4K Series Edid Memory Locations
Extron DTP HD DA 4K Series • SIS Commands... -
Page 24: Command And Response Table For Sis Commands
Command and Response Table for SIS Commands Command ASCII Command Response Additional Description (host to unit) (unit to host) Video Mute X6^] Video mute single output Video mute output only 1, 2, 3, or 4 (DA4) 1, 2, 3, 4, 5, 6, 7, or 8 (DA8) = 0 (video mute disabled) or 1 (video mute TMDS) or 2 (video and sync mute) - Page 25 Command ASCII Command Response Additional Description (host to unit) (unit to host) HDCP Output Mode X1@] Set HDCP output mode for a HDCP HdcpS = 1-4 (DA4) or 1-8 (DA8) single output X1@] HDCP HdcpS = 0 - 3 (0 is default) Set HDCP output mode for all outputs X1@]...
- Page 26 Command ASCII Command Response Additional Description (host to unit) (unit to host) filename NOTE: can optionally carry a full path name. The EDID file format is .bin, carrying 128 or 256 bytes of binary data. IP Configuration/Setup EX1% X1%] Set date/time X1%] View date/time Set DHCP mode...
- Page 27 Command ASCII Command Response Additional Description (host to unit) (unit to host) OLRPT View all output insert port setting Verbose mode 2/3 LrptO00* Serial Port Configuration EX5& X5& Set serial port parameters •Ccp X6!] EX5& X6!] Query serial port parameters Read port parameters X6$] Pti0*...
- Page 28 Command ASCII Command Response Additional Description (host to unit) (unit to host) View HDCP Notifi cations X6& Set green screen N 0 HDCP HdcpN 0 = 0 = Green Screen (default) Set black screen N 1 HDCP HdcpN 1 1 = Black Screen X6&] Verbose 2/3 View HDCP notifi...
-
Page 29: Reference Information
Reference Information This section provides information about updating the fi rmware of the DTP HD DA 4K models. The following topics are discussed: Using the Internal Web Pages Updating the Device Firmware Using the Internal Web Page The DTP HD DA 4K series Internal Web Page allows for monitoring and set up of the device via an Ethernet connection. -
Page 30: Setting Up The Device With The Internal Web
Setting Up the Device with the Internal Web Page Output status This section displays the status of all connected outputs. This section is not configurable. Input status This section displays the status of the connected input. This section is not configurable. Device info This section displays device information including: Device Name —... -
Page 31: Updating The Device Firmware
Updating the Device Firmware Update the device firmware via either the Internal Web Page or the Extron PCS software. Downloading Firmware To obtain the latest version of firmware for your distribution amplifier: Download www.extron.com , click the link at the top of the page (figure 12, ), then Firmware click the... -
Page 32: Loading Firmware To The Da With Pcs
Open Firmware Loader. If there is no desktop icon, open the program from the Start menu by selecting: Start > All Programs > Extron Electronics > Extron Product Configuration Software> Product Configuration Software The PCS dialog box opens with the Add Device... dialog box in front of it. - Page 33 Depending on the connection method that selected, additional options appear. Make the appropriate selections for the connection method. RS-232: Select the appropriate options from the Com Port and Baud Rate menus. • USB: Only the Extron USB Device_0 option is available on the Available Devices •...
-
Page 34: Loading Firmware To The Da With Internal Web
Loading Firmware to the DA with Internal Web Page The firmware can also be updated via the DTP HD DA 4K internal web page. To update the firmware via the internal web page: Using an internet browser, navigate to the device Internal Web Page. In the Device Info section, click the Update button. - Page 35 Extron Electronics makes no further warranties either expressed or implied with respect to the product and its quality, performance, merchantability, or fi tness for any particular use. In no event will Extron Electronics be liable for direct, indirect, or consequential damages resulting from any defect in this product even if Extron Electronics has been advised of such damage.
Need help?
Do you have a question about the DTP HD DA8 4K Series and is the answer not in the manual?
Questions and answers