Table of Contents
Advertisement
Quick Links
OLIMEX© 2017
ESP8266 with Arduino IDE
HOW TO USE ESP8266 WITH ARDUINO IDE
HOW TO USE ESP8266 WITH ARDUINO IDE
This document applies for the following products:
This document applies for the following products:
ESP8266-EVB; ESP8266-EVB-BAT; ESP8266-EVB-BAT-BOX
ESP8266-EVB; ESP8266-EVB-BAT; ESP8266-EVB-BAT-BOX
Document revision B, February 2017
All boards produced by Olimex LTD are ROHS compliant
Advertisement
Table of Contents

Related Manuals for OLIMEX ESP8266-EVB


Summary of Contents for OLIMEX ESP8266-EVB
- Page 1 HOW TO USE ESP8266 WITH ARDUINO IDE This document applies for the following products: This document applies for the following products: ESP8266-EVB; ESP8266-EVB-BAT; ESP8266-EVB-BAT-BOX ESP8266-EVB; ESP8266-EVB-BAT; ESP8266-EVB-BAT-BOX Document revision B, February 2017 All boards produced by Olimex LTD are ROHS compliant...
-
Page 2: Disclaimer
The products described in this document are subject to continuous development and improvements. All particulars of the products and their use contained in this document are given by OLIMEX in good faith. However, all warranties implied or expressed, including but not limited to, implied warranties of merchantability or fitness for purpose, are excluded. -
Page 3: Table Of Contents
OLIMEX© 2017 ESP8266 with Arduino IDE Table of Contents DISCLAIMER ................... 2 CHAPTER 1: PURPOSE OF THIS DOCUMENT ........4 CHAPTER 2: REQUIREMENTS .............. 5 2.1 Hardware requirements ................. 5 2.1.1 ESP8266 board ............................5 2.1.2 Power supply adapter ..........................5 2.1.3 USB<->serial cable .......................... -
Page 4: Chapter 1: Purpose Of This Document
CHAPTER 1: PURPOSE OF THIS DOCUMENT CHAPTER 1: PURPOSE OF THIS DOCUMENT This document aims to assist beginners in the first-time programming of ESP8266-EVB, ESP8266-EVB- BAT, or ESP8266-EVB-BAT-BOX, via Arduino IDE. Experienced ESP8266 users would probably find this document redundant. -
Page 5: Chapter 2: Requirements
2.1.2 Power supply adapter 2.1.2 Power supply adapter The ESP8266-EVB board gets powered via the barrel power jack named “PWR”. You need to apply exactly 5V DC. The corresponding power supply plug (or female jack) that fits the DC barrel has 2.1mm inner diameter and 5.5mm outer diameter. -
Page 6: Personal Computer
OLIMEX© 2017 ESP8266 with Arduino IDE • the cable needs to fit the pins of UEXT connector of the board – if it has free female leads, for example; • the cable has the proper driver support for the operating system of your personal computer. -
Page 7: Chapter 3: Setup
The hardest part of the connection is probably connecting the USB<->serial cable to the UEXT connector of ESP8266-EVB. The important part here is to connect the GND of the cable to the GND pin (#2) of the UEXT connector. Then TXD of the cable to RXD of the UEXT (#4). Finally, RXD of the cable to TXD of the UEXT (#3). - Page 8 OLIMEX© 2015 ESP8266 with Arduino IDE Page 8 of 15...
-
Page 9: Software Setup
OLIMEX© 2017 ESP8266 with Arduino IDE 3.2 Software setup 3.2 Software setup Before we are able to compile and upload a demo example, we need to prepare Arduino IDE to work with ESP8266 boards. This is relatively simple. Follow the steps below: •... - Page 10 OLIMEX© 2017 ESP8266 with Arduino IDE • Now at the bottom of the selector Tools → Board you should see different ESP8266 boards available. This is shown below: At this point we have a properly configured setup. Now we can proceed to upload a simple blinking LED example (the “Hello, World!”...
-
Page 11: Chapter 4: Uploading Blinking Led
OLIMEX© 2017 ESP8266 with Arduino IDE CHAPTER 4: UPLOADING BLINKING LED CHAPTER 4: UPLOADING BLINKING LED We need a properly configured hardware and software setup as described previously in chapters 2 and 3. Then we proceed as follows: • Start Arduino IDE. - Page 12 Edit the settings for upload! Navigate to Tools and edit the settings as show below (except for the COM port number which you identified previously; use the COMx number of your setup): The important settings (specific for Olimex ESP8266-EVB boards) are: ◦...
- Page 13 Enter bootloader mode and power the board. How to do it: press and hold the button of the ESP8266-EVB board; apply 5V of power to the PWR jack; release the button. You need to perform the above sequence every time before uploading new code to the board.
-
Page 14: Chapter 5: Further Reading
The best place to read more about the ESP8266 support for Arduino IDE is this one: https://github.com/esp8266/Arduino • The custom ESP8266 firmware and examples provided by Olimex can be found here: https://github.com/OLIMEX/ESP8266 • The link to the official web-site of Olimex is here: https://www.olimex.com... -
Page 15: Chapter 6: Ordering Codes And Document Revision
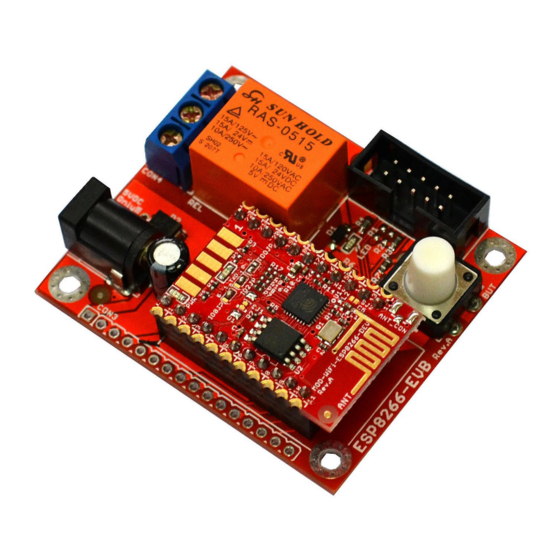
The exact names of some products mentioned in this guide can be found below. The products can be found in our web-shop with these specific product names: ESP8266-EVB – evaluation board for ESP8266 with relay, button, UEXT, all GPIOs available on 0.1" header ESP8266-EVB-BAT – evaluation board for ESP8266 with relay, button, UEXT, Li-Po battery connector with charger and all GPIOs available on boxed connector ESP8266-EVB-BAT-BOX –...
Need help?
Do you have a question about the ESP8266-EVB and is the answer not in the manual?
Questions and answers