Bunn Axiom Series Technical Training Manual
Hide thumbs
Also See for Axiom Series:
- User manual ,
- Service & repair manual (48 pages) ,
- Programming manual (18 pages)
Table of Contents
Advertisement
Advertisement
Table of Contents
Troubleshooting

Related Manuals for Bunn Axiom Series


Summary of Contents for Bunn Axiom Series
- Page 1 BUNN TECHNICAL TRAINING ® AXIOM®...
-
Page 2: Table Of Contents
Test Outputs ......................... 23 Test Switches ....................... 24 Service Fault Messages ..................... 24 Troubleshooting Components ..................25 Troublehsooting Refill, Heating & Brewing Systems ............28 Triac Map ..........................30 Schematics .......................... 31 Additional Resources ......................34 © 2011 Bunn-O-Matic Corporation. All Rights Reserved Rev. B... -
Page 3: Unit 1: Installation
nstallation Unit Objectives Given a realistic scenario depicting a new site install, the learner will be able to install and setup the brewer for customer turnover without error. Given a new machine, all the necessary tools and safety equipment, the learner will be able to install the brewer without error. -
Page 4: Site Requirements
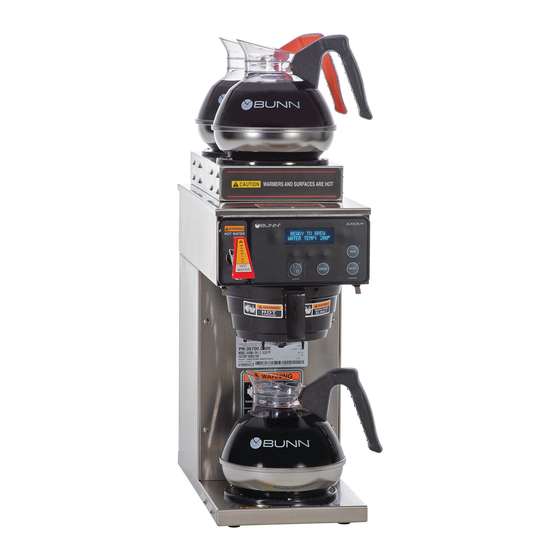
Installation Site Requirements Space • Counter able to support the weight of the equipment • AXIOM® (2 top warmers) approx. dimensions (H 18.9 x W 8.5 x D 17.7) • AXIOM® (3 lower warmers) approx. dimensions (H 16.8 x W 16.5 x D 17.7) • AXIOM®... -
Page 5: Electrical Install
Areas of high altitude will require lowering this temperature 8000 197.4 91.9 87.8 to prevent boiling. This chart should be used as a guide when 8500 196.5 91.4 87.2 re-adjusting the brew water temperature. 9000 195.5 90.8 86.7 9500 194.6 90.3 86.1 10000 193.7 89.8 85.6 Bunn-O-Matic Corporation... -
Page 6: Unit 2: Setup
etup Unit Objectives Given a realistic scenario depicting a new site install, the learner will be able to install and setup the brewer for customer turnover without error. Given an installed machine, all the necessary tools and safety equipment, the learner will be able to set the machine up for initial operation. -
Page 7: User Interface (Programming)
® service technicians alike. End users have an opportunity to see the status of the equipment during idle time or during a brew cycle. It is technician friendly, as with any LCD display equipment BUNN manufactures, allowing for step by ®... -
Page 8: Programming Menus
Programming Menus The programming menus for the AXIOM are divided into three levels. Level 1, (BrewWIZARD ), allows for basic ® ® brewing adjustments. Level 2 is used for more advanced brewing adjustments in addition to supporting service and diagnostic functions. The final level of programming, Level 3, is where you can find advanced screens such as; Cal Temperature, Lime Adjust, and Calibrate LP1-LP2. - Page 9 This function provides a 60 second test mode to capture water from the sprayhead. This measurement will then give you the numbers to enter into the “SPRAY OZ/M: xx” screen above. Will not display when BrewLOGIC is enabled. ® BREW COUNTERS ? Tracks the total number of brew cycles completed. Bunn-O-Matic Corporation...
-
Page 10: Level 3 Programming
SERVICE TOOLS ? Allows the testing of individual components and the ability to check the membrane switches for proper function. FACTORY DEFAULTS Reset all of the previously entered brew settings, ad message, calibrations, etc. Level 3 Programming To access Level 3 programming press and hold the right hidden button, until the screen reads Cal. Temperature, while on the Enter Password screen in Level 2 of programming. -
Page 11: Calibrating Flow Rate
Step 6: The display will read Cooling Tank Please Wait. Once the tank temperature is within the acceptable range the display will read, Container Ready?. Place an empty container beneath the funnel and select Yes. CONTAINER RDY ? QUIT Bunn-O-Matic Corporation... -
Page 12: Calibrate Temperature Probe
Step 7: The display will read Calibrate Spray, press brew start the calibration. CALIBRATE SPRAY PRESS BREW START Step 8: WaitingTilCycle 4 the display will indicate cycles complete. WaitingTilCycle4 CYCLE 1 COMPLETE Step 9: Use the Digital (-) switch and Control (+) switch to adjust total volume captured. Press Done when finished. ENTER OZ: 24.5 Spray OZ/M: XX.X LP1-LP2 OZ XX.X DONE Lime Adjustment... -
Page 13: Resetting Refill Threshold
Step 2: Now create a situation where it is known the water is not touching the probe (can raise the probe out of the tank). Record the probe reading. Step 3: With the 2 readings, set the programmed threshold to be exactly half-way Actual Reading Default Reading between the 2 numbers. XXX REFILL 155 DONE Bunn-O-Matic Corporation... -
Page 14: Unit 3: Machine Composition
achine oMposition Unit Objectives Given a realistic scenario in which the learner has access to the machine’s internal components the learner will understand the composition and functions of the brewer. Given a realistic scenario requiring the learner to access the internal components of the machine the learner will be able to remove the front panel and top cover. -
Page 15: Exterior Overview
Brew Switch: Momentarily pressing and releasing the switch starts a brew cycle when the “Enable Brew On/Off” indicator is on. Warmer Switches: Pressing any additional warmer switch so that the indicator is on, supplies power to the associ- ated warmer. Note: APS and TC models have no warmers. Bunn-O-Matic Corporation... -
Page 16: Accessing The Inside Of The Brewer
Accessing the Inside of the Brewer The majority of service work done on the AXIOM brewer will require the service technician to access the inside of ® the unit. The brewer has two removable panels, the top panel and front panel. Depending on the service required one or both of these panels may need to be removed. -
Page 17: Heating System
This additional heat aids the heater circuit by reducing the number of on/off cycles, thereby extending the life of the relay contacts and the heater. 1425 Watt Blanket Heater High Limit Thermostat Bunn-O-Matic Corporation... -
Page 18: Dispensing System
Sprayhead. The control board opens and closes this valve according to perimeters pro- grammed into the control board based on a specific recipe. While the dispensing system works much the same way as any other BUNN gravity feed brewer. One major differ- ®... -
Page 19: Unit 4: Preventive Maintenance
reventive aintenance Unit Objectives Given a realistic scenario depicting a machine requiring a preventive maintenance, the learner will be able to identify which elements of a component need to be serviced without error. Given a machine, all the necessary tools and safety equipment, the learner will be able to identify the components that need to be serviced for the PM. -
Page 20: Preventive Maintenance
□ Carefully remove silicon hose from brew valve □ Remove mounting nuts □ Remove 4 screws from valve □ Replace plunger, spring and rubber seat using rebuild kit, (BUNN P/N: 11517.0008) □ Carefully remove the silicon hoses from the outlet tank fittings □ Clean fittings using deliming tool (long end) or suitable tool □ Reassembly is the opposite of disassembly Step 3: Rebuild hot water faucet. - Page 21 RDY ? QUIT □ To activate the flow rate check, press the Brew button. □ The valve will open for 60 seconds. Once all of the water has dripped out, use the (-) or (+) buttons to input the volume collected and select Done. ENTER OZ: 24.5 DONE Bunn-O-Matic Corporation...
-
Page 22: Unit 5: Troubleshooting
roubleshooting Unit Objectives Given a realistic scenario depicting a broken machine, the learner will be able to effectively troubleshoot, diagnosis, and repair the problem returning the machine to normal operation. Given a machine displaying an error message, all the necessary tools and safety equipment, the learner will be able to access the software and diagnosis the problem. -
Page 23: Service Tools
Test Outputs the following components can be activated for troubleshooting. BREW VALVE REFILL VALVE MAIN WARMER LEFT WARMER NEXT NEXT NEXT NEXT LEFT FRONT WARMR LEFT REAR WARMER R FRONT/TOP WARMR RIGHT REAR WARMR NEXT NEXT NEXT NEXT TANK HEATER RELAY NEXT Bunn-O-Matic Corporation... -
Page 24: Test Switches
Test Switches this test allows for testing of all switches on the Membrane touchpad when a button is depressed the display will read the button selected. If “Nothing Pressed” appears on the display while depressing the switch the “Control Board” is not receiving a signal. BUNN ™ ®... -
Page 25: Troubleshooting Components
Then scroll to “LP1 & LP2”. LP1 = short probe, LP2 = long probe. 2. A high reading (approximately 255) indicates water is not touching, or not conductive enough to ground the circuit. A low reading (0-2) indicates the probe is grounded. Bunn-O-Matic Corporation... - Page 26 Temperature Probe The temperature probe is inserted through the tank lid assembly. Test Procedures: 1. Connect the brewer to the power source. 2. With a DC voltmeter, check voltage across the two wires at J9 on control board (Blackprobe to black wire, red probe to white wire. The indication should be aproximately between 4vdc cool to 1vdc at ready temperature.
- Page 27 • If voltage is not present as described, refer to Wiring Diagrams and check wiring harness. 4. Check the resistance across the two terminals on the blanket warmer. Refer to chart below. • If resistance is to specification, reconnect the two wires to the blanket WARMER RESISTANCE warmer. 50W-120V 288.0 • If resistance is not to specification, replace the blanket warmer. 50W-220V 968.0 Bunn-O-Matic Corporation...
-
Page 28: Troublehsooting Refill, Heating & Brewing Systems
Troubleshooting the Refill Circuit robleM robable ause eMedy 1. p Press OFF/ON switch on ill not refill oWer off to breWer control panel to determine if power is ON. “ “ 2. W Make sure water is ON. ater shut off “ “ 3. - Page 29 1. l Inspect the tank assembly for excessive ripping froM sprayhead iMe build up lime deposits. Delime as required. 2. d Check/replace ispense valve 1. s A clean sprayhead must be used for eak beverage prayhead proper extraction. Bunn-O-Matic Corporation...
-
Page 30: Triac Map
The reading must not be less than 195°F (91°C). Adjust the temperature setting to increase the water temperature. “ “ 3. f BUNN® paper filters must be used for ilter type proper extraction. “ “ 4. c A fine drip or grind must be used for offee grind proper extraction. -
Page 31: Schematics
(SHORT) RIGHT HIDDEN “DIGITAL” “BREWER” LEVEL PROBE t° “CONTROL” (LONG) OPTIONAL DUAL TOP WARMER ASSY OPTIONAL DUAL TOP WARMER ASSY BRN/BLK REAR 120V AC 2 WIRE 120/208V AC 3 WIRE BLU/BLK 120/240V AC 3 WIRE FRONT SINGLE PHASE Bunn-O-Matic Corporation... - Page 32 SCHEMATIC WIRING DIAGRAM AXIOM DV MAIN ON/OFF SWITCH (Late Models only) BLK-14 SELECTOR LIMIT SWITCH THERMOSTAT WHI-14 TANK HEATER BLK-14 BLU-14 BLU-14 BLK-14 TANK HEATER WHI/VIO-14 RED-14 1425W "KEEP WARM" HEATER 2268W BREW STATION WARMER (CONTROLLED BY ON/OFF SW) WHI/RED REFILL WHI/BLU DISPENSE...
- Page 33 Bunn-O-Matic Corporation...
-
Page 34: Additional Resources
QR Code Reader For quick and direct access to technical resources on the BUNN Online Learning Center, you can download a QR- Reader application for your SmartPhone . • Download QRReader Application for your SmartPhone.
Need help?
Do you have a question about the Axiom Series and is the answer not in the manual?
Questions and answers