Advertisement
Table of Contents
Advertisement
Table of Contents

Subscribe to Our Youtube Channel
Related Manuals for Filmcity FC-CTH


Summary of Contents for Filmcity FC-CTH
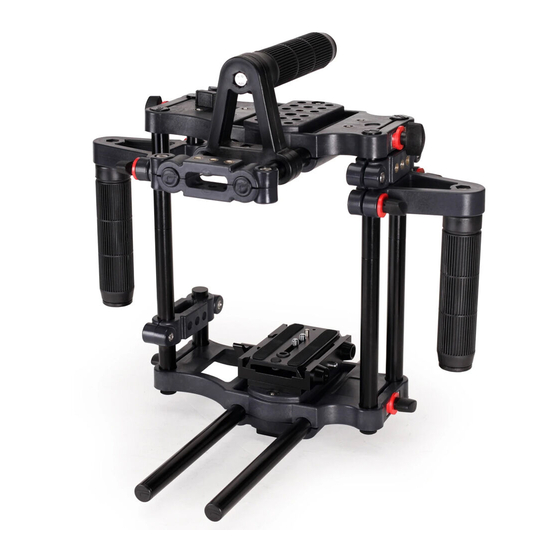
- Page 1 Filmcity Power DSLR camera cage (FC-CTH) Instruction Manual...
- Page 2 At Filmcity, our goal is to ensure 100% Customer Satisfaction in all that we do. We back our sales with a 1 year warranty from the date of purchase and work hard to resolve any problems in the unlikely event one should arise.
- Page 3 Filmcity family. By purchasing your Filmcity Power DSLR camera cage, you have just joined a host of designers, engineers, machinists, assembly, customer service and office staff that take great pride in all that they do.
- Page 4 Introduction Our Filmcity FC‐CTH Adventure Rig meets and exceeds the requirement of DSLR users by providing professional look production value at an affordable price. What’s In The Box Please inspect the contents of your shipped package to ensure you have received everything that is listed below.
- Page 5 Assembling Insert the 300mm female threaded rod into the camera base and tighten with allen key. Attach the quick release adapter base with the quick release plate of your tripod and tighten the bolt to secure properly. Now mount the base plate on your fluid head and secure it properly with the help of knob.
- Page 6 Now loosen the knob and pressing the pin to remove the quick release plate. Attach the camera with quick release plate and tighten the bolt to secure properly. mount the camera onto Base plate tighten the knob to secure it.
- Page 7 Attach the rods on the cage base plate and tighten the knob to secure properly. Screw-in the 100mm male rods to extend the height of cage. Attach the Accessory mounting bracket and tighten with the allen key.
- Page 8 Now insert 70mm female threaded rod to attach the accessory mounting adapter and tighten it to secure it. Attach the one side handle & tighten the knob. For other handle you should insert 70mm female threaded rod. Attach the cage top plate and...
- Page 9 Now Loosen the top plate with the help of allen key and insert the 150mm female rods. Now attach the top handle and tighten the knob to secure it properly. Insert accessory mounting adapter for mounting different accessories.
- Page 10 YOUR FILMCITY POWER DSLR CAMERA CAGE ALL DRESSED UP AND READY TO GO! (SHOWN WITH OPTIONAL ACCESSORIES) WARRANTY We offer a one year warranty for our products from the date of purchase. We will repair or replace your product, free of charge, in the event of a defect in materials or craftsmanship obtained during normal use or handling based on the user manual.
Need help?
Do you have a question about the FC-CTH and is the answer not in the manual?
Questions and answers