
Related Manuals for ROSIERES CIARRA


Summary of Contents for ROSIERES CIARRA
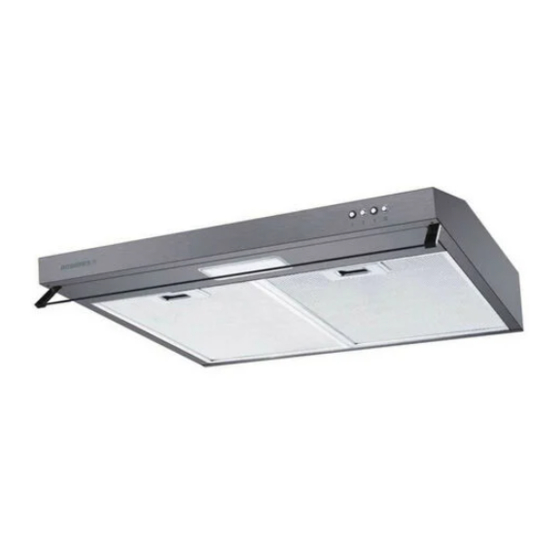
- Page 1 ENGLISH INSTALLATION AND USER’S MANUAL دﻟﯾل اﻟﻣﺳﺗﺧدم واﻟﺗﺛﺑﯾت ARABIC MANUEL D'INSTALLATION ET D'UTILISATION FRENCH ITALIAN MANUALE DI INSTALLAZIONE E USO...
-
Page 2: Table Of Contents
INSTALLATION AND USER’S MANUAL CONTENT INTRODUCTION................2 SAFETY PRECAUTION...............2-3 PREPARE FOR INSTALLATION............4 INSTALLATION................5-6 AIR VENTILATION SETTING............7 DESCRIPTION OF COMPONENTS..........8-9 MAINTENANCE................10 TROUBLESHOOTING..............11 ENVIRONMENTALPROTECTION..........11... -
Page 3: Introduction
INTRODUCTION Thank you for choosing this CIARRA cooker hood. This instruction manual is designed to provide you with all required instructions related to the installation, use and maintenance of the appliance. In order to operate the unit correctly and safety, please read this instruction manual carefully before installation and usage. - Page 4 concerning use of the appliance in a safe way and understand the hazards involved. Children should be supervised to ensure that they do not play with the appliance. Cleaning and user maintenance shall not be made by children without ...
-
Page 5: Prepare For Installation
PREPARE FOR INSTALLATION a. If you have an outlet to the outside,your cooker hood can be connected as below picture by means of an extraction duct (enamel, aluminum, flexible pipe or inflammable material with an interior diameter of 150mm) b. Before installation, turn the unit off and unplug it from the outlet. c. -
Page 6: Installation
INSTALLATION Attention! Observe the warning in the instruction sheet concerning the operation of the appliance when air is discharged from the room. When the range hood and appliance supplied with energy other than electricity are simultaneously in operation, the negative pressure in the room must be not exceed 4 Pa (4×10 Bar) Way one:... - Page 7 Way two: Drill 4 holes of 6mm diameter at the bottom of the hanging cupboard Put the one way valve on the cooker hood, then install the cooker hood on the bottom of the hanging cupboard, tighten the hood with enclosed 4 screws.
-
Page 8: Air Ventilation Setting
AIR VENTILATION SETTING Outdoor exhausting: Turn the adjuster to outdoor position, install the outlet, turn on the cooker hood, then the air will be vented from the outside outlet. Recycling: the recycling mode with carbon filter ,Turn the adjuster to indoor ... -
Page 9: Description Of Components
DESCRIPTION OF COMPONENTS OPERATION Low Speed buttom It’s used for Ventilation on the kitchen. It is suitable for simmering and cooking which do not make much steam. Medium Speed buttom Airflow speed is ideally for ventilation in standard cooking operation. High Speed button When high density of smoke or steam produced, press high-speed button for highest effective ventilation. - Page 10 On/Off button It’s used for turning on/off the fan. Speed plus button For increasing the speed of the fan Speed decrease button For decreasing the speed of the fan. Light button Digital display Fan speed display:"1" for Low speed, "2" for Medium speed, "3"...
-
Page 11: Maintenance
MAINTENANCE Before cleaning switch the unit off and pull out the plug. I. Regular Cleaning Use a soft cloth moistened with hand-warm mildly soapy water or household cleaning detergent. Never use metal pads, chemical, abrasive material or stiff brush to clean the unit. II. -
Page 12: Troubleshooting
TROUBLESHOOTING Fault Cause Solution The fan blade is jammed. Switch off the unit and repair by Light on, but fan qualified service personnel only. does not work The motor is damaged. Light bulb burn. Replace the bulb with correct rating. Both light and fan do not work Power cord looses. - Page 13 دﻟﯾل اﻟﻣﺳﺗﺧدم واﻟﺗﺛﺑﯾت اﻟﻤﺤﺘﻮﻳﺎت ....................اﻟﻤﻘﺪﻣﺔ ..................اﻟﺴﻼﻣﺔ اﺣﺘﻴﺎﻃﺎت ..................ﻟﻠﺘﺮآﻴﺐ ﺘﺠﻬﻴﺰ اﻟ ....................اﻟﺘﺮآﻴﺐ 17 ..................إﻋﺪاد ﺗﺠﺪﯾﺪ اﻟﮭﻮاء 19-20................. اﻟﻤﻜﻮﻧﺎت وﺻﻒ ....................اﻟﺼﻴﺎﻧﺔ ................ وإﺻﻼﺣﻬﺎ اﻷﻋﻄﺎل اآﺘﺸﺎف اﻟﺣﻣﺎﯾﺔ اﻟﺑﯾﺋﯾﺔ ............
- Page 14 اﻟﻤﻘﺪﻣﺔ ﻧﺸﻜﺮك ﻋﻠﻰ اﺧﺘﻴﺎر ﺷﻔﺎط ﺑﻮﺗﺎﺟﺎز هﺬا أ ُ عد دليل التعليمات ھذا ليوفر لك جميع التعليمات المطلوبة المتعلقة بإجراء عملية تثبيت الجھاز، واستخدامه وصيانته إجراء عملية التثبيت ولتشغيل الوحدة بصورة سليمة، وآمنة، ي ُرجى قراءة دليل التعليمات ھذا بعناية قبل واالستخدام...
- Page 15 ھاز يجب اإلشراف على األطفال للتأكد من أنھم ال يعبثون بالج ال يجب أن يقوم األطفال بالتنظيف وأعمال صيانة المستخدم دون إشراف ال ت ُ شعل النيران أسفل شفاط المطبخ قد تصبح األجزاء التي يمكن الوصول إليھا ساخنة عند استخدامھا مع أداة الطھي تنبيه...
- Page 16 ﺘﺮآﻴﺐ اﻟﺘﺠﻬﻴﺰ ﻟﻠ إذا كان لديك منفذ إلى الخارج، ي ُمكن توصيل شفاط البوتاجاز الخاص بك على النحو المبين بالصورة أدناه عن أنبوب مرن، أو ألومنيوم، أو مطلي بالمينا، أو مادة غير قابلة لالشتعال بقطر داخلي طريق إحدى قنوات اإلخراج مم...
- Page 17 اﻟﺘﺮآﻴﺐ راﺟﻊ اﻟﺘﺤﺬﻳﺮ اﻟﻮارد ﻓﻲ ﻟﻮﺣﺔ اﻟﺘﻌﻠﻴﻤﺎت اﻟﻤﺘﻌﻠﻘﺔ ﺑﺘﺸﻐﻴﻞ اﻟﺠﻬﺎز ﻓﻲ ﺣﺎل ﺗﻢ ﺗﻔﺮﻳﻎ اﻟﻬﻮاء ﻣﻦ اﻟﻤﻜﺎن ﺗﻨﺒﻴﻪ ﺟﻬﺰة اﻟﺘﻲ ﺗﻌﻤﻞ ﺑﻤﺼﺎدر ﻃﺎﻗﺔ ﻏﻴﺮ اﻟﻜﻬﺮﺑﺎء ﻓﻲ وﻗﺖ واﺣﺪ، ﻳﺠﺐ أﻻ ﻳﺘﺠﺎوز اﻟﻀﻐﻂ ﻋﻨﺪ ﺗﺸﻐﻴﻞ ﺷﻔﺎط اﻟﻤﻄﺒﺦ واﻷ ﺑﺎر 410 ﺑﺎﺳﻜﺎل اﻟﻌﻜﺴﻲ...
- Page 18 اﻟﻄﺮﻳﻘﺔ اﻟﺜﺎﻧﻴﺔ مم في الجزء السفلي من الخزانة المعلقة بقطر ثقوب اثقب ضع الصمام أحادي االتجاه على شفاط البوتاجاز، ثم ثبت شفاط البوتاجاز في الجزء السفلي من الخزانة ال م ُعلقة، ثم ث ب ّت الشفاط باستخدام البراغي األربعة المرفقة مالحظة...
- Page 19 إﻋﺪاد ﺗﺠﺪﻳﺪ اﻟﻬﻮاء لى الوضع الخارجي، وركب المنفذ، وش غ ّ ل شفاط البوتاجاز، وبعد أدر المنظم إ التصريف من المنفذ الخارجي ذلك سيخرج الھواء من المنفذ الخارجي وضع إعادة التدوير باستخدام مرشح الكربون، أدر المنظم إلى الوضع الداخلي، وركب غطاء إعادة...
- Page 20 وﺻﻒ اﻟﻤﻜﻮﻧﺎت التشغيل زر اﻟﺘﺸﻐﻴﻞ ﻓﻲ وﺿﻊ ﻣﻨﺨﻔﺾ اﻟﺴﺮﻋﺔ الغلي والطھي التي ال تتسبب في الكثير من البخار وھو مناسب ألغراض ي ُستخدم ھذا الزر لتھوية المطبخ زر اﻟﺘﺸﻐﻴﻞ ﻓﻲ وﺿﻊ ﻣﺘﻮﺳﻂ اﻟﺴﺮﻋﺔ تكون سرعة تدفق الھواء مثالية للتھوية خالل عملية الطھي القياسية زر...
- Page 21 إﻳﻘﺎف اﻟﺘﺸﻐﻴﻞ زر اﻟﺘﺸﻐﻴﻞ إيقاف تشغيل المروحة ي ُستخدم ھذا الزر لتشغيل زر زﻳﺎدة اﻟﺴﺮﻋﺔ تخدم لزيادة سرعة المروحة ي ُس زر ﺗﺨﻔﻴﺾ اﻟﺴﺮﻋﺔ ي ُستخدم لخفض سرعة المروحة زر اﻹﺿﺎءة ﺷﺎﺷﺔ ﻋﺮض رﻗﻤﻴﺔ ت ُ ستخدم السرعة " 2 "...
- Page 22 اﻟﺼﻴﺎﻧﺔ أوقف تشغيل الوحدة وافصل القابس قبل إجراء عملية التنظيف اﻟﺘﻨﻈﻴﻒ اﻟﻤﻨﺘﻈﻢ ،ال تستخدم مطل ق ً ا فرشاة خشنة ناعمة مبللة بمياه دافئة صابونية بدرجة طفيفة أو مواد تنظيف عادية استخدم قطعة قماش أو مواد كاشطة، أو مواد كيميائية، أو منصات تنظيف معدنية لتنظيف الوحدة اﻟﺘﻨﻈﻴﻒ...
- Page 23 اآﺘﺸﺎف اﻷﻋﻄﺎل وإﺻﻼﺣﻬﺎ اﻟﺤﻞ اﻟﺴﺒﺐ اﻟﻌﻄﻞ المروحة محشورة شفرة المصباح قيد التشغيل، ولكن أوقف تشغيل الوحدة وأصلحھا بواسطة موظفي الخدمة المؤھلين فقط المروحة ال تعمل المحرك تالف استبدل المصباح بآخر يعمل بقدرة التحمل الصحيحة قد يكون بسبب احتراق المصباح الكھربائي كل...
- Page 24 MANUEL D'INSTALLATION ET D'UTILISATION SOMMAIRE INTRODUCTION ..................24 MESURES DE SÉCURITÉ ...............24 PRÉPARATION À L'INSTALLATION : ............26 INSTALLATION ..................27 RÉGLAGE DE LA VENTILATION DE L’AIR ..........29 DESCRIPTION DES COMPOSANTS ..........30-31 ENTRETIEN ..................... 32 DÉPANNAGE ................... 33 PROTECTION DE L’ENVIRONNEMENT ..........33...
-
Page 25: Introduction
INTRODUCTION Merci d'avoir choisi cette hotte aspirante. Ce manuel d'instruction est conçu pour vous donner toutes les informations nécessaires pour installer, utiliser et entretenir l'appareil. Pour utiliser l'appareil de façon correcte et sûre, veuillez lire attentivement ce manuel d'instruction avant de l'installer et de l'utiliser. La hotte aspirante est construite avec des matériaux de qualité... - Page 26 Surveillez les enfants en bas-âge pour éviter qu’ils ne jouent avec l’appareil. Le nettoyage et l’entretien ne doivent pas être effectués par des enfants sans surveillance. N'allumez aucune flamme sous la hotte. ATTENTION : Les parties accessibles peuvent devenir chaudes lorsqu'elles ...
-
Page 27: Préparation À L'installation
PRÉPARATION À L'INSTALLATION : a. Si vous avez une sortie vers l’extérieur, votre hotte aspirante peut être raccordée comme sur l’image ci-dessous au moyen d'un conduit d’extraction (émail, aluminium, tuyau flexible ou matériau ininflammable avec un diamètre intérieur de 150 mm) b. -
Page 28: Installation
INSTALLATION Attention ! Respectez l'avertissement de la fiche d'instruction intéressant le fonctionnement de l'appareil lorsque de l'air est refoulé hors de la pièce. Quand la hotte et les appareils alimentés par autre chose que de l’électricité fonctionnent simultanément, la pression négative à l’intérieur de la pièce ne doit pas dépasser 4 Pa (410 Bar) Première façon :... - Page 29 Deuxième façon : Percez 4 trous de Ø 6mm en bas du placard suspendu Placez le clapet anti-refoulement sur la hotte aspirante, puis installez la hotte aspirante sur le bas du placard suspendu, fixez la hotte avec les 4 vis fournies.
-
Page 30: Réglage De La Ventilation De L'air
RÉGLAGE DE LA VENTILATION DE L’AIR Evacuation à l'extérieur : Tournez le dispositif de réglage sur la position extérieure, installez la sortie, allumez la hotte aspirante, l’air sera ensuite évacué par la sortie extérieure. Recyclage : le mode recyclage avec filtre à charbon. Tournez le dispositif de ... -
Page 31: Description Des Composants
DESCRIPTION DES COMPOSANTS FONCTIONNEMENT Touche faible vitesse Elle sert à aérer la cuisine. Elle peut être utilisée pour faire mijoter ou cuisiner en créant peu de vapeur. Touche moyenne vitesse La vitesse de l'air est parfaite pour aérer la cuisine en condition normale de cuisson. - Page 32 Touche de Marche/Arrêt Elle sert à mettre en marche/arrêt le ventilateur. Touche d'augmentation de la vitesse Pour augmenter la vitesse du ventilateur Touche de diminution de la vitesse Pour diminuer la vitesse du ventilateur. Touche éclairage Affichage numérique Affichage de la vitesse du ventilateur : "1" pour Faible vitesse, "2" pour Moyenne vitesse, "3"...
-
Page 33: Entretien
ENTRETIEN Avant le nettoyage éteignez l’unité et débranchez la fiche. Nettoyage ordinaire Utilisez un chiffon doux imbibé d'eau tiède légèrement savonneuse ou avec un détersif à usage domestique. N'utilisez jamais d'éponge abrasive, de poudre à récurer ni de brosse rigide pour nettoyer l'appareil. Nettoyage mensuel du filtre à... -
Page 34: Dépannage
DÉPANNAGE Problème Cause Solution La pale du ventilateur est La lumière s'éclaire Éteignez l'appareil et faites-le réparer coincée. mais le ventilateur uniquement par un technicien qualifié. ne fonctionne pas Le moteur est endommagé. L'ampoule de la lampe est Remplacez l'ampoule par une ampoule de La lumière et le grillée. - Page 35 MANUALE DI INSTALLAZIONE E USO SOMMARIO INTRODUZIONE ..................35 PRECAUZIONI DI SICUREZZA ..............35 PREPARAZIONE ALL'INSTALLAZIONE ..........37 INSTALLAZIONE ..................38 IMPOSTAZIONE DELLA VENTILAZIONE DELL'ARIA ......40 DESCRIZIONE DEI COMPONENTI ............41-42 MANUTENZIONE ..................43 SOLUZIONE DEI PROBLEMI ..............44 PROTEZIONE DELL’AMBIENTE ............. 44...
-
Page 36: Introduzione
INTRODUZIONE Grazie per aver scelto questa cappa per cucina. Questo manuale di istruzioni fornisce tutte le istruzioni necessarie per l'installazione, l'uso e la manutenzione dell'elettrodomestico. Per utilizzare l'elettrodomestico in maniera corretta e sicura, consultare attentamente questo manuale di istruzioni prima dell'installazione e dell'uso. La cappa per cucina è... - Page 37 Sorvegliare i bambini affinché non giochino con l'elettrodomestico. La pulizia e la manutenzione non devono essere effettuate dai bambini senza supervisione. Non produrre fiamme libere sotto l'estrattore. ATTENZIONE! I componenti accessibili potrebbero diventare troppo caldi quando la cappa viene utilizzata con altri elettrodomestici per la cottura. avvertenze sono riprodotte...
-
Page 38: Preparazione All'installazione
PREPARAZIONE ALL'INSTALLAZIONE a. Se è disponibile uno scarico esterno, è possibile collegare la cappa a un condotto di estrazione (smaltato, in alluminio, tubo flessibile o materiale non infiammabile con diametro esterno di 150 mm) come illustrato nella figura seguente. b. Prima dell'installazione, staccare la spina dalla presa. c. -
Page 39: Installazione
INSTALLAZIONE Attenzione! Attenersi scrupolosamente alle avvertenze nel foglio di installazione riguardanti l'uso dell'elettrodomestico con l'aria scaricata nell'ambiente. Se la cappa viene utilizzata contemporaneamente ad altri elettrodomestici alimentati con fonti alternative all'elettricità, la pressione negativa dell'ambiente non deve essere superiore a 4 Pa (410 bar) Sistema 1: Per l'installazione a parete, praticare 2 fori da 8 mm di diametro su una... - Page 40 Sistema 2: Praticare 4 fori da 6 mm di diametro sulla parte inferiore del pensile. Collocare la valvola a 1 via sulla cappa, installare la cappa sulla parte inferiore del pensile e stringere la cappa con le 4 viti. Nota: 1.
-
Page 41: Impostazione Della Ventilazione Dell'aria
IMPOSTAZIONE DELLA VENTILAZIONE DELL'ARIA Scarico all'esterno: ruotare il regolatore in posizione esterna, installare lo scarico e accendere la cappa per evacuare l'aria dallo scarico esterno. Modalità ricircolo con filtro a carboni: ruotare il regolatore in posizione interna, installare il coperchio dello scarico e accendere la cappa per evacuare l'aria dallo scarico interno. -
Page 42: Descrizione Dei Componenti
DESCRIZIONE DEI COMPONENTI Pulsante bassa velocità Serve per la ventilazione della cucina. È adatto per la cottura e l'ebollizione lenta che non producono molto vapore. Pulsante media velocità La velocità del flusso d'aria è ideale per la ventilazione in condizioni di cottura standard. - Page 43 Pulsante di accensione e spegnimento Serve ad accendere e spegnere il ventilatore. Pulsante di aumento della velocità Serve ad aumentare la velocità del ventilatore. Pulsante di riduzione della velocità Serve a ridurre la velocità del ventilatore. Pulsante di illuminazione Display digitale Display velocità...
-
Page 44: Manutenzione
MANUTENZIONE Prima della pulizia, spegnere l'apparecchiatura e staccare la spina. Pulizia regolare Adoperare un panno morbido inumidito con acqua calda saponata o un detergente delicato per la pulizia di ambienti domestici. Non utilizzare mai spugnette metalliche, sostanze chimiche, materiali abrasivi o spazzole dure per pulire l'apparecchio. Pulizia mensile del filtro antigrasso ESSENZIALE: per evitare il rischio di incendi, pulire il filtro una volta al mese. -
Page 45: Soluzione Dei Problemi
SOLUZIONE DEI PROBLEMI Guasto Causa Soluzione La pala del ventilatore è La luce si accende Spegnere l'apparecchio e rivolgersi bloccata. ma il ventilatore all'assistenza per la riparazione. non funziona. Il motore è danneggiato. Sostituire la lampadina con un'altra della La lampadina è bruciata. La lampada e il stessa potenza.
Need help?
Do you have a question about the CIARRA and is the answer not in the manual?
Questions and answers