
Subscribe to Our Youtube Channel
Related Manuals for Wohler iAM-MIX-8


Summary of Contents for Wohler iAM-MIX-8
-
Page 1: User Guide
1RU, 8/16 of 64 Channel, Multi-Source Mixing Audio Monitor User Guide Part Number 821807, Revision F... - Page 2 Wohler Technologies. Reproduction Licensed users and authorized distributors of Wohler Technologies, Inc. products may copy this document for use with Wohler Technologies., Inc. products provided that the copyright notice above is included in all reproductions. Customer Support Wohler Technologies, Inc.
-
Page 3: Table Of Contents
TABLE OF CONTENTS Contents User Guide ..................1 TABLE OF CONTENTS................3 Contents ......................3 CHAPTER 1: Installation ................6 Introduction ....................6 Overview....................6 Safety......................6 Instructions ...................6 Safety Symbols..................7 Mounting....................7 Heat Dissipation..................7 Sympathetic Vibration................8 Mechanical Bracing .................8 Electrical Interference ................8 Power ....................8 Compliance .....................9 FCC ......................9 ICES-003 ....................9 CHAPTER 2: Local Operation .............. - Page 4 Sign In ......................26 Remote Monitoring ..................27 Configuration - Preset Setup................28 Common Output Routing................. 32 Destination Outputs................32 Routing Inputs ..................33 Output Options ..................34 Preset Output Routing................35 Typical Questions Regarding Output Routing............36 How do I route sources being audibly monitored to the XLR and AES outputs? ......................
- Page 5 Stream Destinations ................... 61 Device Lock ....................61 Dante Firmware Upgrades ................61 APPENDIX C: Ravenna Network Setup ..........62 Introduction ....................62 What is in the iAM-MIX for Ravenna..............62 RAVENNA-compatible talker/listener:............62 AVB Ethernet features: ................. 62 BACH™ Controller Graphical User Interface: ..........63 Home Page....................
-
Page 6: Chapter 1: Installation
Evertz, Tally, and Grass Valley routers for channel name synchronization. The iAM-MIX may also accept Audio over IP signals via an Ethernet connector. Refer to the Specifications section or contact Wohler Sales for more information for Audio over IP capabilities. The iAM-MIX may be optionally configured to allow routing of any inputs to almost any outputs. -
Page 7: Safety Symbols
7. Protect the power cord from being walked on or pinched, particularly at plug connection source on the equipment and at the socket. 8. Use only the attachments/accessories specified by the manufacturer. 9. Unplug the equipment during lightning storms or when unused for long periods of time. -
Page 8: Sympathetic Vibration
Important Heat generated by the class D power amplifiers, power supplies, and other components is vented by slots in the sides and back of the unit. Therefore, as a safety precaution, you must allow proper ventilation on these surfaces. Sympathetic Vibration Sympathetic vibration from other equipment (cables, etc.) in the rack may be serious enough to interfere with the unit’s sound quality. -
Page 9: Compliance
Compliance This equipment has been tested and found to comply with the limits for a Class A digital device, pursuant to part 15 of the FCC Rules. These limits are designed to provide reasonable protection against harmful interference when the equipment is operated in a commercial environment. -
Page 10: Chapter 2: Local Operation
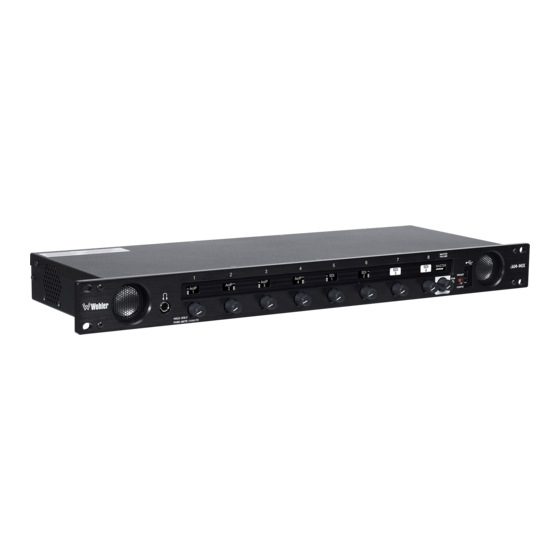
During that time, several status messages are shown spanning the displays on the front panel. Front Panel The iAM-MIX-8 front panel is shown in Figure 2-1. The iAM-MIX-16 front panel is shown in Figure 2-2. Figure 2–1: iAM-MIX-8 Front Panel Figure 2–2: iAM-MIX-16 Front Panel... - Page 11 4. Master Volume: This control adjusts the level of the entire mix. Note that while there is a dedicated Master Volume control on the iAM-MIX-8, the iAM-MIX-16 incorporates a control that can be set up to be either a Master Volume control or a 16th Channel Volume/Mute control.
-
Page 12: Rear Panel
Rear Panel The iAM-MIX-8 and iAM-MIX-16 rear panels are shown in Figure 2-3. They are identical. Some variants may not contain all options (e.g. the MADI only unit). Figure 2-3: Rear Panel Layout 1. Power Connection: The iAM-MIX uses an external AC to 18V DC power adapter. - Page 13 Ethernet. You must use the emSET configuration software to set up this option. It is available from Wohler Technologies Technical Service. e. SMTPE 2110 Receiver: This uses Multi-Mode 850 NM, LC fiber connectors. It allows the iAM-MIX to monitor SDI audio transmitted in real time over Ethernet.
- Page 14 11. Analog Inputs: This DB-25 female connectors accepts +10dBu broadcast level balanced audio. Tascam pinout cables may be used, and can be purchased Wohler Sales. Refer to Figure 2-4 for the pinout of this connector. Figure 2-4: Analog DB25 Input Connections 12.
-
Page 15: Sfp-2022-6 / Sfp-2110 Address Setup
192.168.39.215 iAM-MIX with SFP-2022-6 / SFP-2110 The optional SFP-2022-6 or SFP-2110 module furnished by Wohler Technologies is manufactured by Embrionix and comes from the factory with a default IP address. To integrate it into your digital network, you need to set its address to the source to be monitored. -
Page 16: Channel Displays
Preset / Config Menu Operators can select between up to 8 Presets in the iAM-MIX-8 or 16 Presets in the iAM-MIX-16 or access several control or informational screens by pressing the PRESET / CONFIG button on the front panel. It is recessed to prevent accidental activation. -
Page 17: Preset Selection
this or any other menu. Figure 2-8 Preset / Config Menu The following describes the function and operation of each menu control shown in Figure 2-8: Preset Selection Pressing the control directly below S will display up to 8 (for the iAM- ELECT RESET MIX-8) or 16 (for the iAM-MIX-16) of the available Favorite Presets by name. -
Page 18: Set Input Source
Factory Reset It can be useful to bring all of the settings of the iAM-MIX back to the way they were when it left the Wohler factory if the iAM-MIX is being reinstalled at a new location. Press F to begin the process. The choices R... - Page 19 To cancel the reset process, press R ? or press E ESET Page...
-
Page 20: Chapter 3: Technical Info
CHAPTER 3: Technical Info Table 3–1: iAM-MIX Specifications Specification Values/Domains Power Requirements 100 V to 240 V AC ± 10%, 50/60Hz Power Consumption 40 Watts Dimensions 1.75” x 19” x 6.5” (H x W x D) (44mm x 483mm x 165mm) Weight 8 lbs. - Page 21 Specification Values/Domains SDI Input Termination unbalanced AES/EBU Input Termination 75 unbalanced Analog Input Impedance balanced AES/EBU/MADI Sampling 48 kHz Rate Analog Outputs-Stereo XLR-3 Male, balanced +24dBu max Analog Output Frequency 40 Hz to 20 kHz (± 1dB) Response Analog Output Distortion <0.01% THD+N Analog Output Dynamic >100 dB...
- Page 22 Requires a software ROUTING activation key. **emSET is configuration software that is necessary so that you can set up this module. It is available at no cost either from its manufacturer, Embrionix, or by contacting Wohler Technologies Technical Service. Page...
- Page 23 Figure 3–1: iAM-MIX Block Diagram Page...
-
Page 24: Chapter 4: Using The Iam-Mix Web Gui
CHAPTER 4: Using the iAM-MIX Web GUI The iAM-MIX Web GUI allows you to customize the monitor’s configuration to suit your needs. If the default configuration of the iAM-MIX suits your needs and you prefer to use it that way, then you do not need to use the iAM-MIX Web GUI. Web Browser / Control Device Any web browser application running on any networked device such as desktop or laptop computer, tablet or smart phone can be used with the iAM-MIX Web GUI. -
Page 25: Network Connection
Figure 4–1: Host IP Settings Close the control panel and reboot the host computer after making an IP address change to be sure the change takes effect. Either reconnect to the installed network or continue with this direct connection to access the iAM-MIX Web GUI. -
Page 26: Dashboard
Dashboard Throughout the iAM-MIX Web GUI, other pages are a click or two away on the left side. The Dashboard/Presets Overview on the Dashboard page shows all Preset configurations at a glance. Figure 4–2: Dashboard/Presets Overview The name of the currently active Preset is shown at the top. All of the Presets are shown below. -
Page 27: Remote Monitoring
portion of the browser page and clicking Log In. Figure 4–3: Administrative Account Log In By default, the Email Address is ‘admin@admin.com’. By default, the Password is ‘admin’. You will remain logged in until the browser window is closed or the session is disconnected physically or virtually, or Log Out by clicking Administrator Account in the upper right of any page. -
Page 28: Configuration - Preset Setup
Any of these presets can be recalled from the Web Dashboard or from REST API's. Up to 8 Presets (in the iAM-MIX-8) or 16 Presets (in the iAM-MIX-16) can be denoted as Favorites to be displayed on the Preset Selection menu of the unit. - Page 29 To create a new Preset, enter the name for the new Preset in the • field to the left of the word Preset. Click the Star icon to make it a Favorite, if desired. Then make all of the settings needed and save it. To make changes to an existing Preset, select it from the pull •...
- Page 30 Figure 4–6: Cluster Selection Cluster Assignment In the Cluster box, you can select the type of Cluster from a pull down selection. The available Cluster Type selection is: Mono 1.0: The channel will appear within a single-channel cluster. • By default, all odd numbered channels will map to the left speakers and all even numbered channels will map to the right speakers.
- Page 31 button associated with each channel opens a box that lets you adjust the channel gain from -60 dB to +12 dB. Enter a new value and click OK or click X to close the box. 12. Channel Information: Hovering over each red/yellow/green Channel or Cluster Info box opens a summary of channel settings.
-
Page 32: Common Output Routing
Six or eight channels could be directed to the AES outputs, which could feed an external surround sound system. Contact Wohler Sales to purchase the license for this feature. If Common Output Routing is not licensed, then any of the iAM-MIX inputs can be monitored in stereo or mono only through the internal speakers. -
Page 33: Routing Inputs
speakers. The default routing is set as per the Speaker Assignment, left channels are sent to the left speaker and right channels are sent to Right speaker. 2. Analog XLR: Selected inputs will be mixed to the left and right channels and played through the two Analog XLR Outputs. -
Page 34: Output Options
Output Options The optional settings in this section allow for customization. 1. Speaker Mix: This option selects whether an output has the Speaker Mix or a Free Mix as set in the Routing Input section. The Speaker/Headphone output is always in the Speaker Mix. 2. -
Page 35: Preset Output Routing
Preset Output Routing For many applications, Common Output Routing will be used when the routings generally remain fixed for normal use of the monitor. However, sometimes it can be advantageous to be able to change the output routing according to the currently recalled Preset. -
Page 36: Typical Questions Regarding Output Routing
Typical Questions Regarding Output Routing The questions and thoughts in this section are commonly asked by people when setting up the licensed Output Routing capability. How do I route sources being audibly monitored to the XLR and AES outputs? Using Preset Output Routing or Common Output Routing, signals can be routed to XLR and/or AES outputs, possibly to be monitored by external speakers. -
Page 37: How Do I Make Some Outputs Follow Mutes And Solos While Making Other Outputs Ignore Them
How do I make some outputs follow Mutes and Solos while making other outputs ignore them? In the example shown in Figure 4-12, the Analog XLR Outputs will follow Solos and Mutes, while AES Pair 1 will ignore them. Simple check or uncheck the Solo/Mute selection in the Output Options section. -
Page 38: How Do I Keep The Internal Speakers Always Muted And Send Audio Only To The Analog Xlr Outputs
Figure 4-14 - Source Select Output Routing How do I keep the internal speakers always muted and send audio only to the Analog XLR outputs? You may monitor the audio using an external amplifiers and speakers instead of the internal speakers. In Output Routing Configuration, do not select any channel sources for speaker/headphone. -
Page 39: How Do I Ensure That Outputs Get Automatically Muted When A Headphone Is Inserted Into The Headphone Jack
How do I ensure that outputs get automatically muted when a headphone is inserted into the headphone jack? In Output Routing configuration, if the Mute on Headphone Insertion selection in the Output Options is ON (checked), then the outputs get automatically muted when a headphone jack is inserted into the headphone jack. -
Page 40: How Do I Route Signals To The Analog Xlr Outputs In A Way That Master Volume Doesn't Affect This Output But Channel Volume And Mute/Solo Does
How do I route signals to the Analog XLR Outputs in a way that Master Volume doesn't affect this output but Channel Volume and Mute/Solo does? In Output Routing setting for the Analog XLR outputs, set the Master Volume Control to OFF (unchecked) but set the Channel Volume Control & Solo/Mute to ON (checked). -
Page 41: Configuration - Device Management
Configuration – Device Management This page is used to manage integration with Grass Valley systems to automatically set the text in the labels on the channel strips. Grass Valley integration can be used for AES and SDI audio monitoring interfaces. Evertz and Tally integrations do not require any setup. -
Page 42: Database Management
Database Management Export Presets Use this page to offload an iAM-MIX Preset database to a USB flash drive, inserted in the front panel port. Follow the instructions on the bottom of the page to complete the procedure. Figure 4–20: Export Presets Database Management Export Presets... -
Page 43: Import Presets
Import Presets Use this page to retrieve Presets from a USB flash drive inserted in the front panel port. Follow the instructions on the bottom of the page to complete the procedure. Figure 4–21: Preset Import Use the following steps: 1. -
Page 44: Scan Network-Discovery
Scan Network-Discovery This page will scan the network for Wohler iAM monitors installed on the network. Other devices can have their network settings reconfigured by clicking the Edit (pencil) icon. Information about the Updates tab is in Installing Software on Networked iAM-MIXs. -
Page 45: System Setup
The procedure for changing the IP Address information is as follows: 1. Use DHCP? Check this box if your network has a DHCP server and you want to use dynamic addressing. Otherwise, you must enter static IP address entries in the four fields which follow. 2. - Page 46 Figure 4–25: System Setup - Licenses The Licenses screen displays the licensable options that the product is configured with, including their license numbers. The example above shows an iAM-MIX-8 with several sources installed and the license keys displayed for reference. Licenses without keys will not have the box checked.
- Page 47 Figure 4-26 shows the screen resulting from clicking the AoIP Card button. Figure 4–26: System Setup - AoIP Card The example above shows an iAM-MIX-8 without an AoIP Card installed. Contact Wohler Sales to purchase this option if needed. If an AoIP card is contained in SFP Slot 1 or 2, then the screen in Figure 4-27 can be selected.
-
Page 48: Factory Reset
It can be useful to bring all of the settings of the iAM-MIX back to the way they were when it left the Wohler factory if the iAM-MIX is being reinstalled at a new location. This page is used to reset all of the settings in the iAM-MIX to their original. -
Page 49: Appendix A: Software Upgrades
USB flash drive. It must be FAT32 file type, and does not need to be empty. Both local and network update methods require that a USB flash drive, with Wohler Update Package(s) installed on it, be inserted into the front panel USB jack. - Page 50 Figure A–1: System Update System Update List of update file Selection packages (if any) Use the following steps to install a new software package into the iAM-MIX: 1. Insert the USB flash drive with iAM-MIX update package(s) into the front panel USB jack.
-
Page 51: Updating An Iam-Mix Remotely
8. After the iAM-MIX reboots, either Refresh the browser by clicking on the Wohler logo, or close and reopen the browser for normal operation of the Web GUI. Updating an iAM-MIX Remotely Important: The Web GUI is required to perform this software upgrade procedure. -
Page 52: Updating Multiple Iam-Mix Units
Flash Drive. The Scan Network page will scan the network for Wohler iAM monitors installed on the network and allow firmware updates of one or more compatible and accessible iAM-MIX units. - Page 53 Figure A–2: Active Device Discovery 3. Click the Updates tab. Two boxes will show. The Available Updates window will show the available options for upgrade. If the update file you want is in the list, select it and proceed to Step 5 of this procedure. To add a new update file, click Add File and select the new update file.
- Page 54 9. If you have also updated the unit to which the Web GUI is connected, after the iAM-MIX unit(s) reboot, either Refresh the browser by clicking on the Wohler logo, or close and reopen the browser for normal operation of the Web GUI.
-
Page 55: Appendix B: Dante Network Setup
Configuration-Configure Presets page regardless of which AoIP option is installed. The iAM-MIX is set up at the Wohler factory to be used as a slave rather than a master within the Dante network. Other devices or software, such as a Dante Controller, are expected to be responsible for most device configurations and all audio routing. - Page 56 62 channels of Dante AoIP at 48 kHz or 44.1 kHz audio sample rates. 48 kHz is the iAM-MIX default rate. Note: Contact Wohler for the Dante configuration software that enables transmission of up to 62 transmit channels.
-
Page 57: Dante Device Setup
Dante Device Setup The iAM-MIX’s default Dante Device Name is “Wohler- …” followed by the last 6 digits of the Dante port MAC address, as shown in Figure B-3. This name can be changed by the Dante Controller to appear that way on the network, but that will not change the iAM-MIX unit name appearing on GUI pages and iAM-MIX remote metering or discovery pages. -
Page 58: Dante Clock Selection
through the Device View menus. Some changes may require remote rebooting of the Brooklyn II card to take effect, temporarily interrupting audio and publishing the new information to the network. Important: Only 44.1 kHz and 48 kHz audio sample rates are currently supported by the iAM-MIX. -
Page 59: Aes67
AES67 The iAM-MIX Brooklyn II can be configured for AES67 operation. AES67 operation with Dante is limited to eight or less receive and transmit channels at 48 kHz sample rates. 24 bit linear (L24) encoding and 1 msec packet time are fixed default transmit parameters. - Page 60 Figure B–7: Device View - Network Config The channels to be multicast are selected in the File menu-Create Multicast Flows window shown in Figure B-8. Figure B–8: Multicast Page...
-
Page 61: Stream Destinations
Device Lock command at this time. Dante Firmware Upgrades Wohler iAM-MIX monitors ship with current Brooklyn II firmware as of the option installation date. The version information is found in the Dante Controller Device View-Status page. iAM-MIX software/firmware is tested with the latest Dante code release. -
Page 62: Appendix C: Ravenna Network Setup
APPENDIX C: Ravenna Network Setup Introduction Installing the iAM-MIX into an existing and functioning Ravenna network is virtually plug and play. The iAM rear panel AoIP jack supports 1Gb/s and 100Mb/s Ethernet devices in Ravenna Audio over IP network configurations. iAM-MIX channel source selections are made by choosing Input Type ‘AoIP’... -
Page 63: Bach™ Controller Graphical User Interface
6) Media clock per the AVnu specification 7) Hitless stream redundancy BACH™ Controller Graphical User Interface: The BACH board includes a Graphical User Interface to review and manage the Bach board. It provides an interface to: 1) Manage connections with ease a) Display discovered devices and streams b) Connect streams from network to local destinations c) Start, stop and monitor stream health/status... -
Page 64: Home Page
Home Page You can navigate to different pages within the Bach Controller GUI to review or perform various functions. The Home page can be accessed by entering the 172.27.2.30 IP address. It gives a device overview and stream status. Figure C–1: BACH Controller Home Page Page... -
Page 65: Patch Panel
Patch Panel The Patch page enables routing of connections between listener and talker channels for devices on the network. The highlighted green square indicates a routing connection between a source or talker (left) and a destination or listener (bottom). The Web GUI will allow selection of channels to monitor from among the listeners (bottom). -
Page 66: Controller Cloud
Controller Cloud The Cloud page shows any Ravenna devices on the given network, including any Wohler devices with the Ravenna option installed. Figure C–3: BACH Controller Cloud Page Page... -
Page 67: Source Streams
Source Streams The Source provides in-depth information on source streams that are transmitting (sourcing) Ravenna signals from devices on the network. Figure C–4: BACH Controller Source Stream Page... -
Page 68: Stream Destinations
Stream Destinations The Destination page provides in-depth information on your destination devices that are receiving Ravenna signals on the network. Clicking the Advanced button provides additional options. Note: The Destinations must be set to ON. Table C-1 illustrates the possible channel assignments in the iAM-MIX. Table C-1: Channel Assignments Group/TDM Channels... - Page 69 Page...
-
Page 70: Sync
Sync The Sync page allows you to program parameters relating to Precision Time Protocol (PTP) based time synchronization of network clocks of your BACH-AES67 devices. Figure C–6: BACH Controller Sync Page Page... -
Page 71: Configuration/Device Management
Configuration/Device Management The Config page allows operations such as modifying the IP address, Packet time, Rebooting etc. Configure the Packet Time either as 1ms or 250us. Figure C–7: BACH Controller Device Management Page... -
Page 72: Appendix D: Api Documentation
APPENDIX D: API Documentation Introduction This appendix discusses ways to use the Application Program Interface (API) Version 2, which allows third party equipment to remotely access options and settings of the iAM-MIX. It includes specific code examples for commonly used requests. - Page 73 "Favorite": 1, "Id": 2, "Name": "Preset Name 2" "Favorite": 1, "Id": 3, "Name": "Preset Name 3" "Favorite": 1, "Id": 4, "Name": "Preset Name 5" "Favorite": 1, "Id": 5, "Name": "Preset Name 6" "Favorite": 1, "Id": 6, "Name": "Preset Name 7" "Favorite": 1, "Id": 7, "Name": "Preset Name 8"...
- Page 74 Get preset information: Method: GET URL: /api/cf/presets/<int:preset ID> URL parameters: • preset ID -- preset ID (Number greater than zero) Response JSON Object On Success • string unit_name: Product Name ("IAM-ETZ-G4") • string model: Product model ("iAM_MIX_IP) • string serial_number: Product serial number •...
- Page 75 "MeterSet": { "1": { "VolumeDb": 0, "Source": { "Type": "Sfp-1.Sdi.Sdi-1", "Channel": 7 "DelayMs": 0, "Speaker": "Left", "Label": { "Default": true, "LabelType": 3, "LabelBottom": "7", "LabelTop": "SDI-1", "LabelID": "1" "2": { "VolumeDb": 0, "Source": { "Type": "Sfp-1.Sdi.Sdi-1", "Channel": 8 "DelayMs": 0, "Speaker": "Right", "Label": { "Default": true,...
- Page 76 "DelayMs": 0, "Speaker": "Left", "Label": { "Default": true, "LabelType": 3, "LabelBottom": "5", "LabelTop": "MADI", "LabelID": "5" "6": { "VolumeDb": 0, "Source": { "Type": "Madi", "Channel": 5 "DelayMs": 0, "Speaker": "Right", "Label": { "Default": true, "LabelType": 3, "LabelBottom": "5", "LabelTop": "MADI", "LabelID": "6"...
- Page 77 "LabelBottom": "5", "LabelTop": "MADI", "LabelID": "9" "10": { "VolumeDb": 0, "Source": { "Type": "Madi", "Channel": 5 "DelayMs": 0, "Speaker": "Right", "Label": { "Default": true, "LabelType": 3, "LabelBottom": "5", "LabelTop": "MADI", "LabelID": "10" "11": { "VolumeDb": 0, "Source": { "Type": "Aes", "Channel": 1 "DelayMs": 0, "Speaker": "Left",...
- Page 78 "VolumeDb": 0, "Source": { "Type": "Aes", "Channel": 4 "DelayMs": 0, "Speaker": "Right", "Label": { "Default": true, "LabelType": 3, "LabelBottom": "4", "LabelTop": "AES", "LabelID": "14" "15": { "VolumeDb": 0, "Source": { "Type": "Aes", "Channel": 5 "DelayMs": 0, "Speaker": "Left", "Label": { "Default": true, "LabelType": 3, "LabelBottom": "5",...
- Page 79 "ConfidenceDecode": "Disable", "CrcErrorCount": "Enable" "ConfVersion": 1, "AudioOutputRouting": { "OutputTypes": { "Aoip.Pair-31": { "OutputChannels": [ "OutputTrimDb": 0, "MeterSources": [ "Speaker": "L" "OutputTrimDb": 0, "MeterSources": [ "Speaker": "R" "MasterVolume": true, "SpeakerArrangement": "None", "SoloMute": true, "HeadphoneMute": true, "SpeakerMix": true, "AutoRoute": false "Aoip.Pair-30": { "OutputChannels": [ "OutputTrimDb": 0, "MeterSources": [...
- Page 80 "Speaker": "R" "MasterVolume": true, "SpeakerArrangement": "None", "SoloMute": true, "HeadphoneMute": true, "SpeakerMix": true, "AutoRoute": false "SpeakerHeadphone": { "OutputChannels": [ "OutputTrimDb": 0, "MeterSources": [ "Speaker": "L" "OutputTrimDb": 0, "MeterSources": [ "Speaker": "R" "MasterVolume": true, "SpeakerArrangement": "None", "SoloMute": true, "HeadphoneMute": true, "SpeakerMix": true, "AutoRoute": false "AnalogXlr": { "OutputChannels": [...
- Page 81 "Speaker": "R" "MasterVolume": true, "SpeakerArrangement": "None", "SoloMute": true, "HeadphoneMute": true, "SpeakerMix": true, "AutoRoute": false "Aes.Pair-4": { "OutputChannels": [ "OutputTrimDb": 0, "MeterSources": [ "Speaker": "L" "OutputTrimDb": 0, "MeterSources": [ "Speaker": "R" "MasterVolume": true, "SpeakerArrangement": "None", "SoloMute": true, "HeadphoneMute": true, "SpeakerMix": true, "AutoRoute": false "Aes.Pair-1": { "OutputChannels": [...
- Page 82 "Speaker": "L" "OutputTrimDb": 0, "MeterSources": [ "Speaker": "R" "MasterVolume": true, "SpeakerArrangement": "None", "SoloMute": true, "HeadphoneMute": true, "SpeakerMix": true, "AutoRoute": false "Aes.Pair-2": { "OutputChannels": [ "OutputTrimDb": 0, "MeterSources": [ "Speaker": "L" "OutputTrimDb": 0, "MeterSources": [ "Speaker": "R" "MasterVolume": true, "SpeakerArrangement": "None", "SoloMute": true, "HeadphoneMute": true, "SpeakerMix": true,...
- Page 83 "Speaker": "L" "OutputTrimDb": 0, "MeterSources": [ "Speaker": "R" "MasterVolume": true, "SpeakerArrangement": "None", "SoloMute": true, "HeadphoneMute": true, "SpeakerMix": true, "AutoRoute": false "SystemClockSource": { "Pair": 0, "Type": "Sfp-1" "SpeakerOptions": { "DelayMs": 0 "Clusters": [ "NumberOfMeters": 1, "MuteOnPresetRecall": true, "Type": "Mono", "Name": "Mono 1.0 #1", "FirstMeter": 1 "NumberOfMeters": 1, "MuteOnPresetRecall": true,...
- Page 84 "MuteOnPresetRecall": true, "Type": "Mono", "Name": "Mono 1.0 #5", "FirstMeter": 5 "NumberOfMeters": 1, "MuteOnPresetRecall": true, "Type": "Mono", "Name": "Mono 1.0 #6", "FirstMeter": 6 "NumberOfMeters": 1, "MuteOnPresetRecall": true, "Type": "Mono", "Name": "Mono 1.0 #7", "FirstMeter": 7 "NumberOfMeters": 1, "MuteOnPresetRecall": true, "Type": "Mono", "Name": "Mono 1.0 #8", "FirstMeter": 8 "NumberOfMeters": 1,...
- Page 85 "MuteOnPresetRecall": true, "Type": "Mono", "Name": "Mono 1.0 #15", "FirstMeter": 15 "NumberOfMeters": 1, "MuteOnPresetRecall": true, "Type": "Mono", "Name": "Mono 1.0 #16", "FirstMeter": 16 "MeterPreferences": { "muteMasterVolume": false, "masterVolume": false "Name": { "Preset": "T-S-M-A", "Program": "NoProgram", "Group": "NoGroup" "InputSrcList": { "inputClockRefPair": 1, "meters": { "1": { "parentInput": "SFP-1.SDI.SDI-1"...
- Page 86 "16": { "parentInput": "AES" "Dolby": { "VideoSyncSource": "None", "DolbyChannelsSource": "None" "inputClockRef": "SFP-1" B. On Failure: "status": 404, "action": "For more information about preset, please see API document.", "message": "Preset not found for Id: 5" Page...
- Page 87 Get preset information: Method: GET URL: /api/cf/presets/presetbyname/<str:preset Name> URL parameters: • preset Name -- preset Name (String maximum length: 10). The preset name is case sensitive. Response JSON Object On Success • string unit_name: Product Name ("IAM-ETZ-G4") • string model: Product model ("iAM_MIX_IP) •...
- Page 88 "LabelTop": "SDI-1", "LabelID": "1" "2": { "VolumeDb": 0, "Source": { "Type": "Sfp-1.Sdi.Sdi-1", "Channel": 8 "DelayMs": 0, "Speaker": "Right", "Label": { "Default": true, "LabelType": 3, "LabelBottom": "8", "LabelTop": "SDI-1", "LabelID": "2" "3": { "VolumeDb": 0, "Source": { "Type": "Sfp-1.Sdi.Sdi-1", "Channel": 9 "DelayMs": 0, "Speaker": "Left", "Label": {...
- Page 89 "Source": { "Type": "Madi", "Channel": 5 "DelayMs": 0, "Speaker": "Right", "Label": { "Default": true, "LabelType": 3, "LabelBottom": "5", "LabelTop": "MADI", "LabelID": "6" "7": { "VolumeDb": 0, "Source": { "Type": "Madi", "Channel": 5 "DelayMs": 0, "Speaker": "Left", "Label": { "Default": true, "LabelType": 3, "LabelBottom": "5", "LabelTop": "MADI",...
- Page 90 "Label": { "Default": true, "LabelType": 3, "LabelBottom": "5", "LabelTop": "MADI", "LabelID": "10" "11": { "VolumeDb": 0, "Source": { "Type": "Aes", "Channel": 1 "DelayMs": 0, "Speaker": "Left", "Label": { "Default": true, "LabelType": 3, "LabelBottom": "1", "LabelTop": "AES", "LabelID": "11" "12": { "VolumeDb": 0, "Source": { "Type": "Aes",...
- Page 91 "15": { "VolumeDb": 0, "Source": { "Type": "Aes", "Channel": 5 "DelayMs": 0, "Speaker": "Left", "Label": { "Default": true, "LabelType": 3, "LabelBottom": "5", "LabelTop": "AES", "LabelID": "15" "16": { "VolumeDb": 0, "Source": { "Type": "Aes", "Channel": 6 "DelayMs": 0, "Speaker": "Right", "Label": { "Default": true, "LabelType": 3,...
- Page 92 "Speaker": "L" "OutputTrimDb": 0, "MeterSources": [ "Speaker": "R" "MasterVolume": true, "SpeakerArrangement": "None", "SoloMute": true, "HeadphoneMute": true, "SpeakerMix": true, "AutoRoute": false "Aoip.Pair-30": { "OutputChannels": [ "OutputTrimDb": 0, "MeterSources": [ "Speaker": "L" "OutputTrimDb": 0, "MeterSources": [ "Speaker": "R" "MasterVolume": true, "SpeakerArrangement": "None", "SoloMute": true, "HeadphoneMute": true, "SpeakerMix": true,...
- Page 93 "OutputChannels": [ "OutputTrimDb": 0, "MeterSources": [ "Speaker": "L" "OutputTrimDb": 0, "MeterSources": [ "Speaker": "R" "MasterVolume": true, "SpeakerArrangement": "None", "SoloMute": true, "HeadphoneMute": true, "SpeakerMix": true, "AutoRoute": false "AnalogXlr": { "OutputChannels": [ "OutputTrimDb": 0, "MeterSources": [ "Speaker": "L" "OutputTrimDb": 0, "MeterSources": [ "Speaker": "R"...
- Page 94 "SoloMute": true, "HeadphoneMute": true, "SpeakerMix": true, "AutoRoute": false "Aes.Pair-4": { "OutputChannels": [ "OutputTrimDb": 0, "MeterSources": [ "Speaker": "L" "OutputTrimDb": 0, "MeterSources": [ "Speaker": "R" "MasterVolume": true, "SpeakerArrangement": "None", "SoloMute": true, "HeadphoneMute": true, "SpeakerMix": true, "AutoRoute": false "Aes.Pair-1": { "OutputChannels": [ "OutputTrimDb": 0, "MeterSources": [ "Speaker": "L"...
- Page 95 "Speaker": "R" "MasterVolume": true, "SpeakerArrangement": "None", "SoloMute": true, "HeadphoneMute": true, "SpeakerMix": true, "AutoRoute": false "Aes.Pair-2": { "OutputChannels": [ "OutputTrimDb": 0, "MeterSources": [ "Speaker": "L" "OutputTrimDb": 0, "MeterSources": [ "Speaker": "R" "MasterVolume": true, "SpeakerArrangement": "None", "SoloMute": true, "HeadphoneMute": true, "SpeakerMix": true, "AutoRoute": false "Aes.Pair-3": { "OutputChannels": [...
- Page 96 "Speaker": "R" "MasterVolume": true, "SpeakerArrangement": "None", "SoloMute": true, "HeadphoneMute": true, "SpeakerMix": true, "AutoRoute": false "SystemClockSource": { "Pair": 0, "Type": "Sfp-1" "SpeakerOptions": { "DelayMs": 0 "Clusters": [ "NumberOfMeters": 1, "MuteOnPresetRecall": true, "Type": "Mono", "Name": "Mono 1.0 #1", "FirstMeter": 1 "NumberOfMeters": 1, "MuteOnPresetRecall": true, "Type": "Mono", "Name": "Mono 1.0 #2",...
- Page 97 "NumberOfMeters": 1, "MuteOnPresetRecall": true, "Type": "Mono", "Name": "Mono 1.0 #7", "FirstMeter": 7 "NumberOfMeters": 1, "MuteOnPresetRecall": true, "Type": "Mono", "Name": "Mono 1.0 #8", "FirstMeter": 8 "NumberOfMeters": 1, "MuteOnPresetRecall": true, "Type": "Mono", "Name": "Mono 1.0 #9", "FirstMeter": 9 "NumberOfMeters": 1, "MuteOnPresetRecall": true, "Type": "Mono", "Name": "Mono 1.0 #10", "FirstMeter": 10...
- Page 98 "MeterPreferences": { "muteMasterVolume": false, "masterVolume": false "Name": { "Preset": "", "Program": "", "Group": "" B. On Failure: "status": 404, "action": "For more information about preset, please see API document", "message": "Preset 'IAM-ETZ-G41' was not found" Page...
- Page 99 Get current active preset Method: GET URL: /api/cf/presets/current Response JSON Object • string unit_name: Product Name ("IAM-ETZ-G4") • string model: Product model ("iAM_MIX_IP) • string serial_number: Product serial number • float api_version: REST API version • string result: Preset information without configuration data. Status Codes: •...
- Page 100 Preset Activation Method: PATCH URL: /api/cf/presets/<int:preset ID>/activate URL parameters: • preset ID -- preset ID (Number greater than zero) Response JSON Object On Success • string unit_name: Product Name ("IAM-ETZ-G4") • string model: Product model ("iAM_MIX_IP) • string serial_number: Product serial number •...
- Page 101 Setting Solo Meter Method: PATCH URL: /api/op/presets/mute-meters URL parameters: • data Data in JSON format. Request • Headers Accept: application/json Content-Type: application/json Response JSON Object On Success • string unit_name: Product Name ("IAM-ETZ-G4") • string model: Product model ("iAM_MIX_IP) • string serial_number: Product serial number •...
- Page 102 "model": "iAM-Mix-IP", "message": "Mute meters have been applied successfully", "api_version": 2 B. Invalid meter number: "status": 422, "action": "For more information about mute-meters, please see API document.", "message": { "meters": "2": { "meter_number": ["Must be between 1 and 16."] C. Missing parameter: "status": 422, "action": "For more information about mute-meters, please see API document.",...
- Page 103 Setting Solo Meter Method: PATCH URL: /api/op/presets/solo-meter URL parameters: • data Data in JSON format. Request • Headers Accept: application/json Content-Type: application/json Response JSON Object On Success • string unit_name: Product Name ("IAM-ETZ-G4") • string model: Product model ("iAM_MIX_IP) • string serial_number: Product serial number •...
- Page 104 B. Invalid meter number: "status": 422, "action": "For more information about valid meter numbers, please see API document.", "message": { "meter_number": ["Must be between 1 and 16."] Missing parameter: "status": 422, "action": "For more information about valid meter numbers, please see API document.", "message": { "meter_number": ["Missing data for required field."]...
- Page 105 Setting UnSolo Meter Method: PATCH URL: /api/op/presets/unsolo-meter URL parameters: • data Data in JSON format. Request • Headers Accept: application/json Content-Type: application/json Response JSON Object • string unit_name: Product Name ("IAM-ETZ-G4") • string model: Product model ("iAM_MIX_IP) • string serial_number: Product serial number •...
- Page 106 Source Select Method: PATCH URL: /api/op/sourceselect URL parameters: • data Data in JSON format. Request • Headers Accept: application/json Content-Type: application/json SourceType and input Source are case sensitive. 1. Body content for SDI "SourceType": <String: SDI Input Source> Note: Allowed SDI input sources are: "Sfp-1.Sdi.Sdi-1", "Sfp-2.Sdi.Sdi-1"...
- Page 107 Note: Allowed SMPTE 2110 input sources are: "Sfp-1.Smpte2110", "Sfp-2.Smpte2110", "SourceType": "Sfp-1.Smpte2110", "ChannelGroup": <Int: 1-4> (Mix-IP 16) or <Int: 1-8> (Mix-IP 8) Note: ChannelGroup 1 => Channels 1-16 and ChannelGroup 2 => Channels 17-32 and so on Response JSON Object On Success •...
-
Page 108: Http Routing Table
"message": { " SourceType": ["Not a valid choice."] D. On Failure: Source not licensed: "status": 422, "action": " For more information about licensed keys, please contact Wohler Support.", "message": "Sfp-1.Smpte2022 Source Not Licensed" HTTP Routing Table GET /api/cf/presets GET /api/cf/presets/(int:preset Id)
Need help?
Do you have a question about the iAM-MIX-8 and is the answer not in the manual?
Questions and answers