Table of Contents
Advertisement
Quick Links
Download this manual
See also:
User Manual
Advertisement
Table of Contents

Subscribe to Our Youtube Channel
Related Manuals for Wohler iAM-AUDIO-1


Summary of Contents for Wohler iAM-AUDIO-1
-
Page 1: User Guide
1RU/2RU, Multi Channel, Touch Screen Audio Monitor User Guide Software Release: V1.1 Part Number 821808, Revision A... - Page 2 In no event will Wohler Technologies, Inc. be liable for direct, indirect, special, incidental, or consequential damages resulting from any defect in the hardware, software, or its documentation, even if advised of the possibility of such damages.
-
Page 3: Table Of Contents
TABLE OF CONTENTS Contents User Guide .............. 1 TABLE OF CONTENTS ..........3 Contents ................... 3 CHAPTER 1: Installation ..........6 Introduction ................6 Overview ................6 Safety ..................6 Instructions ............... 6 ... - Page 4 Figure 3–1: IAM-AUDIO Block Diagram ........ 18 CHAPTER 4: Using the iAM-AUDIO Web GUI ....19 Web Browser / Control Device ............ 19 First Time- IP Assignments ............19 Dashboard ................20 Remote Metering ..............22 ...
- Page 5 Device Lock ................42 Dante Firmware Upgrades ............42 Page 5...
-
Page 6: Chapter 1: Installation
. The unit also accepts Audio over IP signals via an Ethernet connector. Refer to Specifications section or contact Wohler Sales for more information. The iAM-AUDIO is compact and simple to operate. It has touch screen LCD displays providing high resolution meters, menus and basic monitor controls. -
Page 7: Safety Symbols
source on the equipment and at the socket. 8. Use only the attachments/accessories specified by the manufacturer. 9. Unplug the equipment during lightning storms or when unused for long periods of time. 10. Refer all servicing to qualified service personnel. Servicing will be required under all of the following conditions: a. -
Page 8: Sympathetic Vibration
Heat generated by the class D power amplifiers, power supplies, and other components is vented by slots in the sides and back of the unit. Therefore, as a safety precaution, you must allow proper ventilation on these surfaces. Sympathetic Vibration Sympathetic vibration from other equipment (cables, etc.) in the rack may be serious enough to interfere with the unit’s sound quality. -
Page 9: Ices-003
ICES-003 This Class A digital apparatus complies with Canadian ICES-003. Cet appareil numérique de la classe A est conforme à la norme NMB-003 du Canada. Page 9... -
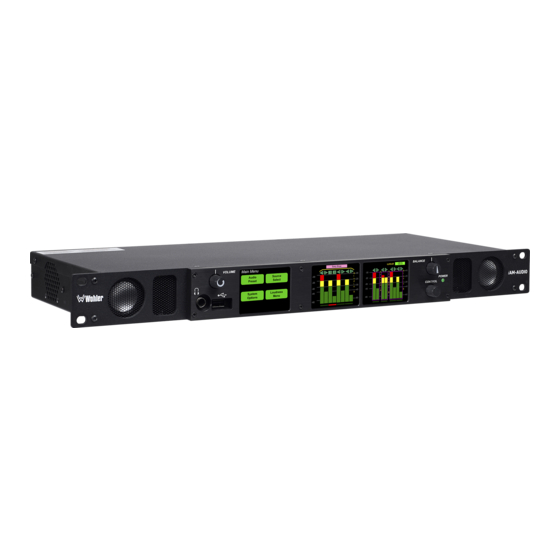
Page 10: Chapter 2: Local Operation
CHAPTER 2: Local Operation Front Panel 1RU and 2RU versions are shown below. 1RU front panels have the two displays on the right for metering, while the 2RU form factor has all meters on the right hand display. Figure 2–1: 1RU Front Panel Layout Menu/Option Level Volume... -
Page 11: Rear Panel
Speakers: Local near field audio monitoring is achieved through the use of class D amplifiers. Two (left/right) low and mid/high range speakers in 1RU; full range speakers in 2RU. Headphone Jack: A 1/4" jack for an optional headphone is provided on the front panel. - Page 12 Use of another power adapter provided by the user may negate the compliance or cause the monitor to not perform properly. Wohler Technologies cannot accept any responsibility for the outcome in such cases.
-
Page 13: Channel Meters And Touch Operations
Channel Meters and Touch Operations Audio meters are displayed on touchscreen LCD display(s) in labeled clusters. Clusters can be soloed and muted by touch actions. Touching the upper part of a meter cluster will solo it. Clusters currently soloed are outlined in blue. ... -
Page 14: Main Menu Figure 2-5 Main Menu (Home Screen)
Main Menu Figure 2-5 Main Menu (Home Screen) Info Pressing the Info button shows the unit information menu below. Further information about the software is shown by pressing the SW Info button. Figure 2-6 Info Menu Figure 2-7 Software Info Page... -
Page 15: Setup
Setup Pressing the Setup button opens the menu. Pressing Presets button shows the operator presets choices. The current preset is highlighted in green. Figure 2-8 Setup Menu Figure 2-9 Presets Menu Input(s) Figure 2-8 Input Menu Insert final Inputs Menu diagram here Page... -
Page 16: Chapter 3: Technical Info
CHAPTER 3: Technical Info Table 3–1: iAM-AUDIO Specifications Specification Values/Domains Power requirements 100 V to 240 V AC ± 10%, 50/60Hz Power consumption 40 Watts Dimensions 1.75” x 19” x 7.5” (H x W x D) (44mm x 483mm x 191mm) Weight 8 lbs. (3.6 kg) Space Required 1 RU in a standard 19” rack Supplied Accessories Power Adapter, AC Power Cord Display Type Passive Matrix OLED Number of Displays 3 (1RU); 2 (2RU) Screen Resolution ... - Page 17 Specification Values/Domains SDI Input Termination 75 Ohms unbalanced AES/EBU Input 75 Ohms unbalanced Termination Analog Input Impedance 40k Ohms balanced AES/EBU/MADI Sampling 48 kHz Rate Analog Outputs‐Stereo XLR‐3 Male, balanced +24dBu max Analog Output Frequency 40 Hz to 20 kHz (± 1dB) Response Analog Output Distortion <0.01% THD+N Analog Output Dynamic > 100 dB Range Analog Output Reference ‐20 dBFS = +4 ± 1.0 dBu Level 1RU; 75mm Low, 40mm Mid‐Hi Internal Speakers‐Stereo 2RU; 80mm Full Range Peak Acoustic Output 98dBA SPL (@ 2 feet) Speaker Power Rating 12 Watts RMS, 24 Watts pk (each side) Acoustic Frequency 150 Hz to 16 kHz (± 5 dB) Response Headphone Out‐Stereo 40 Hz to 20 kHz (±...
-
Page 18: Figure 3–1: Iam-Audio Block Diagram
Figure 3–1: IAM-AUDIO Block Diagram Page... -
Page 19: Chapter 4: Using The Iam-Audio Web Gui
CHAPTER 4: Using the iAM-AUDIO Web GUI The IAM-AUDIO Web GUI allows you to customize the monitor’s configuration to suit your needs. The default presets configure each source’s channels in consecutive fashion. The following setup steps are not necessary to use the iAM- AUDIO in the default configuration. -
Page 20: Dashboard
Close the control panel and reboot the host computer after making an IP address change like this to be sure the change takes effect. Either reconnect to the installed network or continue with this direct connection to access the iAM-AUDIO Web GUI. Make the corresponding address, mask and gateway changes in the iAM-AUDIO Network Setup page. - Page 21 The currently selected preset for local operation is shown full color. Other stored, but not selected, presets have gray backgrounds. The top row shows which sources are used in the preset. The middle row shows which channel numbers are assigned to each control strip. Colors in the bottom row indicate green for active, or red for muted states.
-
Page 22: Remote Metering
Remote Metering Click on the Remote Monitor page to see audio meters for the current preset. Page... -
Page 23: Sign In
Sign In Only authorized users should be allowed to make preset and network changes. Anybody can view status of iAM-AUDIO units on the network, but logging in with a password is required to make any changes. When logging in is required to make a change, the following page will appear. -
Page 24: Channel Naming
Channel Naming Each channel can be preassigned names in the configuration database. There is a separate set of names for each input type, selected by the upper row check boxes. The default names (labels) can be changed by normal cursor text entry operations in your browser and device. - Page 25 If BNC and Optical sources are installed, the MADI Input Selection switch will appear. Only one can be enabled for each preset, though different presets can use either one. If a second SDI source is installed, the SDI-1/SDI-2 Indicator switch will appear. Only one can be enabled for each preset, though different presets can use either one.
-
Page 26: Configuration - Named Presets
Channel# is where the source channel for each strip location is set. Label 1 shows what will be displayed on the upper line of the channel strip, like a scribble strip on a mixing board. Label 2 is for the lower line displayed. Both labels will retrieve labels from the Channel Naming page when first selected here. - Page 27 Page...
-
Page 28: System Setup
Wohler Customer Service. Once entered, saved and accepted, the new license is available for use. Scan Network-Discovery This page will scan the network for Wohler iAM monitors installed on the network. Other devices can have their network settings reconfigured by clicking the Edit (pencil) icon. Information about Updates tab is in... -
Page 29: Network Setup
Click on another MAC to Jump there Network Setup Make network IP Address changes for the local iAM-AUDIO unit’s Management (MGMT) Port here. Will reboot the iAM to complete IP Address change Use DHCP? Check this box if your network has a DHCP server and you want to use dynamic addressing. - Page 30 Page...
-
Page 31: Database Management
Database Management Export Configuration Use this page to offload an iAM-AUDIO’s preset database to a USB flash drive, inserted in the front panel port. Follow instructions on the bottom of the page to complete the procedure. Import Configuration Use this to retrieve presets from a USB flash drive inserted in the front panel port. Follow instructions on the bottom of the page to complete the procedure. - Page 32 Page...
-
Page 33: Save / Restore Database (Db)
Save / Restore Database (DB) This page is used to make a backup copy of the database within an iAM-AUDIO unit. Refer to the list of databases at page bottom. There will only be one database until a new one is Saved. Use Restore to reverse database corruption if you notice or suspect the presets are not appearing correctly. -
Page 34: Software Upgrades
USB flash drive. It must be FAT32 file type, and does not need to be empty. Both local and network update methods require a USB drive/stick, with Wohler Update Package(s) installed on it, be inserted into the front panel USB jack. -
Page 35: Installing The Software Locally
Installing the Software Locally Click on System Update in the web browser GUI. System Information in the right pane shows currently installed software and hardware versions. A list of update file packages will appear here. Click on the one you want to use. Click Update System button below. Insert the USB drive with iAM-AUDIO update package(s) into the front panel USB jack. -
Page 36: Installing Software On Networked Iam-Audios
Either Refresh the browser by clicking on the Wohler logo, or close and reopen the browser for normal operation of the Web GUI after the iAM-AUDIO reboots. Installing Software on Networked iAM-AUDIOs Scan Network-Updates This page will scan the network for Wohler iAM monitors installed on the network and allow firmware updates of compatible and accessible iAM-AUDIO units. -
Page 37: Dante Network Setup
AoIP option is installed. The iAM-AUDIO is set up by Wohler to be used as a slave rather than a master within the Dante network. Other devices, or software such as Dante Controller, are expected to be responsible for most device configurations and all audio routing. -
Page 38: What Is In The Iam-Audio For Dante
What is in the iAM-AUDIO for Dante The Audinate Brooklyn II board automatically recognizes Dante networks when installed, will alert other devices of its presence and configuration, and will configure its AoIP address per DHCP or local link protocols. There is no need to set a static address for the iAM-AUDIO Dante port, so no address entry method is provided in the iAM for Dante network setup. -
Page 39: Dante Device Setup
Dante Device Setup The iAM-AUDIO’s default Dante Device Name is “BKLYN-II- …” followed by the last 6 digits of the Dante port MAC address. This name can be changed by the Dante Controller to appear that way on the network, but that will not change the iAM-AUDIO’s unit name appearing on GUI pages and iAM remote metering or discovery pages. -
Page 40: Dante Clock Selection
Only 44.1 kHz and 48 kHz audio sample rates are currently supported by the iAM-AUDIO. The Brooklyn II card would accept a Dante Controller command to operate at other rates, without giving an indication it will not be implemented. Dante Clock Selection While the Brooklyn’s internal clock is highly accurate, the iAM-AUDIO does not have provisions for external sync clocks, such as those that are GPS or media reference (video genlock or audio word clock) based. -
Page 41: Aes67
AES67 The iAM-AUDIO Brooklyn II can be configured for AES67 operation. AES67 operation with Dante is limited to eight or less receive and transmit channels at 48 kHz sample rates. 24 bit linear (L24) encoding and 1 msec packet time are fixed default transmit parameters. - Page 42 Device Lock command at this time. Dante Firmware Upgrades Wohler iAM-AUDIO monitors ship with current Brooklyn II firmware as of option installation date. The version information is found in the Dante Controller Device View-Status page. iAM software/firmware is tested with the latest Dante code release.
- Page 43 Use the Audinate Dante Firmware Update Manager Windows or OS X application to update the Dante firmware over the Dante network. Follow the application’s installation and usage guide plus any applicable technical notes available. Follow instructions in Software Upgrades for iAM-AUDIO updates. Page...
Need help?
Do you have a question about the iAM-AUDIO-1 and is the answer not in the manual?
Questions and answers