
Related Manuals for Wohler eAMP1-S8-MDA


Summary of Contents for Wohler eAMP1-S8-MDA
-
Page 1: User Guide
1RU Multi-Channel Audio Monitor User Guide Part Number 821841, Revision B... - Page 2 In no event will Wohler Technologies, Inc. be liable for direct, indirect, special, incidental, or consequential damages resulting from any defect in the hardware, software, or its documentation, even if advised of the possibility of such damages.
-
Page 3: Table Of Contents
Startup ....................... 10 Front Panel....................10 Model Differences..................11 Rear Panel....................12 Channel Meters and Touch Operations............. 15 Wohler Zoom Screen ..................17 Menu / Option Touchscreen ................18 Main Menu ..................19 Loudness Menu .................. 19 Loudness Meter.................. 19 Loudness Settings ................ - Page 4 Phase Configuration................29 Analog Configuration ................30 Meter Scales..................31 System Options Menu ................. 33 Network Settings................33 System Reboot .................. 35 System Update .................. 36 Factory Reset ..................37 System Information ................38 Passcode Settings ................39 Forgotten Passcode ................41 CHAPTER 3: Technical Info ...............
- Page 5 Import/Export Presets................... 74 Export Configuration ................74 Import Configuration ................75 System Setup ....................76 System Information ................76 Licenses.................... 77 Factory Reset ....................78 Reboot System .................... 79 APPENDIX A: Software Upgrades............80 Introduction ....................80 Download the Software ................. 80 Update Methods ...................
-
Page 6: Chapter 1: Installation
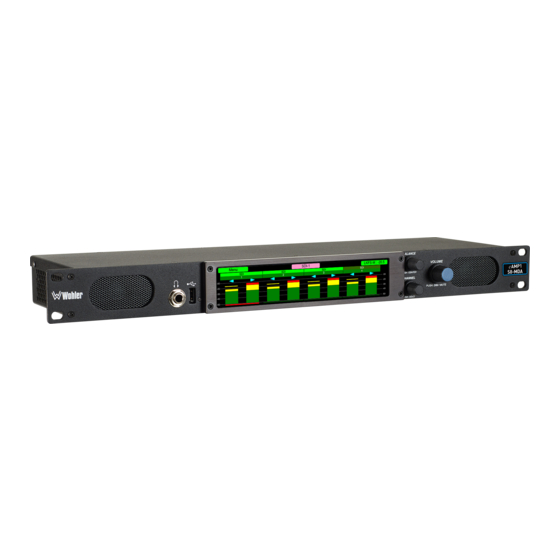
CHAPTER 1: Installation Introduction Overview The eAMP1-S8-MDA and eAMP1-S16-MDA Audio Monitors are 1RU multichannel multi-source audio monitors, each with a 3G-SDI input, AES inputs and analog inputs. These and the associated other eAMP1-Series monitors allow the customer to select a model with the exact channel and input source capabilities needed for an economical cost. -
Page 7: Safety Symbols
9. Unplug the equipment during lightning storms or when unused for long periods of time. 10. Refer all servicing to qualified service personnel. Servicing will be required under all of the following conditions: a. The equipment has been damaged in any way, such as when the power- supply cord or plug is damaged. -
Page 8: Sympathetic Vibration
Sympathetic Vibration Sympathetic vibration from other equipment (cables, etc.) in the rack may be serious enough to interfere with the unit’s sound quality. If you experience sympathetic vibrations, use thin card stock, felt, foam, or weather-stripping between the vibrating surfaces. Tie loose cables securely with cable ties. Mechanical Bracing The 1RU chassis is securely attached to the front panel. -
Page 9: Chapter 2: Local Operation
The eAMP1-S8/16-MDA can be operated easily and simply from controls on its front panel, as described in this chapter. It may also be accessed remotely via the Wohler Web GUI for administrative purposes. The Wohler Web GUI is described in Chapter 4 of this manual. -
Page 10: Dolby Package Upgrade
The optional licensed Dolby Package Upgrade allows decoding and monitoring of ® Dolby D, DD+ & E. It includes Wohler Zoom & metadata. This option requires prior purchase of the OPT-e Package Upgrade. An optional license key must be purchased to add the Dolby Package. Refer to the System Setup section in Chapter 4 to install licenses. -
Page 11: Model Differences
Output Routing option is installed, speaker audio may optionally be set to not mute, using the Wohler Web GUI. Refer to the Global Output Options section of Chapter 4. If the speaker audio is set to mute with headphone insertion, and a... -
Page 12: Rear Panel
2. Network Port: This Ethernet port can connect to either a LAN or to a PC to let you perform metering, monitoring, and configuration remotely. The Wohler Web GUI is described in Chapter 4 of this manual. Third party equipment, which can use API commands to view and change product options, can also be plugged into this port. - Page 13 (8 channels) at a 48 kHz sample rate. Refer to Figure 2-3 for the pinout of this connector. The easiest way to interface with this connector is to use an HD-15 to VGA adaptor cable. Channels are selected as AES 1-8. Figure 2-3: AES HD-15F Connector Pinout AES Pairs 4.
- Page 14 +10dBu broadcast level balanced audio. These signals are monitored on meters 1 - 8 by default. Tascam cables may be used, and can be purchased by contacting Wohler Sales. Refer to Figure 2-5 for the pinout of this connector.
-
Page 15: Channel Meters And Touch Operations
Channel Meters and Touch Operations The audio mixer terminology of “solo” is used in this manual when referring to muting all but a specific audio channel or pair. Audio meters are displayed on touchscreen LCD display(s) in up to 8 channel pairs, as shown in Figure 2-6. - Page 16 Set which Phase Indicators appear using the Phase Config Menu or with the System Preferences: Phase Indicator Configuration tab in the Wohler Web GUI. 8. Menu Selector: Touching the Menu Selector opens the menu used to set up preferences for operation.
-
Page 17: Wohler Zoom Screen
Wohler Zoom Screen Wohler Zoom is a very powerful analysis tool. Much as a camera lens can "zoom" into a single subject of interest out of many, the Wohler Zoom feature lets you quickly "zoom" into a single Dolby bitstream, out of multiple encoded Dolby streams and other channels. -
Page 18: Menu / Option Touchscreen
Menu / Option Touchscreen You may set most options or view a variety of system information using the self- contained menus. To access this, touch the Menu button which appears on the left of the level meter screen. Figure 2-8 is a diagram of the menu arrangement, a tree showing how to reach any menu from the Main Menu. -
Page 19: Main Menu
Main Menu Touch the Menu button on the display to access the Main Menu. The Main Menu is shown in Figure 2-9. Note that depending upon whether the OPTe Package has been installed, some of the selections may not appear. Figure 2-9: Main Menu Loudness Menu Loudness Measurement is available if the OPTe Package is purchased. - Page 20 A box on the lower right of the screen shows the selected Loudness Source, as does the orange bracket on the Level Meters screen. Figure 2-11: Optional Loudness Meter Screen Back LKFS PROG -21.5 -20.1 -20.0 1: Mono #1 LU-M In order to calculate loudness accurately, it is crucial that you correctly set Note: the Channel Function for each channel.
-
Page 21: Loudness Settings
Note: Further and more detailed descriptions of all of the above Loudness terms may be found in the ITU-R BS.1770-3 loudness standard. The controls available on the Loudness Meter Screen are: 1. Cluster Select: You may change which Cluster is being measured by simply touching the green Loudness reading on the Audio Meter screen. - Page 22 Monitoring Mode: 1. Manual: Touch the Manual button to enable Manual Mode. This allows you to measure the loudness of a specific program or segment of a program, such as a commercial. In this mode, the Start and Stop button on the Loudness Meter screen can be manually used to begin and end a loudness measurement interval.
-
Page 23: Source Select
You may simply touch another source in this menu to switch to it. Figures 2-13 and 2-14 show the Source Select Menus for the two models. Figure 2-13: eAMP1-S16-MDA Source Select Menu Figure 2-14: eAMP1-S8-MDA Source Select Menu Touch Menu to return to the Main Menu. Page 23... -
Page 24: Presets
Presets The Presets feature is available if the OPTe Package is purchased. Presets are pre- arranged input and monitoring setups that can be used to monitor a variety of combinations of inputs. They may be set up to allow quick and easy selection of monitoring configurations for various productions and situations. -
Page 25: Preset Favorites
metering screen will display the channels contained in that source. To return to the All Presets Group Selection screen instead, touch the Groups button. To return to the Menu without making a selection, touch the Menu button. Figure 2-17: All Presets Screen - No Presets To return to the Menu from this screen, touch the Menu button. -
Page 26: Unit Settings
Figure 2-19: Preset Favorites Screen - No Favorites Unit Settings Touching the Unit Settings selection on the Main Menu screen proceeds to the Unit Settings Menu, which contains additional menu selections. The Unit Settings Menu is shown in Figure 2-20. This is an intermediary menu which leads to other menus and screens. -
Page 27: Speaker Options
Speaker Options Touching the Speaker Options selection on the Unit Settings Menu screen proceeds to the Speaker Options screen. The controls on this screen affect various characteristics of the monitored audio as heard on the eAMP1-S8/16-MDA. This screen is shown in Figure 2-21. Figure 2-21: Speaker Options Screen The controls function as follows: 1. -
Page 28: Unit Configuration
Unit Configuration Touching the Unit Config selection on the Unit Settings Menu proceeds to the Unit Config Menu. This menu is shown in Figure 2-22. Figure 2-22: Unit Configuration Menu Unit Config Cancel & Exit Save & Exit < > Brightness Termination Meter... -
Page 29: Phase Configuration
Phase Configuration Touching the Phase Config selection on the Unit Settings Menu proceeds to the Phase Config Menu. This menu is shown in Figure 2-22 for the eAMP1-S8-MDA and eAMP1-S16-MDA. Figure 2-23: Phase Configuration Menu Phase Phase Cancel & Exit Save &... -
Page 30: Analog Configuration
Analog Configuration Touching the Analog Config button in the System Options Menu displays the Analog Config screen. Contained in this menu is an Analog Reference as illustrated in Figure 2-24. The parameters set on this screen pertain to the Analog Input and Analog Output DB25 and XLR connectors on the rear panel of the eAMP1-S8/16-MDA. -
Page 31: Meter Scales
Meter Scales Touching the Meter Scales button on the Unit Settings Menu displays the Meter Scales screen as shown in Figure 2-25. The controls on this screen select the scale standards as well as the ballistics that will be applied to the audio meters. Figure 2-25: Meter Scales Screen The controls function as follows: 1. - Page 32 Table 2–4: Meter Limits and References Default Color Default Ballistics Default Bounds Scale Bottom Limit Top Limit Reference Lower Upper Float -72 dBFS 0.0 dBFS 0 dBFS = 0 dBFS -30 dBFS -20 dBFS Type I VU -53 dBr +5.5 dBr -15 dBFS = 0 dBr -5 dBr 0 dBr...
-
Page 33: System Options Menu
System Options Menu Touching System Options in the Main Menu proceeds to the System Options menu, which is an intermediate menu leading to other screens. This menu is shown in Figure 2-27. Figure 2-27: System Options Menu System Options Menu Network System Settings... - Page 34 Figure 2-29: Network Configuration: Setting Change 2. Touch the digits to be entered and then touch the Enter button. The Clear button may be touched to erase any mistyped digits. 3. Now repeat steps 1 and 2 until you have replaced all of the necessary digits. 4.
-
Page 35: System Reboot
Figure 2-31: System Reboot If you have any doubt as to whether you should press Yes, press Back or No instead, and contact Wohler Technical Service for advice. Pressing Back or No will return you to the System Options menu. -
Page 36: System Update
System Update Touching the System Update selection in the System Options Menu displays System Update screen as shown in Figure 2-32, showing the current software version of the product. To update the system software locally from the eAMP1- S8/16-MDA front panel, follow the procedure in the Local Update from the Front Panel section of Appendix A. -
Page 37: Factory Reset
Mac address 28.) If you have any doubt as to whether you should press Yes, press Back or No instead, and contact Wohler Technical Service for advice. Pressing Back or No will return you to the System Options menu. -
Page 38: System Information
System Information Touching the System Details selection in the System Options menu displays the System Details screen as shown in Figure 2-34. This screen lets you view the product Serial Number, Software Version, and various other information. Figure 2-34: System Details Screen The information shown on this screen is read only and cannot be changed. -
Page 39: Passcode Settings
The Wohler Web GUI can be used to limit access to the menus of your choice. Refer to Chapter 4, the Front Panel Configuration tab of System Preferences. - Page 40 shown on the right image of Figure 2-36. Press Clear and try again. When you have successfully entered the Passcode, the Passcode Settings screen will appear, as shown in Figure 2-37. Figure 2-37: Passcode Settings Screen The functions on this screen are as follows: Restricted Access: This switch will turn ON or OFF protection or blocking of any menus, except for the Passcode Settings menu, which is always Passcode protected.
-
Page 41: Forgotten Passcode
Although the Passcode should be remembered or securely noted somewhere, it can happen that it is forgotten. This can be remedied by performing a Factory Reset from the Wohler Web GUI. Unfortunately, this will also erase all of the menu settings. You may also contact Wohler Technical Service for help. -
Page 42: Chapter 3: Technical Info
CHAPTER 3: Technical Info Table 3–1: eAMP1-S8/16-MDA Specifications Specification Values/Domains Power Requirements 100 VAC to 240 VAC ± 10%, 50/60Hz Power Consumption 19 Watts Dimensions 1.75” x 19” x 5.5” (44mm x 483mm x (H x W x D) 140mm), standard 19” rack mounting Shipping/Net Weight 5.8 lbs. - Page 43 Table 3–2: eAMP1-S8-MDA Model Specifications Specification Values/Domains Audio Channels 8 Max SDI Inputs / Output 3G/HD/SD SDI Input and Output 8 channels from 16-channel 3G/HD/SD- De-Multiplexing SDI Input Termination 75Ω unbalanced Cable Length (max) COAX (such as Belden 1694A): > 150 m Unbalanced Stereo Input Stereo Pair on RCA, 40KΩ...
- Page 44 Routing Software activation key. ® Allows decoding and monitoring of Dolby OPT-DOLBY 829174 DD+ & E. Includes Wohler Zoom & metadata. *This option requires the OPTe Package Figure 3–1: eAMP1-S8-MDA Block Diagram Touchscreen for 8 Audio Meters 3G-SDI Input Menu SDI-1 LKFS-M : -20.5...
- Page 45 Figure 3–2: eAMP1-S16-MDA Block Diagram Touchscreen for 16 Audio Meters 3G-SDI Input Menu LKFS-M : -20.5 3G-SDI Output Channel Pair AES Receiver Inputs 1 – 4 on HD-15 Graphics / Touch Processors AES Channel Pair AES Output Outputs 1 – 4 on HD-15 Volume / Drivers Audio from any...
-
Page 46: Chapter 4: The Eamp1-S8/16-Mda Web Gui
CHAPTER 4: The eAMP1-S8/16-MDA Web GUI The self-contained eAMP1-S8/16-MDA Web GUI allows you to customize the configuration of the eAMP1-S8/16-MDA to suit your needs. When the optional OPTe package is purchased and added to the product, additional powerful features like Loudness Measurement and Preset features are enabled, as described throughout this chapter. -
Page 47: Network Connection
Figure 4–1: Host IP Settings Close the control panel and reboot the host computer after making an IP address change to be sure the change takes effect. Either reconnect to the installed network or continue with this direct connection to access the eAMP1-S8/16-MDA Web GUI. -
Page 48: Network Setup
Make network IP Address changes for the local eAMP1-S8/16-MDA Management (MGMT) Port here. Figure 4–2: Set IP Addresses eAMP1-S8-MDA 169.254.1.1 The procedure for changing the IP Address information is as follows: 1. Use DHCP? Check this box if your network has a DHCP server and you want to use dynamic addressing. -
Page 49: Dashboard
Dashboard Throughout the Web GUI, pages are a click or two away using the list of selections on the left side. The Dashboard page shows all of the available Preset configurations at a glance. The eAMP1-S8/16-MDA allows you to assign Presets to particular groups. - Page 50 Group / Preset Edit Buttons Preset Selection Summary eAMP1-S8-MDA A Group / Preset Summary is shown in the upper right of the screen. This enables you to see the total number of Groups, Presets and Favorite Presets in the eAMP1- S8/16-MDA.
- Page 51 Figure 4–5: Dashboard Preset Edit The Edit options for a Preset are: 1. Delete: Remove the Preset from the system. Do Not delete the currently active Preset. 2. Rename: Rename the Preset, but keep all of its other characteristics. 3. Make Favorite: Make this Preset a favorite. This can be done for frequently used Presets.
- Page 52 Figure 4–6: Dashboard Group Edit The Edit options for a Group are as follows: 1. Delete: Delete the Group and all of the Presets it contains. 2. Rename: Rename the Group, but keep all of its other characteristics. Page 52 eAMP1-S8/16-MDA...
-
Page 53: Audio Meters
Click on Audio Meters to remotely display the audio meters of the eAMP1-S8/16- MDA. This display is shown in Figure 4-7. Also displayed is the name of the source that the meters are displaying. In Figure 4-7, this is SDI/BNC-1. Figure 4–7: Audio Meters Display eAMP1-S8-MDA Page 53 eAMP1-S8/16-MDA... -
Page 54: System Preferences
Clock Reference. This tab is shown in Figure 4-8. This System Audio Clock Reference setting can be overridden by the optional System Clock Reference setting in the Preset Management menu when the Preset is chosen. Figure 4–8: System Audio Clock Reference Tab eAMP1-S8-MDA Page 54 eAMP1-S8/16-MDA... -
Page 55: Loudness Configuration Tab
Loudness Configuration Tab This feature is available if the OPTe Package is purchased. The Loudness Configuration tab allows you to make settings which will determine how Loudness is to be calculated on the Loudness Meter. This tab is shown in Figure 4-9. Figure 4–9: Loudness Configuration Tab The following settings can be made on this tab: 1. -
Page 56: Phase Indicator Configuration Tab
Select All and Reset All buttons are also provided. Figure 4–10: Phase Indicator Configuration Tab eAMP1-S8-MDA When you have finished making the settings click Apply to save them or click Cancel to discard them. -
Page 57: Front Panel Configuration Tab
Continue button to try again. If you have forgotten the Passcode, this can be remedied by performing a Factory Reset. Unfortunately, this will also erase all of the menu settings. You may also contact Wohler Technical Service for help. Figure 4-12: Unrecognized Passcode... - Page 58 When you have successfully entered the Passcode, the Passcode Settings screen will appear, as shown in Figure 4-13. Figure 4-13: Front Panel Configuration Tab The functions on this screen are as follows: Enable Restricted Access for Front Panel Configuration: This switch will turn ON or OFF protection or blocking of any local product menus, except for the Passcode Settings menu, which is always Passcode protected.
- Page 59 Figure 4-14: Examples of Local Menu Protection Passcode Access: No Access: System Options System Options Menu Menu Network System Network System Settings Reboot Settings Reboot System System Factory Factory Update Update Reset Reset System Passcode System Passcode Details Settings Details Settings Page 59 eAMP1-S8/16-MDA...
-
Page 60: Preset Management
Preset Management This feature is available if the OPTe Package is purchased. Presets are monitoring configurations that can be composed of channels from multiple sources and displayed on the meters in any order. Presets should be set up to allow operators to quickly shift between setups for monitoring. - Page 61 Presets may be created for any licensed inputs. Refer to the Licenses section in this chapter to install software licenses. 2. System Clock Reference: There must be a system clock reference for monitoring to take place. Select a reference from the pull down list. The best choice is a stable, always present clock source locked to house sync.
- Page 62 7. Speaker Assign: Speaker assignments are made automatically when a cluster is set. However, it can be that in an actual signal, the channel assignments may be different than what the automatic assignment assumes. A speaker assignment adjustment is provided for each channel, should you need to override the automatic settings.
- Page 63 Figure 4–16: Global Phase Indicator Enable / Disable Page 63 eAMP1-S8/16-MDA...
- Page 64 Preset. Figure 4-17: Global Output Routing Preset Tab Global Output Routing eAMP1-S8-MDA 10. When you have finished creating a Preset or making changes to a Preset, either click the Save button to save the Preset, click the Save & Apply button to save the Preset and make it the current Preset, or click the Reset button to discard the changes just made.
-
Page 65: Dolby Presets
Dolby Preset being created. Figure 4-18: Creating a Dolby Preset Group Name Dolby Source Preset Name eAMP1-S8-MDA Dolby Source List Channel Pair Preset Input/Output Matrix After clicking Preset Management in the list on the left, and selecting or creating a Group name and Preset name, as shown in Figure 4-18, use the following steps to set up a Dolby Preset: 1. -
Page 66: Global Output Routing
Output Routing Outputs Inputs Options eAMP1-S8-MDA Destination Outputs On the left of the Global Output Routing screen are listed the Destination Outputs. These are the outputs to which any input can be routed. They are as follows: 1. Speaker/Headphone: Selected inputs will be sent to the left and right speakers. -
Page 67: Source Inputs
3. AES/Analog Pair-1: Selected inputs will be mixed to the left and right channels and played through the AES Pair 1 and the Analog Pair 1 Outputs. 4. AES/Analog Pair-2: Selected inputs will be mixed to the left and right channels and played through the AES Pair 2 and the Analog Pair 2 Outputs. -
Page 68: Typical Questions Regarding Global Output Routing
affected by solos and mutes. 3. Mute on Headphone Insertion: This option controls whether the outputs should be muted upon a headphone insertion. This setting can be adjusted even for outputs whether they are in Speaker Mix or Free Mix modes. 4. -
Page 69: How Do I Have A Downmixed Pre-Fade Output On Aes Pair-1 Combined With A Post-Fade Output On The Analog Xlrs
How do I have a downmixed pre-fade output on AES Pair-1 combined with a post-fade output on the Analog XLRs? To downmix a pre-fade output on AES Pair-1, uncheck the Volume Control checkbox for that AES pair. For a Post-fade output on the Analog XLRs, check Volume Control checkbox. -
Page 70: How Do I Route Only Specific Monitored Channels To The Analog Xlr Outputs
How do I route only specific monitored channels to the Analog XLR outputs? You may route specific channels as shown below. Here Audio Meter channels 9, 11, 13, and 15 are routed to the left analog XLR output and Audio Meter channels 10, 12, 14, and 16 are routed to the right analog XLR output. -
Page 71: How Do I Ensure That The Outputs Are Automatically Muted When The Headphone Jack Is Inserted
speakers). Make sure that the Speaker Mix checkbox selection is unchecked for Analog/XLR. How do I ensure that the outputs are automatically muted when the Headphone jack is inserted? In the Global Output Routing configuration, if the Mute on Headphone Insertion checkbox is ON then the outputs get automatically muted when a headphone is inserted into the Headphone jack. -
Page 72: Preset Replication
Preset Replication Preset Replication is available if the OPTe Package is purchased. This feature allows you to copy presets from a master unit to multiple eAMP1-S8/16-MDA units. This can save a lot of setup time if multiple units all need basically the same setup. To start Preset Replication, click on the Preset Replication tab on the master unit. - Page 73 Figure 4-21: Preset Replication Target Selection Screen Click either From Master Unit or Select Preset File. This determines the source of the Presets to be copied. Preset Files would be files that you have previously stored in the computer running the Web GUI. You may add a descriptive name or version to the Presets being copied.
-
Page 74: Import/Export Presets
While exporting the file, the Preset Tag is appended to the filename, this allows you to store multiple Preset files with different file name. For example, if the Preset Tag is v1.0.0 then for eAMP1-S8/16-MDA the default filename would be "wohler_presets_ eAMP1-S8-MDA -v1.0.0.pdb" or "wohler_presets_ eAMP1-S16- -v1.0.0.pdb"... -
Page 75: Import Configuration
2. Click the Export button on the Import / Export Presets page, as shown in Figure 4-22. 3. A small Verify window will appear: 4. Click Yes to proceed with writing the Preset data to the hard drive. The copying will proceed. After the Preset data has been written, a screen will appear, explaining what has been exported in an Export Presets Summary. -
Page 76: System Setup
These tabs are explained in the following two sections. System Information This tab displays a variety of information about the eAMP1-S8/16-MDA. It is shown in Figure 4-23. This information could be useful to view if you are contacting Wohler Technical Service. Figure 4–23: System Information Tab System... -
Page 77: Licenses
It is shown in Figure 4-24. You will use this tab to enter any new license numbers that you purchase. Contact Wohler Sales to obtain new license numbers. If you need help, Wohler Technical Service will be happy to assist you in installing these numbers. -
Page 78: Factory Reset
If you have any doubt as to whether you should perform a Factory Reset, do not click the Initiate Factory Reset button. Contact Wohler Technical Service for advice. Factory Reset will also reset your IP address to the default one. After a Note: Factory Reset, the IP Settings will need to be updated. -
Page 79: Reboot System
The Reboot System page allows you to reboot an eAMP-S8/S16-MDA remotely. The Reboot System page is shown in Figure 4-26. This function is normally only used upon request from Wohler Technical Service to troubleshoot or correct an issue. The Reboot System function should be used with a bit of caution. It puts the eAMP1-S8/16-MDA out of service for several minutes while it is rebooting, and this may unexpectedly interfere with the use of the product by the remote operator. -
Page 80: Appendix A: Software Upgrades
The eAMP1-S8/16-MDA software update can be found at http://www.wohler.com, under Product Downloads on the Products > eAMP1-S8/16-MDA page, in Support > Downloads > Drivers & Software, or contact Wohler Customer Support for more information. Unzip the downloaded update files to reveal two files. One will have a suffix of .wx and the other will have a suffix of .md5sum. -
Page 81: Local Update From The Front Panel
Local Update from the Front Panel Use the following steps to update the eAMP1-S8/16-MDA software: 1. Copy the unzipped Wohler Update Package file(s) from your computer to the root directory (not inside of a folder) of a USB flash drive. It must be FAT32 file type, and does not need to be empty. - Page 82 Do you want to Update your Software Version 3.4-39 System to 1.0.1? Wohler iAM-AUDIO 3.4-56 6. To proceed, touch Yes. To back out, touch No. After you touch Yes, the screen will change, as shown in Figure A-4. The screen will display "Software Upgrade in Progress"...
-
Page 83: Updating Via The Web Gui Using A Flash Drive
Updating via the Web GUI using a Flash Drive Use the following steps to update the eAMP1-S8/16-MDA software: 1. Copy the unzipped Wohler Update Package file(s) from your computer to the root directory (not inside of a folder) of a USB flash drive. It must be FAT32 file type, and does not need to be empty. - Page 84 Figure A-6 – Available Software Updates 5. After clicking the System Update button, a verification screen displays as shown in Figure A-7. If you agree that the correct update version has been selected, click the Yes button. Figure A-7 – System Update Verification 6.
-
Page 85: Updating An Eamp1-S8/16-Mda Remotely
1. The Software Update files you downloaded earlier must be in the same computer that is running the Web GUI. Connect to the eAMP1-S8/16-MDA with the Wohler Web GUI. Navigate to the System | System Update menu. Click within the large blue dotted line rectangle at the right of the screen. A file selection window will open, as shown in Figure A-9. - Page 86 Figure A-10 – Invalid System File Version Figure A-11 – Invalid Checksum eAMP1-S8-MDA 3. At this point, wait for the update to complete. It may take several minutes, it is critical not to disturb the eAMP1-S8/16-MDA or the Web GUI until the update process is complete.
-
Page 87: Updating Multiple Units Remotely
The eAMP1-S8/16-MDA units being updated will be temporarily out of service. 2. Use the Wohler Web GUI to connect to an eAMP1-S8/16-MDA already containing the latest update. This will be referred to as the Master Unit. Navigate to the System | System Update | Remote System Update menu. - Page 88 Figure A-13 – List of Found eAMP1-S8/16-MDA Units 4. Then click Update Selected Devices. The window shown in Figure A-14 will appear. Figure A-14 – Apply System Package 5. Click Apply System Update. The screen shown in Figure A-15 will appear. This screen contains a table showing the update progress of each of the eAMP1-S8/16-MDA units being updated.
- Page 89 Figure A-15 – System Update Progress 6. At this point, wait for each update to complete. It may take several minutes, it is critical not to disturb any of the eAMP1-S8/16-MDA units or until the update process is complete. When it is complete, the Web GUI each eAMP1-S8/16-MDA will restart.
-
Page 90: Appendix E: Api Documentation
APPENDIX E: API Documentation Introduction If the OPTe Package is purchased, then the Application Program Interface (API) is available for use. This appendix discusses ways to use the API to allow third party equipment to remotely access options and settings of the eAMP1-S8/16-MDA. It includes specific code examples for commonly used requests. - Page 91 2. GET Preset Configuration Method: GET /api/cf/presets/<int:preset ID> Example Response: "error": null, "params": { "PresetId": "result": { "GroupId": 1, "PresetName": "SDI", "Data": { "Name": { "Program": "", "Group": "G1", "Preset": "SDI" "VideoSource": { "InputNo": 1, "ConnectorType": "BNC", "Slot": 1, "Type": "SDI", "Cage": "DolbyDetection": { "NonAudio": "Enabled",...
- Page 92 "FirstMeter": 9, "Name": "Stereo 2.0 #5", "Type": "Stereo", "MuteOnPresetRecall": true "NumberOfMeters": 2, "FirstMeter": 11, "Name": "Stereo 2.0 #6", "Type": "Stereo", "MuteOnPresetRecall": true "NumberOfMeters": 2, "FirstMeter": 13, "Name": "Stereo 2.0 #7", "Type": "Stereo", "MuteOnPresetRecall": true "NumberOfMeters": 2, "FirstMeter": 15, "Name": "Stereo 2.0 #8", "Type": "Stereo", "MuteOnPresetRecall":...
- Page 93 "DelayMs": 0, "Speaker": "Right" "3": { "Source": { "Slot": 1, "Cage": 1, "Channel": 3, "ConnectorType": "BNC", "InputNo": 1, "InputIndex": 0, "Type": "SDI" "VolumeDb": 0, "DelayMs": 0, "Speaker": "Left" "4": { "Source": { "Slot": 1, "Cage": 1, "Channel": 4, "ConnectorType": "BNC", "InputNo": 1, "InputIndex": 0, "Type":...
- Page 94 "Type": "SDI" "VolumeDb": 0, "DelayMs": 0, "Speaker": "Left" "5": { "Slot": 0, "Cage": 0, "ConnectorType": "None", "Source": { "Slot": 1, "Cage": 1, "Channel": 5, "ConnectorType": "BNC", "InputNo": 1, "InputIndex": 0, "Type": "SDI" "VolumeDb": 0, "DelayMs": 0, "Speaker": "Left" "9": { "Source": { "Slot": 1, "Cage": 1,...
- Page 95 "Slot": 1, "Cage": 1, "Channel": 7, "ConnectorType": "BNC", "InputNo": 1, "InputIndex": 0, "Type": "SDI" "VolumeDb": 0, "DelayMs": 0, "Speaker": "Left" "10": { "Source": { "Slot": 1, "Cage": 1, "Channel": 10, "ConnectorType": "BNC", "InputNo": 1, "InputIndex": 0, "Type": "SDI" "VolumeDb": 0, "DelayMs": 0, "Speaker": "Right"...
- Page 96 3. GET list of groups/presets Method: GET /api/cf/groups Example Response: "error": null, "params": null, "result": [ "Name": "G1", "Presets": [ "Favorite": 1, "Name": "AES", "Id": "Favorite": 0, "Name": "SDI", "Id": "Id": "Name": "AES", "Presets": [ "Favorite": 0, "Name": "dfsdf", "Id": "Id": 4.
- Page 97 "GroupName": "G1" 5. POST to delete the group Method: POST api/op/group/<int:groupID>/delete Example Response: "error": null, "params": { "GroupId": "result": { "GroupId": 6. POST to delete the preset Method: POST api/op/preset/<int:presetID>/delete Example Response: "error": null, "params": { "PresetId": "result": { "PresetId": 7.
- Page 98 8. POST to rename preset Method: POST /api/op/preset/<int:presetID>/newPresetNameTest/rename Example Response: "error": null, "params": { "PresetId": 1, "PresetName": "newPresetNameTest" "result": { "PresetId": 1, "PresetName": "newPresetNameTest" 9. POST to set preset as Favorite Method: POST /api/op/preset/<int:presetID>/<favoriteVal>/favorite Example Response: "error": null, "params": { "PresetId": 4, "Favorite": "result": {...
- Page 99 Body content for Aes "SourceType": "Aes" Body content for Sdi "SourceType": "Bnc-1.Sdi" Body Content for 8 channel units: 4. Body Content for Sdi "SourceType": "Bnc-1.Sdi", "ChannelGroup": <Int: 1-2> Note: ChannelGroup 1 => Channels 1-8 and ChannelGroup 2 => Channels 9-16. 5.
Need help?
Do you have a question about the eAMP1-S8-MDA and is the answer not in the manual?
Questions and answers