
Related Manuals for Flowserve HPX


Summary of Contents for Flowserve HPX
- Page 1 Pump Division Worthington S.r.l. INSTRUCTIONS FOR INSTALLATION,OPERATION AND MAINTENANCE ___________________________________________ Centrifugal pumps Type HPX CE-HPX-R-FLOW.DOC – rev. 0...
- Page 2 FOREWORD FLOWSERVE products are the result of more than a century of progressive study and development. Advanced design, proper selection of materials, and precision construction reflect this wide experience. FLOWSERVE products will give trouble-free efficient operation with minimum maintenance and repair.
-
Page 3: Table Of Contents
TABLE OF CONTENTS INTRODUCTION Safety Installation, Operation and Maintenance Safety Procedures Installation Safety Procedures Operation Safety Procedures Maintenance Safety Procedures Construction Parts description Casing Impeller 1.10 Casing cover 1.11 Shaft 1.12 Bearing housing 1.13 Bearings 1.14 Inducer 1.15 Coupling/Coupling guards 1.16 Baseplate 1.17... - Page 4 OPERATION Technical Data Effects of Specific Gravity Effect of Viscosity Changing the Pump Speed Net Positive Suction Head (NPSH) Minimum Continuous Stable Flow Minimum Flow Control Control Notes Thermal Control 3.10 Pressure and/or Flow Control 3.11 Continuous Bypass Control 3.12 Operating Precautions 3.13 Pre-Operational Checks...
-
Page 5: Iintroduction
INTRODUCTION This manual contains instructions for installation, operation and maintenance for your FLOWSERVE Centrifugal Pump. The instructions are written for the use of personnel with a general training in the operation and maintenance of Centrifugal Pumps. Your pump has been designed to provide safe and reliable service. However, it is both a pressure... -
Page 6: Installation Safety Procedures
1.3 Installation Safety Procedures Lifting equipment Make sure that any equipment used to lift pump or any of its components is capable of supporting the weights encountered. Make sure that all parts are correctly rigged before attempting to lift. 2. Coupling alignment CAUTION Coupling alignment must be correct for successful operation. -
Page 7: Maintenance Safety Procedures
3. Pump priming CAUTION Before starting or while operating the pump, the casing and suction line must be completely filled with the liquid being pumped. The rotating parts depend on this liquid for lubrication and the pump may seize if operated without liquid. 4. - Page 8 2. Isolating the pump WARNING Before attempting to disassemble the pump, the pump must be isolated from the system, by closing suction and discharge system valves, drained of liquid and cooled, if pump is handling hot liquid. 3. Draining pump handling hot liquids WARNING When pump is handling "hot"...
-
Page 9: Construction
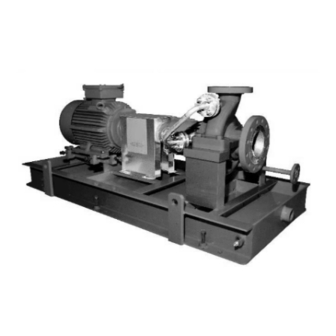
Construction Parts description The type 'HPX' are horizontally mounted, vertically split, back pull out single stage, single suction overhung process pumps, constructed to the requirements of API 610 specifications, for continuous duty service in all process industries and industrial application within the pressure and temperature limitations. -
Page 10: Bearings
It is suggested that the pump be inspected upon arrival and that any irregularities arising due to shipping be reported immediately to the carrier and FLOWSERVE 1.18 Care During Storage If the equipment is not to be installed immediately it should be stored in a clean, dry, vibration free area and covered. -
Page 11: Long Term Storage
1.19 Long term storage General During extended periods of storage prior to installation, precautions must be taken to protect the pump from deterioration. The various parts of the pump are protected prior to shipment by applying varying grades of preservative to the parts. However, during shipment and handling the preservatives are subjected to conditions that can cause their removal. -
Page 12: Inspection And Maintenance
Check individually wrapped parts for signs of deterioration. If necessary, renew preservative and wrapping. Six months prior to the scheduled installation date, an FLOWSERVE representative is to be employed to conduct an inspection. This inspection may include, not necessarily in its entirety and... -
Page 13: Painting And Preservation
All costs involved in conducting the final inspection will be to the account of the purchaser. Prior to and during start up, any requirements for the services of an FLOWSERVE representative will revert back to the original contract agreement for equipment purchased, with revised costing. -
Page 14: To Lift Driver
WARNING Do not lift pump, motor, baseplate unit by slinging from pump casing and/or eye bolt on motor. 1.27 To lift driver Refer to Manufacturers Instructions. 1.28 To lift complete pump only Rig lifting straps at coupling end of bearing housing and at stuffing box extension. Make sure straps are adjusted to obtain an even lift. -
Page 15: Installation
SECTION II INSTALLATION Location Install the unit close to the source of the liquid to be pumped. It is desired to have a straight length of suction pipe (approx. 8 to 10 times the pipe diameter) just upstream of suction nozzle (No double turns). When selecting the location, be sure to allow adequate space for operation as well as for maintenance operations involving dismantling and inspections of parts. -
Page 16: Level The Baseplate
ALLOW AMPLE THREADED BOLT LENGTH ABOVE ROUGH CONCRETE ROUGH FINISH FOR GROUT STUFF WASTE AROUND BOLT WHILE POURING CONCRETE PIPE SLEEVE TO BE THREE TIMES DIAMETER OF ANCHOR BOLT WELD A LARGE WASHER WITH LUGS TO THE BOTTOM OF BOLT AND PIPE SLEEVE TO PREVENT TURNING Fig. -
Page 17: Method Of Levelling Baseplate Using Wedges Or Shims
Figure 3 Method of levelling baseplate using wedges or shims Level the baseplate by using a machinist's level on the machined surfaces of the pump and driver pads. Levelling is best achieved by adjusting the shim pack thickness under each holding bolt. Carefully raise the baseplate by using either the baseplate jacking screws provided or by levering with a suitable pinch bar or by installing a low level hydraulic jack. -
Page 18: Grouting
Grouting Build a dam around the foundation as shown in Figure 4 after levelling the baseplate. It is a matter of personal preference whether the levelling wedges under the baseplate should be removed after grouting. If you do not want to remove the wedges, carefully mark their locations before pouring grout. -
Page 19: Shaft/Coupling Alignment
Shaft/Coupling alignment CAUTION Shaft alignment must be correct for successful operation. Rapid wear, noise, vibration and actual damage to the equipment may be caused by shaft misalignment. The shafts must be aligned within the limits given within this section. NOTE Adjustment to correct the alignment in one direction may alter the alignment in another direction. -
Page 20: Alignment Using The Reverse Alignment Method
Offset misalignment OFFSET MISALIGNMENT COMBINATION OFFSET ANGULAR MISALIGNMENT In offset misalignment, the shaft centre lines are parallel but do not intersect. Alignment using the Reverse Alignment Method The following practices are recommended when using the reverse method of alignment. These should be carried out prior to main alignment. -
Page 21: Alignment Using A Graph (Reverse Alignment)
Alignment using a graph (Reverse Alignment) FIGURE 1 NOTE With reverse alignment there are certain points which must always be born in mind. The pump coupling hub is referred to as A. The motor coupling hub is referred to as B. The motor is aligned to the pump which is considered to be the datum. - Page 22 NOTE For shaft end gaps greater than 3in (75mm) check the rigidity of the Dial Test Indicator arm as follows. Clamp the arm with the Dial Test Indicator fitted to a rigid member (channel or bar). With the Dial Test Indicator on top zero the clock, turn through 180 degrees, half the reading and record. If reading is excessive, the arm should be stiffened.
- Page 23 HORIZONTAL The following are examples of readings taken and plotted on the graph. First side to side and represented by the line Y - Y. Hub A Total Indicator Reading (TIR) + 0.014in. Hub B total Indicator Reading (TIR) - 0.008in. As these are total readings they are first halved and so become A + 0.007in, and B - 0.004in.
- Page 24 FIGURE 2 EXAMPLE 1 0.07 0.06 0.05 0.04 0.03 0.02 Pump 0.01 Clock Readings 0.01 (in) 0.02 0.03 0.04 0.05 0.06 0.07 10 12 14 28 30 32 34 36 38 40 Distance Over Motor Feet (in) VERTICAL HORIZONTAL TIR FOR TOP AND BOTTOM TIR FOR SIDE TO SIDE A = - 0.034"...
- Page 25 FIGURE 2 EXAMPLE 2 0.07 0.06 0.05 0.04 0.03 0.02 Pump 0.01 Clock Readings 0.01 (in) 0.02 0.03 0.04 0.05 0.06 0.07 10 12 14 28 30 32 34 36 38 40 Distance Over Motor Feet (in) VERTICAL X - X HORIZONTAL Y - Y A = TIR - 0.04 = - 0.02 A = TIR +0.012 = 0.006...
-
Page 27: Assemble Coupling
The shims between the equipment feet and mounting surface should be clean and dry. This is especially critical for pumps in service for sometime and need to be realigned. Water, dirt and rust may change the height of the shim pack over a period of time. Shims should be made large enough to support the weight of the equipment on its mounting foot. -
Page 28: Dowel Pump And Driver
2.11 Dowel Pump and Driver Pump hold down bolts are to be torqued down and dowel pins are to be located in pump feet as shown below. Dowel pin location Refer to driver outline drawing and/or driver instructions for driver dowelling information. 2.12 Hot Alignment Check A hot check can only be made after the unit has been in operation a sufficient length of time to assume its NORMAL operating temperature and conditions. -
Page 29: Installation Check List
2.13 Installation Check List Level Baseplate? Grout Baseplate - Check Foundation Bolts? Alignment Shaft/Coupling? Piping Installed - Correct Vent, Gauge, Valve, Suction Strainer Locations? All Flange Bolting Correctly Torqued with appropriate gaskets in place? Check Shaft/Coupling Alignment again. Coupling guard correctly installed? -
Page 30: Piping
This is especially true if the changes reduce the pressure at the suction or if the liquid temperature is increased. In case of doubt contact FLOWSERVE Suction and discharge piping should be of ample size, be installed in direct runs, and have a minimum of bends. -
Page 31: Suction Strainer
The open area of the strainer should have a minimum of a 3 to 1 ratio to the area of the pump suction The FLOWSERVE standard for suction strainers consists of a conical shaped steel plate. The plate has 1/16" perforations and is of sufficient size and thickness for the required flow. See Figure above. -
Page 32: Operation
The pump is designed to deliver rated capacity and rated head for a liquid with a particular viscosity. When contemplating operation at some viscosity other than for which the pump was originally designed and/or applied, the changed conditions should be referred to FLOWSERVE for our recommendations. -
Page 33: Minimum Continuous Stable Flow
Minimum Continuous Stable Flow The Minimum Continuous Stable Flow for the pump is stated on the Data sheet. Minimum Flow Control In all cases, it is the customer's responsibility to supply a system and/or control which assures that any pump within a system is not operated below its minimum flow condition. In many cases, this is not a problem because the system is operating within its own flow range to assure product delivery. - Page 34 The minimum flow of the pumps within the system can now be defined and provisions must be made in the system to assure the total capacity is not less than this. Total Minimum Flow of = Minimum Flow of Weakest Pump + (total No.Pumps - 1) Pumps in System (Strong Pump Flow) Sample: (see Figure )
- Page 35 ST R O NG E ST W E A KE ST C A PA C IT Y G PM PA R A LLE L O PE R A T IO N...
-
Page 36: Operating Precautions
3.12 Operating Precautions WARNING Do not clean pump in the vicinity of rotating parts when pump is operating. If unusual noise or vibrations occur, secure pump as soon as possible. Never operate the pump with suction valve closed. Never operate the pump with the discharge valve closed. Never operate the pump unless it is completely filled with liquid and vented. -
Page 37: Initial Start Up Procedure
3.14 Initial Start Up Procedure Close discharge valve if valve is not already closed, and then crack open to assure minimal flow. (Do not start unit with fully closed valve). On first starts care must be taken not to cause a system water hammer. -
Page 38: Operating Checks
Operation at low flows results in pump horsepower heating the liquid. A bypass may be required to prevent vaporization and subsequent pump damage. Refer to local FLOWSERVE branch to determine if a bypass is required. Mechanical damage may result from continuous operation at flows less than the specified minimum continuous stable flow. -
Page 39: Securing The Pump
3.17 Securing the Pump Shut down driver. The pump should be shut down rapidly to protect the internal wearing parts which are lubricated by the liquid being pumped. NOTE If pump stops abruptly when driver is shut down, investigate for pump binding. Take necessary remedial action before restarting pump. -
Page 40: Routine Maintenance
3.19 Routine Maintenance Recommended Schedule PARTS DAILY Check Suction And Discharge Gauges. Check For Abnormal Operating Conditions (High/Low Temperature, Flows, Vibration, Pressures Etc.) Check Motor Current/Driver Power. Check For Leakage From Seals, Joints. Check All Lubricant Levels Ie. Bearing Housing Oilers, Seal Plan 52/53, Seal Supply Systems As Applicable. -
Page 41: Trouble Shooting
3.20 Trouble Shooting This chart presents the probable troubles that can occur to the pump along with the probable causes and remedies for the troubles. 3.21 Trouble Shooting Chart TROUBLE CAUSE REMEDY Insufficient capacity Suction pressure or speed too Open suction valve wide. Check power and/or pressure. - Page 42 TROUBLE CAUSE REMEDY Pump overloads driver False overload signal. Check starter controls. Wire/connections faulty. Check for hot spots in lines. Speed to high. Check driver instruction section. Specific gravity too high. Check rated conditions. Pump bearings seized or Dismantle pump and replace part or rotating element binding.
-
Page 43: Lubrication
SECTION IV LUBRICATION A "Trico" Oiler is normally furnished with the pump unless otherwise specified. Preparing Bearing Housing Before filling the bearing housing reservoir, flush out the housing thoroughly with safety solvent and a leading grade of flushing oil, compatible with the lubricating oil that will be used. The reservoir is to be filled to appropriate level as illustrated in section 4.6. -
Page 44: Oil Change
Oil Change Frequency of oil change is dependent on pump service and environmental conditions. As a general guide, oil in the bearing housing should be changed every 5000 operating hours, after the initial change. Lubrication Specification The ideal bearing lubricant is a straight well refined, neutral mineral, preferably of the turbine type. It should not contain free acid, chlorine sulphur or more than a trace of free alkali. -
Page 45: Trico Oiler Setting
ISO VG 32 Energol THB 32 (ISO) Gulf Harmony 32 Castrol Perfecto T32 Mobil DTE Oil Light Chevron OC Turbine Oil 32 Shell Turbo T32 Esso Nuto H32 Texaco Regal Oil R & O 32 Trico Oiler Setting Initial fill via top of housing, using overflow plug to establish correct level (see Section 4.1 illustration). -
Page 46: Bearing Housing Oil Fill Capacities
Bearing Housing Oil Fill Capacities Bearing Housing Number * Bearing Designation Oil Fill Capacities (litres) Slinger Oil Ring G040B159 7308 1.51 1.13 G050B159 7311 1.34 0.85 G070B159 7314 1.83 1.02 G090B159 7315 4.43 2.82 7316 4.17 2.60 * The bearing housing size can be identified from the identifying marks cast on the housing on the horizontal centre line in the opposite side to the oiler. -
Page 47: Mechanical Seals
The seal balancing and flushing arrangement provided for each pump is designed and fitted for the specific order requirements. The "HPX" pump can be arranged with either a single, double or tandem mechanical pump seal. Refer to the General Arrangement for piping connections to be used with your pump. -
Page 48: Maintenance, Dismantling
SECTION VI MAINTENANCE, DISMANTLING Dismantling - General Avoid serious or troublesome problems by systematic maintenance checks. Study Section 3.10 as an aid to your maintenance programme. Your pump is a precision machine. Take every precaution to avoid damage or even slight burrs to the shaft bearing areas, as well as any other ground finished surface when dismantling your pump. - Page 49 B. If handling caustic liquids WARNING When pump is handling "caustic” liquid, extreme care must be taken to ensure safety of personnel when attempting to drain pump. Protective devices of suitable protective materials must be worn when draining pump. C. If on vacuum service. WARNING Before attempting any maintenance work on pumps in vacuum service.
-
Page 50: Pump Disassembly Instructions
Pump Disassembly Instructions Disassembly of Pull Out Element This is a pull from rear design, so it is not necessary to remove casing, or to detach suction or discharge piping, coupling hubs or to remove driver. Remove all seal piping, related instrumentation and electrical equipment that will interfere with disassembly. - Page 51 Correctly support pumping element in horizontal position. For non-inducer machines release impeller locking screws and locknut on impeller. For machines fitted with an inducer, release cap nut then remove security washer. Note - Locking devices have left hand throat form. Remove inducer (if fitted) and impeller.
- Page 52 O il Remove the shaft assembly from coupling end of bearing housing. Remove labyrinth from seal end of bearing housing. Remove o-ring from labyrinth. CAUTION Take care not to damage the oil rings. Release locking tab of lock washer. Remove locknut and lock washer. Bearings can be removed by the use of a press or puller.
-
Page 53: Inspection And Renewal Of Parts
SECTION VII INSPECTION AND RENEWAL OF PARTS General Having dismantled the rotor, check the shaft for run out using "V" blocks or rollers placed under the bearing areas. Run out of shaft is not to exceed .002" TIR (0.05mm TIR). Wire brush the pump parts thoroughly. -
Page 54: Case Wear Ring (And Casing Cover Wear Ring When Fitted)
Make sure ring fits on impeller are free of nicks or burrs. Heat new ring to 225 degrees F (107° C) and install on impeller. Drill and tap new holes in impeller, located from clearance holes in ring for No. 10-24 x ½" setscrews spaced half the circular distance from the previously used holes in the impeller. -
Page 55: Mechanical Seal
Mechanical Seal Mechanical seal stationary and rotating faces should be inspected for signs of wear or cracks and replaced as necessary. It is recommended that when reassembling mechanical seal new "O" rings and gaskets be used. Refer to manufacturers drawing for assembly of mechanical seal. Refer to mechanical seal section within this manual for further details. -
Page 56: Bearing Removal
NOTE The old and once popular method of heating bearings in an oil bath is DEFINITELY DISCOURAGED. HEATING INNER RING WITH A GAS TORCH IS PROHIBITED. In either case, it is difficult to control the heating rate and final temperature and even more difficult to keep the oil and/or bearing clean. -
Page 57: Assembly
Inspected bearings which will be reused should be packed with new grease or dipped in clean lubricating oil, covered with clean lint free rags or other suitable covering and placed in a clean box or carton until ready for installation. NOTE Under no circumstances are the bearings to be left exposed. - Page 58 Place bearing housing in a horizontal position suitably supported. Fit new o-rings into the grooves on each labyrinth. Working from the coupling end of the shaft the smaller labyrinth over the shaft and press into the bearing housing until it locates against the machined shoulder.
- Page 59 Check to see if rotor runs freely by turning the shaft with a strap wrench or by hand. Make any corrections or adjustments. Check driver rotation. Driver rotation must coincide with direction indicated by arrow on pump. Align pump - motor coupling per "ALIGNMENT" instructions and install spacer piece. Install coupling guard.
-
Page 60: Torque Value Supplement
7.12 Torque Value Supplement Main Flange Studs/Nuts (Casing to Casing Cover) Stud Size Torque Value Inches ft-lbs (Nm) ¾ 166 - 195 (225 - 264) 264 - 310 (358 - 420) 404 - 475 (548 - 644) 1-1/8 642 - 755 (870 - 1024) Bearing Housing To Casing Cover Hex Head Screw Size... - Page 61 APPENDIX PURE OIL MIST LUBRICATION FOR HPX TYPE PUMPS OIL MIST INSTALLATION Pump bearing housing is arranged for pure oil mist lubrication. The following connections are provided in the bearing housing - A 1/4” NPT with adapter oil mist inlet connection in the top half of the bearing housing, between line and thrust bearings.
Need help?
Do you have a question about the HPX and is the answer not in the manual?
Questions and answers