Table of Contents
Advertisement
Advertisement
Table of Contents

Related Manuals for JGaurora A8S


Summary of Contents for JGaurora A8S
- Page 1 JGAURORA 3D PRINTER MODEL: A8S USER GUIDE...
-
Page 2: Table Of Contents
1.4 Environmental requirements ..........................2 2. About A8S ................................3 2.1 Basic reference ................................ 3 2.2 Overview of A8S ..............................3 2.3 Extruder Nozzle Assembly (Exploded View Diagram) ..................... 4 2.4 Tool box lists ................................5 3. About JGcreat software ............................6 3.1 Software installation ............................... -
Page 3: Preface
1. Preface I.1 Introduction The JGAURORA A8S User Guide was written to help new A8S users to start their printing journey with the JGAURORA A8S. Even if you are familiar with earlier JGAURORA machines or experienced with 3D printing technology, we still recommend that you read through this guide, that will help you have a better 3D printing experience. -
Page 4: About A8S
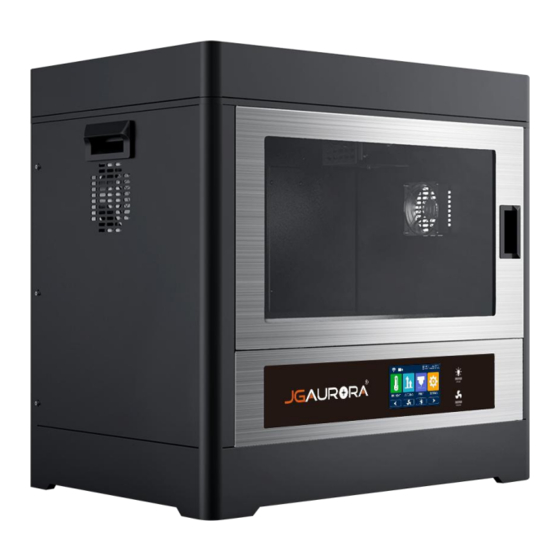
Connectivity: USB cable/ USB stick Language: English/German/French/Spanish/Japanese Support Formats: STL/OBJ/G-Code Environmental requirements: OS: Windows, Linux, Mac Temperature 5 to 40ºC, Humidity 20% to 50% AC Input: AC115 OR 230V, manually switchable Software: Cura/Simplify 3d/JGcreat(Win 7 64 bit) 2.2 Views of A8S... -
Page 5: Extruder Nozzle Assembly (Exploded View Diagram)
----3D Printer User Guide 2.3 Extruder Nozzle Assembly (Exploded View Diagram) Item No. Parts Name Item No. Parts Name Blower Cooling Fan Stepper motor Heater block Extruder plate Extruder PCB board Limit switch Thermistor Extruder gear Heating tube Extruder slider Cooling Duct Heat sink Extruder cover... -
Page 6: Tool Box Lists
----3D Printer User Guide 2.4 Tool box lists... -
Page 7: About Jgcreat Software
----3D Printer User Guide 3. About JGcreat software 3.1 Software installation Copy the files in USB stick to your PC, then double click the software installation icon. Then, follow the installation instructions, as shown in the photos below. Double click Double... -
Page 8: Jgcreat Introduction
----3D Printer User Guide After clicking the “Finish” icon, the software is installed, and ready for use. 3.2 JGcreat introduction 1) Open the software(JGcreat) Double click to Open “JGcreat”... - Page 9 ----3D Printer User Guide 2) Choose the language you prefer (English as an example):...
- Page 10 ----3D Printer User Guide 3) Add Printer 4) Load 3d file and slice it Load an stl or obj 3d file. Select the appropriate print quality. The lower right corner of the software shows "Slicing", which converts the 3D model file, into the standard G-Code instructions that the printer uses to run. Choose the print quality you prefer...
- Page 11 After slicing completed, the lower right corner of the software shows "Save to file". 5) Copy the G-code to the USB stick, and insert it into the USB port on the A8S printer. Then, select the gcode file to print through the touch screen interface.
-
Page 12: Basic Printing
----3D Printer User Guide 4. Basic printing 4.1 Control menu introduction PLA/ABS Option HEAT Setting of hot end/ hot bed PAUSE/ Back START BACK LEVELING CONFIRM Choose model STOP to print PRINT CANCEL Printing EXTRUDER TEMP. HOT BED TMEP. HOME(X/Y/Z) SETTING FAN SPEED X HOME... -
Page 13: Main Menu Introduction
----3D Printer User Guide 4.2 Introduction of main screen WIFI USB STICK CONNECTION Extruder temp. Hot bed temp. Leveling the hot bed Select model file to print Move axis Preheat hot end/hot bed Filament In Filament out Language transfer Wifi 4.3 Platform leveling Click “LEVELING”... -
Page 14: Filament Loading
----3D Printer User Guide Press “LEVELING”, the printer head to back to home automatically, then press the 4 points to make leveling, as below showing: Press “point 1” , Press “point the head move 2”, the head to right back move to left back front... - Page 15 ----3D Printer User Guide While waiting for the nozzle to heat, we can install the onboard filament holder. Tighten the screw. Assemble the holder on the right. Load the filament Load the filament spool to the holder. into the filament tube.
-
Page 16: Trial Printing
Save the file 2) Insert the USB stick into the USB port on the A8S, and then click "PRINT" on the Main Menu , and then select the 3D Gcode file. Click "START" and the A8S will being to preheat the nozzle and printing platform. When the temperature of then nozzle reaches the temperature set in the slicer software, the 3D printing of the model will begin. -
Page 17: Filament Replacement Notes
----3D Printer User Guide Click “Print” Select the file you wish to print. Note: When printing, if the first layer does not adhere to the platform, please stop printing and re-level the printing platform and the nozzle, to set the correct gap. 4.6 Filament replacement notes 1) While printing a model, if the filament is close to running out, please follow these steps for reloading filament: a: Click “PAUSE”... -
Page 18: Common Problems And Solutions
----3D Printer User Guide 5. Common problems and solutions Item Problem description Reason Solution A. Filament has run out . A. Replace filament before its gone. B. Filament was exposed to B. Store filament in air-tight Filament breaks at the moisture, and has become container when finished printing. -
Page 19: D Printer Maintenance
----3D Printer User Guide 6. 3D printer maintenance 1. Daily maintenance 1) Before using the machine to print, make observe the safety recommendations. 2) Regularly clean and maintain the equipment. Clean the surface of the nozzle, print bed, moving parts and other parts, to help prevent wear caused by excessive dust. -
Page 20: Support And Service Details
----3D Printer User Guide 7. Supports and service 1. Please see the Warranty Card for details on our policies for repair and support. 2. If your printer is malfunctioning or damaged, for your safety, and to avoid further damaging the printer, please contact the after-sale service center or our support team for advice first, before attempting any repair.
Need help?
Do you have a question about the A8S and is the answer not in the manual?
Questions and answers