
Related Manuals for JGaurora A-8


Summary of Contents for JGaurora A-8
- Page 1 JGAURORA 3D PRINTER Model:A-8 Operation Instructions www.jgew3d.com Read it before printing and keep it properly. - 0 -...
- Page 2 ---3D printer user manual - 1 -...
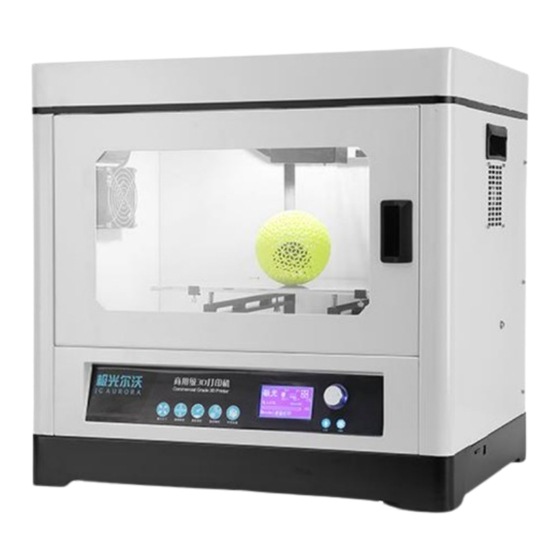
- Page 3 ---3D printer user manual INTRODUCTION A-8 is the new designed FDM big size 3d printer by Shenzhen Aurora Technology Co., Ltd, which could print the plastic models you have drawn. A-8 Properties: This product adopt weldless steel as main body,...
-
Page 4: Security Considerations
---3D printer user manual Security Considerations Pls take consideration of the following below, in case of damage and danger. Do not touch the extruder and hot bed, when machine working, temp. of extruder will be about 200 centigrade, hot bed could be 110 centigrade. -
Page 5: Product Details
---3D printer user manual Product Details 1. Product Details Model:A-8 Nozzle diamater:0.4mm Layer thickness:0.05-0.3mm Machine size: 590*450*568mm Printing speed:10-300mm/s Machine weight:32KG XY axis position accuracy:0.05mm Packing size:700*570*680mm Z axis position accuracy:0.015mm Packing weight:36KG Material: ABS、PLA Build size:350*250*300mm Material tendency:PLA LED Display:yes Material diamater:1.75mm... - Page 6 ---3D printer user manual 3. Extruder analysis Name quick coupling Machined part A bearing turbofan Heating block 40*40 fan Metalsheet A K-Thermocouple Temp. sensor Heating pipe nozzle Pic 2 Stepper motor M6 nuts heatsank cover gear Machined B spring Winding mouth Filament pipe Pic 3 - 5 -...
- Page 7 ---3D printer user manual 4. Tools list Pic 4 - 6 -...
-
Page 8: Software-Cura
---3D printer user manual Software-Cura 1. Cura14.07 installation Way to find Cura:a. SD card b. Download from website c. Steps of installtion Where to find the Cura in the SD card (1) Connect your SD card to computer, open SD card files. Pic 5 Pic 6 Pic 7... - Page 9 ---3D printer user manual Pic 8 (3) Steps of installation Double click ,follow the steps to install it. Pic 9 - 8 -...
- Page 10 ---3D printer user manual Pic 10 Pic 2 - 9 -...
- Page 11 ---3D printer user manual Pic 3 Pic 4 - 10 -...
- Page 12 ---3D printer user manual Pic 5 Pic 6 - 11 -...
- Page 13 ---3D printer user manual Pic 7 Pic 8 - 12 -...
- Page 14 ---3D printer user manual Pic 9 Pic 10 - 13 -...
- Page 15 ---3D printer user manual Click “ok”. Pic 11 Configuration loading. Choose “ Switch to full settings”. Pic 12 - 14 -...
- Page 16 ---3D printer user manual Pic 13 Place of configuration file: computer/the file you saved/ software/installation/peizhiwenjian.ini Pic 14 - 15 -...
- Page 17 ---3D printer user manual After Loading, the basic and advanced configuration will be changed to the A-8 regular printing configuration. Pic 15 Set “ print all at once”. Pic 16 - 16 -...
- Page 18 ---3D printer user manual 2. Settings of Cura Pic 17 Pic 18 - 17 -...
- Page 19 ---3D printer user manual Pic 19 Pic 20 - 18 -...
- Page 20 ---3D printer user manual Pic 21 Pic 22 - 19 -...
- Page 21 ---3D printer user manual Pic 23 Pic 24 - 20 -...
- Page 22 ---3D printer user manual Pic 25 Pic 26 - 21 -...
- Page 23 ---3D printer user manual Pic 27 Pic 28 - 22 -...
- Page 24 ---3D printer user manual Basic setting of model in the software Pic 29 Pic 30 - 23 -...
- Page 25 ---3D printer user manual Pic 31 Pic 32 - 24 -...
- Page 26 ---3D printer user manual Pic 33 Pic 34 - 25 -...
- Page 27 ---3D printer user manual 3. Software expert mode Pic 35 Pic 36 - 26 -...
- Page 28 ---3D printer user manual Pic 37 Pic 38 - 27 -...
- Page 29 ---3D printer user manual Pic 39 Pic 40 - 28 -...
- Page 30 ---3D printer user manual Pic 41 Pic 42 - 29 -...
- Page 31 ---3D printer user manual Pic 43 - 30 -...
- Page 32 ---3D printer user manual Printer Operating 1. LCD display interface Pic 44 2. Filament feeding According to the instructions below to preheat the material, we make PLA as a example. Pic 45 Assemble the filament holder with M6 screw and allen wrench. Pic 46 - 31 -...
- Page 33 ---3D printer user manual Pic 47 Pic 48 Pic 49 - 32 -...
- Page 34 ---3D printer user manual Press the button to feed the filament. Pic 50 Clockwise rotate the button of 14 circles. Pic 51 The material will flow out freely. Pic 52 - 33 -...
- Page 35 ---3D printer user manual Pay attention to these notice: (1)Please change the filament when length of filament remained is less than 15cm, do change in time. Pay attention to the end of filament entering into the feeding mouth totally. (2) When filament change, the extruder temp. should be over 170 centigrade, feeding is clockwise, retraction is anticlockwise.
- Page 36 ---3D printer user manual 3. Platform adjustment Spread some glue on the glass evenly before hot bed adjustment. Show as Pic 62. (1) Adjust the platform at a suitable position, and then spread glue on Pic 53 (2) Smooth the glue by a shovel blade, the glue will solidify on the hot bed when preheating.
- Page 37 ---3D printer user manual Hot bed adjustment for trial printing, steps as below: Pic 55 Do the following steps: Prepare a A4 paper and put it between the hot end and hot bed all around the corners, make sure the paper cannot out of their, that means it is the right distance.
- Page 38 ---3D printer user manual Pic 57 Pic 58 - 37 -...
- Page 39 ---3D printer user manual Pic 59 4. Trial printing (1) SD card offline printing Pic 60 - 38 -...
- Page 40 ---3D printer user manual Gcode generating Pic 61 Pic 62 - 39 -...
- Page 41 ---3D printer user manual Pic 63 Start to print. Pic 64 Select “Print from SD” from LCD display---Select the gcode you are going to print (such as : 123.gcode). The printer will be automatically heating up to the temp. which has setted in the software , then press the rotary button, the printer will automaticlly work up.
- Page 42 ---3D printer user manual is not good and easy to move.shown as picture: Pic 65 Close distance: the path is too flat and the side of path will upwrap, what’s more, it will damage the nozzle, show as pic 75. Pic 66 Right distance:Flat skinning, gapless, shown as picture 76: - 41 -...
- Page 43 ---3D printer user manual Pic 76 (2)USB online printing Adjust as below: Pic 68 - 42 -...
- Page 44 ---3D printer user manual Pic 69 Modifying Serial port Number ( Serial port is according to computer) and Baudrate setting(115200). Pic 79 Click print Extruder and hot bed is hearing up Pic 80 - 43 -...
-
Page 45: Faq And Solutions
---3D printer user manual The progress of printing Printing Pic 81 FAQ and Solutions 1. To solve the plugging problem: Open the upper cover. Pic 82 - 44 -... - Page 46 ---3D printer user manual 1. Screw off the two screws. 3. pull off the fan and hearsank. 2. pull off the cover. Pic 83 Preheat the extruder first. Pic 84 Pull off the filaments pipe by other hand Press the joint down Pic 85 - 45 -...
- Page 47 ---3D printer user manual Use the 2mm allen wrench to pock the feeding nozzle. Pic 86 Cut down the filament and pull it off. Pic 87 - 46 -...
- Page 48 ---3D printer user manual Phenomena Reason Solution slip Filament is too thin Cut the thin filament Temp. is Broken temp. Change a new one unusual sensor Printing not at the right Screw is loose Lock the screws position The model is The hot bed is not Adjust hot bed warped...
-
Page 49: Maintenance
All products should be inspected and test strictly over 48 hours, you can enjoy your printing work freely. Contact information of maintenance service Contact information: Tel: 0086-0755-66607459 QQ: 2383743754( Miss Song) Skype: teresa-jiguang E-mail: 2383743754@qq.com jgaurora@zgew3d.com Add: The Fifth Floor, Jihe Building, Chilingtou County, Bulong Road, Longhua, Shenzhen, China. - 48 -...
Need help?
Do you have a question about the A-8 and is the answer not in the manual?
Questions and answers