Table of Contents
Advertisement
Quick Links
Advertisement
Table of Contents

Related Manuals for JGaurora A-4


Summary of Contents for JGaurora A-4
- Page 1 ----3D Printer User Guide JGAURORA 3D PRINTER MODEL: A-4 USER GUIDE...
-
Page 2: Table Of Contents
Contents 1. Preface......................................3 1.1 Introduction................................3 1.2 Safety matters................................3 1.3 Filament requirements.............................3 1.4 Environmental requirements........................... 3 2. About A-4....................................4 2.1 Basic reference................................. 4 2.2 Views of A-4................................4 2.3 Nozzle exploded view...............................5 2.4 Tool box lists................................6 3. About JGcreat software................................7 3.1 Software installation............................7-8... -
Page 3: Preface
Even if you are familiar with earlier JGAURORA machines or 3D printing technology, we still recommend that you read through this guide, as there is lots of important information about the A-4 for you to get a better 3D experience. -
Page 4: About A-4
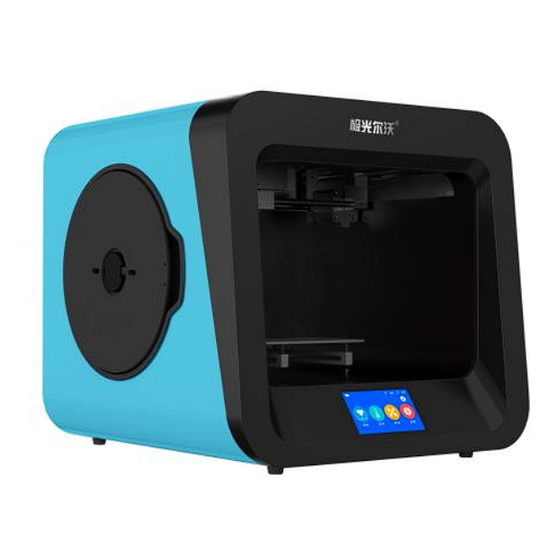
LCD display: 4.3’color IPS Touch Screen Support material: PLA /TPU Connectivity: USB cable/ USB stick Software: JGcreat Support Formats: STL, OBJ, G-Code Filament diameter: 1.75mm Machine dimension: 432*395*418mm AC Input: AC110~220V, 0.4A OS: Windows, Linux, Mac 2.2 Views of A-4... -
Page 5: Nozzle Exploded View
----3D Printer User Guide 1. Touch screen 2. LED light switch 3. Extruder 4. Build plate 5. Filament cartridge 6. USB cable input 7. USB stick input 8. Z-axis guide rod 9. Power Switch 10. Power input 2.3 Nozzle exploded view 1.Extrusion board 2. -
Page 6: Tool Box Lists
----3D Printer User Guide 2.4 Tool box lists... -
Page 7: About Jgcreat Software
----3D Printer User Guide 3. About JGcreat software 3.1 Software installation Copy the files in USB stick to your PC, double click the software installation icon, and enter the software installation interface, the installed process is as the picture shown: Double click Choose where you want to install... -
Page 8: Jgcreat Introduction
----3D Printer User Guide Press Press “Next(N)” “Finish” Choose the box Press as pic,press “Next(N)” “Finish(F)” After clicking the “Finish” icon, the installation of software is completed. 3.2 JGcreat introduction 1) Open the software(JGcreat) Double click to open the “JGcreat”... - Page 9 ----3D Printer User Guide 2) Choose the language you prefer(English as a example):...
- Page 10 ----3D Printer User Guide 3) Add printer choose“A-4”, then press“Add Printer” 4) Load 3d file and slice it Load a 3d file of stl or obj, select the appropriate print quality, the lower right corner of the software shows "Slicing", that is to generate Gcode code.
- Page 11 After slicing is completed, the lower right corner of the software shows "Save the file". 5) Copy the G-code to the USB stick, insert it to USB port on the A-4 printer, and then select the file of gcode to print through touching screen.
-
Page 12: Basic Printing
----3D Printer User Guide 4. Basic printing In Filament 4.1 Control menu introction Pause/Start menu Out Filament Back Choose the Printing printing file CONFIRM Model printing Stop menu menu menu CANCEL PLA option Preheating Extruder temp. setting Custom extruder temp. setting menu 温度设置... -
Page 13: Main Menu Introduction
----3D Printer User Guide 4.2 Main menu introduction Extruder temp. WIFI USB Stick connected Firmware Info. Move menu Setting menu Print menu Preheat menu 4.3 Platform leveling Press the “MOVE”button, then press “All”, the extruder part moves to home. Press“All”... -
Page 14: Filament Loading
----3D Printer User Guide After back to home, move the extruder part through the moving shafts according to the directions as shown in the diagram, Prepare a piece of A4 paper as a reference, place it on the platform, move the nozzle to the A4 paper and make some withdrawaling of A4 paper, if the A4 paper is too loose to withdrawal, then clockwise the rotary nut;... - Page 15 ----3D Printer User Guide In the process of preheating, firstly we open the top cover and install the filament tray to the stand, shown as pic: Load filament though the guide tube till Install the filament stretch out from tray to the stand. other end.
-
Page 16: Filament Replacement Notes
1) In the process of model printing, when the filament is almost used up, pls follow the following steps for refueling: a: Click “Pause” on the interface of A-4, then the X axis will go back to the home. b: Click the "E-" button, and take off the tray after the filament is returned. - Page 17 ----3D Printer User Guide 3) Insert the USB STICK into the USB port on the A-4, and then click "PRINT" on the "main menu" , choose the 3d file of gcode. Click "START" , the A-4 will preheat automatically, then the temp. of nozzle will reach the printing temperature you setted in the software, model printing begin until it is finished.
-
Page 18: Common Problems And Solutions
----3D Printer User Guide 5. Common problems and solutions Item No. Problems description Reason Solution a. Forget to replace the a. Replace flament in time. filament which has used up b. Seal the filament off when printing Filament break at the extruder b. -
Page 19: D Printer Maintenance
----3D Printer User Guide 6. 3D printer maintenance 1. Daily maintenance 1) Before using the machine to print, make sure that every safety protection measure are in good condition. 2) Regularly clean and maintain the equipment, try to clean the surface of the nozzle, hot bed, moving parts and other parts neatly, so as to prevent wear caused by excessive dust. -
Page 20: Supports And Service
1. This product of A-4 implement the relevant regulations corresponding to the "Warranty Card". 2. If this A-4 is out of order, please don't repair it by yourself immediately, pls contact the after-sale service center or our support team firstly.
Need help?
Do you have a question about the A-4 and is the answer not in the manual?
Questions and answers