Advertisement
Advertisement
Table of Contents

Related Manuals for JGaurora A3S


Summary of Contents for JGaurora A3S
- Page 1 User Guide...
-
Page 2: Table Of Contents
Index 02 Before You Begin 03 Safety Information 05 What's in The Box? 06 Product Overview 08 Setup Operation 23 Slicer Software 28 Maintenance 30 Troubleshooting... - Page 3 We believe in sharing the best 3D printing technology and dedicate ourselves to offering you affordable products without compromising quality through an unparalleled commitment to R&D and have seen great success in innovating advanced manufacturing techniques in development of 3D printers and accessories. Push the limits with JGAURORA and we print what you create.
-
Page 4: Before You Begin
• The user guide contains detailed instructions and notes on the operation and use of this printer. • JGAURORA shall not be responsible for any damage or expense that might result from the use of parts other than genuine parts from the JGAURORA. -
Page 5: Safety Information
Safety Information Failure to follow these guidelines may cause damage to your printer and injury to yourself or others. • Keep printer away from humidity and dust. • Make sure the room where you are using the printer is well ventilated and spacious. •... - Page 6 Safety Information O p e r a t i n g E n v i r o n m e n t • Operate your printer in a location with the following conditions: 1. Ambient temperature: 5°C-40°C 2. Relative humidity: 20%-50% (non-condensing) •...
-
Page 7: What's In The Box
What’s in The Box Main components and accessories Base Gantry Filament spool Spool holder SDHC Card SanDisk Card reader SD card USB cable Toothed belt Nozzle Screw Wrench Power cord Note: Package details are subject to change without prior notice. -
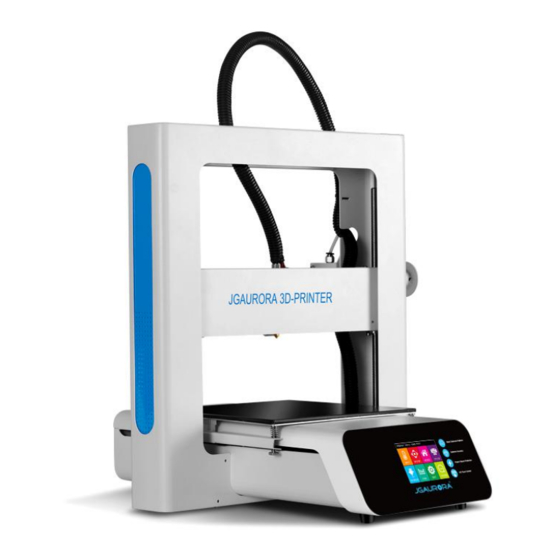
Page 8: Product Overview
Product Overview Gantry Extruder Feeder motor X axis Hot bed Spool holder Filament spool SD card slot LCD display USB port... - Page 9 Product Overview Model:A3S Dimensions:431*370*423mm Layer thickness: 0.05~0.3mm Net weight:Approx. 9kg Printing speed:10~150mm/s (Recommend 30~60mm/s) Shipping dimensions:505*430*245mm Nozzle Temperature:Room temperature~240℃ Shipping weight:Approx. 11.5kg Nozzle diameter:0.4mm Build size:205*205*205 mm Hot bed temperature:Room temperature~110℃ Build surface:Black diamond glass heated plate Supported materials:PLA/ABS/Wood, etc. LCD display: 2.8“ Touch screen Filament diameter:1.75mm Connectivity:SD card/USB Languages:Simplified Chinese/English Supported file types:STL, OBJ, G-Code Operating environment:Temperature 5℃~40℃/Humidity 20~50% Supported OS:Windows XP/Win 7/Win 10 Power requirements:AC 110/220V Software:Cura (Win/Linux/Mac) /JGcreat(Windows 64bit)...
-
Page 10: Setup
S e t up B e f o r e A s s e m b l y When dealing with the form beneath the hot bed: 1. Loosen all four bolts under the hot bed. 2. Push forward the hot bed and then take out the foam. - Page 11 Setup A s s e m b l y - P r i n t e r 1. Take out all necessary parts and toolbox. 2. Guide the base through the gantry and make sure B points are inlaid in the slot of A points. * 3.
- Page 12 Setup B e f o r e A s s e m b l y is as high as H2.* 1. Make sure 2. If not, rotate the Z-axis coupler to adjust.** *H1/H2 refers to the distance from bottom of X-axis to top frame Please make sure the printer is powered off in case you power on the printer...
-
Page 13: Operation
Operation C h o o s e C o m p a t i b l e P o w e r S u p p l y Confirm that the input matches local voltage especially when you're traveling to a different country: Check the input voltage Press to toggle between 110V and 230V 230V indicates current input voltage is compatible... - Page 14 Operation M a i n S c r e e n Preheat Move X/Y/Z axis Auto home X/Y/Z axis Print model nozzle/bed Load/unload filament Level bed Settings Language options...
- Page 15 B e d L e v e l i n g Tap“HOME”in main screen Press“ALL”to home point Note: Tightening up all four spring bolts before leveling. Note: You're highly recommended to watch video tutorials first or contact JGAURORA before leveling or if you have any problems in leveling.
- Page 16 Operation B e d L e v e l i n g 1. Remove the foam in top frame after 'Home point' process completes. 2. Adjust the Z-axis limit switch as follows If nozzle still touches hot bed after tightening up leveling bolts.* 2.1.
- Page 17 4. Repeat this step in all the corners of your bed. Move to left-rear corner Move to right-rear corner Move to right-front corner Move to left-front corner Note: You're highly recommended to watch video tutorials first or contact JGAURORA before leveling or if you have any problems in leveling.
- Page 18 If not, you can try tightening or loosening the spring bolts below the hot bed while printing to adjust the distance and re-level the bed. Note: You're highly recommended to watch video tutorials first or contact JGAURORA before leveling or if you have any problems in leveling.
- Page 19 Operation L o a d i n g F i l a m e n t Tap“HEAT”-“Preheat”-“Extruder 1 (E1)” Hit“ADD”to heat up Extruder 1 to 200℃ Note: Only PLA is used here as filament for demonstration.
- Page 20 Operation L o a d i n g F i l a m e n t While preheating, load the filament into the spool holder and insert the filament into extruder. 1. Cut the tip of the filament straight across, and insert it into feeder as you press the spring clamp.
- Page 21 Operation L o a d i n g F i l a m e n t 2. Select “Set” - “Change” , tap “IN” when temperature reaches 200℃. 3. Continue to push the filament into extruder until filament extrudes out of the nozzle.
- Page 22 Operation Mounting Toothed Belt Mounting toothed belt for cable protection. Mounting from here...
- Page 23 Operation R e a d y f o r P r i n t i n g Save the G-code file on SD card and make sure it's under the root directory. Insert the SD card and hit“PRINT” in main screen. Select the G-code file you like to print.
- Page 24 Operation R e p l a c i n g F i l a m e n t Reload the supplemental filament as follows if filament is about to run out during printing: Tap“OPTION”in printing interface and choose“PAUSE”, the X axis goes back to home point. Hit“MORE”- “CHANGE”, select“OUT”to eject the remaining filament.
-
Page 25: Slicer Software
Slicer Software S o f t w a r e I n s t a l l a t i o n 1. Copy and paste the file from SD card to your computer. 2. Start JGcreate set-up wizard by double clicking the setup.exe icon. 3. - Page 26 Slicer Software S o f t w a r e I n s t a l l a t i o n 1. Run JGcreat. 2. Select Settings-Printer-Add printer.
- Page 27 Slicer Software S o f t w a r e O v e r v i e w Load or import a 3D model file Move Scale Rotate Mirror Preview: Solid, X ray, Layers...
- Page 28 Slicer Software S o f t w a r e I n s t a l l a t i o n Import model and select printing quality. G-code file is generating if“slicing”prompts in bottom right corner.
- Page 29 Slicer Software S o f t w a r e O v e r v i e w Save file when you've done slicing. Save the G-code file on SD card and make sure it's under the root directory. (For detailed instructions in JGcreat operation, please refer to documents in SD card)
-
Page 30: Maintenance
Maintenance The purpose of scheduled maintenance is to perform regular maintenance operations as required, in order to prevent possible failures from occurring and ensure good performance throughout the life of the 3D printer. • Take appropriate measures to minimize the risks to yourself and to others before printing. •... - Page 31 Maintenance • Printer should be cleaned regularly so that there's no dust or other residues accumulated. • During printing, 1.Model should not exceed the actual build volume of the printer. 2.Printer should not be running overload. 3.If there's unusual noise or vibration, you're recommended to clean and lubricate the rails. 3.1.Wiping with a clean dry cloth.
-
Page 32: Troubleshooting
Troubleshooting Symptom Diagnoses Solutions Filament is about to run out Replace the filament Filament breaks at the feeding port of extruder Filament is damaged arising from damp Keep the filament under seal in cool and dry place Filament is clogged in tube Clean the tube Filament slides from the extruder Filament is too thin Cut off the thin part Abnormal temperature Temperature sensor failure Replace with a new temperature sensor Model is not in the right position Loose timing belts Tighten up the bolts and timing belts Warping found on model Bed is not level Level the bed Incorrect settings Choose the correct machine type Fail to generate G-code file Wrong save path Select right save path Fail to install software OS may not be supported Install the supported OS... -
Page 33: Technical Support
Technical Support • P l e a s e r e f e r t o t h e w a r r a n t y c a r d f o r d e t a i l s o f w a r r a n t y p o l i c y . •... - Page 34 W e P r i n t W h a t Y o u C r e a t e...
Need help?
Do you have a question about the A3S and is the answer not in the manual?
Questions and answers