Alpha-InnoTec SWC Series Operating Manual
Brine/water heat pumps
Hide thumbs
Also See for SWC Series:
- Operating manual (76 pages) ,
- Operating manual (32 pages) ,
- Operating manual (48 pages)
Table of Contents
Advertisement
Quick Links
Download this manual
See also:
Operating Manual
Advertisement
Table of Contents

Subscribe to Our Youtube Channel
Related Manuals for Alpha-InnoTec SWC Series


Summary of Contents for Alpha-InnoTec SWC Series
- Page 1 Brine/water heat pumps Operating Manual SWC series 83056700dUK – Translation into English of the original German operating manual...
-
Page 2: Table Of Contents
Contents 11 Maintenance ...............23 11.1 Basic principles ............23 11.2 Maintenance as required ........23 About this operating manual ........ 3 11.3 Yearly maintenance ..........23 Validity ................3 Reference documents ..........3 condenser ..............23 ..... 3 12 Faults Contact ..................24 ................4 ..24 Safety .................. -
Page 3: About This Operating Manual
About this operating manual This operating manual is part of the unit. operating manual carefully and follow it for all Symbol Meaning activities at all times, especially the warnings and safety instructions. Safety-relevant information. Warning of physical injuries. Keep the operating manual to hand at the unit and hand over to the new owner if the unit DANGER Indicates imminent danger resulting... -
Page 4: Contact
1.4 Contact – Heating installer – Plumbing installer Addresses for purchasing accessories, for service – Refrigeration system installer (maintenance cases or for answers to questions about the unit and this operating manual can be found on the internet at Germany: www.alpha-innotec.de During the warranty and guarantee period, service EU: www.alpha-innotec.eu personnel authorised by the manufacturer. -
Page 5: Disposal
Injuries and environmental damage due to If a system is not planned, designed, started up and operated according to the given requirements, there refrigerant The unit contains harmful and environmentally occur: Malfunctions and the failure of components, e.g. unit: pumps, valves Switch off unit. -
Page 6: Description
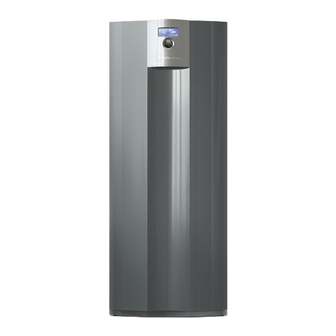
Description Valve motor 3-way changeover valve, heating 3.1 Layout circuit/domestic hot water Heating circuit/hot water circulation pump NOTE Module box This section essentially names Height-adjustable foot (4x) described in this operating manual. Electrical switch cabinet Heating element Housing with unit components Manual output control heating element (MLRH), accessories NOTE... - Page 7 Module box, variant without cooling Module box, variant with cooling Compressor Compressor Condenser Condenser Vibration isolator (4x) Vibration isolator (4x) Lifting lug (4x) Lifting lug (4x) Evaporator Evaporator Heat source circulation pump Heat source circulation pump Subject to change without notice | 83056700dUK – Translation into English of the original German operating manual | ait-deutschland GmbH...
-
Page 8: Accessories
Control unit Room thermostat for switching the cooling function (if included) Dew point monitor for protecting a system with Expansion board for automatic changeover between heating and cooling mode Manual output control heating element (MLRH) for limiting the output of the electric heating element with a cooling function for units without cooling: Pump assemblies... -
Page 9: Operation And Care
Cooling Delivery, storage, transport and installation Cooling is integrated in type K units. Type H units accessories. The following options are possible for units with cooling function ( operating manual of ATTENTION the heating and heat pump controller): Damage to the housing and the unit components Passive cooling (without compressor) due to heavy objects. -
Page 10: Storage
5.2 Storage NOTE directly before installation. Store unit protected against: and dismantling the housing panels. – Moisture/damp – Frost – Dust and dirt damage the unit. friendly way according to local regulations. Notes on safe transport front panel in the place of installation. The housing with the unit components and the module box are heavy ( “Technical data/Scope of... -
Page 11: Installation
Transport with a handcart 5.4 Installation Installation room and space requirements NOTE If transporting with a handcart the module box must be pushed in. NOTE Note and follow the local regulations and transporting the unit on its left-hand side; standards regarding the installation room it can also be transported on its right- and space requirements. -
Page 12: Installation And Connection
Installation and connection Unit without cooling: 6.1 Dismantle the module box ATTENTION If the module box is tilted by more than 45°, compressor oil runs into the cooling circuit. Do not tilt the module box by more than 45°. NOTE If necessary the module box can be dismantled for easier transport of the unit or for service reasons. - Page 13 Use a spanner to close the shut-off valves of the Disconnect the electrical connections: heat source (behind the covers). Unit up to 12 kW capacity: – Disconnect 2 white connectors (1) at the bottom of the electrical control cabinet. To do this, release the lugs by pressing on the sides of the connectors.
- Page 14 Use spanner size SW 37 to unscrew the heating NOTE The following diagrams show the connections of units with up to 12 are installed with clips and without valves. Remove insulation hydraulic connections. 10. Disconnect the hydraulic connections; to do this, push the pipes apart as far as necessary.
-
Page 15: Installing The Module Box
6.2 Installing the module box more easily: place boards“(4) under it, e.g. from Place the module box carefully in the bottom of the housing and slowly and carefully push it in. – 14. Slowly and carefully pull out the module box by the carrying lugs“(2). -
Page 16: Install The Hydraulic Connections
6.3 Install the hydraulic connections valves ATTENTION NOTE Damage to the copper pipes due to unacceptable This section is only relevant for units with up loading! Secure all connections against twisting. ATTENTION NOTE The heat source can be connected from the force! top, right or left. -
Page 17: Connect The Electrical Cables
6.4 Connect the electrical cables the connections ATTENTION Strip the sheathing of all cables to the external loads before laying in the cable duct of the Irreparable damage to the compressor due to control box. Open electrical switchbox: the compressor load infeed. –... -
Page 18: Installing The Control
6.5 Installing the control Use cable ties ( 20 cm in front of the connector (strain relief). NOTE The control can be inserted in a recess in the front panel of the unit or can be installed on the wall. Insert the control in the unit and connect slot. -
Page 19: Remove The Front Panel Of The Module Box
Mount the control on the wall and connect If visually unattractive: Cut off the lugs on the Remove the front panel of the rear of the control (are only needed to insert in module box the front panel). “Dimensioned drawing of Unscrew the front panel of the module box. - Page 20 Advantages of low-salt operation: and higher via the venting valve on the cold Low corrosion-promoting properties exchanger. No formation of mineral scale Ideal for closed heating circuits 8.2 by adding chemicals Water and the following antifreeze products are Monopropylene glycol Monoethylene glycol Fill the unit via the ball valves in the module box.
Need help?
Do you have a question about the SWC Series and is the answer not in the manual?
Questions and answers