
Related Manuals for ZyXEL Communications LTE3316-M604


Summary of Contents for ZyXEL Communications LTE3316-M604
- Page 1 User’s Guide LTE3316-M604 4G LTE-A Indoor IAD Default Login Details Version 1.00 Edition 2, 04/2019 LAN IP Address http://192.168.1.1 User Name admin Password 1234 Copyright © 2019 Zyxel Communications Corporation...
-
Page 2: Related Documentation
Every effort has been made to ensure that the information in this manual is accurate. Related Documentation • Quick Start Guide The Quick Start Guide shows how to connect the managed device. • More Information Go to support.zyxel.com to find other information on the LTE3316-M604 LTE3316 Series User’s Guide... -
Page 3: Table Of Contents
Contents Overview Contents Overview User’s Guide ............................12 Introduction ............................13 Web Configurator ..........................20 Setup Wizard ............................27 Tutorials ..............................32 Technical Reference ........................40 Status ..............................41 Monitor ..............................44 WAN ............................... 52 Wireless LAN ............................66 LAN ................................. 88 DHCP Server ............................ -
Page 4: Table Of Contents
Table of Contents Table of Contents Contents Overview ..........................3 Table of Contents ..........................4 Document Conventions ........................11 Part I: User’s Guide..................12 Chapter 1 Introduction ............................13 1.1 Overview ............................13 1.2 Applications ............................ 13 1.2.1 Wireless WAN (3G/4G/LTE) Connection ................14 1.2.2 WAN Priority ........................... - Page 5 Table of Contents 4.1 Overview ............................32 4.2 Connecting to the Zyxel Device Using WPS ................32 4.2.1 Push Button Configuration (PBC) ..................32 4.2.2 PIN Configuration ........................33 4.3 Connect to Zyxel Device Wireless Network Without WPS ............34 4.4 Using Multiple SSIDs on the Zyxel Device ..................
- Page 6 Table of Contents 8.1 Overview ............................66 8.1.1 What You Can Do ......................... 67 8.1.2 What You Should Know ......................67 8.2 General Wireless LAN Settings ....................... 69 8.3 Wireless Security ..........................72 8.3.1 No Security ..........................72 8.3.2 WPA2-PSK ..........................73 8.3.3 WPA/WPA2 ..........................
- Page 7 Table of Contents 11.6 Technical Reference ........................101 11.6.1 NAT Port Forwarding: Services and Port Numbers ............101 11.6.2 NAT Port Forwarding Example ..................102 11.6.3 Trigger Port Forwarding ....................102 11.6.4 Trigger Port Forwarding Example ..................103 11.6.5 Two Points To Remember About Trigger Ports ............... 103 Chapter 12 DDNS ..............................104 12.1 Overview .............................
- Page 8 Table of Contents Chapter 18 VPN..............................121 18.1 Overview ............................. 121 18.1.1 What You Can Do in this Chapter ................... 121 18.2 What You Need to Know ......................121 18.3 L2TP Server ........................... 122 18.4 L2TP Client ........................... 123 18.4.1 Add L2TP Client ......................... 124 18.5 GRE ...............................
- Page 9 Table of Contents Chapter 23 Universal Plug-and-Play (UPnP)......................145 23.1 Overview ............................. 145 23.2 What You Need to Know ......................145 23.2.1 NAT Traversal ........................145 23.2.2 Cautions With UPnP ......................145 23.3 UPnP Settings ..........................146 23.4 Turn on UPnP in Windows 7 Example ..................146 23.4.1 Auto-discover Your UPnP-enabled Network Device ............
- Page 10 Table of Contents Appendix B Common Services ...................... 180 Appendix C Legal Information ...................... 183 Index ..............................190 LTE3316 Series User’s Guide...
-
Page 11: Document Conventions
Syntax Conventions • The LTE3316-M604 in this user’s guide may be referred to as the “Zyxel Device” in this guide. • Product labels, screen names, field labels and field choices are all in bold font. -
Page 12: User's Guide
User’s Guide... -
Page 13: Introduction
H A P T E R Introduction 1.1 Overview This chapter introduces the main features and applications of the Zyxel Device. The Zyxel Device is a wireless router, which can connect to a mobile network and the Internet through a wireless WAN connection and provide easy network access to users without additional wiring.You can set up a 2.4G of IEEE 802.11b/g/n and 5G of 201.11a/n/ac wireless network. -
Page 14: Wireless Wan (3G/4G/Lte) Connection
Chapter 1 Introduction • Wireless LAN. Wireless clients can wirelessly connect to the Zyxel Device to access network resources. You can use WPS (WiFi Protected Setup) to create an instant network connection with another WPS compatible device. 1.2.1 Wireless WAN (3G/4G/LTE) Connection Zyxel Device comes with a built-in 3G/4G module for 3G/4G connections. -
Page 15: Hardware Connections
Chapter 1 Introduction • Back up the configuration (and make sure you know how to restore it). Restoring an earlier working configuration may be useful if the device becomes unstable or even crashes. If you forget your password, you will have to reset the Zyxel Device to its factory default settings. If you backed up an earlier configuration file, you won’t have to totally re-configure the Zyxel Device;... -
Page 16: Rear Panel
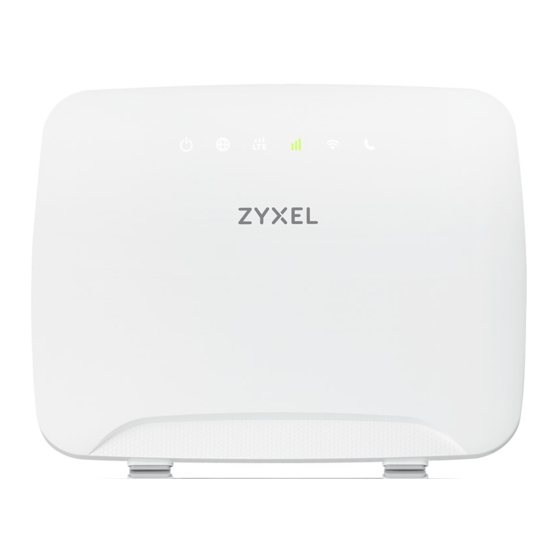
Chapter 1 Introduction The following table describes the LED lights. Table 1 Front Panel LEDs COLOR STATUS DESCRIPTION Power White The Zyxel Device is receiving power and functioning properly. Blinking The Zyxel Device is in the process of starting up or default restoring. The Zyxel Device is not receiving power. -
Page 17: Sim Card Slot
Chapter 1 Introduction Figure 3 Zyxel Device Power Button WPS Button External Antenna Ports Card Slot Power Reset Input WAN/ Phone 1.5.2.1 SIM Card Slot The Zyxel Device comes with a built-in 3G/4G/LTE module for mobile connections. To set up a mobile connection using the built-in 3G/4G/LTE module, just insert a SIM card into the SIM card slot at the back of the Zyxel Device. -
Page 18: Wall Mounting
Chapter 1 Introduction Press the WPS button for more than five seconds and release it. Press the WPS button on another WPS enabled device within range of the Zyxel Device. Note: You must activate WPS in the Zyxel Device and in another wireless device within two minutes of each other. - Page 19 Chapter 1 Introduction If using screw anchors, drill two holes for the screw anchors into the wall. Push the anchors into the full depth of the holes, then insert the screws into the anchors. Do not insert the screws all the way in - leave a small gap of about 0.5 cm.
-
Page 20: Web Configurator
H A P T E R Web Configurator 2.1 Overview This chapter describes how to access the Zyxel Device Web Configurator and provides an overview of its screens. The Web Configurator is an HTML-based management interface that allows easy setup and management of the Zyxel Device via Internet browser. - Page 21 Chapter 2 Web Configurator Type "http://192.168.1.1" as the website address. The Login screen appears. Your computer must be in the same subnet in order to access this website address. Enter the User Name (default: “admin”) and Password (default: “1234”). See Section 2.2 on page 20 more information about login accounts.
-
Page 22: Navigating The Web Configurator
Chapter 2 Web Configurator 2.4 Navigating the Web Configurator The following summarizes how to navigate the Web Configurator from the Home screen. Figure 5 The Web Configurator’s Main Screen The Web Configurator’s main screen is divided into these parts: • A - Title Bar •... -
Page 23: Title Bar
Chapter 2 Web Configurator 2.4.1 Title Bar The title bar provides some useful links that always appear over the screens below, regardless of how deep into the Web Configurator you navigate. Figure 6 Title Bar The icons provide the following functions. Table 3 Title Bar: Web Configurator Icons LABEL DESCRIPTION... - Page 24 Chapter 2 Web Configurator Figure 7 Navigation Panel The following table describes the navigation panel menus and sub-menus. Table 4 Navigation Panel MENU SUB-MENU DESCRIPTION Status This screen shows the Zyxel Device’s general device, system and interface status information. Use this screen to access the summary statistics tables.
- Page 25 Chapter 2 Web Configurator Table 4 Navigation Panel (continued) MENU SUB-MENU DESCRIPTION DHCP Server General Use this screen to enable the Zyxel Device’s DHCP server. Advanced Use this screen to assign IP addresses to specific individual computers based on their MAC addresses and to have DNS servers assigned by the DHCP server.
- Page 26 Chapter 2 Web Configurator Table 4 Navigation Panel (continued) MENU SUB-MENU DESCRIPTION General General Use this screen to view and change administrative settings such as system and domain names. Account User Account Use this screen to change the user name and password of your Zyxel Device.
-
Page 27: Setup Wizard
H A P T E R Setup Wizard 3.1 Overview This chapter provides information on the Wizard setup screens in the Web Configurator. The Web Configurator’s Wizard helps you configure your device to access the Internet and change the wireless LAN settings. Refer to your ISP for your Internet account information. Leave a field blank if you don’t have that information. -
Page 28: Wizard Setup
Chapter 3 Setup Wizard 3.3 Wizard Setup The first Wizard screen displays showing the main steps in the Wizard setup. Click Next to proceed with the time zone setup screen. The Zyxel Device automatically detects your location and displays the correct time zone. If the result is not correct, click Detect Again or manually select the time zone of the Zyxel Device and click Next. - Page 29 Chapter 3 Setup Wizard Enter your APN (Access Point Name) provided by your service provider. Select the country where the Zyxel Device is located and your service provider name. Click Next. Use this screen to enable or disable the Zyxel Device’s wireless LAN, and enter the wireless network name (SSID).
- Page 30 Chapter 3 Setup Wizard Select WPA2-PSK and enter a pre-shared key from 8 to 63 case-sensitive characters for data encryption.The wireless clients which want to associate with this wireless network must have the same wireless security settings. Otherwise, select No Security to allow any client to associate with this network without any data encryption or authentication.
- Page 31 Chapter 3 Setup Wizard The system takes about 120 seconds to apply settings. Click Finish to complete the wizard setup. You are now ready to connect wirelessly to your Zyxel Device and access the Internet. LTE3316 Series User’s Guide...
-
Page 32: Tutorials
H A P T E R Tutorials 4.1 Overview This chapter provides tutorials for setting up your Zyxel Device. • Connecting to the Zyxel Device Using WPS • Connect to Zyxel Device Wireless Network Without WPS • Using Multiple SSIDs on the Zyxel Device 4.2 Connecting to the Zyxel Device Using WPS This section gives you an example of how to set up a wireless network using WPS. -
Page 33: Pin Configuration
Chapter 4 Tutorials Figure 9 Example WPS Process: PBC Method Wireless Client Press and hold for more than 2 seconds WITHIN 2 MINUTES SECURITY INFO COMMUNICATION 4.2.2 PIN Configuration When you use the PIN configuration method, you need to check the client’s PIN number and use the Zyxel Device’s configuration interface. -
Page 34: Connect To Zyxel Device Wireless Network Without Wps
Chapter 4 Tutorials Figure 10 Example WPS Process: PIN Method Wireless Client Enter WPS PIN from other device: START WITHIN 2 MINUTES Authentication by PIN SECURITY INFO COMMUNICATION 4.3 Connect to Zyxel Device Wireless Network Without This example shows you how to configure wireless security settings with the following parameters on your Zyxel Device and connect your computer to the Zyxel Device wireless network. - Page 35 Chapter 4 Tutorials Channel Security WPA-PSK (Pre-Shared Key: 1234567890) Follow the steps below to configure the wireless settings on your Zyxel Device. The instructions require that your hardware is connected (see the Quick Start Guide) and you are logged into the Web Configurator through your LAN connection (see Section 2.3 on page 20).
-
Page 36: Using Multiple Ssids On The Zyxel Device
Chapter 4 Tutorials 4.4 Using Multiple SSIDs on the Zyxel Device You can configure more than one SSID on a Zyxel Device. See Section 8.4 on page This allows you to configure multiple independent wireless networks on the Zyxel Device as if there were multiple APs (virtual APs). -
Page 37: Configuring Security Settings Of Multiple Ssids
Chapter 4 Tutorials 4.4.1 Configuring Security Settings of Multiple SSIDs The Zyxel Device is in router mode by default. This example shows you how to configure the SSIDs with the following parameters on your Zyxel Device. SSID SECURITY TYPE Zyxel_Worker WPA2-PSK DoNotStealMyWirelessNetwork WPA Compatible... - Page 38 Chapter 4 Tutorials Click the Edit icon of the second entry to configure wireless and security settings for SSID_Worker2. 10 Configure the screen as follows. You do not enable Intra-BSS Traffic for SSID_Worker2. Click Apply. 11 Click the Edit icon of the third entry to configure wireless and security settings for SSID_Guest. LTE3316 Series User’s Guide...
- Page 39 Chapter 4 Tutorials 12 Configure the screen as follows. In this example, you enable Intra-BSS Traffic for SSID_Guest to allow wireless clients in the same wireless network to communicate with each other. Click Apply. LTE3316 Series User’s Guide...
-
Page 40: Technical Reference
Technical Reference... -
Page 41: Status
H A P T E R Status 5.1 Overview Use the Status screen to check status information about the Zyxel Device. 5.2 Status This screen is the first thing you see when you log into the Zyxel Device. It also appears every time you click the Status icon in the navigation panel. - Page 42 Chapter 5 Status Table 5 Status (continued) LABEL DESCRIPTION MAC Address This shows the WAN Ethernet adapter MAC address of your device. IP Address This shows the WAN port’s IP address. IP Subnet Mask This shows the WAN port’s subnet mask. Default Gateway This shows the WAN port’s gateway IP address.
- Page 43 Chapter 5 Status Table 5 Status (continued) LABEL DESCRIPTION Item This displays the Zyxel Device port types. The port types are: Cellular WAN, Ethernet WAN, LAN 1~LAN 4, WLAN 2.4G and WLAN 5G. Rate/Status For the LAN and WAN ports, this field displays Off (line is down) or On (line is up or connected).
-
Page 44: Monitor
H A P T E R Monitor 6.1 Overview This chapter discusses read-only information related to the device state of the Zyxel Device. To access the Monitor screens, click after login. You can also click the links in the Summary table of the Status screen to view the packets sent/received as well as the status of wireless clients connected to the Zyxel Device. - Page 45 Chapter 6 Monitor Figure 12 Monitor > Log > View Log You can configure which logs to display in the View Log screen. Go to the Log Setting screen and select the types of logs you wish to display. You can enable the log server, to send detailed events to this server.
-
Page 46: Dhcp Table
Chapter 6 Monitor 6.4 DHCP Table DHCP (Dynamic Host Configuration Protocol, RFC 2131 and RFC 2132) allows individual clients to obtain TCP/IP configuration at start-up from a server. You can configure the Zyxel Device’s LAN as a DHCP server or disable it. When configured as a server, the Zyxel Device provides the TCP/IP configuration for the clients. -
Page 47: Packet Statistics
Chapter 6 Monitor Click Monitor > ARP Table to open the following screen. Figure 15 Monitor > ARP Table The following screen describes the labels on this screen. Table 7 Monitor > ARP Table LABEL DESCRIPTION This is the index number of the entry. IP Address This is the learned IPv4 or IPv6 IP address of a device connected to a port. -
Page 48: Wlan Station Status
Chapter 6 Monitor The following table describes the labels on this screen. Table 8 Monitor > Packet Statistics LABEL DESCRIPTION Port This is the Zyxel Device’s interface type. Status For the LAN ports, this displays the port speed and duplex setting or Down when the line is disconnected. -
Page 49: Lte Modem Status
Chapter 6 Monitor The following table describes the labels on this screen. Table 9 Monitor > WLAN Station Status LABEL DESCRIPTION This is the index number of an associated wireless station. MAC Address This field displays the MAC address of an associated wireless station. Association Time This field displays the time a wireless station first associated with the Zyxel Device’s WLAN. - Page 50 Chapter 6 Monitor The following table describes the labels on this screen. Table 10 Monitor > LTE Modem Status LABEL DESCRIPTION Modem Information Module Name This displays the name of the built-in LTE module. IMEI/MEID This displays the International Mobile Equipment Number (IMEI) or Mobile Equipment Identifier (MEID), which is the serial number of the built-in LTE module.
- Page 51 Chapter 6 Monitor Table 10 Monitor > LTE Modem Status (continued) LABEL DESCRIPTION RSRP This displays the Reference Signal Receive Power (RSRP), which is the average received power of all Resource Elements (RE) that carry cell-specific Reference Signals (RS) within the specified bandwidth. RSRQ This displays the Reference Signal Received Quality (RSRQ), which is the ratio of RSRP to the E-UTRA carrier RSSI and indicates the quality of the received reference signal.
-
Page 52: Wan
H A P T E R 7.1 Overview This chapter discusses the Zyxel Device’s WAN screens. Use these screens to configure your Zyxel Device for Internet access. A WAN (Wide Area Network) connection is an outside connection to another network or the Internet. It connects your private networks such as a LAN (Local Area Network) and other networks, so that a computer in one location can communicate with computers in other locations. -
Page 53: What You Need To Know
Chapter 7 WAN 7.3 What You Need To Know The information in this section can help you configure the screens for your WAN connection, as well as enable/disable some advanced features of your Zyxel Device. 3G (Third Generation) is a digital, packet-switched wireless technology. Bandwidth usage is optimized as multiple users share the same channel and bandwidth is only allocated to users when they send data. -
Page 54: Ipv6 Introduction
Chapter 7 WAN In the multicast example above, systems A and D comprise one multicast group. In multicasting, the server only needs to send one data stream and this is delivered to systems A and D. IGMP (Internet Group Multicast Protocol) is a network-layer protocol used to establish membership in a multicast group - it is not used to carry user data. -
Page 55: Wan Management
Chapter 7 WAN 7.4 WAN Management The summary table shows you the WAN connections configured on the Zyxel Device. Click Configuration > Network > WAN > WAN Management from the Configuration menu. Figure 21 Configuration > Network > WAN > WAN Management The following table describes the labels in this screen. - Page 56 Chapter 7 WAN Figure 22 WAN Management Edit 3G/4G The following table describes the labels in this screen. Table 12 Management WAN Edit: 3G/4G LABEL DESCRIPTION Cellular WAN Antenna Select Select Internal for the Zyxel Device to use its internal antennas for WAN connection. If you attached external antennas (not included) to the Zyxel Device, select External.
- Page 57 Chapter 7 WAN Table 12 Management WAN Edit: 3G/4G (continued) LABEL DESCRIPTION Network Type Select the type of the network (4G or 3G) to which you want the Zyxel Device to connect. Otherwise, select Auto to have the Zyxel Device connect to an available network using the default settings on the SIM card.
- Page 58 Chapter 7 WAN Table 12 Management WAN Edit: 3G/4G (continued) LABEL DESCRIPTION IP Subnet Mask Enter the subnet mask in this field if you selected Static IP in the IP Mode field. IP Gateway Enter the gateway IP address in this field if you selected Static IP in the IP Mode field. Primary DNS Enter the first DNS server address assigned by the service provider.
-
Page 59: Wan Management Edit Ethernet
Chapter 7 WAN 7.4.2 WAN Management Edit Ethernet The Zyxel Device has 4 LAN Ethernet ports, you can configure LAN 1 port to work as a WAN port if needed. This WAN port will work as a fail-over port, which means that if the 3G/4G WAN connection fails, the Zyxel Device will use the WAN Ethernet connection for backup. - Page 60 Chapter 7 WAN Table 13 WAN Management Edit Ethernet (continued) LABEL DESCRIPTION ISP Registered MAC Address Click the Clone button and the Zyxel Device will enter the MAC address of the computer on the LAN automatically. Click the Clear button to remove the MAC address from this field. Static IP WAN Type Configuration These fields appears when you select Static IP in the WAN Type field.
-
Page 61: Network Scan
Chapter 7 WAN Table 13 WAN Management Edit Ethernet (continued) LABEL DESCRIPTION Fail Threshold Type how many WAN connection checks can fail (0 to 99999) before the connection is considered "down" (not connected). The Zyxel Device still checks a "down" connection to detect if it reconnects. Target1 / Target 2 Select DNS1 to have the Zyxel Device send a DNS query to the first DNS server address assigned by the service provider. -
Page 62: Ipv6
Chapter 7 WAN Table 14 Configuration > Network > WAN > Network Scan (continued) LABEL DESCRIPTION Scan Approach Select Auto to have the Zyxel Device connect to an available network using the default settings on the SIM card. If the currently registered mobile network is not available or the mobile network’s signal strength is too low, the Zyxel Device switches to another available mobile network. - Page 63 Chapter 7 WAN The following table describes the labels in this screen. Table 15 Configuration > Network >WAN > IPv6 LABEL DESCRIPTION IPv6 Select Enable to allow the Zyxel Device to run IPv6. Otherwise, select Disable. IPv6 Connection This displays Static IPv6 if you have a fixed IPv6 address assigned by your ISP. This displays DHCPv6 if you want to obtain an IPv6 address from a DHCPv6 server.
-
Page 64: Pin Management
Chapter 7 WAN Table 15 Configuration > Network >WAN > IPv6 (continued) LABEL DESCRIPTION Secondary DNS Enter the second IPv6 DNS server address assigned by the ISP. Address LAN IPv6 Address Enter the IPv6 address for the Zyxel Device LAN interface in this field. LAN IPv6 Link-Local This shows the IPv6 Link-local address in the LAN side. - Page 65 Chapter 7 WAN The following table describes the labels in this screen. Table 16 Configuration > Network > WAN > PIN Management LABEL DESCRIPTION PIN Code Request function Select Enable to turn on PIN code authentication. A PIN (Personal Identification Number) code is a key to a SIM card.
-
Page 66: Wireless Lan
H A P T E R Wireless LAN 8.1 Overview This chapter discusses how to configure the wireless network settings in your Zyxel Device. See the appendices for more detailed information about wireless networks. The following figure provides an example of a wireless network. Figure 27 Example of a Wireless Network The wireless network is the part in the blue circle. -
Page 67: What You Can Do
Chapter 8 Wireless LAN 8.1.1 What You Can Do • Use the General screen to turn the wireless connection on or off, set up wireless security between the Zyxel Device and the wireless clients, and make other basic configuration changes (Section 8.2 on page 69). -
Page 68: Mac Address Filter
Chapter 8 Wireless LAN MAC Address Filter Every wireless client has a unique identification number, called a MAC address. A MAC address is usually written using twelve hexadecimal characters ; for example, 00A0C5000002 or 00:A0:C5:00:00:02. To get the MAC address for each wireless client, see the appropriate User’s Guide or other documentation. -
Page 69: General Wireless Lan Settings
Chapter 8 Wireless LAN The types of encryption you can choose depend on the type of user authentication. (See page 68 information about this.) Table 17 Types of Encryption for Each Type of Authentication NO AUTHENTICATION RADIUS SERVER Weakest No Security WPA-PSK Strongest WPA2-PSK... - Page 70 Chapter 8 Wireless LAN Note: If you are configuring the Zyxel Device from a computer connected to the wireless LAN and you change the Zyxel Device’s SSID, channel or security settings, you will lose your wireless connection when you press Apply to confirm. You must then change the wireless settings of your computer to match the Zyxel Device’s new settings.
- Page 71 Chapter 8 Wireless LAN The following table describes the general wireless LAN labels in this screen. Table 18 Configuration > Network > Wireless LAN > General LABEL DESCRIPTION Wireless Setup - 2.4G / Wireless Setup - 5G Wireless LAN Status Select Enable to activate the 2.4G/5G wireless LAN.
-
Page 72: Wireless Security
Chapter 8 Wireless LAN Table 18 Configuration > Network > Wireless LAN > General (continued) LABEL DESCRIPTION 802.11 Mode In Wireless Setup for 2.4G network you can select from the following: • 802.11b Only: allows either IEEE 802.11b compliant WLAN devices to associate with the Zyxel Device. -
Page 73: Wpa2-Psk
Chapter 8 Wireless LAN Note: If you do not enable any wireless security on your Zyxel Device, your network is accessible to any wireless networking device that is within range. Figure 29 Configuration > Network > Wireless LAN > General: No Security 8.3.2 WPA2-PSK Select WPA2-PSK from the Security Mode list. - Page 74 Chapter 8 Wireless LAN Figure 30 Network > Wireless LAN > General: WPA2-PSK The following table describes the labels in this screen. Table 19 Network > Wireless LAN > General: WPA2-PSK LABEL DESCRIPTION Security Mode Select WPA2-PSK to enable data encryption. Encryption Select the encryption type of data encryption.
-
Page 75: Wpa/Wpa2
Chapter 8 Wireless LAN Table 19 Network > Wireless LAN > General: WPA2-PSK (continued) LABEL DESCRIPTION Apply Click Apply to save your changes back to the Zyxel Device. Cancel Click Cancel to reload the previous configuration for this screen. 8.3.3 WPA/WPA2 Select WPA or WPA2 from the Security Mode list. - Page 76 Chapter 8 Wireless LAN Figure 31 Configuration > Network > Wireless LAN > General: WPA / WPA2 The following table describes the labels in this screen. Table 20 Configuration > Network > Wireless LAN > General: WPA / WPA2 LABEL DESCRIPTION Security Mode Select WPA or WPA2 to enable data encryption.
-
Page 77: More Ap
Chapter 8 Wireless LAN Table 20 Configuration > Network > Wireless LAN > General: WPA / WPA2 (continued) LABEL DESCRIPTION Encryption Select the encryption type of data encryption. Select AES if your wireless clients can all use AES. Select TKIP / AES to allow the wireless clients to use either TKIP or AES. Group Key Update The WPA Group Key Update Timer is the rate at which the AP (if using WPA-PSK key Time... -
Page 78: More Ap Edit
Chapter 8 Wireless LAN Table 21 Configuration > Network > Wireless LAN > More AP (continued) LABEL DESCRIPTION SSID An SSID profile is the set of parameters relating to one of the Zyxel Device’s BSSs. The SSID (Service Set IDentifier) identifies the Service Set with which a wireless device is associated. This field displays the name of the wireless profile on the network. -
Page 79: Mac Filter
Chapter 8 Wireless LAN Table 22 Configuration > Network > Wireless LAN > More AP: Edit (continued) LABEL DESCRIPTION Intra-BSS Traffic A Basic Service Set (BSS) exists when all communications between wireless clients or between a wireless client and a wired network client go through one access point (AP). Intra-BSS traffic is traffic between wireless clients in the BSS. - Page 80 Chapter 8 Wireless LAN Figure 34 Configuration > Network > Wireless LAN > MAC Filter The following table describes the labels in this menu. Table 23 Configuration > Network > Wireless LAN > MAC Filter LABEL DESCRIPTION MAC Address Select to turn on (Enable) or off (Disable) MAC address filtering. Filter Filter Action Define the filter action for the list of MAC addresses in the MAC Filter Summary table.
-
Page 81: Wireless Lan Advanced Settings
Chapter 8 Wireless LAN 8.6 Wireless LAN Advanced Settings Use this screen to allow wireless advanced features, such as the output power, RTS/CTS Threshold settings. Click Configuration > Network > Wireless LAN > Advanced. The screen appears as shown. Figure 35 Configuration > Network > Wireless LAN > Advanced The following table describes the labels in this screen. -
Page 82: Quality Of Service (Qos)
Chapter 8 Wireless LAN Table 24 Configuration > Network > Wireless LAN > Advanced (continued) LABEL DESCRIPTION Green AP Select Enable to reduce the power consumption by adjusting the output power. The Zyxel Device reduces the output power of the transmitter from about 260mA to 188mA when there is no IEEE 802.11 wireless clients associated with the Zyxel Device wireless network. -
Page 83: Wps
Chapter 8 Wireless LAN Table 25 Configuration > Network > Wireless LAN > QoS (continued) LABEL DESCRIPTION Apply Click Apply to save your changes to the Zyxel Device. Cancel Click Cancel to reload the previous configuration for this screen. 8.8 WPS Use this screen to enable/disable WPS, view or generate a new PIN number and check current WPS status. -
Page 84: Wps Station
Chapter 8 Wireless LAN The following table describes the labels in this screen. Table 26 Configuration > Network > Wireless LAN > WPS LABEL DESCRIPTION WPS Setup 2.4G / 5G Select Enable to turn on the WPS feature. Otherwise, select Disable. PIN Code Select Enable so the Zyxel Device can connect by WPS using the PIN Configuration Method. -
Page 85: Scheduling
Chapter 8 Wireless LAN Figure 38 Configuration > Network > Wireless LAN > WPS Station The following table describes the labels in this screen. Table 27 Configuration > Network > Wireless LAN > WPS Station LABEL DESCRIPTION WPS Station Setup - 2.4G / WPS Station Setup - 5G Push Button Use this button when you use the PBC (Push Button Configuration) method to configure wireless station’s wireless settings. -
Page 86: Wds
Chapter 8 Wireless LAN Figure 39 Configuration > Network > Wireless LAN > Scheduling The following table describes the labels in this screen. Table 28 Configuration > Network > Wireless LAN > Scheduling LABEL DESCRIPTION Wireless LAN Select Enable to activate the wireless LAN scheduling feature. Select Disable to turn it off. Scheduling Policy Select On or Off to specify whether the Wireless LAN is turned on or off. - Page 87 Chapter 8 Wireless LAN Figure 40 Configuration > Network > Wireless LAN > WDS The following table describes the labels in this screen. Table 29 Configuration > Network > Wireless LAN > WDS LABEL DESCRIPTION WDS Setup - 2.4G / WDS Setup - 5G Basic Setting Select Disable to turn off the WDS function on the Zyxel Device.
-
Page 88: Lan
H A P T E R 9.1 Overview This chapter describes how to configure LAN settings. A Local Area Network (LAN) is a shared communication system to which many computers are attached. A LAN is a computer network limited to the immediate area, usually the same building or floor of a building. -
Page 89: Lan Ip
Chapter 9 LAN Figure 42 LAN and WAN IP Addresses The LAN parameters of the Zyxel Device are preset in the factory with the following values: • IP address of 192.168.1.1 with subnet mask of 255.255.255.0 (24 bits). • DHCP server enabled with 32 client IP addresses starting from 192.168.1.33. These parameters should work for the majority of installations. -
Page 90: Dhcp Server
H A P T E R DHCP Server 10.1 Overview DHCP (Dynamic Host Configuration Protocol, RFC 2131 and RFC 2132) allows individual clients to obtain TCP/IP configuration at start-up from a server. You can configure the Zyxel Device’s LAN as a DHCP server or disable it. - Page 91 Chapter 10 DHCP Server Figure 44 Configuration > Network > DHCP Server > General The following table describes the labels in this screen. Table 31 Configuration > Network > DHCP Server > General LABEL DESCRIPTION DHCP Server Select Enable to activate DHCP for LAN. DHCP (Dynamic Host Configuration Protocol, RFC 2131 and RFC 2132) allows individual clients (computers) to obtain TCP/IP configuration at startup from a server.
-
Page 92: Advanced Dhcp Server Setting
Chapter 10 DHCP Server Table 31 Configuration > Network > DHCP Server > General (continued) LABEL DESCRIPTION DHCP Relay Select this option to have the Zyxel Device forward DHCP requests to the DHCP server. DHCP Server IP This field is configurable only when you select DHCP Relay. Enter the IP address of the actual remote DHCP server in this field. - Page 93 Chapter 10 DHCP Server Figure 45 Configuration > Network > DHCP Server > Advanced The following table describes the labels in this screen. Table 32 Configuration > Network > DHCP Server > Advanced LABEL DESCRIPTION Static DHCP Table This is the index number of the static IP table entry (row). MAC Address Type the MAC address (with colons) of a computer on your LAN.
-
Page 94: Dhcp Client List
Chapter 10 DHCP Server 10.4 DHCP Client List The DHCP table shows current DHCP client information (including IP address, Host Name and MAC address) of network clients using the Zyxel Device’s DHCP servers. Configure this screen to always assign an IP address to a MAC address (and host name). Click Configuration >... -
Page 95: Nat
H A P T E R 11.1 Overview NAT (Network Address Translation - NAT, RFC 1631) is the translation of the IP address of a host in a packet. For example, the source address of an outgoing packet, used within one network is changed to a different IP address known within another network. -
Page 96: General Settings
Chapter 11 NAT • Use the Port Trigger screen to change your Zyxel Device’s trigger port settings (Section 11.4 on page 100). • Use the ALG screen to enable or disable SIP (VoIP) ALG (Application Layer Gateway) in the Zyxel Device (Section 11.5 on page 101). - Page 97 Chapter 11 NAT port 80 and FTP on port 21. In some cases, such as for unknown services or where one server can support more than one service (for example both FTP and web service), it might be better to specify a range of port numbers.
-
Page 98: Edit Port Forwarding
Chapter 11 NAT The following table describes the labels in this screen. Table 35 Configuration > Network > NAT > Port Forwarding LABEL DESCRIPTION Service Name Select a pre-defined service from the drop-down list box. The pre-defined service port number(s) and protocol will be displayed in the port forwarding summary table. Otherwise, select User define to manually enter the service name and port number(s) and select the IP protocol. - Page 99 Chapter 11 NAT Figure 50 Configuration > Network > NAT > Port Forwarding Edit The following table describes the labels in this screen. Table 36 Configuration > Network > NAT > Port Forwarding Edit LABEL DESCRIPTION Port Forwarding Select Enable to turn on this rule and the requested service can be forwarded to the host with a specified internal IP address.
-
Page 100: Port Trigger
Chapter 11 NAT 11.4 Port Trigger To change your Zyxel Device’s trigger port settings, click Configuration > Network > NAT > Port Trigger. The screen appears as shown. Note: Only one LAN computer can use a trigger port (range) at a time. Figure 51 Configuration >... -
Page 101: Alg
Chapter 11 NAT 11.5 ALG Some NAT routers may include a SIP Application Layer Gateway (ALG). A SIP ALG allows SIP calls to pass through NAT by examining and translating IP addresses embedded in the data stream. When the Zyxel Device registers with the SIP register server, the SIP ALG translates the Zyxel Device’s private IP address inside the SIP data stream to a public IP address. -
Page 102: Nat Port Forwarding Example
Chapter 11 NAT more than one service (for example both FTP and web service), it might be better to specify a range of port numbers. In addition to the servers for specified services, NAT supports a default server. A service request that does not have a server explicitly designated for it is forwarded to the default server. -
Page 103: Trigger Port Forwarding Example
Chapter 11 NAT same manner. This way you do not need to configure a new IP address each time you want a different LAN computer to use the application. 11.6.4 Trigger Port Forwarding Example The following is an example of trigger port forwarding. Figure 54 Trigger Port Forwarding Process: Example Jane requests a file from the Real Audio server (port 7070). -
Page 104: Ddns
H A P T E R DDNS 12.1 Overview Dynamic Domain Name Service (DDNS) services let you use a fixed domain name with a dynamic IP address. Users can always use the same domain name instead of a different dynamic IP address that changes each time to connect to the Zyxel Device or a server in your network. - Page 105 Chapter 12 DDNS Table 39 Dynamic DNS (continued) LABEL DESCRIPTION Host Name The host name is the domain name that the DDNS service will map to your dynamic global IP address. Type the host name fully qualified, for example, “yourhost.mydomain.net”. You can specify up to two host names in the field separated by a comma (",").
-
Page 106: Routing
H A P T E R Routing 13.1 Overview This chapter shows you how to configure static routes for your Zyxel Device. The Zyxel Device usually uses the default gateway to route outbound traffic from computers on the LAN to the Internet. To have the Zyxel Device send data to devices not reachable through the default gateway, use static routes. -
Page 107: Add/Edit Static Route
Chapter 13 Routing Figure 57 Network > Routing > Static Route The following table describes the labels in this screen. Table 40 Network > Routing > Static Route LABEL DESCRIPTION Add Static Route Click this to create a new rule. This is the number of an individual static route. -
Page 108: Dynamic Routing
Chapter 13 Routing The following table describes the labels in this screen. Table 41 Network > Routing > Static Route: Add/Edit LABEL DESCRIPTION Static Route Select to enable or disable this rule. Destination IP This parameter specifies the IP network address of the final destination. Routing is always Address based on network number. -
Page 109: Interface Group
H A P T E R Interface Group 14.1 Overview By default, the four LAN interfaces on the Zyxel Device are in the same group and can communicate with each other. Creating a new interface will create a new LAN bridge interface (subnet) (for example, 192.168.2.0/24) that acts as a dependent LAN network, and is a different subnet from default LAN subnet (192.168.1.0/24). -
Page 110: Add Interface Group
Chapter 14 Interface Group 14.2.1 Add Interface Group Click the Add button in the Interface Group screen to open the following screen. Use this screen to create a new interface group. Note: An interface can belong to only one group at a time. Figure 61 Network >... -
Page 111: Firewall
H A P T E R Firewall 15.1 Overview Use these screens to enable and configure the firewall that protects your Zyxel Device and your LAN from unwanted or malicious traffic. Enable the firewall to protect your LAN computers from attacks by hackers on the Internet and control access between the LAN and WAN. -
Page 112: General Settings
Chapter 15 Firewall About the Zyxel Device Firewall The Zyxel Device’s firewall feature physically separates the LAN and the WAN and acts as a secure gateway for all data passing between the networks. It is a stateful inspection firewall and is designed to protect against Denial of Service attacks when activated (click the General tab under Firewall and then click the Enable Firewall check box). -
Page 113: Firewall Services
Chapter 15 Firewall Figure 63 Configuration > Security > Firewall > Generall The following table describes the labels in this screen. Table 45 Configuration > Security > Firewall > General LABEL DESCRIPTION Enable Firewall Select this check box to activate the firewall. The Zyxel Device performs access control and protects against Denial of Service (DoS) attacks when the firewall is activated. - Page 114 Chapter 15 Firewall Figure 64 Configuration > Security > Firewall > Servicesl The following table describes the labels in this screen. Table 46 Configuration > Security > Firewall > Services LABEL DESCRIPTION ICMP Internet Control Message Protocol is a message control and error-reporting protocol between a host server and a gateway to the Internet.
- Page 115 Chapter 15 Firewall Table 46 Configuration > Security > Firewall > Services (continued) LABEL DESCRIPTION Dest IP Address Enter the IP address of the computer to which traffic for the application or service is entering. The Zyxel Device applies the firewall rule to traffic initiating from this computer. Source IP Address Enter the IP address of the computer that initializes traffic for the application or service.
-
Page 116: Content Filtering
H A P T E R Content Filtering 16.1 Overview This chapter shows you how to configure content filtering. Content filtering is the ability to block certain web features and specific URLs. Keyword Blocking URL Checking The Zyxel Device checks the URL’s domain name (or IP address) and file path separately when performing keyword blocking. - Page 117 Chapter 16 Content Filtering Figure 65 Configuration > Security > Content Filter The following table describes the labels in this screen. Table 47 Configuration > Security > Content Filter LABEL DESCRIPTION Trusted IP Setup To enable this feature, type an IP address of any one of the computers in your network that you want to have as a trusted computer.
- Page 118 Chapter 16 Content Filtering Table 47 Configuration > Security > Content Filter (continued) LABEL DESCRIPTION Keyword List This list displays the keywords already added. Click Add after you have typed a keyword. Repeat this procedure to add other keywords. Up to 64 keywords are allowed. When you try to access a web page containing a keyword, you will get a message telling you that the content filter is blocking this request.
-
Page 119: Ipv6 Firewall
H A P T E R IPv6 Firewall 17.1 Overview This chapter shows you how to enable and create IPv6 firewall rules to block unwanted IPv6 traffic. 17.2 IPv6 Firewall Click Configuration > Security > IPv6 Firewall. The Service screen appears as shown. Figure 66 Configuration >... - Page 120 Chapter 17 IPv6 Firewall Table 48 Configuration > Security > IPv6 Firewall (continued) LABEL DESCRIPTION Black List/ White List Black List / White List Select Allow those match the following rules to allow communication only if traffic matches the firewall rules. Select Deny those match the following rules to deny communication only if traffic matches the firewall rules.
-
Page 121: Vpn
H A P T E R 18.1 Overview A virtual private network (VPN) provides secure communications between sites without the expense of leased site-to-site lines. A secure VPN is a combination of tunneling, encryption, authentication, access control and auditing. It is used to transport traffic over the Internet or any insecure network that uses TCP/IP for communication. -
Page 122: L2Tp Server
Chapter 18 VPN 18.3 L2TP Server Click Configuration > Application > VPN > L2TP VPN to open the following screen. Use this screen to configure the Zyxel Device L2TP VPN settings. Figure 68 Configuration > Application > VPN > L2TP VPN The following table describes the labels in this screen. -
Page 123: L2Tp Client
Chapter 18 VPN Table 49 Configuration > Application > VPN > L2TP VPN (continued) LABEL DESCRIPTION Authentication Select PAP, CHAP, MS-CHAP, and/or MS-CHAP v2 as your authentication method. PAP (Password Authentication Protocol) - The L2TP server will crosscheck the username and password sent by the client with the database for authentication purposes. -
Page 124: Add L2Tp Client
Chapter 18 VPN Figure 69 Configuration > Application> VPN > L2TP Client The following table describes the labels in this screen. Table 50 Configuration > Application > VPN > L2TP Client LABEL DESCRIPTION L2TP Client Configuration L2TP Client Select Enable to configure the L2TP settings for this client. Tunnel List This field is a sequential value, and it is not associated with a specific L2TP VPN session. - Page 125 Chapter 18 VPN Figure 70 L2TP Client: Add The following table describes the labels in this screen. Table 51 L2TP Client: Add LABEL DESCRIPTION Name Specify a name for the L2TP VPN client. Enable Select this to enable the L2TP VPN client connection. Server IP/FQDN Enter the public IP address or FQDN of the L2TP Server.
-
Page 126: Gre
Chapter 18 VPN Table 51 L2TP Client: Add (continued) LABEL DESCRIPTION Remote Subnet Specify the remote subnet for this L2TP tunnel to reach L2TP server. The Remote Subnet format must be IP address/netmask (e.g. 10.0.0.2/24). The Remote Subnet is used for the L2TP VPN server’s Intranet. At the L2TP client’s side, the packets whose destination is in the dedicated subnet will be transferred via the L2TP VPN tunnel. - Page 127 Chapter 18 VPN Figure 71 GRE Tunnel Example Click Configuration > Application> VPN > GRE to open the following screen. Figure 72 Configuration > Application> VPN > GRE The following table describes the labels in this screen. Table 52 Configuration > Application > VPN > GRE LABEL DESCRIPTION Configuration...
-
Page 128: Add Gre
Chapter 18 VPN Table 52 Configuration > Application > VPN > GRE (continued) LABEL DESCRIPTION Tunnel IP This displays the IP address to use as the source address for the packets this WAN IP tunnels to the remote gateway. The remote gateway sends traffic to this IP address. Remote IP This displays the IP address of the remote client to which this WAN IP tunnels traffic. -
Page 129: Vpn Passthrough
Chapter 18 VPN The following table describes the labels in this screen. Table 53 GRE: Add LABEL DESCRIPTION Name Enter a name for this GRE tunnel, this name must be 1~9 characters long. Enable Select this to enable the GRE tunnel. Remote IP Specify the IP address of the remote gateway to which this interface tunnels traffic. - Page 130 Chapter 18 VPN The following table describes the labels in this screen. Table 54 Configuration > Application > VPN > VPN Passthrough LABEL DESCRIPTION VPN Passthrough Enable IPSec Select this check box to turn on the IPsec ALG (Application Layer Gateway) on the Zyxel Device to detect IPsec traffic and help build IPsec sessions through the Zyxel Device’s if NAT is enabled.
-
Page 131: Sms
H A P T E R 19.1 Overview SMS (Short Message Service) allows you to send and view the text messages that the Zyxel Device received from mobile devices or the service provider. When the SMS box is full the Zyxel Device will begin to delete older entries as it adds new ones. 19.1.1 What You Can Do in this Chapter Use the SMS screen to send new messages and view messages received on the Zyxel Device (Section... - Page 132 Chapter 19 SMS Figure 75 Configuration > Application > SMS The following table describes the labels in this screen. Table 55 Configuration > Application > SMS LABEL DESCRIPTION SMS Summary Click New SMS to display the New SMS section. Click SMS Inbox to display only the SMS Inbox List. Unread SMS This shows the number of unread text messages in the SMS in-box.
- Page 133 Chapter 19 SMS Table 55 Configuration > Application > SMS (continued) LABEL DESCRIPTION Text Message Enter the message content. You can type up to 160 characters in one message. If the message exceeds 160 characters, more than one SMS will be sent. The maximum number of SMS that can be sent is 20 (1400 characters total).
-
Page 134: Voice Call
H A P T E R Voice Call 20.1 Overview 4G only supports all-IP-based packet-switched telephony services. When Voice service is enabled, the Zyxel Device supports Circuit Switched FallBack (CSFB) to deliver/receive circuit-switched voice calls and text messages via a 3G mobile network and then goes back to the 4G LTE network to transmit data packets. -
Page 135: Call Configuration
Chapter 20 Voice Call The following table describes the labels in this screen. Table 56 Configuration > Application > Voice Call > General LABEL DESCRIPTION Configuration Voice Service Select Enable to activate voice calls on the Zyxel Device. Status Voice Service This shows the current state of the phone call. - Page 136 Chapter 20 Voice Call Table 57 Configuration > Application > Voice Call > Call Conf. (continued) LABEL DESCRIPTION Call Forwarding Select Enable to forward incoming calls according to the call forwarding rules. Clear the check box if you do not want the Zyxel Device to forward any incoming calls. Call Forwarding Rule This is the index number of the call forwarding rule.
-
Page 137: Mgmt Interface
H A P T E R MGMT Interface 21.1 Overview This chapter explains how to configure the Zyxel Device remote management. Remote Management allows you to manage your Zyxel Device from a remote location. 21.2 What You Can Do • Use the Local MGMT screen to configure settings for HTTP or HTTPS access to the Zyxel Device and how to login and access user screens look (Section 21.4 on page 137). - Page 138 Chapter 21 MGMT Interface Note: You must enable the remote management service in the Configuration > Management > MGMT Interface > Local MGMT screen for the settings in the WWW screen to take effect. Figure 78 Configuration > Management > MGMT Interface > Local MGMT The following table describes the labels in this screen.
-
Page 139: Remote Mgmt
Chapter 21 MGMT Interface Table 58 Configuration > Management > MGMT Interface > Local MGMT (continued) LABEL DESCRIPTION Enable Select this to allow a device to access the Zyxel Device CLI using this service. Port You may change the server port number for the Telnet service if needed. However you must use the same port number in order to use that service for remote management. - Page 140 Chapter 21 MGMT Interface Table 59 Configuration > Management > MGMT Interface > Remote MGMT (continued) LABEL DESCRIPTION Port This is the port number that the computer must use to access the Zyxel Device. If the HTTP Port number was changed to 8080 in the Configuration > Management > MGMT Interface >...
-
Page 141: Bandwidth Management
Chapter 22 Bandwidth Management H A P T E R Bandwidth Management 22.1 Overview This chapter contains information about configuring bandwidth management and editing rules. ZyXEL’s Bandwidth Management allows you to specify bandwidth management rules based on an application. In the figure below, uplink traffic goes from the LAN device (A) to the WAN device (B). Bandwidth management is applied before sending the packets out to the WAN. -
Page 142: What You Need To Know
Chapter 22 Bandwidth Management 22.3 What You Need To Know The sum of the bandwidth allotments that apply to the WAN interface (LAN to WAN, WLAN to WAN) must be less than or equal to the upstream bandwidth that you configure in the Bandwidth Management >... -
Page 143: Add Bandwidth Management Rule
Chapter 22 Bandwidth Management Table 60 Configuration > Management > Bandwidth MGMT > General (continued) LABEL DESCRIPTION WAN Interface Select the Zyxel Device's interface through which traffic in this shaper applies. WAN Interface Resource Bandwidth of Specify the total amount of bandwidth that you want to dedicate to uplink traffic. The Upstream recommendation is to set this to match the actual upstream data rate. - Page 144 Chapter 22 Bandwidth Management Figure 82 Bandwidth Management Rule Configuration The following table describes the labels in this screen. Table 61 Bandwidth Management Rule Configuration LABEL DESCRIPTION QoS Rule Configuration Interface Select the Zyxel Device's interface through which traffic in this shaper applies. Group Select to use the IP address or MAC address of the destination computer for whom this rule applies.
-
Page 145: Universal Plug-And-Play (Upnp)
H A P T E R Universal Plug-and-Play (UPnP) 23.1 Overview This chapter introduces the UPnP feature in the Web Configurator. Universal Plug and Play (UPnP) is a distributed, open networking standard that uses TCP/IP for simple peer-to-peer network connectivity between devices. A UPnP device can dynamically join a network, obtain an IP address, convey its capabilities and learn about other devices on the network. -
Page 146: Upnp Settings
Chapter 23 Universal Plug-and-Play (UPnP) When a UPnP device joins a network, it announces its presence with a multicast message. For security reasons, the Zyxel Device allows multicast messages on the LAN only. All UPnP-enabled devices may communicate freely with each other without additional configuration. Disable UPnP if this is not your intention. - Page 147 Chapter 23 Universal Plug-and-Play (UPnP) Click Change Advanced Sharing Settings. Select Turn on network discovery and click Save Changes. Network discovery allows your computer to find other computers and devices on the network and other computers on the network to find your computer.
-
Page 148: Auto-Discover Your Upnp-Enabled Network Device
Chapter 23 Universal Plug-and-Play (UPnP) 23.4.1 Auto-discover Your UPnP-enabled Network Device Before you follow these steps, make sure you already have UPnP activated on the Zyxel Device and in your computer. Make sure your computer is connected to the LAN port of the Zyxel Device. Open Windows Explorer and click Network. - Page 149 Chapter 23 Universal Plug-and-Play (UPnP) Figure 85 Internet Connection Properties You may edit or delete the port mappings or click Add to manually add port mappings. Figure 86 Internet Connection Properties: Advanced Settings LTE3316 Series User’s Guide...
-
Page 150: Turn On Upnp In Windows 10 Example
Chapter 23 Universal Plug-and-Play (UPnP) Figure 87 Internet Connection Properties: Advanced Settings: Add Note: When the UPnP-enabled device is disconnected from your computer, all port mappings will be deleted automatically. Click OK. Check the network icon on the system tray to see your Internet connection status. Figure 88 System Tray Icon To see more details about your current Internet connection status, right click the network icon in the system tray and click Open Network and Sharing Center. - Page 151 Chapter 23 Universal Plug-and-Play (UPnP) Click the start icon, Settings and then Network & Internet. Click Network and Sharing Center. Click Change advanced sharing settings. LTE3316 Series User’s Guide...
-
Page 152: Auto-Discover Your Upnp-Enabled Network Device
Chapter 23 Universal Plug-and-Play (UPnP) Under Domain, select Turn on network discovery and click Save Changes. Network discovery allows your computer to find other computers and devices on the network and other computers on the network to find your computer. This makes it easier to share files and printers. 23.5.1 Auto-discover Your UPnP-enabled Network Device Before you follow these steps, make sure you already have UPnP activated on the Zyxel Device and in your computer. - Page 153 Chapter 23 Universal Plug-and-Play (UPnP) Make sure your computer is connected to the LAN port of the Zyxel Device. Open File Explorer and click Network. Right-click the Zyxel Device icon and select Properties. Figure 90 Network Connections In the Internet Connection Properties window, click Settings to see port mappings. Figure 91 Internet Connection Properties You may edit or delete the port mappings or click Add to manually add port mappings.
- Page 154 Chapter 23 Universal Plug-and-Play (UPnP) Figure 92 Internet Connection Properties: Advanced Settings Figure 93 Internet Connection Properties: Advanced Settings: Add Note: When the UPnP-enabled device is disconnected from your computer, all port mappings will be deleted automatically. Click OK. Check the network icon on the system tray to see your Internet connection status. Figure 94 System Tray Icon To see more details about your current Internet connection status, right click the network icon in the system tray and click Open Network &...
-
Page 155: Web Configurator Easy Access In Windows 7
Chapter 23 Universal Plug-and-Play (UPnP) Figure 95 Internet Connection Status 23.6 Web Configurator Easy Access in Windows 7 With UPnP, you can access the Web-based Configurator on the Zyxel Device without needing to find out the IP address of the Zyxel Device first. This comes helpful if you do not know the IP address of the Zyxel Device. - Page 156 Chapter 23 Universal Plug-and-Play (UPnP) Figure 96 Network Connections An icon with the description for each UPnP-enabled device displays under Network Infrastructure. Right-click the icon for your Zyxel Device and select View device webpage. The Web Configurator login screen displays. Figure 97 Network Connections: My Network Places Right-click the icon for your Zyxel Device and select Properties.
-
Page 157: Web Configurator Easy Access In Windows 10
Chapter 23 Universal Plug-and-Play (UPnP) Figure 98 Network Connections: My Network Places: Properties: Example 23.7 Web Configurator Easy Access in Windows 10 Follow the steps below to access the Web Configurator. Open File Explorer. Click Network. LTE3316 Series User’s Guide... - Page 158 Chapter 23 Universal Plug-and-Play (UPnP) Figure 99 Network Connections An icon with the description for each UPnP-enabled device displays under Network Infrastructure. Right-click the icon for your Zyxel Device and select View device webpage. The Web Configurator login screen displays. Figure 100 Network Connections: Network Infrastructure Right-click the icon for your Zyxel Device and select Properties.
- Page 159 Chapter 23 Universal Plug-and-Play (UPnP) Figure 101 Network Connections: Network Infrastructure: Properties: Example LTE3316 Series User’s Guide...
-
Page 160: Chapter 24 Tr-069
H A P T E R TR-069 24.1 Overview This chapter explains how to configure the Zyxel Device’s TR-069 auto-configuration settings. 24.2 TR-069 Settings TR-069 defines how Customer Premise Equipment (CPE), for example your Zyxel Device, can be managed over the WAN by an Auto Configuration Server (ACS). TR-069 is based on sending Remote Procedure Calls (RPCs) between an ACS and a client device. - Page 161 Chapter 24 TR-069 The following table describes the fields in this screen. Table 63 Configuration > Management > TR-069 LABEL DESCRIPTION TR069 Select Enable to allow the Zyxel Device to be managed remotely by an ACS via TR-069. Otherwise, select Disable. Inform Select Enable for the Zyxel Device to send periodic inform via TR-069 on the WAN.
-
Page 162: Maintenance
H A P T E R Maintenance 25.1 Overview Use the system screens to configure general Zyxel Device settings. 25.1.1 What You Can Do in this Chapter • Use the General screen to view basic information about the Zyxel Device and restart the Zyxel Device (Section 25.2 on page 162). -
Page 163: User Account
Chapter 25 Maintenance The following table describes the labels in this screen. Table 64 System > System Information LABEL DESCRIPTION System Name System Name is a unique name to identify the Zyxel Device in an Ethernet network. Domain Name Enter the domain name you want to give to the Zyxel Device. Administrator Type how many minutes a management session can be left idle before the session times out. -
Page 164: Modify A User Account
Chapter 25 Maintenance 25.3.1 Modify a User Account Use this screen to edit a users account. Click the Modify icon next to the user account you want to configure. The screen shown next appears. Figure 105 Maintenance > Account > Modify The following table describes the labels in this screen. - Page 165 Chapter 25 Maintenance Figure 106 Maintenance > Time The following table describes the labels in this screen. Table 67 Maintenance > Time LABEL DESCRIPTION Current Time and Date Current Time This field displays the time of your Zyxel Device. Each time you reload this page, the Zyxel Device synchronizes the time with the time server. Current Date This field displays the date of your Zyxel Device.
-
Page 166: Firmware Upgrade
Chapter 25 Maintenance Table 67 Maintenance > Time (continued) LABEL DESCRIPTION Daylight Savings Daylight saving is a period from late spring to early fall when many countries set their clocks ahead of normal local time by one hour to give more daytime light in the evening. Select this option if you use Daylight Saving Time. -
Page 167: Module Upgrade
Chapter 25 Maintenance The following table describes the labels in this screen. Table 68 Maintenance > Firmware Upgrade LABEL DESCRIPTION File Path Type in the location of the file you want to upload in this field or click Browse... to find it. Choose File Click Browse... -
Page 168: Configuration Backup/Restore
Chapter 25 Maintenance Figure 109 Maintenance > Module Upgrade The following table describes the labels in this screen. Table 69 Maintenance > Module Upgrade LABEL DESCRIPTION File Path Type in the location of the file you want to upload in this field or click Browse... to find it. Choose File Click Browse... -
Page 169: System Reboot
Chapter 25 Maintenance The following table describes the labels in this screen. Table 70 Maintenance > Backup/Restore LABEL DESCRIPTION Backup Configuration Backup Click Backup to save the Zyxel Device’s current configuration to your computer. Restore Configuration File Path Type in the location of the file you want to upload in this field or click Browse... to find it. Choose File Click Browse... -
Page 170: Troubleshooting
H A P T E R Troubleshooting 26.1 Overview This chapter offers some suggestions to solve problems you might encounter. The potential problems are divided into the following categories. • Power, and Hardware Installation • Zyxel Device Access and Login •... - Page 171 Chapter 26 Troubleshooting I cannot see or access the Login screen in the Web Configurator. Make sure you are using the correct IP address. • The default IP address is 192.168.1.1. • If you changed the IP address, use the new IP address. •...
-
Page 172: Internet Access
Chapter 26 Troubleshooting 26.4 Internet Access I cannot access the Internet through a 3G/4G wireless WAN connection. Make sure you insert a 4G SIM card into the card slot before turning on the Zyxel Device. Make sure your mobile access information (such as APN) is entered correctly in the WAN screen. These fields are case-sensitive, so make sure [Caps Lock] is not on. -
Page 173: Wireless Connections
Chapter 26 Troubleshooting 26.5 Wireless Connections I cannot access the Zyxel Device or ping any computer from the WLAN. Make sure the wireless LAN is enabled on the Zyxel Device. Make sure the wireless adapter (installed on your computer) is working properly. Make sure the wireless adapter (installed on your computer) is IEEE 802.11 compatible and supports the same wireless standard as the Zyxel Device’s active radio. -
Page 174: Appendix A Customer Support
• Brief description of the problem and the steps you took to solve it. Corporate Headquarters (Worldwide) Taiwan • Zyxel Communications Corporation • https://www.zyxel.com Asia China • Zyxel Communications (Shanghai) Corp. Zyxel Communications (Beijing) Corp. Zyxel Communications (Tianjin) Corp. • https://www.zyxel.com/cn/zh/ India • Zyxel Technology India Pvt Ltd • https://www.zyxel.com/in/en/ Kazakhstan •... - Page 175 • Zyxel Singapore Pte Ltd. • http://www.zyxel.com.sg Taiwan • Zyxel Communications Corporation • https://www.zyxel.com/tw/zh/ Thailand • Zyxel Thailand Co., Ltd • https://www.zyxel.com/th/th/ Vietnam • Zyxel Communications Corporation-Vietnam Office • https://www.zyxel.com/vn/vi Europe Belarus • Zyxel BY • https://www.zyxel.by Belgium • Zyxel Communications B.V. • https://www.zyxel.com/be/nl/...
- Page 176 Appendix A Customer Support • https://www.zyxel.com/be/fr/ Bulgaria • Zyxel България • https://www.zyxel.com/bg/bg/ Czech Republic • Zyxel Communications Czech s.r.o • https://www.zyxel.com/cz/cs/ Denmark • Zyxel Communications A/S • https://www.zyxel.com/dk/da/ Estonia • Zyxel Estonia • https://www.zyxel.com/ee/et/ Finland • Zyxel Communications • https://www.zyxel.com/fi/fi/ France •...
- Page 177 • Zyxel Communications Poland • https://www.zyxel.com/pl/pl/ Romania • Zyxel Romania • https://www.zyxel.com/ro/ro Russia • Zyxel Russia • https://www.zyxel.com/ru/ru/ Slovakia • Zyxel Communications Czech s.r.o. organizacna zlozka • https://www.zyxel.com/sk/sk/ Spain • Zyxel Communications ES Ltd • https://www.zyxel.com/es/es/ Sweden • Zyxel Communications • https://www.zyxel.com/se/sv/ Switzerland •...
- Page 178 Appendix A Customer Support Turkey • Zyxel Turkey A.S. • https://www.zyxel.com/tr/tr/ • Zyxel Communications UK Ltd. • https://www.zyxel.com/uk/en/ Ukraine • Zyxel Ukraine • http://www.ua.zyxel.com South America Argentina • Zyxel Communications Corporation • https://www.zyxel.com/co/es/ Brazil • Zyxel Communications Brasil Ltda. • https://www.zyxel.com/br/pt/ Colombia •...
-
Page 179: North America
Appendix A Customer Support Middle East • Zyxel Communications Corporation • https://www.zyxel.com/me/en/ North America • Zyxel Communications, Inc. - North America Headquarters • https://www.zyxel.com/us/en/ Oceania Australia • Zyxel Communications Corporation • https://www.zyxel.com/au/en/ Africa South Africa • Nology (Pty) Ltd. • https://www.zyxel.com/za/en/... - Page 180 P P E N D I X Common Services The following table lists some commonly-used services and their associated protocols and port numbers. For a comprehensive list of port numbers, ICMP type/code numbers and services, visit the IANA (Internet Assigned Number Authority) web site. •...
- Page 181 Appendix B Common Services Table 71 Commonly Used Services (continued) NAME PROTOCOL PORT(S) DESCRIPTION ICMP User-Defined Internet Control Message Protocol is often used for diagnostic or routing purposes. 4000 This is a popular Internet chat program. IGMP (MULTICAST) User-Defined Internet Group Management Protocol is used when sending packets to a specific group of hosts.
- Page 182 Appendix B Common Services Table 71 Commonly Used Services (continued) NAME PROTOCOL PORT(S) DESCRIPTION TCP/UDP Secure Shell Remote Login Program. STRM WORKS 1558 Stream Works Protocol. SYSLOG Syslog allows you to send system logs to a UNIX server. TACACS Login Host Protocol used for (Terminal Access Controller Access Control System).
-
Page 183: Legal Information
The contents of this publication may not be reproduced in any part or as a whole, transcribed, stored in a retrieval system, translated into any language, or transmitted in any form or by any means, electronic, mechanical, magnetic, optical, chemical, photocopying, manual, or otherwise, without the prior written permission of Zyxel Communications Corporation. Published by Zyxel Communications Corporation. All rights reserved. -
Page 184: Appendix C Legal Information
Appendix C Legal Information Déclaration de conformité • Le présent produit est conforme aux spécifications techniques applicables d'Innovation, Sciences et Développement économique Canada. • L'indice d'équivalence de la sonnerie (IES) sert à indiquer le nombre maximal de dispositifs qui peuvent être raccordés à une interface téléphonique. - Page 185 Appendix C Legal Information • The maximum RF power operating for each band as follows: • WCDMA band I • the band 1922.6MHz to 1977.4MHz is 193.64mW • WCDMA band III • the band 1712.6MHz to 1782.4MHz is 228.56mW • WCDMA band VIII •...
- Page 186 Appendix C Legal Information Íslenska Hér með lýsir, Zyxel því yfir að þessi búnaður er í samræmi við grunnkröfur og önnur viðeigandi ákvæði tilskipunar 2014/53/ (Icelandic) Italiano (Italian) Con la presente Zyxel dichiara che questo attrezzatura è conforme ai requisiti essenziali ed alle altre disposizioni pertinenti stabilite dalla direttiva 2014/53/UE.
-
Page 187: Safety Warnings
Appendix C Legal Information List of national codes COUNTRY ISO 3166 2 LETTER CODE COUNTRY ISO 3166 2 LETTER CODE Austria Liechtenstein Belgium Lithuania Bulgaria Luxembourg Croatia Malta Cyprus Netherlands Czech Republic Norway Denmark Poland Estonia Portugal Finland Romania France Serbia Germany Slovakia... - Page 188 Appendix C Legal Information Die folgende Symbol bedeutet, dass Ihr Produkt und/oder seine Batterie gemäß den örtlichen Bestimmungen getrennt vom Hausmüll entsorgt werden muss. Wenden Sie sich an eine Recyclingstation, wenn dieses Produkt das Ende seiner Lebensdauer erreicht hat. Zum Zeitpunkt der Entsorgung wird die getrennte Sammlung von Produkt und/oder seiner Batterie dazu beitragen, natürliche Ressourcen zu sparen und die Umwelt und die menschliche Gesundheit zu schützen.
-
Page 189: Zyxel Limited Warranty
Appendix C Legal Information • 請勿試圖修理電源變壓器或電源變壓器的纜線,若有毀損,請直接聯絡您購買的店家,購買一個新的電源變壓器。 • 請勿將此設備安裝於室外,此設備僅適合放置於室內。 • 請勿隨一般垃圾丟棄。 • 請參閱產品背貼上的設備額定功率。 • 請參考產品型錄或是彩盒上的作業溫度。 • 產品沒有斷電裝置或者採用電源線的插頭視為斷電裝置的一部分,以下警語將適用 : - 對永久連接之設備, 在設備外部須安裝可觸及之斷電裝置; - 對插接式之設備, 插座必須接近安裝之地點而且是易於觸及的。 About the Symbols Various symbols are used in this product to ensure correct usage, to prevent danger to the user and others, and to prevent property damage. The meaning of these symbols are described below. -
Page 190: Index
Index Index DHCP see also Dynamic Host Configuration Protocol DHCP server 89, 90 access disclaimer ActiveX DNS Server Address Assignment DNS server Auto Configuration Server, see ACS Domain Name System Domain Name System. See DNS. Dynamic DNS Dynamic Host Configuration Protocol DynDNS 104, 119 Bandwidth management... - Page 191 Index hardware connections MAC address MAC address filter MAC address filtering MAC filter maintenance IGMP see also Internet Group Multicast Protocol management version managing the device IGMP version good habits installation Media access control interface group Multicast IGMP Internet Explorer Internet Group Multicast Protocol Internet Protocol version 6 IP Address...
- Page 192 Index TR-069 ACS setup trigger port Quality of Service (QoS) Trigger port forwarding example process Turning on UPnP Windows 7 example RADIUS server remote management TR-069 Remote Procedure Calls, see RPCs Restore configuration Universal Plug and Play Roaming Application RPPCs Security issues RTS/CTS Threshold 67, 81...
- Page 193 Index encryption example MAC address filter overview security SSID Wireless security overview type wireless security Wireless tutorial WPA compatible LTE3316 Series User’s Guide...
Need help?
Do you have a question about the LTE3316-M604 and is the answer not in the manual?
Questions and answers