Table of Contents
Advertisement
Aruba Instant On AP12 Access Point
Installation Guide
The Aruba Instant On AP12 dual-radio access point supports IEEE802.11ac Wave 2, delivering high performance
with 3x3 MU-MIMO (Multi-user Multiple-in, Multiple-output) technology, while also supporting 802.11a/b/g/n
wireless services. The AP12 access point is designed for ceiling and wall mount.
Package Contents
1 x AP12 access point
1 x Ceiling mount bracket (suspended ceiling rail)
1 x Wall/ceiling mount bracket (solid surface)
1 x Ethernet cable
If you have ordered AP12 bundle, the package would also include a power adapter and cord to power the AP
through an electrical power outlet.
Inform your supplier if there are any incorrect, missing, or damaged parts. If possible, retain the carton,
including the original packing materials. Use these materials to repack and return the unit to the supplier if
needed.
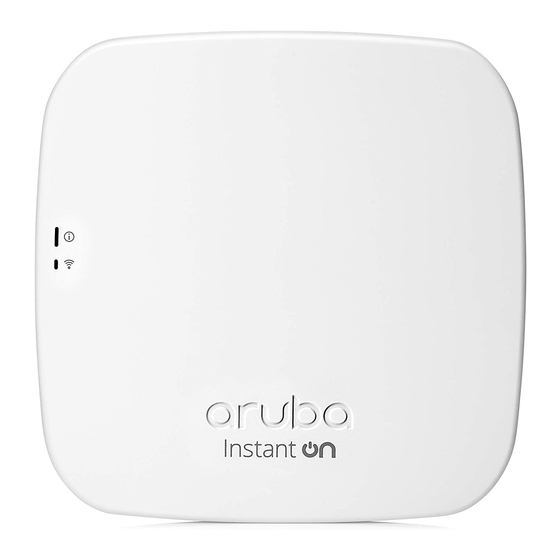
Hardware Overview
Figure 1
System
Radio
Rev01 | June 2019
AP12 (front view)
1
Advertisement
Table of Contents

Related Manuals for Aruba Instant On AP12


Summary of Contents for Aruba Instant On AP12
-
Page 1: Package Contents
Aruba Instant On AP12 Access Point Installation Guide The Aruba Instant On AP12 dual-radio access point supports IEEE802.11ac Wave 2, delivering high performance with 3x3 MU-MIMO (Multi-user Multiple-in, Multiple-output) technology, while also supporting 802.11a/b/g/n wireless services. The AP12 access point is designed for ceiling and wall mount. -
Page 2: Ethernet Port
Back Panel Figure 2 Kensington Lock Slot DC Power Socket Reset Button Ethernet Port Kensington Lock Slot The AP12 access point is equipped with a Kensington lock slot for additional security. Aruba Instant On AP12 Access Point | Installation Guide... -
Page 3: Reset Button
10 seconds during normal operation of the access point. Power If PoE is not available, a proprietary Aruba 12V/30W power adapter can be used to power the AP12 access point. This power adapter is available in the box if you buy the AP12 and power adapter bundle. -
Page 4: Before You Begin
Do not place an access point between two air conditioning/heating ducts. Make sure that access points are placed below ducts to avoid RF disturbances. RF interference sources include: Microwave ovens and other 2.4 or 5 GHz objects (such as cordless phones) Aruba Instant On AP12 Access Point | Installation Guide... -
Page 5: Access Point Installation
2. Place the mount bracket against the back of the access point with the mount bracket at an angle of approximately 30 degrees to the tabs (see Figure 3. Twist the mount bracket clockwise until it snaps into place in the tabs (see Figure | Installation Guide Aruba Instant On AP12 Access Point... - Page 6 5. Pushing toward the ceiling tile, rotate the access point clockwise until the device clicks into place on the ceiling tile rail. Mounting the AP to a 15/16” Ceiling Rail Figure 6 Aruba Instant On AP12 Access Point | Installation Guide...
-
Page 7: Using The Wall/Ceiling Mount Bracket
Align the screw holes in the mount bracket with the previously installed anchors or demarcated screw points. c. Insert two screws to secure the mount bracket. Screws are not included in the package. | Installation Guide Aruba Instant On AP12 Access Point... - Page 8 This mounting option works only with a wall. 1. Place the mount bracket against the back of the AP with the bracket at an angle of approximately 30 degrees to the tab (see Figure 11). Aruba Instant On AP12 Access Point | Installation Guide...
-
Page 9: Verifying Post-Installation Connectivity
Mobile Application Installation Search for “Aruba Instant On” app within the Apple App Store or Google Play to download and install the Aruba Instant On mobile app to your phone. Launch the app and follow the instructions to complete the setup. For... -
Page 10: Log In To Instant On Portal
If a power adapter other than the Aruba-approved adapter is used in the US or Canada, it should be NRTL listed, with an output rated 12Vdc, minimum 2A, marked “LPS” and “Class 2”, and suitable for plugging into a standard power receptacle in the US and Canada. -
Page 11: Regulatory Model Number
Connect the equipment to an outlet on a circuit different from that to which the receiver is connected. Consult the dealer or an experienced radio or TV technician for help. | Installation Guide Aruba Instant On AP12 Access Point... -
Page 12: Industry Canada
Greece (GR), Hungary (HU), Iceland (IS), Ireland (IE), Italy (IT), Latvia (LV), Liechtenstein (LI), Lithuania (LT), Luxembourg (LU), Malta (MT), Netherlands (NL), Norway (NO), Poland (PL), Portugal (PT), Romania (RO), Slovakia Aruba Instant On AP12 Access Point | Installation Guide... - Page 13 If such use is necessary, this equipment and the other equipment should be observed to verify that they are operating normally. Compliance is based on the use of Aruba approved accessories. Use of accessories, transducers and cables other than those specified or provided by the manufacturer of this equipment could result in increased electromagnetic emissions or decreased electromagnetic immunity of this equipment and result in improper operation.
-
Page 14: Нормативные Требования Евразийского Экономического Союза
«HEWLETT-PACKARD Bel» ЖШС, Беларусь Республикасы, 220030, Минск қ., Интернациональная көшесі, 36/ 1, Телефон/факс: +375 17 392 28 20 ЖШС «Хьюлетт-Паккард (К)», Қазақстан Республикасы, 050040, Алматы к., Бостандык ауданы, Әл-Фараби даңғ ылы, 77/7, Телефон/факс: +7 (727) 355 35 50 Aruba Instant On AP12 Access Point | Installation Guide... - Page 15 OF UKRAINE dated May 24, 2017, No. 355. The full text of the UA declaration of conformity is available at the following internet address: https://certificates.ext.hpe.com/public/certificates.html Hong Kong HK0011701596 Philippines Type-Approval No. ESD-1714160C Singapore DB100427 | Installation Guide Aruba Instant On AP12 Access Point...
-
Page 16: Contact Aruba
Enterprise Company. To obtain such source code, send a check or money order in the amount of US $10.00 to: Hewlett Packard Enterprise Company Attn: General Counsel 6280 America Center Drive San Jose, CA 95002 Warranty This hardware product is protected by an Aruba warranty. For details, visit https://support.ArubaInstantOn.com. Aruba Instant On AP12 Access Point | Installation Guide...
Need help?
Do you have a question about the Instant On AP12 and is the answer not in the manual?
Questions and answers