Table of Contents
Advertisement
Ensure that the operator reads and understands the decals
and consults the manuals before maintenance or operation.
Ensure that the Operation and Maintenance manual is not
removed permanently from the machine.
Ensure that maintenance personnel are adequately trained,
competent and have read the Maintenance Manuals.
IRN37–160K–CC
IRN50–200H–CC
IRN75–160K–2S
IRN100–200H–2S
OPERATION AND MAINTENANCE MANUAL
N37K/N45K–CC
N55K/N75K–CC
N50H/N60H–CC
N75H/N100H–CC
TM
N90K/N110K–CC
N132K/N160K–CC SERIAL No : 2820000
N75K/N110K–2S
N132K/N160K–2S
N125H–N200H–CC SERIAL No : NF50103
N100H–N200H–2S SERIAL No : NFF0104
C.C.N. : 54731245
DATE
REV.
SERIAL No :
2730007
SERIAL No : 2770002
SERIAL No : NV1101
SERIAL No : NV5001
SERIAL No : 2800000
SERIAL No : 2830000
SERIAL No : 2820000
: JANUARY 2003
: C
–>
–>
–>
–>
–>
–>
–>
–>
–>
–>
Advertisement
Table of Contents

Subscribe to Our Youtube Channel
Related Manuals for Ingersoll-Rand NIRVANA IRN45K–CC


Summary of Contents for Ingersoll-Rand NIRVANA IRN45K–CC
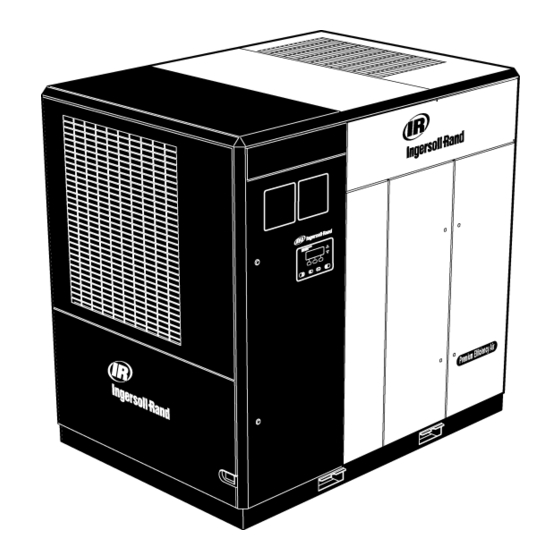
- Page 1 IRN37–160K–CC IRN50–200H–CC IRN75–160K–2S IRN100–200H–2S OPERATION AND MAINTENANCE MANUAL N37K/N45K–CC SERIAL No : 2730007 –> N55K/N75K–CC SERIAL No : 2770002 –> N50H/N60H–CC SERIAL No : NV1101 –> N75H/N100H–CC SERIAL No : NV5001 –> N90K/N110K–CC SERIAL No : 2800000 –> N132K/N160K–CC SERIAL No : 2820000 –>...
- Page 2 Machine models represented in this manual may be used in various locations world–wide. Machines sold and shipped into European Union Territories require that the machine display the EC Mark and conform to various directives. In such cases, the design specification of this machine has been certified as complying with EC directives. Any modification to any part is absolutely prohibited and would result in the CE Certification and marking being rendered invalid.
- Page 3 AIR COMPRESSOR GROUP BONDED WARRANTY & REGISTERED START UP Warranty The Company warrants that the equipment manufactured by it and delivered hereunder will be free of defects in material and workmanship for a period of twenty four months from the date of placing the Equipment in operation or thirty months from the date of shipment from the factory, whichever shall first occur (see extended airend warranty).
-
Page 4: Table Of Contents
CONTENTS CONTENTS PAGE CONTENTS PAGE CONTENTS GENERAL INFORMATION Technical information FOREWORD Installation drawing Process and ABBREVIATIONS & SYMBOLS instrumentation diagram Electrical schematic PURCHASE ORDER General description DETAILS OPERATING INSTRUCTIONS SAFETY Basic operation Safety instructions Intellisys controls Safety precautions Display screen Text decals Current status screen Graphic form and meaning... -
Page 5: Foreword
2.0 FOREWORD Machine models represented in this manual may be Details of approved equipment are available from used in various locations worldwide. Machines sold and Ingersoll–Rand Service departments. shipped into European community countries requires that the machine display the EC Mark and conform to This machine has been designed and supplied for use various directives. -
Page 6: Foreword 2
2.0 FOREWORD WARNING The use of the machine in any of the situation types listed in table 1:– a) Is not approved by Ingersoll–Rand, b) May impair the safety of users and other persons, and c) May prejudice any claims made against Ingersoll–Rand. TABLE 1 WARNING –... -
Page 7: Abbreviations & Symbols
3.0 ABBREVIATIONS & SYMBOLS #### Contact Ingersoll–Rand for serial number –>#### Up to Serial No. ####–> From Serial No. Not illustrated † Option Not required As required Sitemaster/Sitepack High ambient machine Watercooled machine Aircooled machine Energy recovery system T.E.F.C.Totally enclosed fan cooled motor (IP54) O.D.P. -
Page 8: Purchase Order Details
4.0 PURCHASE ORDER DETAILS ROTARY SCREW AIR COMPRESSOR This unit was purchased from Ingersoll–Rand Company reserves the right to make changes or add improvements without notice and without incurring any obligation to make such changes or add such improvements to products sold previously. No. -
Page 9: Safety
5.0 SAFETY 5.1 SAFETY INSTRUCTIONS Safety instructions in the operators manual are Ensure that the Operation and Maintenance manual, bold–faced for emphasis. The signal words DANGER, and the manual holder, are not permanently removed WARNING and CAUTION are used to indicate hazard from the machine. - Page 10 5.0 SAFETY All pressure containing parts, especially flexible hoses Never give fluids or induce vomiting if the patient is and their couplings, must be regularly inspected, be unconscious or having convulsions. free from defects and be replaced according to the The above information contains data supplied in Manual instructions.
- Page 11 5.0 SAFETY Condensate disposal Coolant disposal Condensate cannot be discharged into fresh/surface Steps to be taken in the case of spillage: Soak up with water drains. In some regions compressor condensate a suitable absorbent material, then sweep into a plastic containing ULTRA COOLANT can be fed directly into a bag for disposal.
-
Page 12: Text Decals
5.0 SAFETY Depending on point of manufacture and point of use, the compressor and this manual will show symbols from the following sections. Compressors for use within the European Community must be equipped with symbols from section 5.4. Read and understand thoroughly. Heed warnings and follow instructions. If you do not understand, inform your supervisor. - Page 13 5.0 SAFETY WARNING CAUTION Incorrect lifting of machine can cause injury or property damage. Lift only from base channels Food contaminant. Can cause severe injury or death. Use only Ingersoll–Rand SSR H–1F food grade coolan WARNING 39568464 Rev.03 High pressure air. Can cause severe injury or death.
- Page 14 5.0 SAFETY CAUTION Rotation Improper coolant filter replacement will cause compressor damage. Replace filter element after first 150 hours of operation and every 2000 hours thereafter or when coolant is changed. NOTICE WARNING – HIGH VOLTAGE Rotation Do not attempt any work. Read manual.
- Page 15 5.0 SAFETY Condensate drain. 39541081 Rev. 04 Electrical power inlet. Use 75°C copper wire only. 39541354 Rev. 03 WARNING IMPORTANT Hazardous voltage. Can cause severe injury or Before starting this air compressor unit the shipping death. brace(s) must be removed. Save the brace(s) for future use.
-
Page 16: Graphic Form And Meaning Of Iso Symbols
5.0 SAFETY 5.4 GRAPHIC FORM AND MEANING OF ISO SYMBOLS Prohibition / Mandatory Information / Instructions Warning WARNING: Electrical shock risk. WARNING – Pressurized WARNING – Hot surface. component or system. WARNING – Air/gas flow or Air WARNING – Pressure control. WARNING –... - Page 17 5.0 SAFETY WARNING – Do not undertake any WARNING – Consult the WARNING – For operating maintenance on this machine Operation and Maintenance temperature below 0_C, consult until the electrical supply is manual before commencing any the Operation and Maintenance disconnected and the air pressure maintenance.
- Page 18 5.0 SAFETY Use fork lift truck from this side only. Emergency stop. Tie down point Lifting point. On (power). Off (power). SEQUENCER STATUS LOAD SEQUENCER (AUTOMATIC COMPRESSOR OFF LOAD (UNLOADED) CONTROL) RESET COMPRESSOR STATUS MODULATE MALFUNCTION POWER FOULED FILTER POWER INLET ELECTRIC MOTOR HOURS IRN37–160K–CC &...
- Page 19 5.0 SAFETY COOLANT SEPARATOR PRESSURE AIR DISCHARGE PRESSURIZED TANK ON / OFF CYCLE COOLANT FILTER AIR FILTER ON / OFF PUSH BUTTON COOLANT PRESSURE AIR PRESSURE STAR DELTA IEC 617–7 AUTOMATIC RESTART HEAT EXCHANGER MAINTENANCE MAINTENANCE PROHIBITED COOLANT DRAIN CONDENSATE DRAIN PRESSURE CONTROL MANUAL (SELECT) TEMPERATURE...
- Page 20 5.0 SAFETY BELT TENSION FILTER MOTOR LUBRICATION FRAGILE KEEP DRY THIS WAY UP USE NO HOOKS NO SIDE CLAMPS ROTATION POWER INLET (AC) WATER IN WATER OUT TRAINED SERVICE WAIT TIME CHECK ZERO VOLTS PERSONNEL IRN37–160K–CC & IRN50–200H–CC & IRN75–160K–2S & IRN100–200H–2S...
-
Page 21: Receipt And Handling
6.0 RECEIPT / HANDLING 6.1 RECEIPT When you receive the compressor please inspect it closely. Any indication of careless handling by the carrier should be noted on the delivery receipt especially if the compressor will not be immediately unpacked. Obtaining the deIivery persons signed agreement to any noted damages will facilitate any future insurance claims. -
Page 22: Installation
7.0 INSTALLATION For technical information see section 8.0. 7.1 LOCATION IN PLANT Ensure that the correct tie down points are used. It is recommended that provision be made for lifting heavy components during major overhaul. Use only For major overhaul (i.e. motor removal) position the lifting points provided. -
Page 23: Discharge And Condensate Piping
7.0 INSTALLATION 7.2 DISCHARGE AND CONDENSATE PIPING It is essential when installing a new compressor [1], to When two rotary units are operated in parallel, provide review the total air system. This is to ensure a safe and an isolation vaIve and drain trap for each compressor effective total system. -
Page 24: Electrical
7.0 INSTALLATION 7.3 ELECTRICAL CAUTION This procedure should only be carried out by a qualified electrician, electrical contractor or your local Ingersoll–Rand Distributor or Air Center. The compressor and drive should be properly grounded The feeder cable must be suitably glanded into the / earthed in accordance with Local and National Code power drive module (P.D.M.) electrical box to ensure requirements. - Page 25 7.0 INSTALLATION CAUTION VERY IMPORTANT Supply voltage must be kept to a maximum imbalance of 2% on 50Hz and 3% on 60Hz applications. Voltage imbalances greater than these levels can cause permanent damage to the drive. Compressor must not be subjected to any voltage spikes or surges in excess of 575V. Exposure to spikes/surges in excess of 575V can permanently damage the drive.
-
Page 26: Watercooled Units
7.0 INSTALLATION 7.4 WATERCOOLED UNITS Cooling Water Piping Water temperature and pressure gauges should be installed in the water piping for use in any fault finding Water piping to and from the compressor package must of the water system. Water pressure should ideally be be 1”diameter or larger for N37/75K (N50/100H) and between 3 and 5 bar (43.5 and 72.5 psi) but must not ”... - Page 27 7.0 INSTALLATION Water quality recommendations To ensure good operation life and performance of the compressor cooling system, recommended Water quality is often overlooked when the cooling acceptable ranges for different water constituents are system of a water–cooled air compressor is examined. included below: Water quality determines how effective the heat transfer rate, as well as the flow rate will remain during...
-
Page 28: Sea Watercooled Units
7.0 INSTALLATION 7.5 SEA WATERCOOLED UNITS (SELECTED UNITS ONLY) Water cleanliness is extremely important. Strainers are Sea Water Pressure Orifice diameter in mm available from Ingersoll–Rand. Cleaning of coolers as Bar (psi) (inch) to give a maximum a result of fouling is a customer responsibility. sea water flow of 90l/min (23.76 US gall/min) Isolation valves with side drains should be installed on... -
Page 29: Outdoor Sheltered Installation
7.0 INSTALLATION 7.6 OUTDOOR SHELTERED INSTALLATION Nirvana compressors are not suitable for outdoor installation. Installing a Nirvana compressor outside voids the warranty of the compressor. IRN37–160K–CC & IRN50–200H–CC & IRN75–160K–2S & IRN100–200H–2S... -
Page 30: General Information
8.0 GENERAL INFORMATION 8.1 TECHNICAL INFORMATION – SINGLE STAGE N37K N45K N50H N60H General Sound pressure level dB(A) * Maximum ambient temperature _C (_F) 46 (115) 46 (115) 46 (115) 46 (115) Minimum ambient temperature _C (_F) 1.7 (35) 1.7 (35) 1.7 (35) 1.7 (35) Weight Kg (lbs) - Page 31 8.0 GENERAL INFORMATION N37K N45K N50H N60H Water Cooling System Cooling (clean) water flow m /min (US 0.06 (16) 0.06 (16) 0.06 (16) 0.06 (16) gallon/min) Maximum ∆P in air ducts Pa (inch WG) 62 (0.25) 62 (0.25) 62 (0.25) 62 (0.25) Compressed air outlet ∆T _C (_F) 8 (46.4)
- Page 32 8.0 GENERAL INFORMATION N55K N75K N75H N100H General Sound pressure level dB(A) * Maximum ambient temperature _C (_F) 46 (115) 46 (115) 46 (115) 46 (115) Minimum ambient temperature _C (_F) 1.7 (35) 1.7 (35) 1.7 (35) 1.7 (35) Weight Kg (lbs) 1531 (3374) 1531 (3374) 1531 (3374)
- Page 33 8.0 GENERAL INFORMATION N55K N75K N75H N100H Water Cooling System Cooling (clean) water flow m /min (US 0.13 (35) 0.13 (35) 0.13 (35) 0.13 (35) gallon/min) Maximum ∆P in air ducts Pa (inch WG) 62 (0.25) 62 (0.25) 62 (0.25) 62 (0.25) Compressed air outlet ∆T _C (_F) 8 (46.4)
- Page 34 8.0 GENERAL INFORMATION N90K N110K N125H N150H General Sound pressure level dB(A) * Maximum ambient temperature _C (_F) 46 (115) 46 (115) 46 (115) 46 (115) Minimum ambient temperature _C (_F) 1.7 (35) 1.7 (35) 1.7 (35) 1.7 (35) Weight Kg (lbs) 3175 (6985) 3175 (6985) 3175 (6985)
- Page 35 8.0 GENERAL INFORMATION N90K N110K N125H N150H Water Cooling System Cooling (clean) water flow m /min (US 2.38 / 5.55 3.17 / 7.13 2.38 / 5.55 3.17 / 7.13 gallon/min) @ 10_C (50_F) / 32_C (90_F) (9 / 21) (12 / 27) (9 / 21) (12 / 27) Maximum ∆P in air ducts Pa (inch WG)
- Page 36 8.0 GENERAL INFORMATION N132K N160K N200H General Sound pressure level dB(A) * Maximum ambient temperature _C (_F) 46 (115) 46 (115) 46 (115) Minimum ambient temperature _C (_F) 1.7 (35) 1.7 (35) 1.7 (35) Weight Kg (lbs) 3175 (6985) 3175 (6985) 3175 (6985) Maximum pressure barg (psig) 10 (145)
- Page 37 8.0 GENERAL INFORMATION N132K N160K N200H Water Cooling System Cooling (clean) water flow m /min (US 4.75 / 10.56 4.75 / 10.56 4.75 / 10.56 gallon/min) @ 10_C (50_F) / 32_C (90_F) (18 / 40) (18 / 40) (18 / 40) Maximum ∆P in air ducts Pa (inch WG) 62 (0.25) 62 (0.25)
- Page 38 8.0 GENERAL INFORMATION 8.1 TECHNICAL INFORMATION – TWO STAGE N75K N90K N110K N100H N125H N150H General Sound pressure level dB(A) * Maximum ambient temperature _C (_F) 46 (115) 46 (115) 46 (115) 46 (115) 46 (115) 46 (115) Minimum ambient temperature _C (_F) 1.7 (35) 1.7 (35) 1.7 (35)
- Page 39 8.0 GENERAL INFORMATION N75K N90K N110K N100H N125H N150H Water Cooling System Cooling (clean) water flow m /min (US 2.38/5.55 2.38/5.55 3.17/7.13 2.38/5.55 2.38/5.55 3.17/7.13 gallon/min) @ 10_C (50_F) / 32_C (90_F) (9 / 21) (9 / 21) (12 / 27) (9 / 21) (9 / 21) (12 / 27)
- Page 40 8.0 GENERAL INFORMATION N132K N160K N200H General Sound pressure level dB(A) * Maximum ambient temperature _C (_F) 46 (115) 46 (115) 46 (115) Minimum ambient temperature _C (_F) 1.7 (35) 1.7 (35) 1.7 (35) Weight Kg (lbs) 3650 (8030) 3650 (8030) 3650 (8030) Maximum pressure barg (psig) 10 (145)
- Page 41 8.0 GENERAL INFORMATION N132K N160K N200H Water Cooling System Cooling (clean) water flow m /min (US 4.75 / 10.56 4.75 / 10.56 4.75 / 10.56 gallon/min) @ 10_C (50_F) / 32_C (90_F) (18 / 40) (18 / 40) (18 / 40) Maximum ∆P in air ducts Pa (inch WG) 62 (0.25) 62 (0.25)
-
Page 42: Installation Drawing
8.0 GENERAL INFORMATION 8.2 INSTALLATION DRAWING – N37/45K–CC & N50/60H–CC ” NPT Air discharge (Female) 60Hz units G 4 x Ø 13.0mm (1”) ” BSP Air discharge (Female) 50Hz units Compressor should be bolted to the floor with four M10 (0.38”) bolts using holes shown. Seal base to B Ø63mm (2.48”) Electrical inlet floor with cork or rubber. - Page 43 8.0 GENERAL INFORMATION 8.2 INSTALLATION DRAWING – N55/75K–CC & N75/100H–CC ” NPT Air discharge (Female) 60Hz units F Cabinet cooling airflow ” BSP Air discharge (Female) 50Hz units G 4 x Ø 13.0mm (1”) B Ø63mm (2.48”) Electrical inlet Compressor should be bolted to the floor with four M10 (0.38”) bolts using holes shown.
- Page 44 8.0 GENERAL INFORMATION 8.2 INSTALLATION DRAWING – N90/160K, N125/200H SINGLE STAGE & N75/160K, N100/200H TWO STAGE IRN37–160K–CC & IRN50–200H–CC & IRN75–160K–2S & IRN100–200H–2S...
- Page 45 8.0 GENERAL INFORMATION A 2” NPT Air discharge (Female) 60Hz units E Exhaust airflow (N100H–N150H) F Cabinet cooling airflow 2” BSP Air discharge (Female) 50Hz units (N75K–N110K) G 4 x Ø 13.0mm (1”) Compressor should be bolted to the floor with four 2 1/2”...
-
Page 46: Process And Instrumentation Diagram
8.0 GENERAL INFORMATION 8.3 PROCESS AND INSTRUMENTATION DIAGRAM N37/75K–CC & N50/100–CC IRN37–160K–CC & IRN50–200H–CC & IRN75–160K–2S & IRN100–200H–2S... - Page 47 8.0 GENERAL INFORMATION 1 Air discharge 23 Drive motor 2 Compressor 24 Blower motor 3 Air filter 25 Cooling air blower 4 Vacuum switch 1VAC 26 Cooling water inlet (W.C. only) 5 Cooler, air 27 Cooling water outlet (W.C. only) 6 Cooler, coolant 28 Pressure transducer 3APT 7 Condensate discharge...
- Page 48 8.0 GENERAL INFORMATION 8.3 PROCESS AND INSTRUMENTATION DIAGRAM N90/160K & N125/200H SINGLE STAGE AND N75/160K & N100/200H TWO STAGE IRN37–160K–CC & IRN50–200H–CC & IRN75–160K–2S & IRN100–200H–2S...
- Page 49 8.0 GENERAL INFORMATION 1 Air discharge 26 Cooling water inlet (W.C. only) 2 Compressor, single stage 27 Cooling water outlet (W.C. only) 3 Air filter 28 Pressure transducer 3APT 4 Vacuum switch 1VAC 29 Pressure transducer 6APT 5 Cooler, air 30 Dryer (customer supply equipment) 6 Cooler, coolant 31 Line filters (customer equipment)
-
Page 50: Electrical Schematic
8.0 GENERAL INFORMATION 8.4 ELECTRICAL SCHEMATIC N37K/N75K, N50H/N100K IRN37–160K–CC & IRN50–200H–CC & IRN75–160K–2S & IRN100–200H–2S... - Page 51 8.0 GENERAL INFORMATION 1ATS Switch, high airend discharge temperature Motor, main drive 1DPS Switch, fouled oil filter Breaker, blower motor 1VAC Switch, fouled air filter Optional 2ATT Sensor, airend discharge temperature Zero voltage 2CTT Sensor, injected coolant temperature Protected earth 3APT Transducer, sump pressure, wet side PORO Power outage restart option (optional) Valve, blowdown solenoid...
- Page 52 8.0 GENERAL INFORMATION 8.4 ELECTRICAL SCHEMATIC N75K/N160K, N100H/N200H & N75H/N160H 22093058 Revision H 12/02 IRN37–160K–CC & IRN50–200H–CC & IRN75–160K–2S & IRN100–200H–2S...
- Page 53 8.0 GENERAL INFORMATION 1ATS Switch, high airend discharge temperature MCB4 Breaker, miniature circuit, PSU 1ATT Sensor, inlet temperature MCB9 Breaker, miniature circuit, heater 1DPS Switch, fouled oil filter Mains filter (if fitted) 1VAC Switch, fouled air filter Motor, main drive 2APT Interstage pressure MMS1 Breaker, blower motor 2ATT...
-
Page 54: General Description
8.0 GENERAL INFORMATION 8.5 GENERAL DESCRIPTION The compressor is an electric motor driven, contact The coolant system consists of a sump, cooler, cooled screw compressor, complete with all thermostatic valve, anti–condensation valve and a necessary components piped, wired and baseplate filter. -
Page 55: Operating Instructions
9.0 OPERATING INSTRUCTIONS 9.1 BASIC OPERATION WARNING Check that the coolant level is at least visible in the center of the sight glass, add coolant if necessary. Refer Ensure that all protective covers/guards are in to maintenance procedures for setting correct level. place before attempting to start the machine. - Page 56 9.0 OPERATING INSTRUCTIONS Start sequence Blowdown mode The compressor will initially start by the operator If the blowdown mode is set to on, the compressor will pressing the local start button or receiving a remote open the blowdown valve anytime that it stops. This will start command.
-
Page 57: Intellisys Controls
9.0 OPERATING INSTRUCTIONS 9.2 INTELLISYS CONTROLS 1. Emergency stop 5. F2 Pressing this switch stops the compressor immediately. Not used. The blowdown valve will open to vent pressure in the separator tank to atmosphere. Note: the system 6. Arrows downstream of the separator tank may still contain pressure. -
Page 58: Display Screen
9.0 OPERATING INSTRUCTIONS 9.3 DISPLAY SCREEN The display screen is divided into three functional The right side shows various items or lists such as the areas, as seen in the typical CURRENT STATUS machine’s CURRENT STATUS readings, the MAIN screen shown here. MENU, the OPERATOR SETPOINTS list, etc. -
Page 59: Current Status Screen
9.0 OPERATING INSTRUCTIONS 9.4 CURRENT STATUS SCREEN The CURRENT STATUS screen is considered to be the 12 Motor Speed “normal” display that the controller shows. 13 Motor Current The following items and their present values can be 14 Motor Voltage displayed on the right side of the screen by pressing the up and down arrow buttons. -
Page 60: Main Menu
9.0 OPERATING INSTRUCTIONS 9.5 MAIN MENU The MAIN MENU screen can be accessed from the The language and units of measure are pre–set prior to CURRENT STATUS screen by pressing the MAIN the compressor leaving the factory. MENU button, identified by the words “MAIN MENU” in the bottom line of the screen directly above the center –MAIN MENU–... -
Page 61: Operator Setpoints
9.0 OPERATING INSTRUCTIONS 9.6 OPERATOR SETPOINTS –OPERATOR SETPOINTS– Setpoints are user–adjustable variables in the controller logic that can be set using the OPERATOR SETPOINTS screen shown opposite. TARGET PRESSURE The name and value of each of the setpoints listed can 105 psi be seen on the screen by moving the list up and down using the arrow buttons. - Page 62 9.0 OPERATING INSTRUCTIONS Automatic stop pressure This is the number of seconds that the condensate solenoid will be open (energized) when blowing out the The compressor will stop once the system pressure condensation. rises to this pressure and the compressor is operating at the minimum speed.
-
Page 63: Options
9.0 OPERATING INSTRUCTIONS 9.7 OPTIONS Options are turned on or off and their associated values –OPTIONS– are set using the OPTION screen shown opposite. Some options are purchased, they require additional REMOTE START/STOP ON machine hardware and must first be enabled by service personnel. -
Page 64: Sensor Calibration
9.0 OPERATING INSTRUCTIONS This option will cause the unit to start on the scheduled Scheduled stop start day , at the time stored in this setpoint. To disable This option will cause the unit to stop on the scheduled this option, set the value of scheduled start equal to the stop day, at the time stored in this setpoint. -
Page 65: Alarm History
9.0 OPERATING INSTRUCTIONS 9.9 ALARM HISTORY Alarm History displays each of the Alarm messages for Each of the last 15 Alarm messages can be seen by the last 15 Alarms experienced by the machine. It also moving the Alarm History list up and down using the gives access to displaying the machine operating arrow buttons. -
Page 66: Energy Status Messages
9.0 OPERATING INSTRUCTIONS 9.11 ENERGY STATUS MESSAGES AVERAGE CAPACITY – Displays the compressor’s –ENERGY STATUS– average capacity in cfm or m for the time period that AVERAGE PACKAGE kW was started by selecting the reset averaging setpoint. ENERGY COST – Displays the energy cost of the AVERAGE % CAPACITY–... -
Page 67: Warnings
9.0 OPERATING INSTRUCTIONS 9.12 WARNINGS When a WARNING occurs, a large question mark will CHANGE INLET FILTER – This will occur if the Inlet flash on the display screen. Vacuum is greater than 0.05 bar (0.7 psig). If multiple WARNINGS exist, the small up/down arrows CHANGE SEPR ELEMENT –... -
Page 68: Alarms
9.0 OPERATING INSTRUCTIONS 9.15 ALARMS –ALARM STATUS– When an Alarm occurs, a large exclamation mark in a triangle will flash on the display screen. The display message will indicate what caused the Alarm. PACKAGE DISCH The compressor will stop and cannot be re–started PRESSURE again until the alarm condition no longer exists and the 100 psi... -
Page 69: Maintenance
10.0 MAINTENANCE 10.1 MAINTENANCE PROMPTS The service warning will return each subsequent The service warning and flashing LED will appear at 2000 hours. intervals, dependant on the service level selected. Refer to operating instructions. The machine will be master reset after service work conducted prior to the 2000 hour interval to prevent The customer can only reset the warning for 24 hours false indication. -
Page 70: Maintenance Chart
10.0 MAINTENANCE 10.2 MAINTENANCE CHART The MAINTENANCE CHART indicates the various components and the intervals when maintenance has to take place. Where a service interval is stated in both hours and months, it is the sooner of the two intervals that must be adhered to. -
Page 71: Maintenance Procedures
10.0 MAINTENANCE Note: On some sea watercooled models the oil cooler and aftercooler are fitted with sacrificial zinc anodes (pencils) that are located in the end bonnets of the coolers. These sacrificial zinc anodes should be checked after the first 50 hours of operation to determine if corrosive conditions exist. -
Page 72: Routine Maintenance
10.0 MAINTENANCE Compressed air can be dangerous if incorrectly Prior to attempting any maintenance work on a handled. Before doing any work on the unit, ensure running machine, ensure that:– that all pressure is vented from the system and that the work carried out is limited to only those tasks the machine cannot be started accidentally. - Page 73 10.0 MAINTENANCE Coolant change procedure Place the old element in a sealed bag and dispose of in a safe way. Clean the mating face of the housing. WARNING Remove the new Ingersoll–Rand replacement The coolant filter and coolant may be hot! element from its protective package.
- Page 74 10.0 MAINTENANCE CAUTION Run the compressor for about 10 minutes by venting air from the system to let the unit warm up. With the Do not use any form of sealant on either the unit running, test at or near the maximum operating separator tank or the separator tank cover faces.
- Page 75 10.0 MAINTENANCE S Remove hose from elbow in aftercooler inlet. Plug S Cover inlet of blower wheel with plastic sheeting to elbow in inlet hole of aftercooler. prevent entrance of cleaning fluid. S Unscrew the fitting connecting the aftercooler to S Cover the inlet grill of the intake panel with plastic the discharge tube.
- Page 76 10.0 MAINTENANCE Watercooled Cooler Cleaning Check orifice and clean if required. Use suitable tool and remove orifice from its housing. Be careful A periodic inspection and maintenance program not to damage flared end of fitting or O–ring.Wash should be implemented for watercooled heat housing in safety solvent and blow dry.
- Page 77 10.0 MAINTENANCE S Disconnect any electrical cables to the valve (or Fluid and Vibration Monitoring trap). Ingersoll–Rand recommends incorporating predictive S Determine the type of condensate drain device maintenance, specifically the use of coolant and and continue in the appropriate section below:– vibration analysis, into all Preventative Maintenance programs.
-
Page 78: Fault Finding
11.0 FAULT FINDING 11.1 GENERAL FAULTS WARNING When attempting to identify and remedy any fault or failure, ensure it is only attempted by qualified personnel and that the safety and maintenance sections of this manual have been read and are fully understood and followed. Major overhauls should only be carried out by a qualified Ingersoll–Rand representative. - Page 79 11.0 FAULT FINDING SYMPTOM FAULT REMEDY Compressor will not Compressor not sized to meet Contact your local IR representative meet pressure required system requirements or by system requirements have been changed. Air loss due to pipe, hose, joint Overhaul or replace or seal failure Air loss due to blowdown valve Overhaul or replace...
- Page 80 11.0 FAULT FINDING SYMPTOM FAULT REMEDY Pressure produced by Intellisys set incorrectly Check and modify settings compressor is too high Pressure transducer may be Recalibrate or replace due to speed not faulty, incorrectly calibrated or reducing as demand not receiving pressure signal reduces reduces Drive settings fault...
- Page 81 11.0 FAULT FINDING SYMPTOM FAULT REMEDY Discharge air is Aftercooler not functioning Clean or replace contaminated with correctly condensate Moisture separator drain trap Overhaul or replace faulty Continuous low speed / low Review system requirements and contact your local ambient operation causing IR representative condensate build up Compressor package...
- Page 82 11.0 FAULT FINDING FAULT CAUSE REMEDY Remote start failure Remote start button is pressed Check operation of buttons or operating procedures after machine is running or remote start button remains closed. Remote stop failure Remote stop button remains Check operation of buttons or operating procedures open and either start button is pressed Sensor failure...
- Page 83 11.0 FAULT FINDING 11.3 DRIVE FAULTS (INDICATED ON THE INTELLISYS CONTROLLER) The drive controller is directly linked to the Intellisys controller. Faults in the drive controller will be displayed on the intellisys controller as ‘VSD fault 0, VSD fault 1’ etc. The following VSD faults may be investigated and remedied at source.
Need help?
Do you have a question about the NIRVANA IRN45K–CC and is the answer not in the manual?
Questions and answers