Table of Contents
Advertisement
Quick Links
Advertisement
Table of Contents

Related Manuals for MPS MP8869S


Summary of Contents for MPS MP8869S
- Page 1 User Guide MP8869S Evaluation Kit (EVKT-8869S)
-
Page 2: Table Of Contents
3.3 Software Set-Up ......................... 7 3.4 Troubleshooting Tips ....................... 10 Section 4. Ordering Information ......................11 MonolithicPower.com MP8869S Evaluation Kit User Guide rev 1.0 MPS Proprietary Information. Patent Protected. Unauthorized Photocopy and Duplication Prohibited. 7/17/2018 © 2018 MPS. All Rights Reserved. -
Page 3: Overview
12A continuous/15A peak output current over an input supply range from 2.85V to 18V with excellent load and line regulation. This kit allows for quick evaluation of the MP8869S. By using the I2C, users can set the current limit, slew rate, work mode, and output voltage. This device also features telemetry, which provides output voltage and output current monitoring via I2C. - Page 4 USER GUIDE – MP8869S EVALUATION KIT (EVKT-8869S) Features and Benefits The MP8869S is highly customizable. Users can program the MP8869S via the MPS I2C GUI. ⚠️ All changes made in I2C mode will NOT be retained once the EVB is powered down.
-
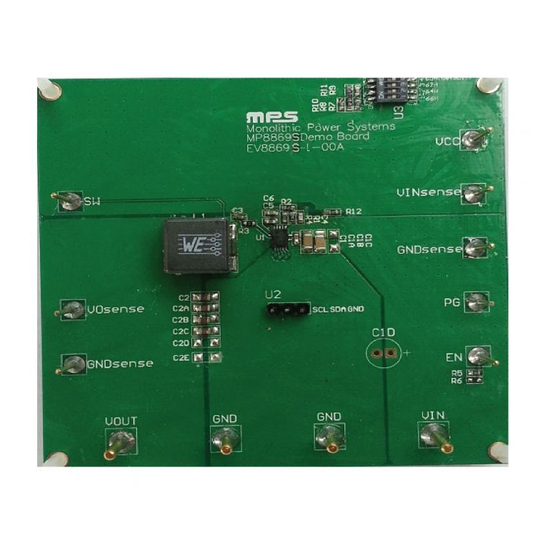
Page 5: Section 1. Hardware Specifications
It provides I2C and PMBus capabilities. Together with MPS Virtual Bench Pro and GUI tools, it provides a quick and easy way to evaluate the performance of MPS digital products. For more details, refer to the EVKT-USBI2C-02 datasheet. -
Page 6: Software Installation Procedure
2.1 Software Installation Procedure Programming occurs through the MPS I2C GUI. Follow the instructions below to install the software. Note: In the near future, this software can be downloaded from the MPS website. For now, it is provided on a USB thumb drive. -
Page 7: Section 3. Evaluation Kit Test Set-Up
3. Connect the positive and negative terminals of the power supply output to the VIN and GND pins, respectively. 4. Turn the power supply on. The MP8869S will enter the power-on sequence automatically. 3.3 Software Set-Up After connecting the hardware according to the above steps, follow the steps below to use the GUI software. - Page 8 EVB is Disconnected Disconnected Figure 8: Warning Indicates Unsuccessful Connection – Evaluation Board not Connected MonolithicPower.com MP8869S Evaluation Kit User Guide rev 1.0 MPS Proprietary Information. Patent Protected. Unauthorized Photocopy and Duplication Prohibited. 7/17/2018 © 2018 MPS. All Rights Reserved.
- Page 9 PC. Re-plug the USB into the computer and restart the GUI. 3. Click the PartSelect button to select the MP8869S (see Figure 7) (The default GUI window is for the MP8861). The Register Control menu will appear on the left side. I2C register values will be read and displayed on the right side after clicking the Read button (see Figure 9).
-
Page 10: Troubleshooting Tips
• Shutdown Event If the MP8869S detects that the input voltage is lower than the UVLO falling threshold (enter no supply state) or over-temperature protection is triggered (enter power-off state), the MP8869S switches to no supply state or power-off state, regardless of the current state. -
Page 11: Section 4. Ordering Information
USB thumb drive that stores the GUI installation file and supplemental Tdrive-8869S documents Order directly from MonolithicPower.com. MonolithicPower.com MP8869S Evaluation Kit User Guide rev 1.0 MPS Proprietary Information. Patent Protected. Unauthorized Photocopy and Duplication Prohibited. 7/17/2018 © 2018 MPS. All Rights Reserved.
Need help?
Do you have a question about the MP8869S and is the answer not in the manual?
Questions and answers