Technibel Liberty300 Solar Installation And Operating Instructions Manual
Domestic hot water solar and heat pump
Hide thumbs
Also See for Liberty300 Solar:
- Installation and operating instructions manual (32 pages) ,
- User manual (9 pages) ,
- User manual (4 pages)
Table of Contents
Advertisement
Quick Links
Advertisement
Table of Contents

Subscribe to Our Youtube Channel
Related Manuals for Technibel Liberty300 Solar


Summary of Contents for Technibel Liberty300 Solar
- Page 1 LIBERTY300 solar Domestic hot water solar and heat pump Installation and Operating Instructions Made in FRANCE 10.13.195 GB.00 The information within this document is not contractual, we reserve the right to modify without warning the technical characteristics and the equipment of all appliances.
- Page 2 10-13-19 GB 00 - NSTALLATION ANUAL...
- Page 3 Heating method ...........................p.35 •Tab 4-3 : Sensor reading ..........................p.40 •Tab 5-1 : Troubleshooting ..........................p.45 •Tab 5-2 : Functionning of LIBERTY300 Solar ....................p.46 •Tab 5-3 : Maintenance log .........................p.48 •Tab 5-4 : Part list ............................p.51 •Tab 7-1 : Technical Data ..........................p.63 FIGURES •Fig 1-1 :...
-
Page 4: Table Of Contents
SUMMARY 1 - RECOMMENDATIONS ................7 1.1 - Important information ..................7 1.2 - Requirements / safety precautions ..............7 1.3 - Storage and transport ..................8 1.3.1 - Notes ..............................8 1.3.2 - Vehicular transport ..........................8 1.3.3 - Forklift transport ............................ 8 1.3.4 - Manual transport.......................... - Page 5 4.7 - BOOST function (for better comfort) ..............33 4.8 - INSTALLER menu ....................34 4.8.1 - Parameter settings ..........................34 PAR. 01 4.8.1.1 - -Heating mode ..................... 35 PAR. 04 4.8.1.2 - -Anti-legionellosis cycle ................36 PA R.05 4.8.1.3 - -Ventilation mode ..................
- Page 6 10-13-19 GB 00 - NSTALLATION ANUAL...
-
Page 7: Recommendations
- in rooms with a risk of explosion due to gases, fumes or dust • The use of this device is NOT PERMITTED if its water reservoir is empty • ALL maintenance on LIBERTY300 Solar should be carried out while the device is off and by a qualified person. -
Page 8: Storage And Transport
1.3.3 - Forklift transport When transporting with a forklift, LIBERTY300 Solar must remain on the wooden palette. Maintain a low lifting speed, LIBERTY300 Solar could easily lose its balance, it may be convenient to fasten it to avoid tipping. 1.3.4 - Manual transport... - Page 9 The plastic cover must not be used for handling (it cannot handle a great amount of strain). If it is not possible to avoid inclining or laying the device down, wait at least 1 hour after having installed LIBERTY300 Solar in its final location to activate it. 10-13-19 GB 00 -...
- Page 10 10-13-19 GB 00 - NSTALLATION ANUAL...
-
Page 11: Description
• Solar components must be installed according to specifications and instructions of the manufacturer. • LIBERTY300 Solar is equipped with an air to water heat pump, used as back up. When solar energy is no more available, the heat pump starts and heats the water to the temperature setting with up to 3 times less energy than electric heater. -
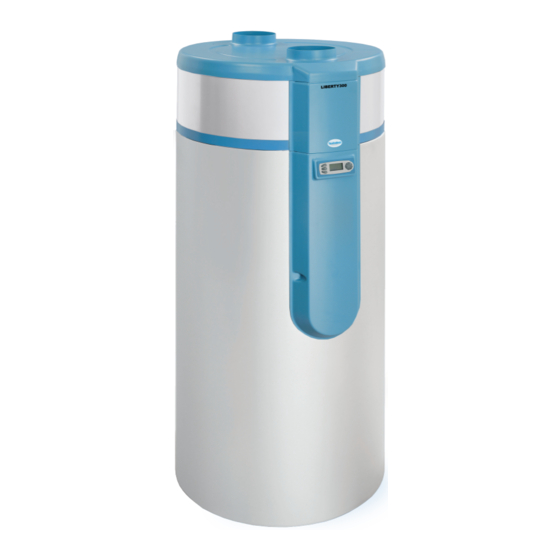
Page 12: The Main Components Of The Heat Pump
2.2 - The main components of the heat pump Dryer filter High-pressure Evaporator switch Check valve Expansion valve Condensate evacuation orifice Electronic control Defrost valve Compressor capacitors Compressor contact Compressor start-up Compressor start- relay up capacitor Anti-corrosion anode Service flange for electrical backup with aquastat and security thermostat Fig. -
Page 13: Dimensions
2.4 - Dimensions Fig. 2-3 10-13-19 GB 00 - NSTALLATION ANUAL... -
Page 14: Safety Devices
2.5 - Safety devices LIBERTY300 Solar is equipped with the following safety devices : • High pressure switch The high pressure switch protects the heat pump from the refrigerating circuit’s high pressure. In case of high pressure, the switch will stop the heat pump. A restart of the pump will occur automatically as soon as the refrigerating circuit’s pressure drops. -
Page 15: Technical Characteristics
2.6 - Technical characteristics LIBERTY300 Solar - ECS300SOLT5ZAA Construction Solar heat exchanger Body cover PVC + 5 mm PE film (uncoverable white) Isulation PU Foam 45 mm Nominal volume 300L Materials Enamelled steel Protection Magnesium anode Maximum pressure of service (water tank) - Page 16 10-13-19 GB 00 - NSTALLATION ANUAL...
-
Page 17: Installation
440kg) • Position LIBERTY300 Solar and adjust the stands in such a way that it is level. A slight inclination to the right of the device (1° max.) is acceptable, the evacuation of condensates being situated on the right of the device. -
Page 18: Connection Of Air Inlet And Outlet
2 (see section “PAR.06 – Ventilation speed”) 3.2.2.1 - On outdoor air The heat pump can function on a wide range of air temperatures (from -5°C to 35°C). LIBERTY300 Solar can remove heat from outdoor air. Partial ducts (only one duct) must be avoided when using outdoor air during winter, this could lead to an over-cooling of a room. -
Page 19: On Room Ambiant Air
Fig. 3-7 3.3 - Duct sizing The connection of LIBERTY300 Solar must be done using insulated air ducts of a nominal diameter of 160mm. The piping can be connected either on the intake side, the blouing side or both. The total length of the pipes must not exceed :... -
Page 20: Plumbing Connections
3.4 - Plumbing connections • It is mandatory to install a new pressure-relief valve (not included) set to 7 bars on the domestic cold water supply of the device. Membrane type valve are recommended. This pressure-relief valve must conform to the domestic standard. •... - Page 21 The connection of the recycling line is carried out in funtion of need (with a timing command). • Condensate run-off (see section “Condensate line connections”) DRAINING OF LIBERTY300 Solar The drain valve must be installed in the lower position of inlet water circuit Draining is operated as follow :...
-
Page 22: Hydraulic Connections
• keep the tube vertical and open toward the bottom. 3.5.2 - Solar collector connections LIBERTY300 Solar is delivered with temperature sensors at inlet and outlet of the heat exchanger (size M1/2”). The hydraulic circuit of the solar collector has to be connected to these inlet and outlet ports. -
Page 23: Electrical Connections
3.6 - Electrical connections It is not necessary to remove the upper cover to carry out LIBERTY300 Solar’s electrical connections. LIBERTY300 Solar is delivered with a 2.50m electrical cable found at the back of the device. The electrical supply must be single-phase 230V and grounded. -
Page 24: Peak Time / Off Peak Time Operation
The solar pump (not included) must be plugged to the electric board of LIBERTY300 Solar as follow: For pump consumming up to 200W, connection can be made directly at connector «Entrée 2» («Solar pump» on the figure below) with a 3G 0,75mm² cable. - Page 25 • Pass a 0.75 mm² 2 wire cable with metal tips through an available cable gland at the back of the device and bring the extremity of the cable to the electronic card. The other end of the cable is to be connected to the electrical service provider’s contact.
-
Page 26: Ventilation External Control
3.6.3 - Ventilation external control LIBERTY300 Solar can be used to permanently ventilate a room if the heating cycle is finished. This ventilation can be used to renew the air of a room. In this case, the connection of a moisture sensor allows to activate the operation of the ventilator in function to the ambiant humidity. -
Page 27: Activation Of Domestic Hot Water
3.7 - Activation of domestic hot water LIBERTY300 Solar must never be SEALING TESTS: operated WITHOUT WATER Pressure tests WITH AIR are NOT PERMITTED • The assembly of the air and water circuits as well as the electrical installations must be carried out in... - Page 28 10-13-19 GB 00 - NSTALLATION ANUAL...
-
Page 29: Setup And Use
“PAR.10 – Minimum temperature”°. In instances where there is a need for high amounts of domestic hot water, LIBERTY300 Solar possesses a “boost” function (activated by the user) which ensures the quick heating of water to the desired temperature (50°C for example) with the help of the heat pump and the electrical backup. -
Page 30: Controls
4.1 - Controls Menu button Start / Stop Clock settings Fig. 4-1 Screen Dial Signification of symbols : ...Electrical backup activated ..Solar loading ..Need for domestic hot water ..Compressor activated ..Econo-mode activated ..Ventilation activated (by time programming or external (speed 1 or 2) activation) Solar pump running ..Vacation mode activated... -
Page 31: Programming
4.3 - Programming • Direct access by pressing “Clock settings”. during 3 seconds MO NDAY Choice of the day D AY NEW PROG 0000-___ _ 00 00- 0630 00:30 meaning Set ending Set confort time level of the s t a nd by : d o n o t of the first first period kee p t h e t a n k... -
Page 32: Desired Water Temperature Settings
The “VACATIONS” function ends automatically at the same time as soon as the number of days have passed. During the entire duration of the vacation LIBERTY300 Solar will display “RETURN” (Return from vacation) along with a countdown for the number of days. -
Page 33: Eco Mode
4.6 - ECO Mode ECO Mode restricts the operation of heat pump to a limited volume in the tank, leaving more space to store solar energy. ECO mode activates a «waiting for the sun» period every day in order to maximise the solar gain. Restriction of heat pump to half of the tank applies only during this period. -
Page 34: Installer Menu
4.8 - INSTALLER menu According to the installation configurations, it is necessary to adjust certain parameters to optimise the functioning of your LIBERTY300 Solar . Access to installer menu: • Press the Menu button • Turn the dial until the screen displays “INSTALLER”... - Page 35 PAR.01 4.8.1.1 - -Heating mode The 01 parameters allows to chose which energy is used for heating domestic water. PAR.0 1 • Press the dial to access the “Heating mode” setting. • Default setting: (solar with back up by heat pump and electric relief). s et 01 •...
-
Page 36: Par. 04 -Anti-Legionellosis Cycle
1st press on Menu = return to the screen “SETTINGS” mandatory when 2nd press on Menu = return to the screen “INSTALLER” LIBERTY300 Solar is 3rd press on Menu = return to the main screen connected using air ducts 10-13-19 GB 00 -... -
Page 37: Par. 08 -Starting Time
PAR.07 4.8.1.5 - -Solar set point Parameter limits the rise of temperature brought by solar. PAR.07 • Press the dial to access the solar set point mode settings 65° C • Default setting : 65 ° C REG.0 7 • Turn the dial to change the mode. 60°... -
Page 38: Par. 09 -Electric Back Up Settings
PAR.09 4.8.1.7 - -Electric back up settings The start-up setting of the electrical backup can be shifted (either in + or in -) according to the comfort setting chose by the user (e.g. 55°C) If the temperature of the air is out of functioning range (<-5°C or >+35°C), the heat pump cannot function, it is the electrical backup that automatically takes control. -
Page 39: Par. 11 & P Ar. 12 -Waiting For Solar Period
& -Waiting for solar period- During this period, LIBERTY300 Solar restricts the operation of heat pump to the upper half of the cylinder. LIBERTY300 Solar leaves the bottom of cylinder being cooled down by morning consumptions. This will give the most favorable conditions to use any new sunlight. -
Page 40: Resetting Parameters
The “Sensor reading” display menu allows to know, in real time, the different information given by the sensors and input. DI SPLAY • Press the dial to read the sensor values of LIBERTY300 Solar . AIR INLET Temperature of ambient air (air taken in) -
Page 41: Maintenance And Repair
To maintain performance, it is recommended to have the device inspected by a qualified person every two years. During maintenance or the shutting down of LIBERTY300 Solar , follow the environmental protection rules with respect to recovery, recycling and disposal of consumable parts and components. -
Page 42: Air Intake Circuit
5.4 - Anti-corrosion anode The anti-corrosion anode is installed in the hot water tank and must be regularly electrically tested as well as a minimum of every years after the activation of LIBERTY300 Solar. Replace it if necessary. • Visual inspection... -
Page 43: Troubleshooting
5.5 - Troubleshooting All intervention on LIBERTY300 Solar must be carried out by a qualified person. Respect all safety instructions! • The solar pump does not start while sun has been shining for a moment Check that: • Temperature setting for hot water has been reached and therefore no solar load is requested. - Page 44 • Condensates do no run-off (presence of water under the device) Check that: • The condensate evacuation system is not dirty of blocked. Clean if necessary: Remove the cover (see section “Peak time / off-peak time functioning”). Check for blockage. •...
-
Page 45: Error Codes
5.6 - Error codes 5.6.1 - Problems and solutions Tab. 5-1 10-13-19 GB 00 - NSTALLATION ANUAL... -
Page 46: Functioning Of Lyberty300 During Error
5.6.2 - Functioning of Lyberty300 during error Tab. 5-2 10-13-19 GB 00 - NSTALLATION ANUAL... -
Page 47: N.t.c. Sensors Characteristics
5.7 - N.T.C. Sensors characteristics LIBERTY300 Solar’s 4 sensors have the same curve of ohmic values. Résistance (kOhms) Fig. 5-1 Température (° C) 10-13-19 GB 00 - NSTALLATION ANUAL... -
Page 48: Maintenance Log
1 certificate of aptitude. The degassing of the refrigerating fluid into the atmosphere is not permitted, the recovery of the refrigerant is obligatory before any intervention on the circuit. •Turn LIBERTY300 Solar off before opening it. •Wait for the complete stop of the ventilator before any intervention. Recovered refrigerant... -
Page 49: Parts List
5.9 - Parts list See next pages 10-13-19 GB 00 - NSTALLATION ANUAL... -
Page 50: Parts List
5.9 - Parts list Fig. 5-2 10-13-19 GB 00 - NSTALLATION ANUAL... - Page 51 Number Reference Designation B1239163 SHUT OFF VALVE B1244002 HP SWITCH B1472681 EVAPORATOR B1472683 FILTER DRYER B1243949 DEFROSTING SENSOR AND AIR TEMPERATURE SENSOR B1243923 WATER TANK SENSOR 1200 mm B1243929 CAPACITOR 2μF B1243931 RESISTANCE B1243930 CAPACITOR 3μF B1944023 STARTING CAPACITOR B1243950 ELECTRIC HEATER SENSOR 900 mm B1958888 JACKET...
- Page 52 10-13-19 GB 00 - NSTALLATION ANUAL...
-
Page 53: Warranty
6 - WARRANTY The warranty covers: • The tank is warranted against break through for a period of five (5) years starting from the date of activation of the warranty voucher is returned to the manufacturer, or, in the absence of this document, from the fabrication date of the device. -
Page 54: Warranty Limits
• All other causes where product defects are not concerned. LIBERTY300 Solar is not guaranteed against: • Colour variation of the device or damages caused by air pollution or exposure to chemical products or alteration due to bad weather. -
Page 55: Electrical Connections
6.1.2.4 - Electrical connections Cases (non-limited) for voiding of warranty: • Defective electrical connections that do not conform to the current national norms. • Failure to comply with connection schematics outlined in the installation manual. • Electrical supply that is significantly over or under the required voltage. •... - Page 56 10-13-19 GB 00 - NSTALLATION ANUAL...
-
Page 57: Appendix
7 - APPENDIX 7.1 - Main components of domestic hot water heat pump Fig. 7-1 * DHW = Domestic hot water * DCW = Domestic cold water 1. Compressor 9. Security limiter thermostat for 14. Sensor #2: Defrosting sensor 2. High-pressure switch (>25 bars) electrical backup (85°C) 15. -
Page 58: Electrical Schematic
7.2 - Electrical schematic Fig. 7-2 HP : High-pressure switch C1 : Start-up capacitor for compressor C2 : Ventilator 2μF capacitor C3 : Ventilator 3μF capacitor 1MΩ resistance for ventilator RC : Compressor contactor Ventilator Compressor EV : Solenoid valve RE : 1500W electrical resistance LTS :... -
Page 59: Cabling Schematic
7.3 - Cabling schematic See next page 10-13-19 GB 00 - NSTALLATION ANUAL... - Page 60 10-13-19 GB 00 - nstallatIon anual...
- Page 61 Fig. 7-3 HP : High-pressure switch C1 : Start-up capacitor for compressor C2 : Ventilator 2μF capacitor C3 : Ventilator 3μF capacitor 1MΩ resistance for ventilator RC : Compressor contactor Ventilator Compressor EV : Solenoid valve RE : 1500W electrical resistance LTS : Security limiter thermostat of the electrical backup...
-
Page 62: Performance Curves
7.4 - Performance curves The performance is measured with a standard heating cycle with 15°C cold water. 7.4.1 - C.O.P . Evolution This curve represents the C.O.P . (coefficient of performance) of different air and water temperature. eau 45°C water 45°C eau 60°C water 60°C Air temperature (°C) -
Page 63: Technical Data
7.5 - Technical data The performance measures are based upon the standard project prEN 255-3 version 09/2008. "Individual electric devices for the production of thermodynamic sanitary hot water with external air" COP +20°C COP +15°C Coefficient of performance COP + 7°C COP + 2°C COP - 5°C Minimum operating temperature of the heat pump... - Page 64 Zone Industriel RD28 BP131 Reyrieux 01601 TREVOUX Tél. (33) 04 74 00 92 92 Fax (33) 04 74 00 42 00 http://www.technibel.com B1871817 - SC.11.266...
Need help?
Do you have a question about the Liberty300 Solar and is the answer not in the manual?
Questions and answers