Table of Contents
Advertisement
Advertisement
Table of Contents

Related Manuals for Labrie AUTOMIZER HELPING-HAND


Summary of Contents for Labrie AUTOMIZER HELPING-HAND
- Page 1 UTOMIZER ELPING HAND ’ PERATOR ANUAL...
- Page 3 UTOMIZER ELPING ’ PERATOR S MANUAL...
- Page 4 Liability Labrie Enviroquip Group assumes no liabilty for any incidental, consequential, or other liability that might result from the use of the information contained in this document. All risks and damages, incidental or otherwise, arising from the use or misuse of the information contained herein are entirely the responsability of the user.
-
Page 7: Table Of Contents
Key Features of the A ......................5 ELPING Multiplexed System .................................. 5 Standard Limited Product Warranty ............................6 To Contact Labrie Plus ..................................8 In the U.S....................................... 8 In Canada ...................................... 8 Safety ................... 9 Conventions ....................................... 9 Basic Safety Notions ..................................9 Responsibilities .................................... - Page 8 Driving the Vehicle ..................................46 Driving Speed ................................... 46 Right-Hand Side Driving Position ............................. 47 Controls and Indicators ............. 49 Labrie’s Multiplexed System ..............................49 Main Page ....................................50 Main Menu ....................................57 Operational Diagram of the Multiplexed System ....................... 67 Control Panel ....................................
- Page 9 Table of Contents vii Inspection Sheet ..................................92 Loading and Packing ..................................93 Planning your Route ................................93 Safety while Using the Packing System .......................... 94 Loading Refuse ..................................94 Packer Description ................................. 95 Loading Procedure ................................. 95 Pack on the Go ..................................99 Unloading .......................................
- Page 10 viii Table of Contents...
-
Page 11: Introduction
A Note about Warranty Do not forget to complete the owner’s registration form and to send it to Labrie Enviroquip Group. Also, make sure you indicated the “In service” date on that form. This date will be used to start the warranty period. -
Page 12: Introducing The A
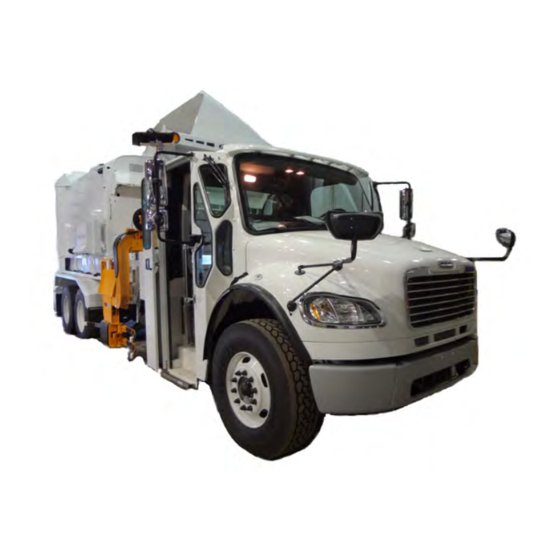
UTOMIZER ELPING highest standards, and designed to collect residential and commercial refuse and recycling materials. This vehicle is a modified version of the standard Labrie A . It has been modified to be UTOMIZER equipped with a H . - Page 13 Introduction 3 Another version of the A comes with an optional lifting bucket instead of a H UTOMIZER ELPING gripper assembly. This bucket may be used for manual collection of residential waste, recyclables and organics. It is controlled using either the in-cab joystick or the packer control station located next to the right-hand side folding door.
- Page 14 4 Introduction Figure 1-4 Packer cylinders Figure 1-5 Automated arm (left); tailgate (right) In the cab, you will find a control panel, a monitor, one or two joysticks, and all the switches that control most of the truck’s functions (Figure 1-6).
-
Page 15: Key Features Of The Automizer
This whole system has been designed to help you operate your unit in an efficient and easy way. See Labrie’s Multiplexed System on page 49 for more details. units must be operated by only one person. -
Page 16: Standard Limited Product Warranty
In the event a part or component of the Product fails or becomes defective during the warranty period and, in the opinion of Labrie, such failure or defect results from Labrie’s material or workmanship, the part or component shall be repaired or replaced by Labrie or an authorized distributor at no cost provided that the unit is brought to an authorized distributor’s service facility. - Page 17 Because the Product is engineered to work only with genuine Labrie parts and components, this warranty shall be void and of no effect if i) the Product is modified other than by Labrie or by an authorized Labrie distributor or other than in accordance with a specific authorization and instructions from Labrie or from an authorized Labrie distributor or ii) if parts and components of any other manufacturer are used as substitutes for genuine Labrie parts and components.
-
Page 18: To Contact Labrie Plus
E-mail (Customer Service): service@labriegroup.com For technical support and parts ordering, the serial number of your vehicle is required. Therefore, MPORTANT Labrie Enviroquip Group recommends to keep record of the information found on the VIN plate, which is located in the cab. -
Page 19: Safety
Safety Safety is always of prime importance when operating any type of equipment. All operators working with the 2R-III must be aware of the safety practices and features detailed in this section. : This section also applies to A units UTOMIZER equipped with the optional bucket instead of the gripper assembly. -
Page 20: Responsibilities
10 Safety Danger! Always be aware of the vehicle’s surroundings to make sure that no pedestrians, passersby, bystanders, or other people or vehicles are in any way exposed to any danger caused by the use of the 2R-III Danger! Never get in the hopper area when the engine is running. Only authorized personnel may do so following a lockout/tagout procedure (see Locking Out and Tagging Out the Vehicle on page 43). -
Page 21: Employee Responsibilities
Safety 11 To establish a “lockout/tagout” procedure and ensure its application any time inspection, repair or maintenance is performed on the vehicle, regardless of whether it takes place on the road or in the garage. To provide necessary safety equipment and apparel. ... -
Page 22: Things To Do
12 Safety Do not use damaged equipment. MPORTANT : This section also applies to A units equipped with the optional bucket instead of UTOMIZER the gripper assembly. Things to Do Inspect the body and all systems at the beginning of each day. ... -
Page 23: General Precautions
Enviroquip Group customers elect to operate the vehicle with more than one worker, additional safety items shall be installed to protect the co-worker from hazardous situations. In such cases, Labrie Enviroquip Group must be informed of every and all units that will be operated MPORTANT by more than one worker. - Page 24 14 Safety When removing nylon locknuts, always replace them by new ones. Never drive this vehicle with the tailgate unlocked. Once you have completed your collection route, park the gripper or the bucket inside the hopper. Generally speaking, when in transport mode, always park the gripper or the bucket inside the hopper.
-
Page 25: Fire
Safety 15 Danger! Never drive this vehicle if the lifting arm is not fully retracted to its home position. The unit would be simply too wide to be driven safely. Failure to fully retract the arm will result in unit and /or property damage, severe injury or even death. Warning red lights on dashboard flash when the arm is not completely retracted to its home position. -
Page 26: Location Of Safety And Informative Decals
16 Safety Location of Safety and Informative Decals Pay careful attention to all safety, warning and informative decals while working in and around the 2R-III . Keep your decals clean and in good condition at all times. For replacement decals, please call LabriePlus. - Page 27 Safety 17 84470 84469 - English/French 47262 84468 120978 - English/Spanish 84467 - English/French 79834 - English/French 47270 120981 - English/Spanish 79837 - English/French...
- Page 28 18 Safety 47282 47280 120983 - English/Spanish 120982 - English/Spanish 79842 - English/French 79841 - English/French 47286 47308 84054 - English/Spanish 84059 - English/Spanish 79844 - English/French 79847 - English/French 47314 47348 84060 - English/Spanish 84015 - English/Spanish 79848 - English/French 84014 - English/French...
- Page 29 Safety 19 47350 47352 84072 - English/Spanish 84073 - English/Spanish 79850 - English/French 79851 - English/French 47422 47424 121033 - English/Spanish 84077 - English/Spanish 79853 - English/French 79854 - English/French 47554 79768 - English/Spanish 79856 - English/French 47562 47795 - English/Spanish 79776 - English/French...
- Page 30 20 Safety 84187 84485 - English/French/Spanish 79781 84321 79782 - English/Spanish 159775 - English/Spanish 84099 - English/French 84322 - French 47564 32411 47256 Optional 84419 - Spanish 159761 - French Optional...
- Page 31 Safety 21 121349 121350 - French 97832 84447 - Spanish 159759 - French Optional 84482...
- Page 32 22 Safety 47843 47844 - French...
- Page 33 Safety 23 84272 159782 - Spanish 84336 - French...
-
Page 34: Decals On Tailgate
24 Safety Decals on Tailgate 32307 47266 47268 120973 - English/Spanish 120974 - English/Spanish 79835 - English/French 79836 - English/French 32414A 84418 - Spanish Optional 159760 - French 47274 47777 - English/Spanish 79839 - English/French Optional... -
Page 35: Decals Outside Cab
Safety 25 Decals outside Cab 43816 84040 - English/Spanish 79865 - English/French 47352 84073 - English/Spanish 79851 - English/French 47350 84072 - English/Spanish 79850 - English/French 47286 84054 - English/Spanish 79844 - English/French... -
Page 36: Decals Inside Cab
26 Safety Decals inside Cab 43874 43880 47451 159751 - English/Spanish 47770 - English/Spanish 84497 - English/Spanish 79826 - English/French 79828 - English/French 84026 - English/French 47312 43790 47276 84011 - English/Spanish 84304 - English/Spanish 84303 - English/Spanish 84010 - English/French 79818 - English/French 79840 - English/French 47440... - Page 37 Safety 27 47878 Optional 43882 84491 - English/Spanish 47877 Optional 159777 - English/Spanish 84029 - English/French 84009 - English/French 159776 - English/Spanish 84030 - English/French 43764 84025 - English/Spanish 156068 84024 - English/French 159814 - English/French 47610 84021 - English/Spanish 84020 - English/French 84189 84188 - English/French...
- Page 38 28 Safety 43850 84001 - English/Spanish 79822 - English/French 159766 43910 159767 - French 84013 - English/Spanish 169407 - English/French 84012 - English/French 104539 84032 - English/Spanish 84031 - English/French...
- Page 39 Safety 29 43972 47284 84148 - English/Spanish 120980 - English/Spanish 79831 - English/French 79843 - English/French 43794 43764_R4 84147 - English/Spanish 79819 - English/French 43856 43798 79823 - English/French 79821 - English/French...
- Page 40 30 Safety 47998 84018 - English/French 47600 47601 - French 84406 84407 - French 97755 159771 - English/Spanish 84373 97777 - English/French 84372 - English/French 47981 159773 - English/Spanish 43792 84023 - English/Spanish 79914 - French 84022 - English/French...
-
Page 41: Multiplexed Switch Actuators
Safety 31 Multiplexed Switch Actuators : Multiplexed switch actuators and their location on the control panel vary according to the options installed on the unit. -
Page 42: Multiplexed Indicator Tops
: This illustration and the preceding one were taken from the PDF file no 159535. : 1- All symbols to be negative lens. 2- Electronic file for the symbols available on request from Labrie Enviroquip Group only. Safety Features Back Up Alarm The back up alarm sounds when the truck is in reverse or when the tailgate is open. -
Page 43: Tailgate Safety Prop
Safety 33 To set the body safety prop: Make sure that there is enough clearance above the body to raise it safely. Start the engine. Raise the body until the safety prop is free to tilt under it. Release the safety prop using the safety prop handle and position it adequately. Figure 2-3 Safety prop handle Lower the body until it rests on the safety prop. - Page 44 34 Safety Danger! The tailgate safety prop shall be set each time the tailgate is open for inspection and maintenance purposes. Setting the Tailgate Safety Prop To set the tailgate safety prop: Make sure that the body is empty. Remove the safety pins. Figure 2-4 Safety pin Start the engine.
- Page 45 Safety 35 Figure 2-5 Pulling the safety prop upward (left) and setting it down (right) Lower the tailgate onto the safety prop using the Tailgate Down switch (see Tailgate Down Switch on page 71). Putting the Tailgate Safety Prop Back in Place To put the tailgate safety prop back in its home position: Start the engine.
-
Page 46: Camera System (Optional)
36 Safety Figure 2-7 Setting the safety prop in its home position With the Tailgate Down switch on the in-cab control panel (see Tailgate Down Switch on page 71), fully close and lock the tailgate. message on the monitor should disappear. TAILGATE OPEN Put the safety pins back in place. -
Page 47: Tailgate Holding Valve
Safety 37 Figure 2-9 Camera on central RHS post The operator can switch from one camera to the other using a selector switch located on the 7” LCD color monitor installed in the cab. Refer to the camera manufacturer’s manual for more information. : On some units, the right-hand side camera may be installed on the right-hand side rail instead of on the central right-hand side post at the rear of the hopper. -
Page 48: Hopper Door Proximity Switch Test
38 Safety Hopper Door Proximity Switch Test Successful completion of this test ensures that the Hopper Door proximity switch is working properly (see Figure 2-10). If the hopper door is open, all hydraulic functions should become inoperative. Warning! Injury or death may occur if you attempt to enter the body while the packer blade or arm is working. -
Page 49: Arm Fully Retracted Limit Switch Test
Safety 39 If the hydraulic system is still operative, the Hopper Door proximity switch may need to be adjusted or replaced. Refer to the Limit and Proximity Switches section in the Maintenance Manual for proper procedure. Arm Fully Retracted Limit Switch Test Successful completion of this test ensures that the Arm Extended warning lights on the dashboard flash red when the arm is moved away from its parked position. -
Page 50: Packer Fully Retracted Proximity Switch Test
40 Safety Figure 2-12 Arm Fully Retracted limit switch Packer Fully Retracted Proximity Switch Test Successful completion of this test ensures that the packer reaches its “home” position or the packer cylinder does not remain pressured up or abruptly bottom out at the “home” position. For this test, proceed as follows: Empty all refuse from the body. -
Page 51: Crusher Panel Up Proximity Switch Test (If Equipped)
Safety 41 Crusher Panel Up Proximity Switch Test (if equipped) : This test only applies to units equipped with a lifting bucket. Successful completion of this test ensures that the bucket operation is disabled when the crusher panel is not in its stowed position. For this test, proceed as follows: Start the truck. -
Page 52: Quick Reference Lockout Chart
42 Safety Engage the hydraulic pump (see Hydraulic Pump Switch on page 70). With the crusher panel in the up position and the gripper/bucket in the parked position inside the hopper, try to lower the crusher panel. The crusher panel should not move. If it does move while the gripper/bucket is in parked position inside the hopper, the arm parked limit switch (see Figure 2-15) may need to be adjusted or replaced. -
Page 53: Locking Out And Tagging Out The Vehicle
Safety 43 Figure 2-16 Clean-out trap Locking Out and Tagging Out the Vehicle For any inspection, repair or general maintenance being done on the vehicle, whether on the road or at the shop, it is the employer’s responsibility to establish and see to the application of a proper lockout and tagout procedure. -
Page 54: Shutting Down The Vehicle
44 Safety Figure 2-18 Master switch Put an “O ” tag on the driver’s wheel and on the front windshield. ERVICE Use safety props to block any system that could move by gravity (open tailgate, raised body, etc.). Drain all air tanks. Verify and inspect any security device and/or mechanism to make sure that there is no bypass and that they are all functional. -
Page 55: Starting Up The Vehicle
Safety 45 Starting Up the Vehicle Apply this procedure to start up your vehicle: Make sure no system will engage and/or start to operate as you start the engine. Make sure the shut-off valve on the hydraulic tank is fully open before starting the vehicle (see Figure 2-20). -
Page 56: Driving The Vehicle
Driving Speed If the cab of the vehicle has been modified by Labrie Enviroquip Group (right-hand side driving position) for door-to-door waste collection, the maximum speed limit while driving at the right-hand side is, if permitted, 20 mph (32 km/h). -
Page 57: Right-Hand Side Driving Position
Right-Hand Side Driving Position The following procedure applies ONLY to cabs that had been modified by Labrie Enviroquip Group. It must be followed at the beginning, but also at the end of the collection route in order to revert to the left-hand side driving position. - Page 58 48 Safety Figure 2-24 Adjusting mirrors...
-
Page 59: Controls And Indicators
This whole system has been designed to help you operate your unit in an efficient and easy way. Labrie’s multiplexed system is reliable and safe, and it requires less wiring harnesses to operate. It can also monitor various function status of the body and display warning and caution messages. -
Page 60: Main Page
A flashing red light on the monitor is also a sign of a problem. Call LabriePlus for support. The logo of Labrie Enviroquip Group appears momentarily on the monitor screen at the start of the system (see Figure 3-2). - Page 61 Controls and Indicators 51 Figure 3-3 Cart counter Press the far right button to reset the counter display to zero. Time and Date Indicator (optional) A time and date indicator may be found on the upper left-hand side corner of the screen. The availability of this indicator is based on the chassis on which the body is mounted.
- Page 62 52 Controls and Indicators Table 1 Warning messages (cont’d) Warning and Caution Messages Solution Arm Up:Chute Bad Pos. Place Chute in Correct Position Arm Up:Crusher Not Raised Raise Crusher Panel Arm:Auxiliary Deadman ON Release Auxiliary Deadman Arm:Body Raised Lower Body Arm:Hopper Door Not Close Close Hopper Door Arm:Pump Not Started...
- Page 63 Controls and Indicators 53 Table 1 Warning messages (cont’d) Warning and Caution Messages Solution Gripper Open:Arm Too High Lower Arm High Hydraulic Oil Temp. Turn Off Engine and Refer to your Maintenance Personnel Low Hydraulic Oil Add Hydraulic Oil Packer Extend:Air Weigh Signal Unload Body Packer:Already Extended Refer to Maintenance Personnel or...
- Page 64 54 Controls and Indicators Table 1 Warning messages (cont’d) Warning and Caution Messages Solution Pump:BodyLower Switch ON Release BodyLower Switch prior to Engaging Pump Pump:BodyRaise Switch ON Release BodyRaiseSwitch prior to Engaging Pump Pump:CrusherDown Switch ON Release CrusherDown Switch prior to Engaging Pump Pump:CrusherUp Switch ON Release CrusherUp Switch prior to...
- Page 65 Controls and Indicators 55 Table 1 Warning messages (cont’d) Warning and Caution Messages Solution Pump:Packer Extend Switch ON Release Packer Extend Switch prior to Engaging Pump Pump:Packer Retract Switch ON Release Packer Retract Switch prior to Engaging Pump Pump:PTO Not OK Refer to Maintenance Personnel or LabriePlus Pump:RPM Too High...
- Page 66 56 Controls and Indicators Table 2 Error messages (cont’d) Error Messages Solution Button Pack 12 is disconnected Refer to Maintenance Personnel or LabriePlus Button Pack 13 is disconnected Refer to Maintenance Personnel or LabriePlus Button Pack 14 is disconnected Refer to Maintenance Personnel or LabriePlus Button Pack 15 is disconnected Refer to Maintenance Personnel or LabriePlus...
-
Page 67: Main Menu
Controls and Indicators 57 Table 2 Error messages (cont’d) Error Messages Solution Module 50 not Connected Refer to Maintenance Personnel or LabriePlus Module 60 is disconnected Refer to Maintenance Personnel or LabriePlus Module 60 not Connected Refer to Maintenance Personnel or LabriePlus Should the system issue a warning or caution message, it will appear on the Main Page. - Page 68 “OK” button. Multicycle The monitor used in Labrie’s multiplexed system is user-friendly. Say you want to change the multicycle settings of the packer. All you have to do is select...
- Page 69 Controls and Indicators 59 Figure 3-7 Control panel Multicycle switch Start cycle button Pump switch To test the new settings of the packer: On the control panel press the switch and the green button. MULTICYCLE START CYCLE Once the packer has completed its cycles and come to a stop, switch OFF the hydraulic pump and turn OFF the engine.
- Page 70 60 Controls and Indicators Figure 3-8 Module I/O Status page Input Status The Input Status page is accessible from the Module I/O Status page. After selecting the desired module and pressing “OK”, the Input Status page of the selected module is displayed (see Figure 3-9).
- Page 71 Controls and Indicators 61 Press “Esc” to return to the preceding page. Press the “Output” button to display the Output Status page. Output Status The Output Status page (Figure 3-10) is accessible from the Input Status page. Figure 3-10 Output Status page The rectangles on this page are used to check the status of different outputs.
- Page 72 62 Controls and Indicators But before the Force page is displayed, a warning message appears on the monitor screen (see Figure 3-11). Figure 3-11 Warning message This message stays on for 15 seconds. Then an “OK” prompt appears on the lower right-end corner of the screen.
- Page 73 Controls and Indicators 63 Figure 3-13 Force page (input) As no input function can be forced to be active or inactive, the operator must press the “Output” button to go to the following page (see Figure 3-14). Figure 3-14 Force page (output) The Force page allows the operator to force a function to be overridden, that is, to make an inactive function active and an active function inactive.
- Page 74 64 Controls and Indicators press “OFF” to deactivate the corresponding function (rectangle turns from green to blue) press “RESET” to have the software control the status of the corresponding function : To cancel changes made in this page and restore the default values, all you have to do is cut power to the multiplexed system by turning the ignition key off.
- Page 75 the CANopen bus, which is used for the body. These 2 communication buses are completely independent of one another, except for some specific data that are transferred from the chassis J1939 bus to Labrie’s multiplexed system, where they are used. These specific data are the following: ...
- Page 76 Looking at Figure 3-17 above you will notice the following digit string 8-6-5-1 between, for example, 10 and R1. As all Labrie electrical schematics begin with ZS00, you simply add those digits to that base number to get the corresponding electrical schematic number.
-
Page 77: Operational Diagram Of The Multiplexed System
Controls and Indicators 67 Operational Diagram of the Multiplexed System Labrie Enviroquip Group has elaborated a document that illustrates the way the multiplexed system works. Particularly, it visually shows how this system reacts to different situations and how it manages the various lockouts that are on the A . - Page 78 68 Controls and Indicators...
-
Page 79: Control Panel
Controls and Indicators 69 Control Panel The control panel is located at the center of the cab for easy access during collection and operation. On a truck with two driving positions, this control panel is mounted on a pivotal support which can be turned by hand. -
Page 80: Hydraulic Pump Switch
70 Controls and Indicators Hydraulic Pump Switch This switch (see Figure 3-18), also known as PTO switch, engages and disengages the hydraulic pump, all the body functions (packing, body up/down, tailgate up/down) and the joystick that controls the arm. Note that the switch turns green when the pump is engaged. ... -
Page 81: Body Down Switch
Controls and Indicators 71 Body Down Switch This control switch (see Figure 3-19) is used to lower the body. Press and keep down this switch to lower the body to the desired height. When the body touches the rod of the limit switch fixed to the frame, the buzzer stops sounding. -
Page 82: Hopper Work Light Switch
72 Controls and Indicators Press the switch again to turn OFF the rubrail lights (switch turns blue). Hopper Work Light Switch This switch (see Figure 3-19) turns ON/OFF the hopper work light. Press the switch once to turn ON the hopper work light (switch turns green). ... -
Page 83: 10-Second Inhibit Switch
Controls and Indicators 73 10-Second Inhibit Switch This switch (see Figure 3-18), also known as gripper auto-close override, allows the operator to momentarily open the gripper in the hopper to let the object that it holds fall into the hopper. It also allows the operator to pick up elevated carts. -
Page 84: In-Cab Packer Control Station
74 Controls and Indicators This feature is used to monitor the temperature inside the hydraulic system as well as the level of hydraulic oil inside the tank. If the oil temperature gets too high or the level of hydraulic oil gets too low, the hydraulic alarm switch LED will blink red at 1Hz, meaning that a correction must be applied quickly. -
Page 85: Retract Push-Button (Yellow)
Controls and Indicators 75 Figure 3-23 Pack push-button Retract Push-Button (yellow) The packer retract button (see Figure 3-24) will retract the packer to its “home” position, that is where it was at the beginning of its stroke. This control is useful when the body is full and the material prevents the packer from reaching the end of its stroke. -
Page 86: Stop Button
76 Controls and Indicators Figure 3-25 Auxiliary packer control station Stop button Pack button Retract button Bucket control button Crusher panel down button Crusher panel up button Stop Button The Emergency Stop button will stop all hydraulic functions on the truck. Pressing the red button will make the packer and the bucket stop where they are. -
Page 87: Crusher Panel Down Switch
Controls and Indicators 77 Crusher Panel Down Switch Use this button to lower the crusher panel. Button must be kept pressed to activate panel movement. : This button is inoperative if the bucket is not in its “home” position, that is right against the bucket stopper. - Page 88 78 Controls and Indicators The upper front buttons are used to control the chute (standard setup) if such a device is installed on the vehicle. The left button moves the chute to the left side of the hopper while the right button moves it to the right side.
-
Page 89: Cab Dashboard
Controls and Indicators 79 Shift the joystick backward at 45° between the gripper up and arm retract lettering to raise the gripper and retract the arm at the same time. Shift the joystick backward at 90° to the gripper up lettering to raise the gripper only. ... -
Page 90: Arm Extended Warning Lights
80 Controls and Indicators Figure 3-29 Parking brake button Arm Extended Warning Lights There are 2 Arm Extended warning lights on the dashboard (see Figure 3-30). When they are flashing, they indicate that the arm is not completely retracted alongside the hopper. Do not move the vehicle in such a situation. - Page 91 Controls and Indicators 81...
- Page 92 82 Controls and Indicators...
-
Page 93: Operating The Automizer Tm Helping -Hand
Operating the UTOMIZER ELPING The different methods, procedures and necessary actions to operate the A UTOMIZER ELPING are presented in this section. Warning! You must read and understand the Operator’s Manual before operating the vehicle and its equipment. Before operating the A UTOMIZER ELPING the operator must be completely familiar with all safety... -
Page 94: Visual Inspection
84 Operating the A UTOMIZER ELPING Visual Inspection Before starting the vehicle, the operator MUST perform a visual inspection of the truck. Ensure the engine is not running and the parking brake is set. : Some of the items mentioned in this manual are optional and may not be found on your UTOMIZER ELPING As part of the visual inspection, you must:... -
Page 95: Body Inspection Procedure
Operating the A UTOMIZER ELPING Body Inspection Procedure Exit the cab to continue your inspection. Bring a rag along to clean all accessible lights, stickers, camera lenses, etc. Check for mechanical problems: rollers, hinges, door-locking mechanisms, wear items, etc. Report any defective system to the maintenance personnel. : Some of the items mentioned in this manual are optional and may not be found on your UTOMIZER ELPING... - Page 96 86 Operating the A UTOMIZER ELPING Figure 4-1 Automated arm Danger! Do not stand directly in the path of the arm while performing the inspection. Warning! Apply the lockout/tagout procedure at all times. See Locking Out and Tagging Out the Vehicle on page 43 Apply the following inspection procedure: Make sure to park the vehicle on safe, level ground.
- Page 97 Operating the A UTOMIZER ELPING • Mounting bolts; • Plastic gliders; • Gripper (left); bucket (right)
- Page 98 88 Operating the A UTOMIZER ELPING • Hoses and connections; • Cylinders. Check for loose nuts and bolts. Check gripper rubber stripes (std.) or pads (opt.) for cracks, wear, or damage. Figure 4-2 Optional rubber pads Check limit switches. Refer to the Maintenance Manual for more details.
-
Page 99: Inspecting Right-Hand Side Driving Controls
Mid-height limit switch (left), parked limit switch (right) Inspecting Right-Hand Side Driving Controls : This section applies only to cabs modified by Labrie Enviroquip Group. If your cab has not been modified by Labrie Enviroquip Group, please refer to your cab manufacturer’s recommendations. -
Page 100: Adjusting Mirrors
Mirror adjustment from left and right driving positions Setting the Floor Riser : This section applies only to cabs modified by Labrie Enviroquip Group. If your cab has not been modified by Labrie Enviroquip Group, please refer to your cab manufacturer’s recommendations. - Page 101 Operating the A UTOMIZER ELPING Figure 4-6 Floor riser in vertical position (left), in horizontal position (right) Latch If you need extra height, hold the riser with one hand before pulling it down and, with the other hand, extend the legs. Figure 4-7 Floor riser legs in collapsed position (left) and in extended position (right) Legs...
-
Page 102: Inspection Sheet
92 Operating the A UTOMIZER ELPING Inspection Sheet The following is an example of an inspection sheet. The operator MUST follow the inspection sheet provided by his employer. If the employer does not have any, ask for his permission before using this example sheet. -
Page 103: Loading And Packing
Operating the A UTOMIZER ELPING Loading and Packing Once you have finished the start-of-the-day inspection and made sure that your A UTOMIZER is ready for a work day, you can drive to the loading area to start collecting refuse. ELPING Ensure that all malfunctions or concerns are reported to your supervisor and/or maintenance MPORTANT department. -
Page 104: Safety While Using The Packing System
94 Operating the A UTOMIZER ELPING Safety while Using the Packing System Warning! Always keep the warning lights and/or four-way flashers on when collecting refuse. Danger! Never attempt to reach inside the hopper area when the packer blade, the arm or the bucket is in motion. -
Page 105: Packer Description
Operating the A UTOMIZER ELPING Packer Description The packer, made of high strength steel, travels the hopper to push refuse into the body. If any piece of garbage exceeds above the packer, it will be crushed or bent against the rear breaker bar, located just above the exit opening of the hopper. - Page 106 96 Operating the A UTOMIZER ELPING Slow down when near the cart. Align the lifting arm on the vehicle with the roller cart that you intend to pick up. With the arm parked alongside the truck, use the joystick to reach the cart (extension of the arm may be needed to reach the cart).
- Page 107 : The following procedure relates to the use of the Auto-Neutral feature and the temporary handbrake. This applies only to cabs modified by Labrie Enviroquip Group. If your cab has not been modified by Labrie Enviroquip Group, please refer to your cab manufacturer’s recommendations.
- Page 108 ELPING The switch should turn from blue to green. : The Auto-Neutral feature comes with a Labrie modified cab. If your unit has this feature installed, you will see an Auto-Neutral switch mounted on the in-cab control panel (see Figure 3-19).
-
Page 109: Pack On The Go
Operating the A UTOMIZER ELPING Get out of the cab, collect the refuse bags and put them inside the bucket. You can put several refuse bags inside the bucket before emptying the bucket of all its contents into the hopper. Get back in the cab and raise the bucket to dump its contents into the hopper. -
Page 110: Unloading
100 Operating the A UTOMIZER ELPING The multi-cycle function allows the packer to perform up to 8 cycles when pressing the start cycle button (green button). Standard factory preset of the module is 3 cycles. Unloading Unloading Procedure Once you have completed your collection route, park the lifting arm or the bucket inside the hopper (the crusher panel [if installed] must be in the up position). -
Page 111: Unloading Corrective Actions
Operating the A UTOMIZER ELPING Open the tailgate completely by pressing and holding down the Tailgate Up switch on the in-cab control panel (see Figure 3-19). Once the tailgate is completely open, raise the body by pressing and holding down the Body Up switch on the in-cab control panel (see Figure 3-19). - Page 112 102 Operating the A UTOMIZER ELPING Pull down the safety prop towards the body. Figure 4-15 Body safety prop Slowly lower the body until it rests on the prop. Proceed with the necessary cleaning of the chassis. Once finished, slightly raise the body and put the safety prop back to its vertical position. Lock the safety prop.
-
Page 113: Unloading Emergency Actions
Operating the A UTOMIZER ELPING Unloading Emergency Actions If the truck starts to sink on one side as you unload: Danger! NLOADING EMERGENCY ACTIONS Stop all movement of the equipment. Start or continue lowering the body. If the equipment does not stop sinking, stay inside and protect yourself. Danger! Do not use safety prop with a loaded body. -
Page 114: End-Of-The-Day Cleaning And Inspection
104 Operating the A UTOMIZER ELPING End-of-the-Day Cleaning and Inspection Daily Hopper Cleaning Cleanliness is a key part of safety and critical to the vehicle maintenance. Daily cleaning of the hopper and chassis is crucial because it will minimize breakdowns and maintenance expenses. -
Page 115: Daily Chassis Cleaning
Operating the A UTOMIZER ELPING Figure 4-17 Clean-out door (left) and hoe (right) Finish cleaning the area with pressurized water. Daily Chassis Cleaning The following is the daily chassis cleaning procedure: Start the engine. Engage the hydraulic pump by pressing the Pump switch on the control panel. The switch turns green. -
Page 116: Water Trap Bleeding
106 Operating the A UTOMIZER ELPING Water Trap Bleeding Usually located on the right-hand side truck frame, near mid-section, the water trap must be drained at the end of every working day. Just slacken off both water trap bleed screws under the bowls and catch the water and oil that flow out with a rag. - Page 117 Operating the A UTOMIZER ELPING Figure 4-19 Arm proportional valve Contact your Service Center and refer to the Troubleshooting section of the Maintenance Manual. Danger! Never drive this vehicle if the automated arm is not retracted to its home position. The vehicle would be too high and/or too wide to be driven safely.
- Page 118 Our office in the U.S. Our office in Canada 1198 Shattuck Industrial Blvd. 175A Route Marie-Victorin LaFayette, GA 30728 Levis, QC G7A 2T3 Toll Free: 1-800-231-2771 Toll Free: 1-877-831-8250 Telephone: 1-920-233-2770 Telephone: 1-418-831-8250 General Fax: 1-920-232-2496 Service Fax: 1-418-831-1673 Sales Fax: 1-920-232-2498 Parts Fax: 1-418-831-7561 Mailing Address Mailing Address...
Need help?
Do you have a question about the AUTOMIZER HELPING-HAND and is the answer not in the manual?
Questions and answers