Table of Contents
Advertisement
Quick Links
Advertisement
Table of Contents

Related Manuals for Newport XPS-RL


Summary of Contents for Newport XPS-RL
- Page 1 XPS-RL Universal High-Performance Motion Controller/Driver Quick Start...
- Page 2 Quick Start Warranty Newport Corporation warrants that this product will be free from defects in material and workmanship and will comply with Newport’s published specifications at the time of sale for a period of one year from date of shipment. If found to be defective during the warranty period, the product will either be repaired or replaced at Newport's option.
-
Page 3: Table Of Contents
Cross-Over Cables (Gray) .................. 8 2.5.3 Direct Connection to the XPS-RL Controller ............. 8 2.5.4 Connecting the XPS-RL to a Corporate Network using Static IP Configuration 11 2.5.5 Configuring the XPS-RL for Connection to a Corporate Network Using Dynamic IP Configuration ................12 2.5.6... - Page 4 XPS-RL Quick Start XPS-RL Controller/Driver Documentation ........27 Service Form ......................29 EDH0367En1021 — 12/17...
-
Page 5: Preface
Customer shall protect the Newport Programs and Related Materials as trade secrets of Newport, and shall devote its best efforts to ensure that all its personnel protect the Newport Programs as trade secrets of Newport Corporation. Customer shall not at any... - Page 6 • Can you identify anything that may have caused the problem? Newport Corporation RMA Procedures Any XPS-RL Series Controller/Driver being returned to Newport must be assigned an RMA number by Newport. Assignment of the RMA requires the item’s serial number.
-
Page 7: Introduction
The XPS-RL holds all of these features in a more compact and mobile package. To maximize the value of the XPS-RL Controller/Driver system, it is important that users become thoroughly familiar with available documentation: The XPS-RL Quick Start is delivered as a hard copy with the controller. -
Page 8: Definitions And Symbols
Electric Shock Figure 2: Electrical shock symbol. The Electrical Shock Symbol in Figure 2 may appear on labels affixed to the XPS-RL Series Controller/Driver. This symbol indicates a hazard arising from dangerous voltages. Any mishandling could result in damage to the equipment, personal injury, or even death. -
Page 9: Warnings And Cautions
XPS-RL Quick Start Warnings and Cautions The following are definitions of the Warnings, Cautions and Notes that may be used in this manual to call attention to important information regarding personal safety, safety and preservation of the equipment, or important tips. - Page 10 • Disconnect power before cleaning the Controller/Driver unit. Do not use liquid or aerosol cleaners. • Do not open the XPS-RL Controller/Driver stand alone motion controller. There are no user-serviceable parts inside the XPS-RL Controller/Driver. • Return equipment to Newport Corporation for service and repair.
-
Page 11: Getting Started
Getting Started Unpacking and Handling It is recommended that the XPS-RL Controller/Driver be unpacked in your lab or work site rather than at the receiving dock. Unpack the system carefully; small parts and cables are included with the equipment. Inspect the box carefully for loose parts before disposing of the packaging. -
Page 12: System Setup
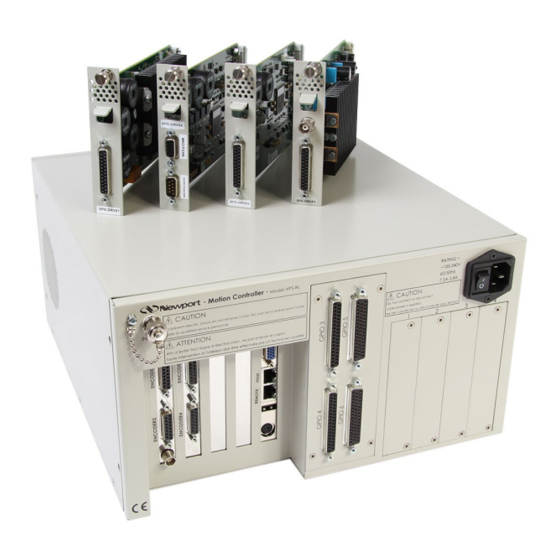
Proper Ventilation Figure 6: Installing driver cards. Due to the high power of the XPS-RL controller (180 W for the CPU and 300 W for the drives), ventilation is very important. To ensure a good level of heat dissipation, the following rules must be followed: 1. -
Page 13: Power On
If the controller boots properly, beep is happy-sounding, otherwise a sad- sounding beep is emitted. • There is also an Inhibit switch with a BNC connector in the rear of the XPS-RL. The Inhibit switch is directly linked by hardware to cut off motor power supply. -
Page 14: Cross-Over Cables (Gray)
2.5.3 Direct Connection to the XPS-RL Controller For a direct connection between a PC and the XPS-RL controller you need to use the crossover cable and the REMOTE connector at the back of the XPS-RL. Figure 9: Direct connection to the XPS-RL using cross-over cable. - Page 15 XPS-RL Quick Start When the PC is connected to the XPS-RL, an Unidentified network will appear in your active networks found under Control Panel > Network and Sharing Center. Following is the procedure to verify the Ethernet card address is set to Obtain an IP address automatically.
- Page 16 5. Open Internet Browser and connect to http://192.168.254.254 Login: Administrator Username: Password: Administrator (Please see the picture below). Role: Administrator NOTE Please note that the login text is case sensitive. Once logged in, the XPS-RL has established a direct connection to the local computer. EDH0367En1021 — 12/17...
-
Page 17: Connecting The Xps-Rl To A Corporate Network Using Static Ip Configuration
Once you are logged in using the previously described steps for direct connection, you can change the IP configuration of the controller in order to connect the XPS-RL over a Network. Select “Controller” of the web-site and select the sub-menu “IP management”. -
Page 18: Configuring The Xps-Rl For Connection To A Corporate Network Using Dynamic Ip Configuration
Configuring the XPS-RL for Connection to a Corporate Network Using Dynamic IP Configuration It is recommended to ask your IT department to configure the XPS-RL to your network to avoid any issue with your network policies and rules. • Connect to the XPS-RL as described in Section 2.5.3: “Direct Connection to the XPS-RL Controller“. - Page 19 You can see the dynamic IP address in Controller → General. The IP address delivered by your DHCP is displayed above. In case the XPS-RL cannot negotiate an IP address from the DHCP the displayed address will be 0.0.0.0. In that case contact your IT department.
-
Page 20: Recovering A Lost Ip Configuration
Check with your IT department that the lease time set at the DHCP is longer than the time you plan to leave the XPS-RL switched off otherwise you will lose your dynamic address and will need to connect to the REMOTE to know the new assigned one by the DHCP. - Page 21 XPS-RL Quick Start First, the IP address on the PC’s Ethernet card must be set to Obtain IP Address Automatically. 1. Open Internet Browser and connect to http://192.168.254.254 Login: Administrator Username: Administrator (Please see the picture below). Password: Administrator Role: NOTE Please note that the login text is case sensitive.
-
Page 22: Configuring The Controller
• Connect the stages or motion devices. • Switch on the XPS-RL controller and wait for the end of the boot sequence (approximately 50 seconds). • Open an internet browser and connect to http://<your fixed IP address> (if connected to REMOTE plug, address is http://192.168.254.254) -
Page 23: Default Configuration
XPS-RL Quick Start 2.6.1 Default Configuration When logged in as Administrator, select “System” then “Default configuration”. The following screen appears: If you want to continue, click the “OK” button and the following page appears: Check, if all connected stages are recognized by the system. To change the Group name type in desired name under the Name column. - Page 24 Enter an allowed position value in the “Absolute move 1” field and click “GO”. The stage moves to this absolute position. Your system is now ready to use. For more advanced functions, please read the XPS-RL User’s Manual.
-
Page 25: Quick Configuration For Newport Positioners
XPS-RL Quick Start 2.6.2 Quick Configuration for Newport Positioners Before using Quick Configuration, it is needed to populate the stages.ini file with the needed configurations, using “Add, remove or edit” stages under the main tab “Stages” (see chapter 2.6.3). When logged in as Administrator, select “System”, then “Quick configuration”. The following screen appears: If you want to continue, click the “OK”... - Page 26 The drop down menu lists stage configuration(s) available from the stages.ini file stored on the XPS-RL controller. To add stage parameters to the stages.ini file click on “Stages” then click “Add, remove or edit stages”.
-
Page 27: Manual Configuration For Newport Positioners
→ “Configuration files” using the text editor (see chapter 4.31 of the User’s Manual for details). Alternatively, the stage parameters can be modified directly in the stages.ini file using a text editor. The stages.ini file is located in the Config folder of the XPS-RL controller. This folder is accessible via ftp. - Page 28 Please refer to chapter 6.3 (in the XPS-RL User's Manual) for details on the different motion groups and their specific features. The group name and positioner name can be any user given name.
- Page 29 Quick Start this box should remain checked. Otherwise, with vacuum compatible stages or with old Newport stages, or with non-Newport stages, uncheck this box. 6. Click on “ADD” to add the stage to the stages.ini file. Once all stages have been added to the stages.ini file, you can review or modify these parameters from the screen “Add, remove or edit stages”...
- Page 30 11. Enter the appropriate Slot number. The Slot number is the axis number where the stage is physically connected to the XPS-RL controller. Looking at the rear of the controller, plug number 1 is the first plug on the left and the number increases to the right.
- Page 31 XPS-RL Quick Start 12. Select the Stage Name from the list of stages. These stage names refer to the stages defined with the Web Tool “Stage Management”. 13. Click on “OK” to return to the initial screen. 14. Continue the same way with the other motion groups.
-
Page 32: Manual Configuration For Non Newport Stages
2.6.4 Manual Configuration for non Newport stages To configure the XPS-RL controller to stages or positioning devices not made by Newport, use the tool “Create custom stages” under the main tab “Stages”. For detailed information about this tool, please refer to Appendix F: “Configuration Wizard”... - Page 33 XPS-RL Quick Start XPS-RL Controller/Driver Documentation To maximize the value of the XPS-RL Controller/Driver system, it is important that users become thoroughly familiar with available documentation: The User’s Manual & Motion Tutorial This book contains the majority of the information about the XPS-RL system. This reference manual also provides an exhaustive overview of the XPS-RL architecture, and a complete description of its features and capabilities.
- Page 34 Programmer’s Manual, and the Software Drivers Manual are only supplied as software copies. They can get accessed from the XPS web site: 1. Follow directions on Section 2.5: Connecting to the XPS-RL 2. After logging in, click on the “Documentation” tab...
- Page 35 XPS-RL Quick Start Service Form Your Local Representative Tel.: __________________ Fax: ___________________ Name: _________________________________________________ Return authorization #: ____________________________________ (Please obtain prior to return of item) Company:_______________________________________________ Address: ________________________________________________ Date: __________________________________________________ Country: ________________________________________________ Phone Number: __________________________________________ P.O. Number: ____________________________________________ Fax Number: ____________________________________________...
- Page 36 Visit Newport Online at: www.newport.com North America & Asia Europe Newport Corporation MICRO-CONTROLE Spectra-Physics S.A.S 1791 Deere Ave. 9, rue du Bois Sauvage Irvine, CA 92606, USA 91055 Évry CEDEX France Sales Tel.: (800) 222-6440 Sales e-mail: sales@newport.com Tel.: +33 (0)1.60.91.68.68 Technical Support e-mail: france@newport.com...
Need help?
Do you have a question about the XPS-RL and is the answer not in the manual?
Questions and answers