Avipas AV-1560 User Manual
Hd video conferencing camera w/ poe
Hide thumbs
Also See for AV-1560:
- Quick start manual (5 pages) ,
- How to connect (5 pages) ,
- Quick start manual (5 pages)

Related Manuals for Avipas AV-1560


Summary of Contents for Avipas AV-1560
- Page 1 Model: AV-1560 HD Video Conferencing Camera w/ PoE User Manual V2.0 (English) Please read this user manual thoroughly before using. www.avipas.com...
- Page 2 Preface Thank you for using this HD Video Conferencing Camera. This manual introduces the functions, installation process and operation of the HD camera. Prior to installation and usage, please read the manual thoroughly. Precautions This product should only be used under the specified conditions in order to avoid any damage to the camera: ◼...
-
Page 3: Table Of Contents
Catalogue 1 Attentions ........................1 2 Packing List ........................ 1 3 Quick Start ........................1 4 About AV-1560 ......................3 4.1 Features ..........................3 4.2 Product Specifications ......................3 4.3 Interfaces ..........................4 4.4 Dimensions ..........................5 4.5 Remote Control ........................5 4.6 RS-232 Interface ........................ - Page 4 6.5.1 Setup IPC controlled via dynamic DNS ................... 12 6.5.2 Dynamic DNS visit camera ...................... 12 6.5.3 VLC stream media player monitoring ..................13 6.6 IP Camera Parameter Setup ....................13 6.6.1 Homepage ..........................13 6.6.2 Video Settings .......................... 15 6.6.3 Image Settings .........................
-
Page 5: Attentions
Do not use in corrosive liquid, gas or solid Attentions environment to avoid any cover (plastic material) damage. Make sure there is no ⚫ Electric Safety obstacle within rotation range. Installation and operation must accord with Please never power on before installation is electric safety standard. -
Page 7: About Av-1560
20x, f=4.42mm ~ 88.5mm, F1.8 Lens ~ F2.8 4.1 Features Digital Zoom ⚫ H.265 Encode Minimum AV-1560 supports H.265 encoding. It enables 0.5 Lux @ (F1.8, AGC ON) Illumination full HD 1080p/60 transmission with ultra-low Shutter 1/30s ~ 1/10000s bandwidth. -
Page 8: Interfaces
Input Voltage DC 12V / PoE (802.3af) IPC Features Video Current H.264/H.265/MJPEG 1.0A (Max) Compression Consumption First Stream, Operating Video Stream -10°C ~ 40°C Second Stream Temperature 1920x1080, 1280x720, Storage First Stream -40°C ~ 60°C 1024x576, 960x540, Temperature Resolution 640x480, 640x360 Power 12W (Max) 1280x720, 1024x576,... -
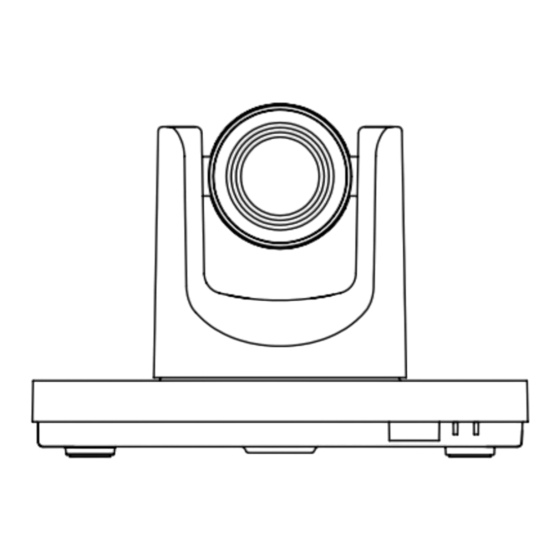
Page 9: Dimensions
Item Name 4.5 Remote Control System Video Format Switch RS232 OUT Interface RS232 IN Interface Network Interface LINE IN Interface RS485 Interface SDI Interface HDMI Interface USB 2.0 Interface DC 12V Interface Power Switch Power Lamp 4.4 Dimensions 1. Standby Key Press it to enter standby mode. -
Page 10: Rs-232 Interface
To enter submenu or to turn the camera PTZ 16. Backlight Key back to the center position. [BACKLINGHT]: Press this button to enable 6. Return Key backlight compensation. Press it again to disable backlight compensation. Back to the previous submenu. NOTE: 7. -
Page 11: Visca Network
3.TXD 3.TXD 4.GND 4.GND ⚫ List of protocols 5.RXD 5.RXD The serial ports of AV-1560 follows VISCA/ 6.GND 6.GND Pelco-D/ Pelco-P standard protocols. 7.IR OUT 7.NC For a detailed list of VISCA/Pelco-D/Pelco-P 8.NC 8.NC... -
Page 12: Gui Settings
Bright mode). GUI Settings Gain Limit: Maximum gain limit. 0~15 (effective only in Auto, SAE, AAE, Bright modes). 5.1 MENU Anti-Flicker: Options: Off, 50Hz, 60Hz (effective Press [MENU] to display the main menu on the only in Auto, AAE, Bright modes). monitoring screen. -
Page 13: Image
Colortemp: 2500K ~ 8000K (effective only in AF-Zone: Adjust the focusing area. Options: VAR mode). Top, Center, Bottom. AF-Sense: Adjust the auto-focusing sensitivity. Options: Low, Normal, High. 5.4 IMAGE L/R Set: Options: STD, REV. IMAGE Image Freeze: On, Off. Luminance Display Info: On, Off. -
Page 14: Noise Reduction
01 FF command is invalid). 5.6 NOISE REDUCTION P_D_Address: 0~254. (effective only NOISE REDUCTION PELCO-D protocol). NR2D-Level P_P_Address: 0 ~ 31. (effective only in NR3D-Level PELCO-P protocol). Select Item Net Mode: Set the serial port network control. Change Value Options: Serial, Paral. [Menu] Back Baudrate: Serial port baud rate. -
Page 15: Network Functions
Method 1: Press [*] + [#] + [4] on remote Network Functions controller sequentially, the camera IP address will show on screen. 6.1 Operating Environment Method 2: Connect camera to PC with an Operating System: Windows 2000/2003/XP/ Ethernet cable, use “upgrade_En.exe” to vista/7/8/10 search address. -
Page 16: Visit/Access Ip Camera
6.5 IP Camera controlled via WAN 6.5.1 Setup IPC controlled by dynamic DNS Two dynamic DNS: Dyndns.org, 3322.org. Router Port Mapping: Take Tenda router for instance, on the Router The default IP address of AV-1560 is: Homepage, select “Advanced”-“Virtual Server”, “192.168.100.88”, username “admin”, add a new port number in “Ext Port”, add a new... -
Page 17: Vlc Stream Media Player Monitoring
is then http://youdomain.3322.org:89. If the camera port default is 80, then the port number can be omitted. Use host name can access camera directly. 6.5.3 VLC stream media player monitoring To visit VLC media server: Step 1 Open VLC media player. Step 2 Click “Media”>“Open Network Stream”, or click “Ctrl + N”: 6.6 IP Camera Parameter Set Up... - Page 18 Information, then click “Set”. B. PTZ Setup When PTZ turns to other positions, type in the corresponding position number and click “Call” button or click “No.” of the Presets Information, PTZ will turn back to that preset position. PTZ / MENU: MENU mode: when push the [MENU] button on the remote controller, camera OSD menu will display in the upper corner of the viewing area.
-
Page 19: Video Settings
6.6.2 Video Settings 4) Resolution First stream: 1920x1080, 1280x720, 1024x576, 960x540, 640x480, 640x360. Second stream: 1280x720, 1024x576, 720x576(50Hz), 720x480(60Hz), 720x408, 640x360, 480x270, 320x240, 320x180. 5) Bit Rate Generally speaking, a higher bit rate will give a clearer image. However, the configuration of the bit rate needs to be considered along with the network bandwidth. -
Page 20: Image Settings
10) Slice Split Enable 5) Hue Enable or disable slice split function. 0~14, slider control, corresponding numerical shows on the right. 11) Split Mode Default value is 7. Select split mode. Options: Fixed blocks, Fixed 6) Flip & Mirror bytes. Click flip to flip the image upside down. -
Page 21: System Settings
The default work mode: RTSP. the port numbers (default port: 80). Options: RTSP, SDK, Multicast. B. RTSP Port 2) Reboot AV-1560 supports RTSP protocol. It can use Restart the camera (system). the VLC tool to broadcast. 3) Username and password C. PTZ Port The user can change the password (letters and Support PTZ protocols, default port: 5678. -
Page 22: Device Information
8) SDK Settings ⚫ No shooting extremely bright object for a On/Off to enable/disable active connection. Set long time, such as direct sunlight, light SDK address (default value is 192.168.100.138) sources, etc. and port (default value is 1234). ⚫ No operating in unstable lighting 9) NTP Settings conditions, otherwise image will be On/Off to enable/disable NTP time sync, main... - Page 23 gateway settings of the Camera. 3) Check whether the MAC addresses conflict. 4) Check whether the web port is occupied by another device. ⚫ Forget the IP address or login password. The default IP address: 192.168.100.88; default user name: admin; default password: admin.
- Page 24 To receive warranty service, please contact AVIPAS Inc. first. We will decide whether a repair or replacement is needed and will advise you of the cost of such repair or replacement.
Need help?
Do you have a question about the AV-1560 and is the answer not in the manual?
Questions and answers