Rohde & Schwarz SGS100A User Manual
Sgma rf source
Hide thumbs
Also See for SGS100A:
- Manual (8 pages) ,
- Instrument security procedures (8 pages) ,
- User manual (326 pages)
Table of Contents
Advertisement
Advertisement
Chapters
Table of Contents

Related Manuals for Rohde & Schwarz SGS100A


Summary of Contents for Rohde & Schwarz SGS100A
- Page 1 ® R&S SGS100A SGMA RF Source User Manual (;×é52) 1173910502...
- Page 2 ® This document describes the R&S SGS100A, stock no. 1416.0505.02 and its options. ● ® R&S SGS-B1 (1416.2408.02) ● ® R&S SGS-B26 (1416.1353.02) ● ® R&S SGS-B106/106V (1416.2308.02/1416.2350.02) ● ® R&S SGS-B112/112V (1416.1553.02/1416.1576.02) ● ® R&S SGS-K22 (1416.2650.02) ● ®...
- Page 3 Safety Instructions Instrucciones de seguridad Sicherheitshinweise Consignes de sécurité Risk of injury and instrument damage The instrument must be used in an appropriate manner to prevent electric shock, fire, personal injury or instrument damage. ● Do not open the instrument casing. ●...
- Page 4 Gefahr von Verletzungen und Schäden am Gerät Betreiben Sie das Gerät immer ordnungsgemäß, um elektrischen Schlag, Brand, Verletzungen von Personen oder Geräteschäden zu verhindern. ● Öffnen Sie das Gerätegehäuse nicht. ● Lesen und beachten Sie die "Grundlegenden Sicherheitshinweise", die als gedruckte Broschüre dem Gerät beiliegen. ●...
-
Page 5: Table Of Contents
® Contents R&S SGS100A Contents 1 Preface....................13 Key Features........................13 Documentation Overview................... 13 1.2.1 Getting Started Manual....................13 1.2.2 User Manual and Help....................13 1.2.3 Service Manual......................14 1.2.4 Instrument Security Procedures..................14 1.2.5 Basic Safety Instructions....................14 1.2.6 Data Sheets and Brochures..................14 1.2.7... - Page 6 Front Panel Tour......................31 Rear Panel Tour......................33 4 First Steps with the Instrument............36 Configuring a CW Signal with the R&S SGMA-GUI..........36 Configuring a CW Signal with the R&S SGS100A Web-GUI........38 5 System Overview................. 40 Setups for Instrument Control................... 40 5.1.1 Manual Operation from the R&S SGMA-GUI..............40...
- Page 7 ® Contents R&S SGS100A 6.4.1 Storing and Loading Settings..................67 6.4.2 Handling Instruments in the R&S SGMA-GUI...............68 6.4.2.1 How to Automatically Add New Instruments to the SGMA-GUI ........68 6.4.2.2 How to Manually Add New Instruments to the SGMA-GUI .......... 68 6.4.2.3...
- Page 8 ® Contents R&S SGS100A 7.5.8.1 Connecting R&S NRP Power Sensors to the R&S SGS..........102 7.5.8.2 NRP Sensor Mapping....................103 7.5.8.3 NRP Power Viewer......................105 About...........................105 NRP Power Viewer Settings..................107 Pulse Modulation.......................112 7.6.1 Pulse Modulation Settings................... 114 7.6.2 Pulse Generator Settings.................... 115 7.6.3...
- Page 9 ® Contents R&S SGS100A 8.14 Diagnostic and Tests....................144 8.14.1 Self-test........................145 8.14.2 Keyboard Tests......................145 8.15 External Adjustments....................146 9 Performing Configuration Tasks............147 How to Generate an I/Q Modulated Signal..............147 How to Generate I/Q Signals with an R&S SGS and an R&S SGU Upconverter. 149 How to Enable a Baseband Bypass Mode..............
- Page 10 ® Contents R&S SGS100A 10.2.2 Example: Remote Control over LAN Using Socket Communication......171 10.3 Advanced Remote Control Using PCIe..............172 10.3.1 Setting Up a Remote Control Connection via PCIe............ 173 10.3.2 Download the Drivers....................173 10.3.3 Configuring the Controller................... 174 10.3.3.1 Building and Installing the Hardware Driver..............
- Page 11 ® Contents R&S SGS100A 11.3 General Commands....................203 11.4 Preset Commands.....................204 11.5 CALibration Subsystem................... 205 11.6 CONNector Subsystem.....................208 11.7 DIAGnostic Subsystem.................... 209 11.8 EXTension Subsystem....................209 11.9 MMEMory Subsystem....................213 11.9.1 File Naming Conventions.................... 213 11.9.2 Extensions for User Files.................... 214 11.9.3...
- Page 12 ® Contents R&S SGS100A 13.2.2 Permanent messages....................288 13.3 SCPI-Error Messages....................288 13.4 Device-Specific Error Messages................288 Annex....................291 A Remote Control Basics..............291 Messages........................291 LAN Interface Messages...................292 SCPI Command Structure..................292 A.3.1 Syntax for Common Commands................. 293 A.3.2 Syntax for Device-Specific Commands...............293 A.3.2.1...
- Page 13 ® Contents R&S SGS100A A.5.7.1 Service Request......................308 A.5.7.2 Serial Poll........................309 A.5.7.3 Query of an instrument status..................309 A.5.7.4 Error Queue........................ 309 A.5.8 Reset Values of the Status Reporting System............310 General Programming Recommendations............. 310 B Telnet program examples..............312 Index....................317...
- Page 14 ® Contents R&S SGS100A User Manual 1173.9105.02 ─ 12...
-
Page 15: Preface
® Preface R&S SGS100A Documentation Overview 1 Preface The R&S SGS is a signal generator intended either for the generation of IQ-modulated signals or as a pure local oscillator (LO) source. Optimized for use in automated test equipment (ATE), the instrument offers fast settling times in an exceptionally small form factor and low power consumption. -
Page 16: Service Manual
® Preface R&S SGS100A Documentation Overview with programming examples, and information on maintenance, instrument interfaces and error messages. Includes the contents of the getting started manual. The contents of the user manuals are available as help in the R&S SGS. The help offers quick, context-sensitive access to the complete information. -
Page 17: Application Notes, Application Cards, White Papers, Etc
SGS100A Typographical Conventions 1.2.8 Application Notes, Application Cards, White Papers, etc. These documents deal with special applications or background information on particu- lar topics. See www.rohde-schwarz.com/application/sgs100a. 1.3 Typographical Conventions The following text markers are used throughout this documentation: Convention Description "Graphical user interface ele-... -
Page 18: Preparing For Use
® Preparing for Use R&S SGS100A Putting into Operation 2 Preparing for Use ● Putting into Operation..................... 16 ● Linux Operating System..................22 ● Connecting an External PC and Devices..............22 2.1 Putting into Operation This section describes the basic steps to be taken when setting up the R&S SGS for the first time. -
Page 19: Emi Suppression
® Preparing for Use R&S SGS100A Putting into Operation Risk of instrument damage due to inappropriate operating conditions An unsuitable operating site or test setup can damage the instrument and connected devices. Before switching on the instrument, observe the information on appropriate operating conditions provided in the data sheet. -
Page 20: Accessory List
® Preparing for Use R&S SGS100A Putting into Operation Risk of injury during transportation The carrying handles at the front and side of the casing are designed to lift or carry the instrument. Do not apply excessive force to the handles. If a handle is ripped off, the falling instrument can cause injury. -
Page 21: Switching The Instrument On And Off
® Preparing for Use R&S SGS100A Putting into Operation Risk of injury and instrument damage if stacking instruments A stack of instruments may tilt over and cause injury. Furthermore, the instruments at the bottom of the stack may be damaged due to the load imposed by the instruments on top. - Page 22 ® Preparing for Use R&S SGS100A Putting into Operation To connect the AC supply ► Connect the R&S SGS to the AC power source using the AC power cable deliv- ered with the instrument. Note: The instrument is in compliance with safety class EN61010-1.
-
Page 23: Function Check
® Preparing for Use R&S SGS100A Putting into Operation Risk of losing data If you switch off the running instrument using the rear panel switch or by disconnecting the power cord, the instrument loses its current settings. Always press the [POWER ON/STANDBY] key first to shut down the application prop- erly. -
Page 24: Linux Operating System
® Preparing for Use R&S SGS100A Connecting an External PC and Devices The R&S SGS offers a two-stage preset concept: ● Preset the instrument to a predefined state The "SGMA-GUI > Instrument Name > Preset" function calls up a defined instru- ment setup. -
Page 25: Installing The R&S Sgma-Gui Software
® Preparing for Use R&S SGS100A Connecting an External PC and Devices ● PCI Express (refer to Chapter 2.3.3, "Connecting a Controller via PCI Express", on page 28 ● USB interface (refer to Chapter 2.3.4, "Connecting a Controller or a USB Device USB",... -
Page 26: Connecting A Remote Pc Via Lan
® Preparing for Use R&S SGS100A Connecting an External PC and Devices Installing a new software version Administrator rights are necessary for installation and starting. 1. Download the R&S SGMA-GUI software. 2. In Windows Explorer, double-click SGMA-GUI_V.VV.VVV.VVV.exe. Follow the instructions. -
Page 27: Connecting The Instrument To The Network
® Preparing for Use R&S SGS100A Connecting an External PC and Devices This section describes how to configure the LAN interface. It includes the following top- ics: ● Chapter 2.3.2.1, "Connecting the Instrument to the Network", on page 25 ●... -
Page 28: Assigning The Ip Address
® Preparing for Use R&S SGS100A Connecting an External PC and Devices 4. R&S SGMA-GUI main panel, select "Setup > Instruments". 5. In the "Configure Instruments" dialog, click "Scan". The new instrument should appear with a Zeroconf IP address 169.254.xx.yy 6. -
Page 29: Automatically Adding Instruments To The Sgma-Gui
® Preparing for Use R&S SGS100A Connecting an External PC and Devices 4. Enter the "Subnet mask", for example 255.255.255.0. 5. Enter the "Default Gateway", for example 192.168.0.1. Assigning a static IP address to your Windows-PC network card 1. Obtain the IP address and subnet mask for the R&S SGS and the IP address for the local default gateway from your network administrator. -
Page 30: Connecting A Controller Via Pci Express
® Preparing for Use R&S SGS100A Connecting an External PC and Devices Note: This step is performed automatically on the first start and can also be omit- ted for instruments with a direct LAN connection to the computer. All instruments are added automatically to the main panel of the SIGMA-GUI. - Page 31 ® Preparing for Use R&S SGS100A Connecting an External PC and Devices Setting up a USB connection from a PC to the R&S SGS If your network does not support DHCP, you can set a USB connection between a PC and a R&S SGS.
- Page 32 ® Preparing for Use R&S SGS100A Connecting an External PC and Devices Using a USB Adapter You can use a USB adapter to customize the connectors of a USB cable to the require- ments of the instrument. For example, you can use a Type-A / Micro-A adapter to customize a standard USB cable with type A and type Micro-B connectors for the connection of an R&S SGS (act-...
-
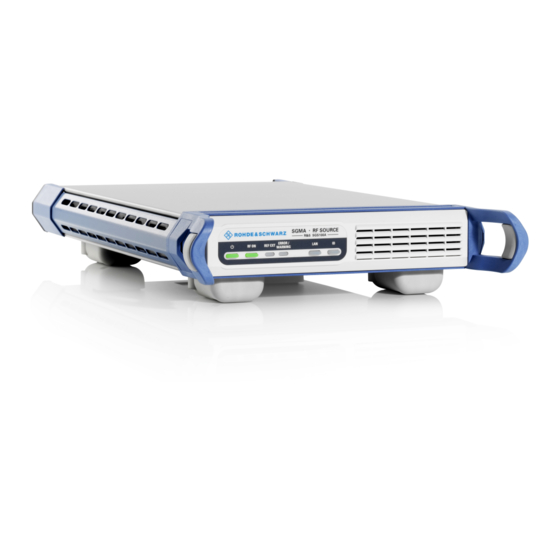
Page 33: Instrument Tour
® Instrument Tour R&S SGS100A Front Panel Tour 3 Instrument Tour The following topics help you get familiar with the instrument and perform the first steps: ● Front Panel Tour ● Rear Panel Tour This section explains the control elements and the connectors of the R&S SGS with the aid of the front and rear views. - Page 34 ® Instrument Tour R&S SGS100A Front Panel Tour The [RF ON] key switches the RF signal on or off. If activated, the button is green. [REF EXT] The [REF EXT] LED indicates the status of the external reference. ● Green indicates that the instrument can synchronize to the external clock.
-
Page 35: Rear Panel Tour
® Instrument Tour R&S SGS100A Rear Panel Tour Pressing the ID key of an inactive instrument and starting "SGMA-GUI > Setup > Instruments > Scan", leads to an automatic activation of the instrument in the SGMA- GUI. 3.2 Rear Panel Tour This section provides an overview of the connectors on the rear panel of the instru- ment. - Page 36 ® Instrument Tour R&S SGS100A Rear Panel Tour ● If the interface is configured as a host interface, a memory stick for file transmis- sion can be connected. For details, see Chapter 2.3.4, "Connecting a Controller or a USB Device via USB",...
- Page 37 ® Instrument Tour R&S SGS100A Rear Panel Tour SMA female type connectors, for reference or local oscillator signals, and alternatively also in MIMO setups. Reference input and output: ● [REF IN]: Input for external reference signal. ● [REF OUT]: Output of internal reference signal.
-
Page 38: First Steps With The Instrument
4 First Steps with the Instrument This section provides examples on how to configure the R&S SGS to generate a con- tinuous wave (CW) signal via the R&S SGMA-GUI and the R&S SGS100A Web-GUI. 4.1 Configuring a CW Signal with the R&S SGMA-GUI The R&S SGS in this example is a base unit equipped with the frequency option... - Page 39 ® First Steps with the Instrument R&S SGS100A Configuring a CW Signal with the R&S SGMA-GUI 3. In the R&S SGMA-GUI main panel, the green indicator in front of the instrument's name confirms that there is a connection between the instrument and the remote PC and that the instrument is recognized by the software.
-
Page 40: Configuring A Cw Signal With The R&S Sgs100A Web-Gui
4.2 Configuring a CW Signal with the R&S SGS100A Web- The R&S SGS100A Web-GUI is an alternative way to operate the R&S SGS. There is no installation needed. It can be used with all devices and operating systems, including tablets and smart phones, which have one of the following web browsers installed: ●... - Page 41 Name". For additional information on other settings, hold the mouse cursor over the specific setting. Error messages are also displayed in the R&S SGS100A Web-GUI. If you want to hide an error message, click on it. 4. In the menu bar on the left side press "Preset" to restore the predefined instru- ment's settings.
-
Page 42: System Overview
® System Overview R&S SGS100A Setups for Instrument Control 5 System Overview The R&S SGS RF Source is a signal generator intended either for the generation of IQ-modulated signals or as a pure local oscillator (LO) source in the frequency range of 1 MHz to 12.75 GHz. -
Page 43: Remote Control From A Controller
® System Overview R&S SGS100A Setups for Instrument Control 5.1.2 Remote Control from a Controller The remote control provides access to the instrument's settings from a remote com- puter (external controller) by means of remote commands. To automate often repeating settings and settings sequences, these are grouped in the remote control programs, i.e. -
Page 44: Setups For Connecting An R&S Sgs And An R&S Sgu
® System Overview R&S SGS100A Setups for Connecting an R&S SGS and an R&S SGU 5.2 Setups for Connecting an R&S SGS and an R&S SGU If an R&S SGU is connected to an R&S SGS, the R&S SGU acts as an extension to the R&S SGS extending its frequency range. -
Page 45: Connection In A Company Network
® System Overview R&S SGS100A Setups for Connecting an R&S SGS and an R&S SGU For a direct PCIe connection, an automatic identification of the R&S SGU as an exten- sion is only available for an R&S SGS with a "Controller > Revision" 5 or higher. For a description on how to manually set the PCIe identification, see Chapter 9.14, "How to... - Page 46 ® System Overview R&S SGS100A Setups for Connecting an R&S SGS and an R&S SGU Figure 5-5: Connection of an R&S SGS and an R&S SGU in a company network 1. Connect the test equipment as shown in Figure 5-5: a) Connect the R&S SGS, the R&S SGU and the controller to the company net-...
- Page 47 ® System Overview R&S SGS100A Setups for Connecting an R&S SGS and an R&S SGU 5. In the R&S SGMA-GUI main panel, the green indicator in front of the instrument's name confirms that there is a connection between the instrument and the remote PC and that the instrument is recognized by the software.
-
Page 48: Connection With A Pcie Switch
® System Overview R&S SGS100A Setups for Connecting an R&S SGS and an R&S SGU The diagram displays the connection state of the tested signal connections. If the test connections are correct (shown by an uninterrupted blue line), you can start using the R&S SGS and the R&S SGU in extension mode. -
Page 49: R&S Sgu As An Extension To The R&S Sgs
® System Overview R&S SGS100A Setups for Connecting an R&S SGS and an R&S SGU PCIe switch connection of an R&S SGS and an R&S SGU Figure 5-7: Connection of an R&S SGS and an R&S SGU through a PCIe switch 1. - Page 50 ® System Overview R&S SGS100A Setups for Connecting an R&S SGS and an R&S SGU Figure 5-8: Example of a test setup for upconverting a CW signal generated by the R&S SGS For higher setting/ measuring speeds, use a PCIe switch and PCIe connections.
- Page 51 ® System Overview R&S SGS100A Setups for Connecting an R&S SGS and an R&S SGU 5. In the R&S SGMA-GUI main panel, the green indicator in front of the instrument's name confirms that there is a connection between the instrument and the remote PC and that the instrument is recognized by the software.
- Page 52 ® System Overview R&S SGS100A Setups for Connecting an R&S SGS and an R&S SGU 9. Select "Test Signal Connections > Test" to trigger a check of all required signal connections. The diagram displays the connection state of the tested connections.
-
Page 53: Introduction To The Instrument Functions
® System Overview R&S SGS100A Introduction to the Instrument Functions The extension adopts these values and states automatically and generates a CW signal with RF = 40 GHz and Level = -20 dBm. The signal is output at the [RF OUT] connector on the rear panel of the R&S SGU. - Page 54 ® System Overview R&S SGS100A Introduction to the Instrument Functions Figure 5-9: Simplified Block Diagram TCXO = Built-in reference oscillator OCXO = Oven-controlled oscillator, requires hardware option R&S SGS-B1 Synth. = Synthesizer I/Q Mod = I/Q Modulator REF/LO IN, REF/LO OUT, I, Q, RF OUT = Connector at the rear panel "Ref.
-
Page 55: Understanding The R&S Sgma-Gui Software
® Understanding the R&S SGMA-GUI Software R&S SGS100A Operating Menu and Toolbar 6 Understanding the R&S SGMA-GUI Soft- ware This section gives a detailed description of the R&S SGMA-GUI user interface and information on how to work with it. The main panel with the overview of the configured instruments is the operating and control interface for the whole program. -
Page 56: File Menu
® Understanding the R&S SGMA-GUI Software R&S SGS100A Operating Menu and Toolbar File Setup Help Exit Protection Shut down instruments and exit 6.1.1 File Menu The R&S SGMA-GUI employs the standard Save/Recall file management function and allows you to store and reload settings in/to a file with a user-defined name and loca- tion (see also Chapter 6.4.1, "Storing and Loading... -
Page 57: Setup Menu
® Understanding the R&S SGMA-GUI Software R&S SGS100A Operating Menu and Toolbar 6.1.2 Setup Menu The setup menu provides access to dialogs for setting the general settings of the soft- ware, like dialogs for managing the connected instruments or dialogs providing infor- mation about the installed options. - Page 58 ® Understanding the R&S SGMA-GUI Software R&S SGS100A Operating Menu and Toolbar Tip: The first initialization of a newly connected instrument in a network and the instru- ment's request to the DHCP server for an IP address may take some time. During this time, the instrument does not respond to the query sent by the scan function.
-
Page 59: Add/Edit Instruments
® Understanding the R&S SGMA-GUI Software R&S SGS100A Operating Menu and Toolbar Scan LAN instruments with host name prefix Sets the prefix the searched host names begin with. Use this function to limit the amount of the searched instruments and to speed up the scan process. - Page 60 ® Understanding the R&S SGMA-GUI Software R&S SGS100A Operating Menu and Toolbar Remote command: on page 77 :INSTruments:NAME Instrument Type Selects the instrument's family. Remote command: on page 79 :INSTruments:TYPE Active Activates/deactivates the display of the instrument's settings in the main panel.
-
Page 61: Versions/Options Dialog
® Understanding the R&S SGMA-GUI Software R&S SGS100A Operating Menu and Toolbar Remote command: on page 77 :INSTruments:REMote:NAME GPIB Address Enters the GPIB address of the connected instrument. See also Chapter 10.1.5, "GPIB Interface (IEC/IEEE Bus Interface)", on page 170. -
Page 62: Protection
® Understanding the R&S SGMA-GUI Software R&S SGS100A Operating Menu and Toolbar Software Displays information on: "Package" Installed software packages. "Version" Release of the software package. Show Open Source Acknowledgments Accesses the list of the used open source software packages and the corresponding verbatim license texts. -
Page 63: Reset Sgma-Gui
® Understanding the R&S SGMA-GUI Software R&S SGS100A Operating Menu and Toolbar Protection Level / Password "Protection Level 1" can be activated to expand the functionality of the internal adjust- ment. The password is 123456. The other protection levels 2 to 4 provide access to protected service functions. Only the authorized personnel of Rohde &... -
Page 64: Help
® Understanding the R&S SGMA-GUI Software R&S SGS100A Info Dialog and Messages in the Info Bar 6.1.3 Help The R&S SGMA-GUI is equipped with a context-sensitive help function. A help page can be called any time during software operation. The context-sensitive page which is opened with the [F1] button is part of a compre- hensive help system. -
Page 65: Understanding The Messages In The Info Bar
® Understanding the R&S SGMA-GUI Software R&S SGS100A Info Dialog and Messages in the Info Bar Parameter Description "LEV" Message level. Messages referring to a logical component of R&S SGMA-GUI, e.g., Unicode, are marked in red color, info messages are marked in black color. -
Page 66: Main Panel
® Understanding the R&S SGMA-GUI Software R&S SGS100A Main Panel The information, e.g., file not found, is displayed in black color. ● Warning A warning indicates a less significant error and is displayed in black color. ● Brief message Brief messages report automatic settings in the program, e.g. switching on illegal entries that are not accepted by the program, e.g., range violations. - Page 67 ® Understanding the R&S SGMA-GUI Software R&S SGS100A Main Panel Instrument/Connection State The three colors of the state indicator in front of the instrument's name distinguish between the following states: ● Gray: the instrument is configured and activated in the R&S SGMA-GUI but there is no connection to the instrument.
- Page 68 ® Understanding the R&S SGMA-GUI Software R&S SGS100A Main Panel Instrument Name/ IP Address Displays the alias name of the instrument and the IP address, as set by the parameters in "SGMA-GUI > Setup > Instruments > Add/Edit Instruments" dialog.
-
Page 69: Working With R&S Sgma-Gui
® Understanding the R&S SGMA-GUI Software R&S SGS100A Working with R&S SGMA-GUI Note: The SCPI command [:SOURce]:POWer[:LEVel][:IMMediate][: sets the level of the "Level" display, that means the level containing off- AMPLitude] set while sets the level at the RF output connector. -
Page 70: Handling Instruments In The R&S Sgma-Gui
® Understanding the R&S SGMA-GUI Software R&S SGS100A Working with R&S SGMA-GUI 3. To load settings from a file, select "SGMA-GUI main panel > File > Open" 4. Navigate to the directory the file is stored in and select the setting file. -
Page 71: How To Scan For New Instruments
® Understanding the R&S SGMA-GUI Software R&S SGS100A Working with R&S SGMA-GUI Tip: See also Chapter 6.4.3, "Finding Out the Default Hostname of the Instrument", on page 71 . 7. For USB or PCIe interfaces, select "Remote Control > Serial Number" and enter the serial number of the connected instrument , e.g. -
Page 72: How To Delete An Instrument
® Understanding the R&S SGMA-GUI Software R&S SGS100A Working with R&S SGMA-GUI 2. Select the instrument to be edited and click the "Edit" button. Edit Instrument dialog opens. 3. Change the settings and confirm with OK. The edited settings are applied. -
Page 73: Finding Out The Default Hostname Of The Instrument
® Understanding the R&S SGMA-GUI Software R&S SGS100A Working with R&S SGMA-GUI 6.4.3 Finding Out the Default Hostname of the Instrument The default hostname of the instrument is a non-case-sensitive string built as follows: hostname = <instrument name><serial number>, where <serial number>... - Page 74 ® Understanding the R&S SGMA-GUI Software R&S SGS100A Working with R&S SGMA-GUI Field "Edit Instrument > Symbolic Name" displays the name of the instrument as shown in the R&S SGMA-GUI main panel. Dialog "Edit Instrument" does not appear If this dialog does not open, perform the following: ●...
-
Page 75: Managing Messages In The Info Dialog
® Understanding the R&S SGMA-GUI Software R&S SGS100A Working with R&S SGMA-GUI How to identify an instrument in an instrument set ► To identify the instrument in an instrument set, use one of the device identification functions: a) Select "SGMA-GUI > Setup > Instruments > Available Instruments > Instrument >... -
Page 76: Remote Control Of The R&S Sgma-Gui
® Understanding the R&S SGMA-GUI Software R&S SGS100A Remote Control of the R&S SGMA-GUI How to call the history 1. In the "Info" dialog, click the "History" button. A list of all messages that have occurred since the instrument switch-on is dis- played. -
Page 77: R&S Sgma-Gui Settings
® Understanding the R&S SGMA-GUI Software R&S SGS100A Remote Control of the R&S SGMA-GUI // Response: SGU-100002,SGS-100006, SGT-100008 :INSTruments:SERial? // Response: 100002,100006,100008 :INSTruments:REMote:CHANnel? // Response: LAN,USB, PCIe :INSTruments:REMote:NAME? // Response: rssgu100a100002, rssgs100a100006, rssgt100a100008 // ****************************************************************** // Check the instrument state and activate instruments if required... -
Page 78: Instruments:active[:State]
® Understanding the R&S SGMA-GUI Software R&S SGS100A Remote Control of the R&S SGMA-GUI ....................78 :INSTruments:GPIB:BOARd ......................78 :INSTruments:SCAN ..................78 :INSTruments:SCAN:HNPRefix ......................78 :INSTruments:SERial ......................79 :INSTruments:TYPE :INSTruments:ACTive[:STATe] <State> Enables/disables the instrument for the R&S SGMA-GUI. The main panel of this soft- ware displays only activated instruments. -
Page 79: Instruments:mapping:file
® Understanding the R&S SGMA-GUI Software R&S SGS100A Remote Control of the R&S SGMA-GUI :INSTruments:MAPPing:FILE <File> Saves the list of the available instruments in a mapping file. Mapping files are stored with the predefined file extension .map; the file extension may be omitted. -
Page 80: Instruments:gpib:address
® Understanding the R&S SGMA-GUI Software R&S SGS100A Remote Control of the R&S SGMA-GUI :INSTruments:GPIB:ADDRess <Serial> Sets the GPIB Address of the connected instrument. Parameters: <Serial> List of Numbers Manual operation: "GPIB Address" on page 59 :INSTruments:GPIB:BOARd <Board> Identifies the GPIB bus card the controller uses. -
Page 81: List Of R&S Sgma-Gui Commands
® Understanding the R&S SGMA-GUI Software R&S SGS100A Remote Control of the R&S SGMA-GUI Parameters: <Serial> <SerialNumberInstr#1>, <SerialNumberInstr#2>,... Example: Chapter 6.5.1, "Configuring Instruments in the R&S SGMA- GUI", on page 74. Manual operation: "Serial Number" on page 59 :INSTruments:TYPE <Type>... -
Page 82: Signal Generator Settings
® Signal Generator Settings R&S SGS100A Frequency/Phase Settings 7 Signal Generator Settings This section summarizes the settings necessary to configure the instrument for signal generation. The description in this section follows the menu tree structure of the graph- ical user interface. Each of the discussed topics follows a common structure, providing basic background information, and reference to the user interface. - Page 83 ® Signal Generator Settings R&S SGS100A Frequency/Phase Settings Access: ► Select "SGMA-GUI > Instrument Name > Frequency/Phase". The frequency and phase related settings are provided in this dialog. Configuring the RF frequency 1. To change the RF frequency of the selected instrument, perform one of the follow- ing: a) Select "SGMA-GUI >...
-
Page 84: Local Oscillator (Lo) Coupling
® Signal Generator Settings R&S SGS100A Local Oscillator (LO) Coupling In the "SGMA-GUI main panel", enabled frequency offset is also indicated with the key- word "Freq (Offs)". Remote command: on page 236 [:SOURce]:FREQuency:OFFSet Delta Phase Sets the phase of the RF signal. The current phase of the signal is used as the refer- ence. -
Page 85: Local Oscillator (Lo) Coupling Settings
® Signal Generator Settings R&S SGS100A Local Oscillator (LO) Coupling If two signal generators are coupled via their 10 MHz reference, they are generating exactly the same frequency but only in the long-term perspective. Having a closer look into the instantaneous differential phase (“delta phase”) of these two RF signals, this is unstable due to: ●... -
Page 86: Reference Oscillator
® Signal Generator Settings R&S SGS100A Reference Oscillator "Ext" The signal fed-in at the [REF/LO IN] input connector is used as signal source. An icon in the block diagram indicates that an external LO source is used. Note: The local oscillator input/output requires the additional software option R&S SGS-K90. - Page 87 ® Signal Generator Settings R&S SGS100A Reference Oscillator Ref. Oscillator Source/Ext Ref On/Off Determines whether the internal built-in oscillator (TXCO or OXCO) is used as a refer- ence source or if an external reference is used. The internal reference oscillator OCXO requires the additional option R&S SGS-B1.
- Page 88 ® Signal Generator Settings R&S SGS100A Reference Oscillator Remote command: on page 261 [:SOURce]:ROSCillator:EXTernal:SBANdwidth Output Frequency Selects the output for the reference oscillator signal. The available values depend on the input frequency and the reference oscillator source. Table 7-1: Output frequency "Reference Oscillator Source"...
-
Page 89: Level And Power-On Settings
® Signal Generator Settings R&S SGS100A Level and Power-On Settings Adjustment Active Available only for "Source > Int". Selects adjustment mode. "OFF" Uses the calibrated internal reference frequency. This value is deter- mined at one of the R&S service centers during calibration. -
Page 90: Rf Level
® Signal Generator Settings R&S SGS100A Level and Power-On Settings 7.5.1 RF Level ► To access the RF level settings, select "SGMA-GUI > Instrument Name > Level > RF Level". This dialog comprises settings like the RF level and level limit. - Page 91 ® Signal Generator Settings R&S SGS100A Level and Power-On Settings Mode Allows you to optimize the RF output signal for applications, where improved harmonic distortion or improved wideband noise is required. "Normal" In normal mode, the generator provides an RF output signal with high signal to noise ratio and low distortion, according to the data sheet.
-
Page 92: Attenuator
® Signal Generator Settings R&S SGS100A Level and Power-On Settings Limit Sets the level limit. The value specifies the upper limit of the level at the [RF Out] connector. A message appears if an attempt is made to set a level above this limit and the level at the RF out- put is confined to the upper limit. - Page 93 ® Signal Generator Settings R&S SGS100A Level and Power-On Settings "Fixed" The level settings are made without switching the attenuator. When this operating mode is switched on, the attenuator is fixed in the current position to provide level settings without interruption. The...
-
Page 94: Power-On/Emf
® Signal Generator Settings R&S SGS100A Level and Power-On Settings 7.5.3 Power-On/EMF ► To access the power- on/EMF settings, select "SGMA-GUI > Instrument Name > Level > Power-On/EMF". This dialog comprises the settings for the power-on behavior of the instrument. -
Page 95: User Correction Settings
® Signal Generator Settings R&S SGS100A Level and Power-On Settings By default, the instrument operates in "Table & On" mode to provide the highest level accuracy and fastest setting time. Level control can be switched to "Off (Table)" or "On" for particular applications. The "Off (Table)" state (level control Off) is recommended if in CW mode the signal/intermodulation ratio is to be improved for multi-transmitter measurements. - Page 96 ® Signal Generator Settings R&S SGS100A Level and Power-On Settings The "User Correction" function is used to create and activate lists in which level correc- tion values predefined by the user are freely assigned to RF frequencies. Correction is performed by the user-defined table values being added to the output level for the respective RF frequency.
- Page 97 ® Signal Generator Settings R&S SGS100A Level and Power-On Settings User Cor. Data Calls the "File Select" menu for selecting and creating a list or the "File Manager". Remote command: on page 240 [:SOURce]:CORRection:CSET:DELete on page 244 [:SOURce<hw>]:CORRection:CSET[:SELect] Edit User Cor. Data Calls the editor for editing the selected user correction list.
- Page 98 ® Signal Generator Settings R&S SGS100A Level and Power-On Settings "Goto" Selects row for editing. If "Goto Row" is selected, a window opens for entering the requested row. "Edit" Calls a selection of possible actions described below. "Insert Range" Insert new rows before the marked row. The number of rows to be inserted can be defined in an entry window.
- Page 99 ® Signal Generator Settings R&S SGS100A Level and Power-On Settings "Save as" Open the file menu to save the list under a new name. Note: Save list only after filling both columns (frequency and level), otherwise the entries are lost.
-
Page 100: Filling The Correction List Automatically
® Signal Generator Settings R&S SGS100A Level and Power-On Settings Select ASCII Source/Destination Calls the "File Manager" for selecting the ASCII file to be imported into a user correc- tion list (source) or the ASCII file the user correction list is exported (destination) in. -
Page 101: Fill With Sensor
® Signal Generator Settings R&S SGS100A Level and Power-On Settings The correction list entries are only computed when the "Fill" button is pressed. From Sets the start value of the index range. Remote command: n.a. Range Sets the range for filling the table. - Page 102 ® Signal Generator Settings R&S SGS100A Level and Power-On Settings This dialog describes all parameters for filling a table automatically with sensor readings. Since the settings are interdependent, the affected parameters change accordingly if you set a value. To fill the table, press the "Execute" button.
-
Page 103: Using Power Sensors
® Signal Generator Settings R&S SGS100A Level and Power-On Settings Remote command: on page 245 [:SOURce<hw>]:CORRection:ZERoing:STATe [:SOURce<hw>]:CORRection:CSET:DATA[:SENSor<ch>][:POWer]:SONCe on page 240 Used Instrument Settings For Measurement Displays the settings relevant for the measurement. "Modulation" Indicates the modulation state "Amplitude" Shows the currently set level. -
Page 104: Connecting R&S Nrp Power Sensors To The R&S Sgs
® Signal Generator Settings R&S SGS100A Level and Power-On Settings 7.5.8.1 Connecting R&S NRP Power Sensors to the R&S SGS R&S NRP sensors are connected to the R&S SGS in the following ways: ● Connection to the USB connector Requires a USB Adapter Micro-A to A and the following cables, depending on the used sensor type: –... -
Page 105: Nrp Sensor Mapping
® Signal Generator Settings R&S SGS100A Level and Power-On Settings Using USB hub Figure 7-2 illustrates the connection as principle. For details, see the description ® ® R&S Series Power Sensors getting started. Figure 7-2: Connecting power sensors to the R&S SGS via USB hub... - Page 106 ® Signal Generator Settings R&S SGS100A Level and Power-On Settings Any R&S NRP sensor that supports the USB legacy protocol and is connected to one of the USB interfaces, is detected automatically and added to the list. Vice versa, the R&S SGS removes a sensor from the list, when it is disconnected.
-
Page 107: Nrp Power Viewer
® Signal Generator Settings R&S SGS100A Level and Power-On Settings Scan Scans the network and the USB connections for sensors connected via the VISA com- munication protocol, i.e. sensors that are addressed via LAN or USBTMC. Sensors communicating via the USB legacy protocol are detected automatically. - Page 108 ® Signal Generator Settings R&S SGS100A Level and Power-On Settings Follow the following general recommendation to find out the optimum filter length: ● Always start a measurement in auto mode ("Filter > Auto"). Check if the measurement results are sufficient.
-
Page 109: Nrp Power Viewer Settings
® Signal Generator Settings R&S SGS100A Level and Power-On Settings ● Software version of the connected power sensor: on page 235 :SENSe<ch>[:POWer]:TYPE? ● Acquisition of level correction data: Chapter 7.5.5, "User Correction Settings", on page 93. Additional information See Rohde & Schwarz website http://www.rohde-schwarz.com... - Page 110 ® Signal Generator Settings R&S SGS100A Level and Power-On Settings The "Overview" tab shows the list of detected sensors, and provides a separate tab per sensor. A sensor tab contains all parameters for configuring the sensor settings, like aver- age or peak display, reference source, filter and level offset.
- Page 111 ® Signal Generator Settings R&S SGS100A Level and Power-On Settings └ Source......................110 └ Frequency ....................110 └ Level Offset State,Level Offset..............110 └ Filter......................110 └ Filter Length....................111 └ Auto Once..................... 111 └ Noise Content....................111 └ Timeout......................111 └ Default Aperture Time...................
-
Page 112: Source
® Signal Generator Settings R&S SGS100A Level and Power-On Settings Remote command: on page 235 :SENSe<ch>[:POWer]:ZERO Source ← Sensor Settings Selects the source for measurement. "RF" Assigns the signal to the RF path of the R&S SGS. The R&S SGS transfers the RF frequency and level settings to the R&S power sensor automatically. -
Page 113: Filter Length
® Signal Generator Settings R&S SGS100A Level and Power-On Settings "User" The filter length is defined manually, with the parameter Filter Length. As the filter length works as a multiplier for the time window, constant filter length results in a constant measurement time. -
Page 114: Pulse Modulation
® Signal Generator Settings R&S SGS100A Pulse Modulation Aperture Time ← Sensor Settings If "Use Default Aperture Time > Off", defines the acquisition time per sensor. For example, to obtain a sufficient low average value, set the aperture time exactly to one modulation period. - Page 115 ® Signal Generator Settings R&S SGS100A Pulse Modulation Modulation signal sources The R&S SGS provides the following signal sources for the signal modulation: ● Internal: A high-performance pulse generator, that allows you to generate either single or double pulse signals ●...
-
Page 116: Pulse Modulation Settings
® Signal Generator Settings R&S SGS100A Pulse Modulation 7.6.1 Pulse Modulation Settings ► To access the pulse modulation settings, select "SGMA-GUI > Instrument Name > Pulse Modulation". The "Pulse Modulation" dialog contains all parameters required to configure pulse modulation and pulse signal generation. -
Page 117: Pulse Generator Settings
® Signal Generator Settings R&S SGS100A Pulse Modulation 7.6.2 Pulse Generator Settings ► To access the pulse connector/trigger settings, select "SGMA-GUI > Instrument Name > Pulse Modulation > Pulse Genrator". Comprises the settings necessary to configure the internal pulse modulation signal. -
Page 118: Pulse Connector/Trigger Settings
® Signal Generator Settings R&S SGS100A Pulse Modulation Pulse Delay Sets the pulse delay. The pulse delay determines the time that elapses after a trigger event before pulse modulation starts, see Figure 7-3. The pulse delay is not effective for double pulse generation. -
Page 119: Trigger Connector Settings
® Signal Generator Settings R&S SGS100A Trigger Connector Settings "Pulse Mod Ext Trigger" Input for an external trigger signal, used to trigger the pulse genera- tor. "Pulse Mod Ext Source" Input for an externally provided pulse modulation signal. Used when an external pulse modulator source is provided at the connector. -
Page 120: I/Q Modulation And Signal Impairment
® Signal Generator Settings R&S SGS100A I/Q Modulation and Signal Impairment Comprises the settings necessary to configure the signal at the input/output of the multi-purpose [TRIG] connector. Trigger Connector Mode Determines the signal at the input/output of the multi purpose [TRIG] connector. -
Page 121: Gain And Gain Imbalance
® Signal Generator Settings R&S SGS100A I/Q Modulation and Signal Impairment stream is to simulate frequent sources of distortions in a real signal-processing chain to generate a test signal with dirty transmitter conditions. 7.8.1.1 Gain and Gain Imbalance An I/Q gain is a multiplication of all I/Q amplitudes by a common factor. The effect is equivalent to two identical I and Q gain factors. -
Page 122: I And Q Offset
® Signal Generator Settings R&S SGS100A I/Q Modulation and Signal Impairment 7.8.1.2 I and Q Offset An I offset adds a constant value to all I amplitudes, leaving the Q amplitudes unchanged. A Q offset has the opposite effect. A combination of I and Q values results in an I/Q offset, which is usually due to carrier feedthrough in the I/Q modulator. -
Page 123: General I/Q Settings
® Signal Generator Settings R&S SGS100A I/Q Modulation and Signal Impairment 7.8.2 General I/Q Settings ► To access the settings of the I/Q modulator, select "SGMA-GUI > Instrument Name > I/Q Settings > General". Comprises the settings for setting the state and the analog wideband I/Q input. -
Page 124: Analog Impairment Settings
® Signal Generator Settings R&S SGS100A I/Q Modulation and Signal Impairment 7.8.3 Analog Impairment Settings ► To access the settings of the I/Q modulator, select "SGMA-GUI > Instrument Name > I/Q Settings > Analog Impairments". Comprises the settings like I/Q offset and quadrature offset. -
Page 125: Preset
® Signal Generator Settings R&S SGS100A Preset Remote command: on page 246 [:SOURce]:IQ:IMPairment:IQRatio[:MAGNitude] Quadrature Offset Sets the quadrature offset (see Chapter 7.8.1.3, "Quadrature Offset", on page 120). Remote command: on page 247 [:SOURce]:IQ:IMPairment:QUADrature[:ANGLe] 7.9 Preset Calls up a defined instrument setup. All parameters and switching states are preset (also those of inactive operating modes). -
Page 126: Extension
® Signal Generator Settings R&S SGS100A Extension 7.10 Extension Depending on the installed option, your R&S SGS generates an RF signal with fre- quency range up to 12.75 GHz. Some test cases, however, require even higher fre- quencies. A general setup would thus include an upconverter connected to the signal generator and you would have to control both the signal generator and the upconverter. - Page 127 ® Signal Generator Settings R&S SGS100A Extension To access the extension mode settings and enable the extension mode 1. Select "SGMA-GUI > Instrument Name > Extension". Tip: Steps 2 and 3 can be omitted if the R&S SGS and a single R&S SGU are con- nected using PCIe or USB or by a direct LAN connection.
- Page 128 ® Signal Generator Settings R&S SGS100A Extension Connected The connection state indicator visualizes the state of selected extension: ● Grey - the connection to the extension is not activated ("Extension > Available Instruments > Instrument# > Select > Off") ●...
- Page 129 ® Signal Generator Settings R&S SGS100A Extension Figure 7-9: A faulty connection between an R&S SGU and an R&S SGS Note: If your connection is marked as faulty check whether the cables are connected properly. Check also if the connection cables are functioning properly.
-
Page 130: General Instrument Settings And Instrument Setup
® General Instrument Settings and Instrument Setup R&S SGS100A Internal Adjustments 8 General Instrument Settings and Instrument Setup This section describes the settings which do not directly affect signal generation. Access: ► Select "SGMA-GUI > Instrument Name > Setup" and select the required dialog. - Page 131 ® General Instrument Settings and Instrument Setup R&S SGS100A Internal Adjustments Adjust All Starts all internal adjustments for which no external measuring equipment is needed. The adjustments with external measuring equipment are described in the service man- ual. Remote command:...
-
Page 132: Hardware Configuration
® General Instrument Settings and Instrument Setup R&S SGS100A Hardware Configuration I/Q Modulator Starts the adjustment for the I/Q modulator for the entire frequency range. The I/Q modulator is adjusted regarding carrier leakage, I/Q imbalance and quadrature. Remote command: on page 206... - Page 133 ® General Instrument Settings and Instrument Setup R&S SGS100A Hardware Configuration The dialog is a table that lists the installed assemblies. It is divided into the sec- tions: ● "Common Assembly" ● "RF Assembly" Assembly The tables list the installed assemblies.
-
Page 134: Software / Options
® General Instrument Settings and Instrument Setup R&S SGS100A Software / Options 8.3 Software / Options Querying information about the installed options and software version ► Select "SGMA-GUI > Instrument Name > Setup > Software/Options". The "Software/Options" dialog shows the firmware version of the instrument soft- ware and all installed hardware and software options. -
Page 135: Install Sw-Options
® General Instrument Settings and Instrument Setup R&S SGS100A Install SW-Options Software options purchased at a later stage can be activated with a keycode. The acti- vation code is supplied with the software option. An instruction on how to install options is described in the service manual. -
Page 136: Nrp Info
® General Instrument Settings and Instrument Setup R&S SGS100A Protection Only if the instrument is equipped with an older firmware version, a firmware update before enabling the software option may be required. The information on the valid firm- ware versions for the purchased software option is provided together with the option. -
Page 137: Security Setting
® General Instrument Settings and Instrument Setup R&S SGS100A Security Setting 2. To deactivate the protection, the correct password has to be entered. After the instrument has been switched on, the protection levels 1 to 4 are automatically activated. Enter "Protection Level 1 > Password > 123456". - Page 138 ® General Instrument Settings and Instrument Setup R&S SGS100A Security Setting The settings of this dialog are not accessible over remote control (e.g. SCPI com- mands). Change User Password The user name and password are required for remote access to the instrument via VNC, FTP or SAMBA.
- Page 139 ® General Instrument Settings and Instrument Setup R&S SGS100A Security Setting New Password ← Change User Password Enter the new user password. Confirm Password ← Change User Password Enter the new password for conformation. The new password is only valid after the "Change Password" button is pressed.
-
Page 140: Maintenance
® General Instrument Settings and Instrument Setup R&S SGS100A Maintenance Security Password ← Security Settings Enters the password that is required to enable or to disable the settings protected by a security password. The default is '123456'. Note: It is highly recommended to change the default security password before con- necting the instrument to the network. -
Page 141: Network Settings
® General Instrument Settings and Instrument Setup R&S SGS100A Network Settings This feature accelerates the update process and the required restart of the external PC can be executed once after the update operation of all instruments is completed. Security Password Enters the password that is required to enable or to disable the settings protected by a security password. - Page 142 ® General Instrument Settings and Instrument Setup R&S SGS100A Network Settings The dialog provides access to the network settings, like settings about the general net- work environment and specific identification of the computer in the network. The dialog also displays an indication whether the instrument is connected to the network or not.
- Page 143 ® General Instrument Settings and Instrument Setup R&S SGS100A Network Settings Note: Lost LAN connection to an instrument. If the connection to an instrument configured to use static IP addresses is lost, press the [LAN LED] on the instrument front panel.
-
Page 144: Remote Channels
® General Instrument Settings and Instrument Setup R&S SGS100A Factory Preset 8.10 Remote Channels The "Remote" dialog provides access to the settings for remote control. ► To access this dialog, select "SGMA-GUI > Instrument Name > Setup > Remote". Visa Resource Strings Indicates the VISA resource strings used for remote control of the instrument. -
Page 145: Eco Mode
® General Instrument Settings and Instrument Setup R&S SGS100A Eco Mode 1. To access this dialog, select "SGMA-GUI > Instrument Name > Setup > Factory Preset". 2. Select "Execute Factory Preset". The instrument's settings are reset to their factory states. Security settings and user data are not effected. -
Page 146: Standby And Restart
® General Instrument Settings and Instrument Setup R&S SGS100A Diagnostic and Tests With enabled "Eco Mode 1" the doubler stage in a 12.75 GHz instrument is perma- nently switched off to reduce power consumption and the maximum frequency is limited to 6 GHZ. An enabled "Eco Mode" is indicated by a green coloring of the frequency range in the R&S SGMA-GUI. -
Page 147: Self-Test
® General Instrument Settings and Instrument Setup R&S SGS100A Diagnostic and Tests 8.14.1 Self-test 1. To access this dialog, select "SGMA-GUI > Instrument Name > Diagnostic Tests > Self-test". 2. To trigger a self-test, select "Self-test". Performs a self-test on all installed hardware options. -
Page 148: External Adjustments
® General Instrument Settings and Instrument Setup R&S SGS100A External Adjustments 8.15 External Adjustments The external adjustment is a protected service procedure, that requires a Protection Level 2 password. The exact test procedure is described in the service manual. Access: 1. -
Page 149: Performing Configuration Tasks
® Performing Configuration Tasks R&S SGS100A How to Generate an I/Q Modulated Signal 9 Performing Configuration Tasks This section provides a general explanation on how to operate the instrument manually via the R&S SGMA-GUI software. We assume, that the R&S SGS is connected to a remote PC. The R&S SGMA-GUI software has to be installed on this remote PC and the instrument has to be added to the list of "Available Instruments". - Page 150 ® Performing Configuration Tasks R&S SGS100A How to Generate an I/Q Modulated Signal To generate an I/Q modulated signal 1. Connect the test equipment. Provide the external analog signal to be modulated at the I and Q connectors of the instrument.
-
Page 151: How To Generate I/Q Signals With An R&S Sgs And An R&S Sgu Upconverter
® Performing Configuration Tasks R&S SGS100A How to Generate I/Q Signals with an R&S SGS and an R&S SGU Upconverter In the "I/Q settings >General" dialog, set "State > On" to enable the I/Q modulator. 7. Select "SGMA-GUI main panel > RF > On" or press the [RF ON] key on the front panel of the instrument. - Page 152 ® Performing Configuration Tasks R&S SGS100A How to Generate I/Q Signals with an R&S SGS and an R&S SGU Upconverter Figure 9-2: Example of the test setup For higher setting/ measuring speeds, use a PCIe switch and PCIe connections. If a common reference frequency is required, use the internal reference signal of the signal generator and provide it to the R&S SGS and the connected signal analyzer,...
-
Page 153: How To Enable A Baseband Bypass Mode
® Performing Configuration Tasks R&S SGS100A How to Enable a Baseband Bypass Mode The scan function finds out the connected R&S SGU. 5. Select the R&S SGU from the list and set "Available Instruments > Select > On" to enable it as an extension. -
Page 154: How To Configure The Reference Oscillator Source
® Performing Configuration Tasks R&S SGS100A How to Configure the Reference Oscillator Source Some instrument's functions like "Frequency" and I/Q settings are disabled. 3. Select "SGMA-GUI > Instrument Name > Level > RF Level" and adjust the level of the output signal. -
Page 155: How To Configure The Local Oscillator (Lo) Coupling Source
® Performing Configuration Tasks R&S SGS100A How to Configure the Local Oscillator (LO) Coupling Source 3. In the "Reference Oscillator" dialog, set the parameter "Ext. Ref. Input Frequency" to the value of the fed external reference frequency. Now, the instrument uses an external reference signal. The green [REF EXT] LED at the front panel of the instrument indicates that the instrument is synchronized to the external reference signal. -
Page 156: How To Define The Signal At The Ref/Lo Out Connector
® Performing Configuration Tasks R&S SGS100A How to Connect and Configure Instruments for Optimum Phase Coherence 9.6 How to Define the Signal at the REF/LO OUT Connec- The reference oscillator and the LO use the same [REF/LO IN] connector. Hence, it is not possible to use both an external reference source and an external LO source signal at the same time. -
Page 157: How To Restore The Lan Connection To An Instrument
® Performing Configuration Tasks R&S SGS100A How to Restore the LAN Connection to an Instrument 3. Avoid unnecessary cable lengths and branching points. Refer to Figure 9-3 for an example of how to connect two instruments for achieving phase coherence. The configuration can be extended by further instruments. -
Page 158: How To Switch Between The Operating States
® Performing Configuration Tasks R&S SGS100A How to Switch between the Operating States 9.9 How to Switch between the Operating States Figure 9-4 gives an overview of the operating states of the instruments and how to trigger the switch-over between them. - Page 159 ® Performing Configuration Tasks R&S SGS100A How to Switch between the Operating States Operating Description Indication state Standby The standby power mode keeps the power In the R&S SGMA-GUI, the status indicator in switch circuits and the remote control sys- front of the instrument name is red.
-
Page 160: How To Use Computer Names
® Performing Configuration Tasks R&S SGS100A How to Optimize Performance For description on how to terminate work and shut down the instrument regularly, refer Chapter 2.1.5, "Switching the Instrument On and Off", on page 19. 9.10 How to Use Computer Names If there is a name server in the network, alternatively to the IP address each PC or instrument connected in a LAN can be accessed via an unambiguous computer name. -
Page 161: How To Install A New Firmware Version On The Instrument
® Performing Configuration Tasks R&S SGS100A How to Install a New Firmware Version on the Instrument Restoring the default settings Use the "R&S SGMA-GUI main panel > Instrument name > Preset" or the "R&S SGMA-GUI main panel > Instrument name > Setup > Factory Preset" function to return the instrument to its predefined state. - Page 162 ® Performing Configuration Tasks R&S SGS100A How to Install a New Firmware Version on the Instrument Tip: Calibration error. If the "Info" line shows the message "Calibration Error", select "SGMA-GUI main panel > Instrument Name > Setup > Internal Adjustments >...
-
Page 163: How To Activate Options
® Performing Configuration Tasks R&S SGS100A How to Manually Set a PCIe Direct Connection between an R&S SGS and an R&S SGU 9.13 How to Activate Options A firmware update before the activation of the SW option may be required. -
Page 164: Network And Remote Control Operation
® Network and Remote Control Operation R&S SGS100A Remote Control Interfaces and Protocols 10 Network and Remote Control Operation As an alternative to operating the R&S SGS interactively via the R&S SGMA-GUI, one can also control the R&S SGS using programmed commands from a remote PC. -
Page 165: Remote Control Programs And Libraries
® Network and Remote Control Operation R&S SGS100A Remote Control Interfaces and Protocols for remote control over LAN (when using VXI-11 or HiSLIP protocol) or USB. However, no VISA installation is necessary for remote control while using socket communication. For more information about VISA, refer to the user documentation. - Page 166 ® Network and Remote Control Operation R&S SGS100A Remote Control Interfaces and Protocols Figure 10-2: Remote control program using VISA Protocol Remote control program Socket viOpen (..., "TCPIP:rssgs100a100010::5025::SOCKET", ...) viPrintf (..., "SOUR:FREQ 2GHz\n") VXI-11 viOpen (..., "TCPIP:rssgs100a100010::inst0::INSTR", ...) viPrintf (..., "SOUR:FREQ 2GHz\n") HiSLIP viOpen (..., "TCPIP:rssgs100a100010::hislip0::INSTR", ...)
-
Page 167: Lan Interface
® Network and Remote Control Operation R&S SGS100A Remote Control Interfaces and Protocols Protocol Remote control program Socket rssgs_init ("TCPIP:rssgs100a100010::5025::SOCKET", ...) rssgs_SetFrequency (..., 2e9) rssgs_init ("TCPIP:rssgs100a100010::inst0::INSTR", ...) VXI-11 rssgs_SetFrequency (..., 2e9) HiSLIP rssgs_init ("TCPIP:rssgs100a100010::hislip0::INSTR", ...) rssgs_SetFrequency (..., 2e9) USBTMC rssgs_init ("USB::0x0aad::0x0088::1000010::INSTR", ...) rssgs_SetFrequency (..., 2e9) -
Page 168: Visa Resource Strings
® Network and Remote Control Operation R&S SGS100A Remote Control Interfaces and Protocols ment. Software for instrument control and (for specified protocols only) the VISA pro- gram library must be installed on the controller. Identifying instruments in a network If several instruments are connected to the network, each instrument has its own IP address and associated resource string. -
Page 169: Hislip Protocol
® Network and Remote Control Operation R&S SGS100A Remote Control Interfaces and Protocols inst0 currently selects the VXI-11 protocol by default and can be omitted. For details of the VXI-11 protocol, refer to .Chapter 10.1.2.3, "VXI-11 Protocol", on page 168... -
Page 170: Protocol
® Network and Remote Control Operation R&S SGS100A Remote Control Interfaces and Protocols Using VXI-11, each operation is blocked until a VXI-11 device handshake returns. How- ever, using HiSLIP, data is sent to the device using the "fire and forget" method with immediate return. -
Page 171: Pci Express Interface
® Network and Remote Control Operation R&S SGS100A Remote Control Interfaces and Protocols ● <vendor ID> is the manufacturer ID for Rohde&Schwarz ● <product ID> is the product identification of the R&S instrument ● <serial number> is the individual serial number on the rear of the instrument ●... -
Page 172: Gpib Interface (Iec/Ieee Bus Interface)
® Network and Remote Control Operation R&S SGS100A Starting a Remote Control Session 10.1.5 GPIB Interface (IEC/IEEE Bus Interface) The R&S SGS is not equipped with an IEC/IEEE bus interface. To be able to control the instrument via the GPIB bus: 1. -
Page 173: How To Find The Visa Resource String
® Network and Remote Control Operation R&S SGS100A Starting a Remote Control Session Instrument address To operate the instrument via remote control, it must be addressed using the defined interface address. Chapter 10.1.2, "LAN Interface", on page 165, Chapter 10.1.3, "USB Interface",... -
Page 174: Advanced Remote Control Using Pcie
® Network and Remote Control Operation R&S SGS100A Advanced Remote Control Using PCIe To set up a Telnet connection To control the software, only a telnet program is required. The telnet program is part of every operating system. 1. To establish a Telnet connection with the R&S SGS, start the telnet program. Enter the socket address. -
Page 175: Setting Up A Remote Control Connection Via Pcie
® Network and Remote Control Operation R&S SGS100A Advanced Remote Control Using PCIe Fast settings The PCIe interface can be utilized not only to transfer text messages e.g. SCPI com- mands but also to carry register based remote control messages. The latter mode is called fast settings mode. -
Page 176: Configuring The Controller
® Network and Remote Control Operation R&S SGS100A Advanced Remote Control Using PCIe C source code files from which you can build a Linux kernel mode driver for the R&S SGS PCIe remote control interface. – SgsDriverDemo C source code module for a demo program using the instrument driver API. -
Page 177: Making Shared Libraries Accessible
® Network and Remote Control Operation R&S SGS100A Advanced Remote Control Using PCIe 10.3.3.2 Making Shared Libraries Accessible Two library files per operating system are included in SharedLibraries-Dlls file: ● For Linux operating system libsocketcontroller.so and libpciecontroller.so ● For Windows operating system SocketController.dll and PCIeController.dll... -
Page 178: Connecting The Controller And The Instrument
® Network and Remote Control Operation R&S SGS100A Advanced Remote Control Using PCIe Running the example program ► On the command line, enter ./SgsDriverDemo RESOURCESTRING [cmd]. Where ● RESOURCESTRING is the (VISA) resource string of your instrument, e.g. TCPIP::ipaddress::5025::SOCKET or PCIE::0x162f:: 0x132e::serialno::INSTR. -
Page 179: Enabling Fast Settings
® Network and Remote Control Operation R&S SGS100A Advanced Remote Control Using Fast Socket Permitted PCIe cables PCIe extension cables must fulfill the following requirements: ● Single lane connectors ● Max. cable length of 5 m. For example: OSS-PCIe-CBL-x1 cable from One Stop Systems or 74576-000x cable from Molex. -
Page 180: Setting Up A Remote Control Connection Via Fast Socket
® Network and Remote Control Operation R&S SGS100A Advanced Remote Control Using Fast Socket To use the advantage of the fast settings, the following prerequisites must be fulfilled: ● On Windows operating systems, the fast socket driver must be installed. -
Page 181: Installing The Protocol Driver
® Network and Remote Control Operation R&S SGS100A LXI Configuration 10.4.2 Installing the Protocol Driver The protocol driver defines the way to communicate with the instrument via the LAN fast socket interface. For Linux operating system, no special driver is needed. -
Page 182: Default State Of The Network Settings
® Network and Remote Control Operation R&S SGS100A LXI Configuration On the R&S SGS the LXI functionality is already installed and enabled. Thus, the instrument can be accessed via any web browser (like the Microsoft Internet Explorer) to perform the following tasks: ●... -
Page 183: Lan Configuration
® Network and Remote Control Operation R&S SGS100A LXI Configuration The instrument home page (welcome page) opens. The navigation pane of the browser interface contains the following elements: ● "LXI" – "Home" opens the instrument home page. The home page displays the device information required by the LXI stan- dard, including the VISA resource string in read-only format. -
Page 184: Ip Configuration
® Network and Remote Control Operation R&S SGS100A LXI Configuration It comprises the following navigation entries. ● Configuration....................182 ● Advanced Config....................182 ● Ping Client......................183 ● SCPI Remote Trace....................184 10.5.3.1 IP Configuration The "IP configuration" web page displays all mandatory LAN parameters and allows their modification. -
Page 185: Ping Client
® Network and Remote Control Operation R&S SGS100A LXI Configuration The following advanced parameters are available: ● "mDNS and DNS-SD": The additional protocols "multicast DNS" and "DNS service discovery" are used for device communication in zero configuration networks, working without DNS and DHCP. -
Page 186: Scpi Remote Trace
® Network and Remote Control Operation R&S SGS100A LXI Configuration To initiate a ping at the instrument: 1. On the "Ping Client" page, enter the IP address of the host in the "Destination Address" field (for example 10.111.0.125). 2. Select "Submit". - Page 187 ® Network and Remote Control Operation R&S SGS100A LXI Configuration Toolbars The toolbar at the top of the dialog provides basic settings and functions. ● "Live mode" / "logging": If logging is switched on, messages are traced. They are stored in an internal database and can be displayed upon request, using the refresh button (live mode off) or they can be displayed automatically (live mode on).
-
Page 188: How To Record Scpi Commands And Messages Exchanged Via The Lxi Web Browser Interface
® Network and Remote Control Operation R&S SGS100A LXI Configuration ● I: number of the subinstrument ● "message": indicates the type of the message. Possible values and related mes- sage contents are: – > = incoming command – < = outgoing response to a query –... -
Page 189: Using The R&S Sgma-Gui To Monitor The Remote Control Operation
® Network and Remote Control Operation R&S SGS100A Using the R&S SGMA-GUI to Monitor the Remote Control Operation The function records all sent commands, received responses and messages, and stores them in an internal database. If "live mode" is disabled, you can display the recent traces upon request, using the "refresh"... - Page 190 ® Network and Remote Control Operation R&S SGS100A Using the R&S SGMA-GUI to Monitor the Remote Control Operation Table 10-2: Cross-reference between used remote channels and collision-free communication Monitor/ LAN (HiSLIP) LAN (Socket) PCIe (VXI-11) Controller LAN (VXI-11) LAN (HiSLIP)
- Page 191 ® Network and Remote Control Operation R&S SGS100A Using the R&S SGMA-GUI to Monitor the Remote Control Operation Connecting and configuring the monitoring PCs In the "Setup > Security > Security Settings" dialog, check the state of the LAN and USB interfaces and enable them if necessary.
-
Page 192: Remote Control Commands
® Remote Control Commands R&S SGS100A 11 Remote Control Commands In the following, all remote-control commands will be presented in detail with their parameters and the ranges of numerical values. For an introduction to remote control and the status registers, refer to Chapter A, "Remote Control... -
Page 193: Programming Examples
® Remote Control Commands R&S SGS100A Programming Examples 11.1 Programming Examples This chapter provides simple programming examples for the R&S SGS. The purpose of the examples is to present all commands for a given task. In real applications, one would rather reduce the examples to an appropriate subset of commands. - Page 194 ® Remote Control Commands R&S SGS100A Programming Examples :TEST:ALL:STARt? :TEST:ALL:RESult? // Response: RUN // Call :TEST:ALL:RESult? repeatedly until finished (0 or 1 is returned) :DIAGnostic:POINt:CATalog? // Response: D_TEMP_RFB,D_TEMP_CPU,D_TEMP_DBL,... :DIAGNostic:MEASure:POINt? 'D_TEMP_RFB' // Calibration functions may take several minutes // Set timeout values of controller accordingly...
-
Page 195: Generating An I/Q Modulated Signal
® Remote Control Commands R&S SGS100A Programming Examples :SYSTem:EMODe EM1 // ****************************************************************** // Query the installed common assemblies and HW options // ****************************************************************** :SYSTem:SOFTware:OPTion1:NAME? :SYSTem:SOFTware:OPTion1:DESignation? :SYSTem:SOFTware:OPTion1:LICenses? :SYSTem:SOFTware:OPTion1:EXPiration? :SYSTem:HARDware:ASSembly1:NAME? :SYSTem:HARDware:ASSembly1:PNUMber? :SYSTem:HARDware:ASSembly1:SNUMber? :SYSTem:HARDware:ASSembly1:REVision? // ****************************************************************** // Unlock the instrument // ****************************************************************** :UNL 72349234 11.1.2 Generating an I/Q Modulated Signal... - Page 196 ® Remote Control Commands R&S SGS100A Programming Examples :SOURce:OPMode NORMal // ****************************************************************** // Set RF frequency and level // ****************************************************************** :SOURce:FREQuency:CW 2 GHz // :SOURce:PHASe 0 // :SOURce:PHASe:REFerence :SOURce:POWer -10dBm :SOURce:POWer:PEP? // ****************************************************************** // Enable internal reference frequency source // ******************************************************************...
-
Page 197: Adjusting Network And Remote Channel Settings
® Remote Control Commands R&S SGS100A Programming Examples // Unlock the instrument // ****************************************************************** :UNL 72349234 11.1.3 Adjusting Network and Remote Channel Settings In the following example we assume that a remote PC is connected to the instrument, the remote PC and the instrument are switched on and a connection between them is established. -
Page 198: Advanced Task For Optimizing Performance
® Remote Control Commands R&S SGS100A Programming Examples :SYSTem:COMMunicate:NETWork:IPADdress? // Response: 10.113.11.91 :SYSTem:COMMunicate:NETWork:IPADdress:SUBNet:MASK? //Response: 255.255.0.0 :SYSTem:COMMunicate:NETWork:IPADdress:GATeway? //Response: 10.113.0.1 // ****************************************************************** // Changing network settings // ****************************************************************** :SYSTem:PROTect1:STATe OFF,123456 // :SYSTem:COMMunicate:NETWork:COMMon:HOSTname "mySGS" // :SYSTem:COMMunicate:NETWork:IPADdress:MODE STATic // :SYSTem:COMMunicate:NETWork:IPADdress 9.8.7.6 :SYSTem:COMMunicate:NETWork:RESTart // ******************************************************************... -
Page 199: Enabling And Configuring An Extension Mode
® Remote Control Commands R&S SGS100A Programming Examples // ****************************************************************** // Query and adjust the reference oscillator settings // ****************************************************************** :SOURce:ROSCillator:SOURce? // Response: EXT :SOURce:ROSCillator:EXTernal:FREQuency? // Response: 100MHZ :SOURce:ROSCillator:EXTernal:SBANdwidth? //Response: WIDE :SOURce:ROSCillator:SOURce INTernal :SOURce:ROSCillator:OUTput:FREQuency 100MHZ :SOURce:ROSCillator:INTernal:ADJust:STATe OFF // uses the calibrated adjustment value of the internal ref. frequency... - Page 200 ® Remote Control Commands R&S SGS100A Programming Examples // ****************************************************************** *RST; *CLS // :SYSTem:PRESet // :RESTart // :SYSTem:FPReset // ****************************************************************** // Lock the instrument to the controller // ****************************************************************** :LOCK? 72349234 // Lock instrument to avoid interference by other controllers...
-
Page 201: Common Commands
® Remote Control Commands R&S SGS100A Common Commands // 1 :EXTension:BUSY:STATe? // 0 // extension is connected and ready for operation // ****************************************************************** // Send remote commands to the extension to control it // e.g. activate the RF optput of the extension and subsequently confirm this // ****************************************************************** :EXTension:SEND ":OUTP:STAT ON"... -
Page 202: Cls
® Remote Control Commands R&S SGS100A Common Commands *CLS Clear status Sets the status byte (STB), the standard event register (ESR) and the EVENt part of the QUEStionable and the OPERation registers to zero. The command does not alter the mask and transition parts of the registers. It clears the output buffer. -
Page 203: Opc
® Remote Control Commands R&S SGS100A Common Commands Return values: <ISTflag> 0 | 1 Usage: Query only *OPC Operation complete Sets bit 0 in the event status register when all preceding commands have been execu- ted. This bit can be used to initiate a service request. The query writes a "1" into the output buffer when all preceding commands have been executed, which is useful for command synchronization. -
Page 204: Rcl
® Remote Control Commands R&S SGS100A Common Commands Resets the status registers. *RCL <Number> Recall Loads the instrument settings from an intermediate memory identified by the specified number. The instrument settings can be stored to this memory using the command with the associated number. -
Page 205: General Commands
® Remote Control Commands R&S SGS100A General Commands Reads the contents of the status byte in decimal form. Usage: Query only *TRG Trigger Triggers all actions waiting for a trigger event. In particular, *TRG generates a manual trigger signal. This common command complements the commands of the TRIGger subsystem. -
Page 206: Preset Commands
® Remote Control Commands R&S SGS100A Preset Commands test query to prove whether the instrument is locked Controller ID request lock from the controller with the specified Controller ID Return values: <Value> Number request refused; the instrument is already locked to other <Lock Request Id>, i.e. -
Page 207: Calibration Subsystem
® Remote Control Commands R&S SGS100A CALibration Subsystem ● Activating the original state of delivery (factory reset, :SYSTem:FPReset on page 205). Only functions that are protected by a password remain unchanged as well as the passwords themselves. :SOURce<hw>:PRESet :SYSTem:PRESet Triggers an instrument reset. It has the same effect as: ●... -
Page 208: Calibration:frequency[:Measure]
® Remote Control Commands R&S SGS100A CALibration Subsystem Return values: <All> 0 | 1 | OFF | ON Example: Chapter 11.1.1, "Performing General Task for Instrument Setup", on page 191. Usage: Query only Manual operation: "Adjust All" on page 129 :CALibration:FREQuency[:MEASure]? Performs all adjustments which affect the frequency. -
Page 209: Calibration:level:temperature
® Remote Control Commands R&S SGS100A CALibration Subsystem Return values: <Level> 0 | 1 | OFF | ON Example: Chapter 11.1.1, "Performing General Task for Instrument Setup", on page 191. Usage: Query only Manual operation: "Level" on page 129 :CALibration:LEVel:TEMPerature? -
Page 210: Connector Subsystem
® Remote Control Commands R&S SGS100A CONNector Subsystem :CALibration:ROSCillator[:DATA] <Data> Sets the calibration value for the custom defined external adjustment. Parameters: <Data> integer Range: 0 to INT_MAX *RST: Example: on page 207 :CALibration:ROSCillator:DATA:MODE Manual operation: "Calibration Value" on page 146 11.6 CONNector Subsystem... -
Page 211: Diagnostic Subsystem
® Remote Control Commands R&S SGS100A EXTension Subsystem 11.7 DIAGnostic Subsystem ...................209 :DIAGnostic:POINt:CATalog? ..................209 :DIAGnostic[:MEASure]:POINt? :DIAGnostic:POINt:CATalog? Queries the test points available in the instrument. For description of the test points, see the service manual. Example: Chapter 11.1.1, "Performing General Task for Instrument Setup",... -
Page 212: Query Only
® Remote Control Commands R&S SGS100A EXTension Subsystem :EXTension:REMote:STATe? Queries the state of the remote control connection to the extension. Return values: <State> 0 | 1 | OFF | ON 1|ON Connected 0|OFF Not connected Example: Chapter 11.1.5, "Enabling and Configuring an Extension Mode",... -
Page 213: Extension:instruments:remote:lan:name
® Remote Control Commands R&S SGS100A EXTension Subsystem Parameters: <Channel> <Channellnstr#1>[,<Channellnstr#2>,...] Returns a list of the used remote channels of the available extensions, one interface per instrument. If an extension uses more than one remote channels, the fastest one is returned. -
Page 214: Test:extension:connection
® Remote Control Commands R&S SGS100A EXTension Subsystem Example: Chapter 11.1.5, "Enabling and Configuring an Extension Mode", on page 197. Usage: Query only Manual operation: "Available Instruments" on page 126 :EXTension:SELect <SelNr> Selects an extension by its index number. The subsequent SCPI commands are rela- ted to this extension. -
Page 215: Mmemory Subsystem
® Remote Control Commands R&S SGS100A MMEMory Subsystem 11.9 MMEMory Subsystem The MMEMory subsystem (Mass Memory) contains the commands for managing files and directories as well as for loading and storing complete instrument settings in files. The files are stored on the internal flash memory of the instrument or on external USB memory devices. -
Page 216: Extensions For User Files
® Remote Control Commands R&S SGS100A MMEMory Subsystem Depending on how much information is provided, either the values specified in the parameter or the values specified with the command MMEM:CDIR (default directory) are used for the path and the drive settings in the commands. -
Page 217: Remote Control Commands
® Remote Control Commands R&S SGS100A MMEMory Subsystem Response: 127145265,175325184,"test,DIR,0","temp,DIR,0", "readme.txt,ASC,1324","state.savrcltxt,STAT,5327", "waveform.wv,BIN,2342" the directory usbuser contains the subdirectories test and temp as well as the files readme.txt, state.savrcltxt and waveform.wv which have different file types. Tip: To query only the subdirectories of the current or specified directory, perform:... -
Page 218: Mmemory:catalog
® Remote Control Commands R&S SGS100A MMEMory Subsystem :MMEMory:CATalog? <path> Returns the content of a particular directory. Query parameters: <path> string String parameter to specify the directory. If you leave out the path, the command returns the contents of the directory selected with :MMEMory:CDIRectory. -
Page 219: Mmemory:copy
® Remote Control Commands R&S SGS100A MMEMory Subsystem Parameters: <Directory> <directory_name> String containing the path to another directory. The path can be relative or absolute. To change to a higher directory, use two dots '..' . Example: "Working with Files and Directories"... -
Page 220: Mmemory:dcatalog
® Remote Control Commands R&S SGS100A MMEMory Subsystem For files with a size with more than nine digits (gigabytes), the instrument allows the syntax #(<Length>), where <Length> is the file size in decimal format. Parameters for setting and query: <Filename>... -
Page 221: Mmemory:delete
® Remote Control Commands R&S SGS100A MMEMory Subsystem :MMEMory:DELete <Filename> Removes a file from the specified directory. Setting parameters: <Filename> string String parameter to specify the name and directory of the file to be removed. Example: "Working with Files and Directories"... -
Page 222: Mmemory:mdirectory
® Remote Control Commands R&S SGS100A MMEMory Subsystem :MMEMory:MDIRectory <Directory> Creates a subdirectory for mass memory storage in the specified directory. If no direc- tory is specified, a subdirectory is created in the default directory. This command can also be used to create a directory tree. -
Page 223: Fast Speed Commands
® Remote Control Commands R&S SGS100A Fast Speed Commands :MMEMory:STORe:STATe <savrcl_state_nr>, <file_name> Stores the current instrument setting in the specified file. The instrument setting must first be stored in an internal memory with the same num- ber using the common command *SAV. -
Page 224: Output Subsystem
® Remote Control Commands R&S SGS100A OUTPut Subsystem 11.11 OUTPut Subsystem ................... 222 :OUTPut:AFIXed:RANGe:LOWer? ..................222 :OUTPut:AFIXed:RANGe:UPPer? ......................222 :OUTPut:AMODe ....................223 :OUTPut[:STATe]:PON ......................223 :OUTPut[:STATe] :OUTPut:AFIXed:RANGe:LOWer? Queries the minimum level which can be set without the attenuator being adjusted (Attenuator FIXed). Return values: <Lower>... -
Page 225: Sense, Read, Initiate And Slist Subsystems
® Remote Control Commands R&S SGS100A SENSe, READ, INITiate and SLISt Subsystems APASsive The attenuator is switched automatically. The level settings are made only for the passive reference circuits. The high-level ranges are not available. FIXed The level settings are made without switching the attenuator. - Page 226 ® Remote Control Commands R&S SGS100A SENSe, READ, INITiate and SLISt Subsystems The local state is set with the INIT command. Switching off the local state enhances the measurement performance. Measurements results can be retrieved in local state on or off.
- Page 227 ® Remote Control Commands R&S SGS100A SENSe, READ, INITiate and SLISt Subsystems Example: Performing a power measurement with a fixed filter Prerequisite: The sensor is connected to the instrument and mapped to the first sensor channel. SENSe1:SOURce RF //Sensor measures the power of the RF signal...
-
Page 228: Slist[:List]
® Remote Control Commands R&S SGS100A SENSe, READ, INITiate and SLISt Subsystems ................233 :SENSe<ch>[:POWer]:LOGGing:STATe ..................233 :SENSe<ch>[:POWer]:OFFSet ................233 :SENSe<ch>[:POWer]:OFFSet:STATe ................... 233 :SENSe<ch>[:POWer]:SNUMber? ..................234 :SENSe<ch>[:POWer]:SOURce ................. 234 :SENSe<ch>[:POWer]:STATus[:DEVice]? ...................234 :SENSe<ch>[:POWer]:SVERsion? ..................235 :SENSe<ch>[:POWer]:TYPE? ..................235 :SENSe<ch>[:POWer]:ZERO :SLISt[:LIST]? Returns a list of all detected sensors in a comma-separated string. -
Page 229: Slist:sensor:map
® Remote Control Commands R&S SGS100A SENSe, READ, INITiate and SLISt Subsystems Example: Example "Detecting and assigning a power sensor" on page 224. Manual operation: " Sensor Mapping List " on page 104 :SLISt:SENSor:MAP <SensorId>, <Mapping> Assigns a sensor directly to one of the sensor channels, using the sensor name and serial number. -
Page 230: Sense
® Remote Control Commands R&S SGS100A SENSe, READ, INITiate and SLISt Subsystems Return values: <Power> float or float,float The sensor returns the result in the unit set with command SENSe<ch>:UNIT[:POWer] Certain power sensors, such as the R&S NRP-Z81, return two values, first the value of the average level and - separated by a comma - the peak value.:Unit[:Power] -
Page 231: Sense
® Remote Control Commands R&S SGS100A SENSe, READ, INITiate and SLISt Subsystems Example: Example "Performing a power measurement with a fixed fil- ter" on page 225. Manual operation: "Default Aperture Time" on page 111 :SENSe<ch>[:POWer]:APERture:TIMe <ApTime> Defines the aperture time (size of the acquisition interval) for the corresponding sensor.[:Power]:Aperture:time -
Page 232: Sense
® Remote Control Commands R&S SGS100A SENSe, READ, INITiate and SLISt Subsystems Return values: <List> string list *RST: Usage: Query only Manual operation: " S-Parameter " on page 112 :SENSe<ch>[:POWer]:FILTer:LENGth:AUTO? Queries the current filter length in filter mode AUTO (:SENSe<ch>[:POWer]:...[:Power]:Filter:length:auto -
Page 233: Sense
® Remote Control Commands R&S SGS100A SENSe, READ, INITiate and SLISt Subsystems :SENSe<ch>[:POWer]:FILTer:NSRatio <NSRatio> Sets an upper limit for the relative noise content in fixed noise filter mode SENSe<ch>[:POWer]:FILTer:TYPE). This value determines the proportion of intrin- sic noise in the measurement results.[:Power]:Filter:nsratio -
Page 234: Sense
® Remote Control Commands R&S SGS100A SENSe, READ, INITiate and SLISt Subsystems :SENSe<ch>[:POWer]:FILTer:TYPE <Type> Selects the filter mode. The filter length is the multiplier for the time window and thus directly affects the measurement time. Parameters: <Type> AUTO | USER | NSRatio...[:Power]:Filter:type - Page 235 ® Remote Control Commands R&S SGS100A SENSe, READ, INITiate and SLISt Subsystems :SENSe<ch>[:POWer]:LOGGing:STATe <State> Activates the recording of the power values, measured by a connected R&S NRP power sensor. Parameters: <State> 0 | 1 | OFF | ON *RST: Example:...
- Page 236 ® Remote Control Commands R&S SGS100A SENSe, READ, INITiate and SLISt Subsystems Return values: <SNumber> string Example: SENS1:SNUM? Queries the serial number. Usage: Query only Manual operation: " Sensor type and serial number " on page 109 :SENSe<ch>[:POWer]:SOURce <Source> Determines the signal to be measured.
-
Page 237: Source Subsystem
® Remote Control Commands R&S SGS100A SOURce Subsystem :SENSe<ch>[:POWer]:TYPE? Queries the sensor type. The type is automatically detected. Return values: <Type> string Example: SENS1:TYPE? Queries the type of sensor. Response: NRP-Z21 The R&S NRP-Z21 sensor is used. Usage: Query only Manual operation: "... - Page 238 ® Remote Control Commands R&S SGS100A SOURce Subsystem BBBYpass Baseband bypass mode *RST: NORMal Example: Chapter 11.1.2, "Generating an I/Q Modulated Signal", on page 193. Manual operation: "Operation Mode" on page 80 [:SOURce]:FREQuency[:CW|FIXed] <Cw> Sets the RF frequency at the RF output connector of the selected instrument.
-
Page 239: Source:correction Subsystem
® Remote Control Commands R&S SGS100A SOURce:CORRection Subsystem Parameters: <Source> INTernal | EXTernal INT: use built in oscillator; EXT: use signal at [REF/LO IN] con- nector Example: Chapter 11.1.2, "Generating an I/Q Modulated Signal", on page 193. Manual operation: "Source"... - Page 240 ® Remote Control Commands R&S SGS100A SOURce:CORRection Subsystem ..........239 [:SOURce<hw>]:CORRection:CSET:DATA:POWer:POINts? ......240 [:SOURce<hw>]:CORRection:CSET:DATA[:SENSor<ch>][:POWer]:SONCe ................240 [:SOURce]:CORRection:CSET:DELete ..........240 [:SOURce<hw>]:CORRection:DEXChange:AFILe:CATalog? ..........241 [:SOURce<hw>]:CORRection:DEXChange:AFILe:EXTension ..........241 [:SOURce<hw>]:CORRection:DEXChange:AFILe:SELect ........242 [:SOURce<hw>]:CORRection:DEXChange:AFILe:SEParator:COLumn ........242 [:SOURce<hw>]:CORRection:DEXChange:AFILe:SEParator:DECimal ............243 [:SOURce<hw>]:CORRection:DEXChange:EXECute ............243 [:SOURce<hw>]:CORRection:DEXChange:MODE ............244 [:SOURce<hw>]:CORRection:DEXChange:SELect ..............244 [:SOURce<hw>]:CORRection:CSET[:SELect] ................245 [:SOURce<hw>]:CORRection[:STATe] ................245 [:SOURce<hw>]:CORRection:VALue?
- Page 241 ® Remote Control Commands R&S SGS100A SOURce:CORRection Subsystem [:SOURce<hw>]:CORRection:CSET:DATA:FREQuency:POINts? Queries the number of frequency values in the selected table. The numerical suffix at SOURce must not be used for this command. Return values: <Points> integer Range: 0 to 10000 *RST:...
- Page 242 ® Remote Control Commands R&S SGS100A SOURce:CORRection Subsystem Example: CORR:CSET '/var/sgs/ucor1' selects the table ucor1. CORR:CSET:DATA:POW:POIN? queries the number of level values in the table ucor1. Response: 440 the table ucor1 contains 440 level values. Usage: Query only [:SOURce<hw>]:CORRection:CSET:DATA[:SENSor<ch>][:POWer]:SONCe The command fills the selected user correction list with the level values measured by the power sensor for the given frequencies.
- Page 243 ® Remote Control Commands R&S SGS100A SOURce:CORRection Subsystem Return values: <Catalog> string Example: MMEM:CDIR '/var/sgs/import' selects the directory for the ASCII files with frequency and level value pairs. CORR:DEXC:AFIL:EXT TXT selects that ASCII files with extension *.txt are listed. CORR:DEXC:AFIL:CAT? queries the available files with extension *.txt.
- Page 244 ® Remote Control Commands R&S SGS100A SOURce:CORRection Subsystem Example: CORR:DEXC:MODE IMP selects that ASCII files with frequency and level value pairs are imported and transferred into user correction lists. CORR:DEXC:AFIL:SEL '/var/sgs/import_ucor.csv' selects that ASCII file ucor.csv is imported. CORR:DEXC:SEL '/var/sgs/import_ucor_imp' selects that the ASCII file ucor.csv is imported into user cor-...
- Page 245 ® Remote Control Commands R&S SGS100A SOURce:CORRection Subsystem Example: CORR:DEXC:MODE EXP selects that the user correction list is exported into an ASCII file. CORR:DEXC:AFIL:SEL '/var/sgs/import_ucor.csv' selects ASCII file ucor.csv as destination for the user correction list data. CORR:DEXC:AFIL:SEP:COL TAB the pairs of frequency and level values are separated by a tabu- lator.
- Page 246 ® Remote Control Commands R&S SGS100A SOURce:CORRection Subsystem Example: CORR:DEXC:MODE IMP selects that ASCII files with frequency and level value pairs are imported and transferred into user correction lists. CORR:DEXC:AFIL:SEL '/var/sgs/ucor.csv' selects that ASCII file ucor.csv is imported. CORR:DEXC:SEL '/var/sgs/ucor_imp' selects that the ASCII file ucor.csv is imported into user cor-...
- Page 247 ® Remote Control Commands R&S SGS100A SOURce:CORRection Subsystem Example: CORR:CSET '/var/sgs/ucor1' selects the table ucor1. CORR ON activates level correction. Correction is performed using the table ucor1. Manual operation: " User Cor. Data " on page 95 [:SOURce<hw>]:CORRection[:STATe] <State> Activates/deactivates level correction. Level correction is performed using the table which has been selected with the command [:SOURce<hw>]:CORRection:CSET[:...
-
Page 248: Source:iq Subsystem
® Remote Control Commands R&S SGS100A SOURce:IQ Subsystem Manual operation: " Fill User Correction Data with Sensor" on page 100 11.15 SOURce:IQ Subsystem ...................... 246 [:SOURce]:IQ:STATe ..............246 [:SOURce]:IQ:IMPairment:IQRatio[:MAGNitude] ................246 [:SOURce]:IQ:IMPairment:LEAKage:I ................246 [:SOURce]:IQ:IMPairment:LEAKage:Q ............... 247 [:SOURce]:IQ:IMPairment:QUADrature[:ANGLe] ................... 247 [:SOURce]:IQ:IMPairment[:STATe] ....................247 [:SOURce]:IQ:CREStfactor .................... - Page 249 ® Remote Control Commands R&S SGS100A SOURce:IQ Subsystem Parameters: <Q> float Range: -5 to 5 Increment: 0.01 *RST: Default unit: PCT Example: Chapter 11.1.2, "Generating an I/Q Modulated Signal", on page 193. Manual operation: "Offset" on page 122 [:SOURce]:IQ:IMPairment:QUADrature[:ANGLe] <Angle>...
-
Page 250: Source:phase Subsystem
® Remote Control Commands R&S SGS100A SOURce:PHASe Subsystem Example: Chapter 11.1.2, "Generating an I/Q Modulated Signal", on page 193 Manual operation: "Crest Factor" on page 121 [:SOURce]:IQ:WBSTate <State> Selects optimized settings for wideband modulation signals. Parameters: <State> 0 | 1 | OFF | ON... -
Page 251: Source:power Subsystem
® Remote Control Commands R&S SGS100A SOURce:POWer Subsystem 11.17 SOURce:POWer Subsystem ................249 [:SOURce]:POWer:ALC:DSENsitivity ..................249 [:SOURce]:POWer:ALC[:STATe] ..................249 [:SOURce]:POWer:ALC:SONCe ..............250 [:SOURce]:POWer:ATTenuation:RFOFf:MODE .............. 250 [:SOURce]:POWer:ATTenuation:SOVer[:OFFSet] ..................... 250 [:SOURce]:POWer:LMODe ....................250 [:SOURce]:POWer:POWer .................. 251 [:SOURce]:POWer:SCHaracteristic ............251 [:SOURce]:POWer[:LEVel][:IMMediate][:AMPLitude] ..............252 [:SOURce]:POWer[:LEVel][:IMMediate]:OFFSet ................252 [:SOURce]:POWer:LIMit[:AMPLitude] .................... -
Page 252: [:Source]:Power:attenuation:rfoff:mode [:Source]:Power:attenuation:sover[:Offset] [:Source]:Power:lmode
® Remote Control Commands R&S SGS100A SOURce:POWer Subsystem [:SOURce]:POWer:ATTenuation:RFOFf:MODE <Mode> Determines the attenuator's state after the instrument is switched on. Parameters: <Mode> MAX | FATTenuated | FIXed | UNCHanged MAX = FATTenuated Sets attenuation to maximum when the RF signal is switched off. -
Page 253: [:Source]:Power:scharacteristic
® Remote Control Commands R&S SGS100A SOURce:POWer Subsystem This value does not consider a specified offset. The command [:SOURce]:POWer[: sets the level of the "Level" display, that LEVel][:IMMediate][:AMPLitude] means the level containing offset. Parameters: <Amplitude> float Range: -20 to 25 Increment: 0.01... -
Page 254: [:Source]:Power[:Level][:Immediate][:Amplitude] [:Source]:Power[:Level][:Immediate]:Offset [:Source]:Power:limit[:Amplitude]
® Remote Control Commands R&S SGS100A SOURce:POWer Subsystem [:SOURce]:POWer[:LEVel][:IMMediate]:OFFSet <Offset> Note: The level offset is also effective for level sweeps! The command specifies the constant level offset of a downstream attenuator/amplifier. If a level offset is entered, the level entered with... -
Page 255: Source:pulm Subsystem
® Remote Control Commands R&S SGS100A SOURce:PULM Subsystem [:SOURce]:POWer:RANGe:LOWer? [:SOURce]:POWer:RANGe:UPPer? Queries the minimum/maximum level range in the current level mode Return values: <Upper> float Usage: Query only Manual operation: "Level Range" on page 89 11.18 SOURce:PULM Subsystem This subsystem contains the commands for setting the pulse modulation. - Page 256 ® Remote Control Commands R&S SGS100A SOURce:PULM Subsystem // Set the polarity of the externally applied modulation signal. SOURce:PULM:POLarity NORMal // Select the impedance for the external pulse modulation trigger input SOURce:PULM:TRIGger:EXTernal:IMPedance G10K // ****************************************************************** // Configure the pulse generator settings...
- Page 257 ® Remote Control Commands R&S SGS100A SOURce:PULM Subsystem SOURCe:PULM:TRAin:SEL ‘P_FIVE' // Enter the pulse train data SOURCe:PULM:TRAin:ONTime 10ns,30ns,40ns,20ns,10ns SOURCe:PULM:TRAin:OFFTime 30ns,40ns,50ns,40ns,30ns SOURCe:PULM:TRAin:REPetition 10,1,3,10,6 // ****************************************************************** // Select pulse train mode // ****************************************************************** // Select the internal modulation generator and the pulse mode...
- Page 258 ® Remote Control Commands R&S SGS100A SOURce:PULM Subsystem [:SOURce<hw>]:PULM:DOUBle:DELay <Delay> Sets the delay from the start of the first pulse to the start of the second pulse. Parameters: <Delay> float Range: 40 ns to 100 s Increment: 10 ns *RST:...
- Page 259 ® Remote Control Commands R&S SGS100A SOURce:PULM Subsystem [:SOURce<hw>]:PULM:POLarity <Polarity> Sets the polarity of the pulse modulator signal. This command is effective only for an external modulation signal. Parameters: <Polarity> NORMal | INVerted NORMal The RF signal is suppressed during the pulse pause.
- Page 260 ® Remote Control Commands R&S SGS100A SOURce:PULM Subsystem [:SOURce<hw>]:PULM:TRIGger:EXTernal:GATE:POLarity <Polarity> Selects the polarity of the Gate signal. Parameters: <Polarity> NORMal | INVerted *RST: NORMal Example: PULM:TRIG:EXT:GATE:POL NORM The pulse signal is generated while the gate signal is high. Manual operation: "Gate Input Polarity"...
-
Page 261: Source:roscillator Subsystem
® Remote Control Commands R&S SGS100A SOURce:ROSCillator Subsystem EGATe The pulse modulation is gated by an external gate signal. The trigger signal is supplied via the trigger connector. *RST: AUTO Example: PULM:TRIG:MODE EXT selects triggering by an external trigger event. - Page 262 ® Remote Control Commands R&S SGS100A SOURce:ROSCillator Subsystem [:SOURce]:ROSCillator:OUTPut:FREQuency <OutputFreq> Selects the output for the reference oscillator signal. Parameters: <OutputFreq> 10MHZ | 100MHZ | 1000MHZ | 13MHZ 13MHZ requires RF board with part number 1419.5308.02. Example: Chapter 11.1.4, "Advanced Task for Optimizing Perform- ance",...
-
Page 263: Status Subsystem
® Remote Control Commands R&S SGS100A STATus Subsystem Parameters: <State> 0 | 1 | OFF | ON *RST: n.a. (factory preset: 0) Example: ROSC:SOUR INT Selects the internal source. ROSC:ADJ ON Activates use of a user-defined adjustment value. ROSC:ADJ:VAL 1400 Sets the adjustment value to 1400. - Page 264 ® Remote Control Commands R&S SGS100A STATus Subsystem Setting values: A decimal value in the range 0 to 32767 (=2 ..................262 :STATus:OPERation:CONDition? ...................262 :STATus:OPERation:ENABle ...................262 :STATus:OPERation[:EVENt] ..................263 :STATus:OPERation:NTRansition ..................263 :STATus:OPERation:PTRansition ......................263 :STATus:PRESet .................. 263 :STATus:QUEStionable:CONDition ..................264 :STATus:QUEStionable:ENABle ..................264 :STATus:QUEStionable[:EVENt] ................
- Page 265 ® Remote Control Commands R&S SGS100A STATus Subsystem :STATus:OPERation:NTRansition <Ntransition> Sets the bits of the NTRansition part of the STATus:OPERation register. If a bit is set, a transition from 1 to 0 in the condition part causes an entry to be made in the EVENt part of the register.
- Page 266 ® Remote Control Commands R&S SGS100A STATus Subsystem Example: :STATus:QUEStionable:CONDition? queries the Status:Questionable:Condition register. :STATus:QUEStionable:ENABle <Enable> Sets the bits of the ENABle part of the STATus:QUEStionable register. The enable part determines which events of the STATus:EVENt part are enabled for the summary bit in the status byte.
-
Page 267: System Subsystem
® Remote Control Commands R&S SGS100A SYSTem Subsystem Parameters: <PTransition> string Example: STAT:QUES:PTR 32767 all transitions from 0 to 1 in the condition part of the STA- Tus:QUEStionable register cause an entry to be made in the EVENt part :STATus:QUEue[:NEXT]? Queries the oldest entry in the error queue and then deletes it. -
Page 268: System:emode
® Remote Control Commands R&S SGS100A SYSTem Subsystem ..............272 :SYSTem:COMMunicate:SERial:RESource? ................272 :SYSTem:COMMunicate:SERial:SBITs ..............272 :SYSTem:COMMunicate:HISLip:RESource? .............. 272 :SYSTem:COMMunicate:PCIexpress:RESource? ................273 :SYSTem:COMMunicate:SOCKet:PORT ..............273 :SYSTem:COMMunicate:SOCKet:RESource? ................ 273 :SYSTem:COMMunicate:USB:RESource? ......................273 :SYSTem:REBoot ......................274 :SYSTem:RESTart ..................... 274 :SYSTem:SHUTdown ..................274 :SYSTem:STARtup:COMPlete? ..................274 :SYSTem:PROTect<ch>[:STATe] ..............275 :SYSTem:HARDware:ASSembly<dir>:NAME? -
Page 269: System:error:code:all
® Remote Control Commands R&S SGS100A SYSTem Subsystem Volatile errors are reported once, at the time they appear. Identi- cal errors are reported repeatedly only if the original error has already been retrieved from (and hence not any more present in) the error queue. -
Page 270: System:error:count
® Remote Control Commands R&S SGS100A SYSTem Subsystem Example: SYST:ERR:CODE Queries the oldest entry in the error queue. Response: 0 No errors have occurred since the error queue was last read out. Usage: Query only :SYSTem:ERRor:COUNt? Queries the number of entries in the error queue. -
Page 271: System:version
® Remote Control Commands R&S SGS100A SYSTem Subsystem Return values: <Serror> string Example: SYST:SERR queries all errors existing in the error queue. Response: -221, 'Settings conflict', 153, Example: 'Input voltage out of range' The two returned errors have occurred since the error queue was last queried. -
Page 272: System:communicate:network:macaddress
® Remote Control Commands R&S SGS100A SYSTem Subsystem :SYSTem:COMMunicate:NETWork:MACaddress <MacAddress> Queries the MAC address of the network adapter. Parameters: <MacAddress> string Example: SYST:COMM:NETW:MAC queries the MAC address. :SYSTem:COMMunicate:NETWork:STATus? Queries the network configuration state. Return values: <State> 0 | 1 | OFF | ON... -
Page 273: System:communicate:network[:Ipaddress]:Subnet:mask
® Remote Control Commands R&S SGS100A SYSTem Subsystem Parameters: <Gateway> string Range: 0.0.0.0 to ff.ff.ff.ff Example: SYSTem:COMMunicate:NETWork:IPADdress:GATeway '1.2.3.4' sets the IP address of the default gateway. Manual operation: "Default Gateway" on page 141 :SYSTem:COMMunicate:NETWork[:IPADdress]:SUBNet:MASK <Mask> Sets the subnet mask. Parameters: <Mask>... -
Page 274: System:communicate:serial:resource
® Remote Control Commands R&S SGS100A SYSTem Subsystem Parameters: <Parity> NONE | ODD | EVEN *RST: n.a. (factory preset: NONE) Example: SYST:COMM:SER:PAR NONE Selects parity NONE. :SYSTem:COMMunicate:SERial:RESource? Queries the VISA resource string for the serial remote control interface. This string is used for remote control of the instrument. -
Page 275: System:communicate:socket:port
® Remote Control Commands R&S SGS100A SYSTem Subsystem Usage: Query only Manual operation: "Visa Resource Strings" on page 142 :SYSTem:COMMunicate:SOCKet:PORT <ScpiEthPort> Sets the port number for remote control via socket communication. Parameters: <ScpiEthPort> integer Range: 1000 to 65535 *RST: n.a. (factory preset: 5025) -
Page 276: System:restart
® Remote Control Commands R&S SGS100A SYSTem Subsystem :SYSTem:RESTart Restarts the firmware. The operating system remains active. Usage: Event :SYSTem:SHUTdown Shuts down the instrument. Usage: Event :SYSTem:STARtup:COMPlete? Queries if the startup of the instrument is completed. Return values: <Complete> 0 | 1 | OFF | ON... -
Page 277: System:hardware:assembly
® Remote Control Commands R&S SGS100A SYSTem Subsystem :SYSTem:HARDware:ASSembly<dir>:NAME? The query returns a list of hardware assembly names. Suffix: <dir> 1..2 Defines the section: 1 = common assembly, 2 = RF assembly. Return values: <Name> string Example: Chapter 11.1.1, "Performing General Task for Instrument Setup",...:Name -
Page 278: System:hardware:assembly
® Remote Control Commands R&S SGS100A SYSTem Subsystem :SYSTem:HARDware:ASSembly<dir>:SNUMber? Queries the list of hardware module serial numbers. Suffix: <dir> 1..2 Defines the section: 1 = common assembly, 2 = RF assembly. Return values: <SNumber> string Example: Chapter 11.1.1, "Performing General Task for Instrument Setup",...:Snumber -
Page 279: System:software:option
® Remote Control Commands R&S SGS100A SYSTem Subsystem :SYSTem:SOFTware:OPTion<dir>:LICenses? Queries the list of option license counts. Suffix: <dir> 1..2 Defines the section: 1 = hardware, 2 = software. Return values: <Licenses> string Example: Chapter 11.1.1, "Performing General Task for Instrument Setup",...:Licenses -
Page 280: Test Subsystem
® Remote Control Commands R&S SGS100A TEST Subsystem Example: SYSTem:OSYStem? Response: "Linux" Usage: Query only 11.22 TEST Subsystem The TEST system contains the commands for performing the routines as well as for direct manipulation of the hardware assemblies (:TEST:DIRect). The self tests return a "0" if the test is performed successfully, otherwise a value other than "0"... -
Page 281: Unit Subsystem
® Remote Control Commands R&S SGS100A List of R&S SGS Commands Parameters: <State> 0 | 1 | OFF | ON 11.23 UNIT Subsystem The UNIT subsystem contains the commands specifying which units are valid if no unit is indicated in a command. These settings are valid for the entire instrument. - Page 282 ® Remote Control Commands R&S SGS100A List of R&S SGS Commands :CONNector:REFLo:OUTPut......................... 208 :CONNector:TRIGger:OMODe........................208 :DIAGnostic:POINt:CATalog?.........................209 :DIAGnostic[:MEASure]:POINt?........................209 :EXTension:BUSY[:STATe]?...........................211 :EXTension:INSTruments:NAME?......................... 210 :EXTension:INSTruments:REMote:CHANnel?....................210 :EXTension:INSTruments:REMote:LAN:NAME?....................211 :EXTension:INSTruments:REMote:SERial?....................211 :EXTension:INSTruments:SCAN[:STATe]...................... 210 :EXTension:REMote:STATe?......................... 210 :EXTension:SELect............................212 :FFASt................................221 :INITiate<hw>[:POWer]:CONTinuous......................227 :LOCK?................................203 :MEMory:HFRee?............................219 :MMEMory:CATalog:LENGth?........................216 :MMEMory:CATalog?............................. 216 :MMEMory:CDIRectory..........................
- Page 283 ® Remote Control Commands R&S SGS100A List of R&S SGS Commands :SENSe<ch>[:POWer]:LOGGing:STATe......................233 :SENSe<ch>[:POWer]:OFFSet........................233 :SENSe<ch>[:POWer]:OFFSet:STATe......................233 :SENSe<ch>[:POWer]:SNUMber?.........................233 :SENSe<ch>[:POWer]:SOURce........................234 :SENSe<ch>[:POWer]:STATus[:DEVice]?..................... 234 :SENSe<ch>[:POWer]:SVERsion?........................ 234 :SENSe<ch>[:POWer]:TYPE?........................235 :SENSe<ch>[:POWer]:ZERO........................235 :SLISt:ELEMent<ch>:MAPPing........................226 :SLISt:SCAN[:STATe].............................226 :SLISt:SENSor:MAP............................227 :SLISt[:LIST]?..............................226 :SOURce<hw>:PRESet..........................205 :STATus:OPERation:CONDition?........................262 :STATus:OPERation:ENABle......................... 262 :STATus:OPERation:NTRansition........................263 :STATus:OPERation:PTRansition........................263 :STATus:OPERation[:EVENt].........................262...
- Page 284 ® Remote Control Commands R&S SGS100A List of R&S SGS Commands :SYSTem:FPReset............................205 :SYSTem:HARDware:ASSembly<dir>:NAME?....................275 :SYSTem:HARDware:ASSembly<dir>:PNUMber?..................275 :SYSTem:HARDware:ASSembly<dir>:REVision?..................275 :SYSTem:HARDware:ASSembly<dir>:SNUMber?..................276 :SYSTem:MMEMory:PATH:USER?....................... 277 :SYSTem:OSYStem?.............................277 :SYSTem:PRESet............................205 :SYSTem:PROTect<ch>[:STATe]........................274 :SYSTem:REBoot............................273 :SYSTem:RESTart............................274 :SYSTem:SERRor?............................268 :SYSTem:SHUTdown.............................274 :SYSTem:SOFTware:OPTion<dir>:DESignation?..................276 :SYSTem:SOFTware:OPTion<dir>:EXPiration?.................... 276 :SYSTem:SOFTware:OPTion<dir>:LICenses?....................277 :SYSTem:SOFTware:OPTion<dir>:NAME?....................277 :SYSTem:STARtup:COMPlete?........................274 :SYSTem:VERSion?............................
- Page 285 ® Remote Control Commands R&S SGS100A List of R&S SGS Commands [:SOURce]:POWer:LMODe..........................250 [:SOURce]:POWer:PEP?..........................252 [:SOURce]:POWer:POWer..........................250 [:SOURce]:POWer:RANGe:LOWer?......................253 [:SOURce]:POWer:RANGe:UPPer?......................253 [:SOURce]:POWer:SCHaracteristic....................... 251 [:SOURce]:POWer[:LEVel][:IMMediate]:OFFSet................... 252 [:SOURce]:POWer[:LEVel][:IMMediate][:AMPLitude]..................251 [:SOURce]:ROSCillator:EXTernal:FREQuency....................259 [:SOURce]:ROSCillator:EXTernal:SBANdwidth..................... 261 [:SOURce]:ROSCillator:OUTPut:FREQuency....................260 [:SOURce]:ROSCillator:SOURce........................260 [:SOURce]:ROSCillator[:INTernal]:ADJust:VALue..................260 [:SOURce]:ROSCillator[:INTernal]:ADJust[:STATe]..................260 [:SOURce<hw>]:CORRection:CSET:DATA:FREQuency................238 [:SOURce<hw>]:CORRection:CSET:DATA:FREQuency:POINts?..............239 [:SOURce<hw>]:CORRection:CSET:DATA:POWer..................239 [:SOURce<hw>]:CORRection:CSET:DATA:POWer:POINts?................ 239 [:SOURce<hw>]:CORRection:CSET:DATA[:SENSor<ch>][:POWer]:SONCe..........
- Page 286 ® Remote Control Commands R&S SGS100A List of R&S SGS Commands *OPT?................................201 *PRE................................201 *PSC................................201 *RCL................................202 *RST................................202 *SAV................................202 *SRE................................202 *STB?................................202 *TRG................................203 *TST?................................203 *WAI................................203 User Manual 1173.9105.02 ─ 12...
-
Page 287: Maintenance
® Maintenance R&S SGS100A Cleaning 12 Maintenance The instrument does not need periodic maintenance. Only cleaning the instrument is essential. Follow the instructions in the service manual and the safety instructions when exchanging modules or ordering spare parts. The order number for spare parts is inclu- ded in the service manual. -
Page 288: Storing And Packing
® Maintenance R&S SGS100A Storing and Packing 2. Check and clean the fans regularly to ensure that they always operate properly. 3. Clean the touchscreen as follows: a) Apply a small amount of standard screen cleaner to a soft cloth. -
Page 289: Error Messages And Troubleshooting
® Error Messages and Troubleshooting R&S SGS100A Error Messages 13 Error Messages and Troubleshooting This chapter describes the error messages of the R&S SGS. The error messages are output in the "Info" line on the screen and entered in the error/event queue of the sta- tus reporting system. -
Page 290: Permanent Messages
® Error Messages and Troubleshooting R&S SGS100A Device-Specific Error Messages instrument (e.g. range violations). They are displayed in the info line on a yellow back- ground. They are displayed on top of status information or permanent messages. Volatile messages do not normally demand user actions and disappear automatically after a brief period of time. - Page 291 ® Error Messages and Troubleshooting R&S SGS100A Device-Specific Error Messages Error Error Description Remedy Code Adjustment failed Adjustment could not be executed The adjustment data have to be generated first by an internal or external adjustment or to be loa- ded into the device.
- Page 292 ® Error Messages and Troubleshooting R&S SGS100A Device-Specific Error Messages Error Error Description Remedy Code File contains invalid The selected file contains data that is Check the file extension. data not valid for the file type. The file extension determines the data that is valid for this file type.
-
Page 293: Annex
® Remote Control Basics R&S SGS100A Messages Annex A Remote Control Basics This chapter provides basic information on operating an instrument via remote control. A.1 Messages The messages transferred on the data lines are divided into the following categories: ●... -
Page 294: Lan Interface Messages
® Remote Control Basics R&S SGS100A SCPI Command Structure "SCPI confirmed" in the command reference chapters. Commands without this SCPI label are device-specific; however, their syntax follows SCPI rules as per- mitted by the standard. Instrument responses Instrument responses (response messages and service requests) are messages the instrument sends to the controller after a query. -
Page 295: Syntax For Common Commands
® Remote Control Basics R&S SGS100A SCPI Command Structure The commands can be either device-specific or device-independent (common com- mands). Common and device-specific commands differ in their syntax. A.3.1 Syntax for Common Commands Common (= device-independent) commands consist of a header preceded by an aster- isk (*), and possibly one or more parameters. -
Page 296: Long And Short Form
® Remote Control Basics R&S SGS100A SCPI Command Structure A.3.2.1 Long and short form The mnemonics feature a long form and a short form. The short form is marked by upper case letters, the long form corresponds to the complete word. Either the short form or the long form can be entered;... -
Page 297: Scpi Parameters
® Remote Control Basics R&S SGS100A SCPI Command Structure Optional mnemonics with numeric suffixes Do not omit an optional mnemonic if it includes a numeric suffix that is relevant for the effect of the command. Example: Definition:DISPlay[:WINDow<1...4>]:MAXimize <Boolean> Command: DISP:MAX ON refers to window 1. -
Page 298: Special Numeric Values
® Remote Control Basics R&S SGS100A SCPI Command Structure ● M (milli) ● U (micro) ● N (nano) Example: SENSe:FREQ:STOP 1.5GHz = SENSe:FREQ:STOP 1.5E9 Some settings allow relative values to be stated in percent. According to SCPI, this unit is represented by the PCT string. -
Page 299: Boolean Parameters
® Remote Control Basics R&S SGS100A SCPI Command Structure A.3.3.3 Boolean Parameters Boolean parameters represent two states. The "ON" state (logically true) is represen- ted by "ON" or a numeric value 1. The "OFF" state (logically untrue) is represented by "OFF"... -
Page 300: Overview Of Syntax Elements
® Remote Control Basics R&S SGS100A SCPI Command Structure the transmission is not known or if speed or other considerations prevent segmentation of the data into blocks of definite length. A.3.4 Overview of Syntax Elements The following tables provide an overview of the syntax elements and special charac- ters. -
Page 301: Structure Of A Command Line
® Remote Control Basics R&S SGS100A SCPI Command Structure Table A-3: Special characters Parameters A vertical stroke in parameter definitions indicates alternative possibilities in the sense of "or". The effect of the command differs, depending on which parameter is used. -
Page 302: Responses To Queries
® Remote Control Basics R&S SGS100A SCPI Command Structure Example: HCOP:ITEM ALL;:HCOP:IMM This command line contains two commands. Both commands are part of the HCOP command system, i.e. they have one level in common. If the successive commands belong to the same system, having one or several levels in common, the command line can be abbreviated. -
Page 303: Command Sequence And Synchronization
® Remote Control Basics R&S SGS100A Command Sequence and Synchronization A.4 Command Sequence and Synchronization IEEE 488.2 defines a distinction between overlapped and sequential commands: ● A sequential command is one which finishes executing before the next command starts executing. Commands that are processed quickly are usually implemented as sequential commands. -
Page 304: Status Reporting System
® Remote Control Basics R&S SGS100A Status Reporting System SINGle; *OPC? For time consuming overlapped commands, you can allow the controller or the instru- ment to do other useful work while waiting for command execution. Use one of the fol-... - Page 305 ® Remote Control Basics R&S SGS100A Status Reporting System Figure A-1: Graphical overview of the status registers hierarchy OPER = Operation Status Summary Bit RQS/MSS = Service Request Generation = Standard Event Status Summary Bit = Message Available in Output Queue...
-
Page 306: Structure Of A Scpi Status Register
® Remote Control Basics R&S SGS100A Status Reporting System ● Standard Event Status, i.e. the Event status Register (ESR) and the Event Status Enable (ESE), see Chapter A.5.4, "Event Status Register (ESR) and Event Status Enable Register (ESE)", on page 307. - Page 307 ® Remote Control Basics R&S SGS100A Status Reporting System Description of the five status register parts The five parts of a SCPI register have different properties and functions: ● CONDition The CONDition part is written into directly by the hardware or the sum bit of the next lower register.
-
Page 308: Status Byte (Stb) And Service Request Enable Register (Sre)
® Remote Control Basics R&S SGS100A Status Reporting System The instrument automatically generates the sum bit for each register. Thus an event can lead to a service request throughout all levels of the hierarchy. A.5.3 Status Byte (STB) and Service Request Enable Register (SRE) The STatus Byte (STB) is already defined in IEEE 488.2. -
Page 309: Event Status Register (Esr) And Event Status Enable Register (Ese)
® Remote Control Basics R&S SGS100A Status Reporting System A.5.4 Event Status Register (ESR) and Event Status Enable Register (ESE) The ESR is defined in IEEE 488.2. It can be compared with the EVENt part of a SCPI register. The event status register can be read out using command *ESR?. -
Page 310: Operation Status Register (Status:operation)
® Remote Control Basics R&S SGS100A Status Reporting System Table A-7: Meaning of the bits used in the questionable status register Bit No. Meaning 0–15 Not used A.5.6 Operation Status Register (STATus:OPERation) This condition part contains information on the actions currently being performed by the instrument, while the event part contains information on the actions performed by the instrument since the last readout of the register. -
Page 311: Serial Poll
® Remote Control Basics R&S SGS100A Status Reporting System Example: Use command *OPC to generate an SRQ . *ESE 1 - set bit 0 of ESE (Operation Complete) *SRE 32 - set bit 5 of SRE (ESB). After its settings have been completed, the instrument generates an SRQ. -
Page 312: Reset Values Of The Status Reporting System
® Remote Control Basics R&S SGS100A General Programming Recommendations larly since faulty commands from the controller to the instrument are recorded there as well. A.5.8 Reset Values of the Status Reporting System The following table contains the different commands and events causing the status reporting system to be reset. - Page 313 ® Remote Control Basics R&S SGS100A General Programming Recommendations Reacting to malfunctions The service request is the only possibility for the instrument to become active on its own. Each controller program should instruct the instrument to initiate a service request in case of malfunction. The program should react appropriately to the service request.
-
Page 314: B Telnet Program Examples
® Telnet program examples R&S SGS100A B Telnet program examples The following program example shows a simple TcpClient class that is intended to explain on how to get started with programming of sockets. The example sets up a socket communication to R&S SGS and opens a simple user interface, very similar to the telnet, which allows input of commands. - Page 315 ® Telnet program examples R&S SGS100A ~TcpClient(); void connectToServer( string &hostname, int port ); void disconnect( ); void transmit( string &txString ); void receive( string &rxString ); string getCurrentHostName( ) const; getCurrentPort( ) const; private: string currentHostName; currentPort; currentSocketDescr; SockAddrStruct serverAddress;...
- Page 316 ® Telnet program examples R&S SGS100A if( currentSocketDescr == 0 ) currentHostName = ""; currentPort = 0; currentHostInfo = NULL; clientIsConnected = false; printf("can't create socket\n" ); serverAddress.sin_family = currentHostInfo->h_addrtype; serverAddress.sin_port = htons( currentPort ); memcpy( (char *) &serverAddress.sin_addr.s_addr, currentHostInfo->h_addr_list[0], currentHostInfo->h_length );...
- Page 317 ® Telnet program examples R&S SGS100A throw string("connection must be established before any data can be received\n"); char * receiveBuffer = new char[receiveBufferSize]; memset( receiveBuffer, 0, receiveBufferSize ); bool receiving = true; while( receiving ) int receivedByteCount = recv( currentSocketDescr, receiveBuffer, receiveBufferSize, 0 );...
- Page 318 ® Telnet program examples R&S SGS100A hostname = argv[1]; break; default: printUsage(); return(-1); client.connectToServer( hostname, port ); bool terminate = false; while( !terminate ) char buffer[1024]; if( useSingleCommand ) input = singleCommand; //send string else cin.getline( buffer, 1024 ); input = buffer;...
-
Page 319: Index
® Index R&S SGS100A Index Symbols *OPC ................301 Case-sensitivity *OPC? ................301 SCPI ................. 294 *RST ................310 Change password ............137 *WAI ................301 Cleaning ................285 /var directory ..............213 Clear status 9.91E37 Remote ..............200 Remote control ............300 Colon ................ - Page 320 ® Index R&S SGS100A Delta temperature ............130 Ext. trigger Destination import/export Gate polarity .............. 117 User correction data ........... 98 Input slope ..............117 Detector sensitivity Extension import/export - user correction data ....97 ALC ................93 Extension mode Device identify ............58, 142 Higher frequency ............
- Page 321 ® Index R&S SGS100A Hostname ................ 140 Changing ..............158 Default ................ 71 Hostname prefix ..............57 ID ................32 LAN ................32 POWER ON ..............31 POWER ON/STANDBY ..........31 I / Q RF ON ................. 31 Connectors ..............34 Keywords I offset ................120...
- Page 322 ® Index R&S SGS100A Message ................62 Operation complete Additional information ..........73 Remote ..............201 All messages .............. 74 Operation mode ..............80 Brief ................73 Option Deleting ............... 73 Hardware ..............132 Deleting all ..............73 Software ..............132 Deleting brief ...............
- Page 323 ® Index R&S SGS100A PPE ................. 303 Resource strings ............. 142 Preset instrument settings ......... 21, 123 Restart ................156 Protection ..............60, 134 Restart network ............... 140 Protocol RF frequency ..............81 VXI ................168 RF level ................87 PTRansition ..............
- Page 324 ® Index R&S SGS100A Source Local oscillator ............83 Power sensors ............110 UCOR Pulse modulation ............114 Fill with sensor ............100 UP ................... 296 Reference oscillator ..........67, 85 Source import/export Update package Error ................160 User correction data ........... 98 SRE .................
Need help?
Do you have a question about the SGS100A and is the answer not in the manual?
Questions and answers