Advertisement
Advertisement
Table of Contents

Related Manuals for START International ZCM1000 Series


Summary of Contents for START International ZCM1000 Series
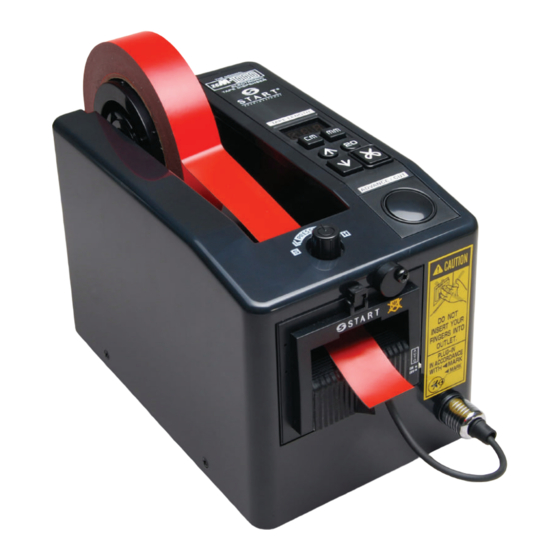
- Page 1 ZCM1000/M1000 Series...
-
Page 2: Table Of Contents
Parts List WARRANTY POLICY FOR LD SERIES LABEL DISPENSERS START International warrants all parts on ZCM series tape dispensers against defects in design, materials and work manship for a period of 360 days. Parts excluded from this are: cutting blades, silicone rollers and cutter liners;... -
Page 3: Notes
FEATURES • Will dispense butt-cut and die-cut material. • Adjustable photosensor for pinpoint accuracy. • Handled lock rod makes scrap removal easy. • No tools required for adjustment. NOTES • Keep strip plate free of adhesive build-up. • Clean photosensor with compressed air or dry cloth. •... -
Page 4: Description Of Parts And Functions
DESCRIPTION OF PARTS AND FUNCTIONS... -
Page 5: Operation
OPERATION Using Automatic Feed: 1. Plug in power cord and turn unit on. 2. Set tape on the center of reel and stick the end of the tape onto the metal feed roller. Press ADVANCE key until tape feeds through cutting unit. If the tape will not feed through the cutter, fold corners of the tape to form a triangle shape and re-feed (Fig. - Page 6 OPERATION (CONT’D) To Replace Cutter Unit Turn off auto sensor and power before removing cutter unit. Pull sensor plug out, then pull cutter unit forward while pressing the knob on the top of the unit (Fig. 1). To replace blades, remove the two screws inside head. Blade can then be lifted out and replaced.
-
Page 7: Specifications
SPECIFICATIONS TROUBLE SHOOTING When problems occur, carry out the following procedures. If the tape dispenser does not operate normally after following the troubleshooting procedures, contact your supplier. 1. If the motor does not drive: • Check that the power cord is plugged in. •... -
Page 8: Preventive Maintenance
PREVENTIVE MAINTENANCE WEEKLY - Remove cutting head. Clean and look for missing roller rings. Replace as needed. MONTHLY- Remove blade spring and blades to inspect cutter liners. Place one drop of silicone oil on each liner, or replace if worn. Inspect feed roller and blades for tape fragments or adhesive buildup. -
Page 9: Exploded Views/Parts Breakdown
EXPLODED VIEWS / PARTS BREAKDOWN REMOVE BODY COVER AND BOTTOM PLATE CHANGE THE SEPARATING ROLLER... - Page 10 EXPLODED VIEW FRONT HOLDER STRUCTURE...
- Page 11 EXPLODED VIEW FEED STRUCTURE REMOVING SENSOR UNIT...
- Page 12 EXPLODED VIEW...
- Page 13 EXPLODED VIEW BOTTOM PLATE WIRING CONTROL PANEL CONNECTIONS...
-
Page 14: Parts List
PARTS... - Page 15 PARTS...
- Page 16 PARTS...
- Page 17 PARTS...
- Page 18 PARTS...
- Page 19 PARTS...
- Page 20 PARTS...
- Page 21 PARTS...
- Page 22 PARTS...
Need help?
Do you have a question about the ZCM1000 Series and is the answer not in the manual?
Questions and answers