Table of Contents
Advertisement
Quick Links
WELCOME TO UTSTARCOM
Thank you for choosing the up-to-date UTStarcom CDM-7025,
our new model, developed by top researchers to support the
CDMA2000 1X system through Qualcomm-manufactured
MSM6050 chips and CDMA technologies. This product allows
for high speed communication services and a GUI animation
menu. T9 input mode makes it much easier to enter text,
while VR (Voice Recognition) makes the UTStarcom more user
friendly. Other proven technologies include:
l
Full graphic display of 9 text input lines and 1 icon
line with variable font size.
l
Easy to dial through the VR feature.
l
Easy to enter letters through the T9 text input mode.
l
GUI & Animation display compliant with
CDMA2000 1X.
l
Full graphic - STN65K color LCD
l
Navigation Key and 20 keys aligned for more
convenience.
l
Sophisticated features of speaker phone and voice
recognition.
l
Additional services of text messaging and call
forwarding, call transfer, call waiting.
1
WELCOME TO UTSTARCOM
This UTStarcom user guide contains very important
information about how to handle and use the product. Please
read this manual thoroughly, pay attention to the warranty
on the back page and be alert to the exclusions and
limitations of your warranty, which are related with the
unauthorized use of components.
2
Advertisement
Table of Contents

Subscribe to Our Youtube Channel
Related Manuals for UTStarcom CDM-7025


Summary of Contents for UTStarcom CDM-7025
- Page 1 WELCOME TO UTSTARCOM WELCOME TO UTSTARCOM Thank you for choosing the up-to-date UTStarcom CDM-7025, This UTStarcom user guide contains very important our new model, developed by top researchers to support the information about how to handle and use the product. Please...
-
Page 2: Table Of Contents
TABLE OF CONTENTS TABLE OF CONTENTS CHAPTER 1. BEFORE USING YOUR PHONE DURING A CALL ....................30 PACKAGE INCLUDES .....................9 MUTE (UNMUTE) ........................30 HANDSET DESCRIPTION ..................10 SEND TXT MSG ........................30 BATTERY USAGE ....................14 CONTACTS..........................30 POWER CONNECTION ......................16 RECENT CALLS........................30 PCS AND 1X BATTERY TIMES .....................17 VOICE PRIVACY ........................30 BATTERY LIFE (FOR NEW BATTERY) ...................17 LOCATION...........................31... - Page 3 TABLE OF CONTENTS TABLE OF CONTENTS RECENT CALLS.....................48 CHAPTER 6. VOICE SIGNAL COMMANDS VOICE SIGNAL COMMANDS................87 MISSED ..........................48 RECEIVED..........................49 VR SETTINGS........................88 DIALED..........................50 INFORMATION........................91 ALL............................51 CHAPTER 7. MESSAGE VIEW TIMERS........................52 MESSAGE ......................93 SETTINGS......................53 NEW MSG...........................93 SOUND SETTINGS .......................53 INBOX..........................95 DISPLAY SETTINGS ......................61 SENT ...........................96 PHONE SETTINGS........................66 DRAFTS..........................97...
-
Page 4: Chapter 1. Before Using Your Phone
CHAPTER 1 MEMO BEFORE USING YOUR PHONE CHAPTER 1 BEFORE USING YOUR PHONE This chapter provides important information about using the UTStarcom including: PACKAGE INCLUDES HANDSET DESCRIPTION BATTERY USAGE BATTERY HANDLING INFORMATION... -
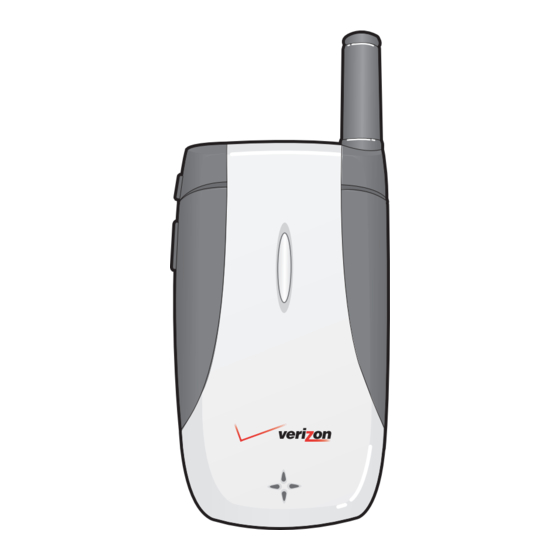
Page 5: Package Includes
PACKAGE INCLUDES HANDSET DESCRIPTION This package should include all items pictured below. The UTStarcom weighs X.Xoz. The dimensions are X.XX” x X.XX” x X.XX”. If any are missing or different, immediately contact the retailer where you purchased the phone. Antenna... - Page 6 HANDSET DESCRIPTION HANDSET DESCRIPTION (THE FUNCTION KEYS) (DISPLAY INDICATORS) The idle display appears when you are not on a call or using the menu. In Idle Mode You must be in the idle display to dial a phone number. Press Up for VR, Down for Shortcut, Right for Fun & Games and Left for Setting &...
-
Page 7: Battery Usage
HANDSET DESCRIPTION BATTERY USAGE (DISPLAY INDICATORS) (BATTERY INSTALLATION) Place the battery and place the battery cover on the back of the handset and slide into place. Battery Battery charging level — the more blocks, the stronger the charge. Push the battery down until it locks into place. Alarm Only Phone will alert you with an alarm tone when call is received. -
Page 8: Power Connection
BATTERY USAGE BATTERY USAGE (BATTERY REMOVAL) (BATTERY CHARGING) POWER CONNECTION Pull down the release latch, lift up the battery cover. Plug the AC Charger into a standard outlet. Remove the battery from the handset. Plug the other end of the AC Charger into the bottom of your Note If the battery is not correctly placed in the compartment,the phone. -
Page 9: Pcs And 1X Battery Times
BATTERY USAGE BATTERY HANDLING (BATTERY CHARGING) INFORMATION PCS AND 1X BATTERY TIMES DO’s Only use the battery and charger approved by the manufacturer. The operating time is subject to your handset usage and configuration. Only use the battery for its original purpose. Try to keep batteries in a temperature between 41ºF (5ºC ) and 95ºF Battery Capacity (35ºC). -
Page 10: Chapter 2. Basic Operation
CHAPTER 2 MEMO BASIC OPERATION CHAPTER 2 BASIC OPERATION This chapter addresses and explains the basic features of your phone including: TURNING THE PHONE ON / OFF ACCESSING THE MENU MENU SUMMARY BASIC FUNCTIONS DURING A CALL MAKING AN EMERGENCY CALL... -
Page 11: Turning The Phone On / Off
TURNING THE PHONE ACCESSING THE MENU ON / OFF TURNING THE PHONE ON Your phone can be customized via the menu. Each function can be accessed by scrolling with the Navigation Key or by pressing the number Press and hold END KEY until your “Power On”... -
Page 12: Menu Summary
MENU SUMMARY MENU SUMMARY FUN & GAMES Sound Settings Phone Settings Master Volume Standalone Mode CUTY Call Sound Short Cut Key MESSAGE Call Ringtone Language Call Vibrate Location New Msg Alert Sound Security Inbox TXT Message Common Code Sent Voicemail Msg Lock Mode Drafts Keypad Volume... -
Page 13: Basic Functions
BASIC FUNCTIONS BASIC FUNCTIONS MAKING A CALL ANSWERING CALLS Enter a phone number. When your phone rings or vibrates, press SEND KEY to answer the incoming call. (Depending on your phone’s settings, you may also To modify the phone number you have entered : Note answer incoming calls by opening the phone or by pressing any •... -
Page 14: Answering A Call
BASIC FUNCTIONS BASIC FUNCTIONS ANSWERING A CALL If one of the people you called hangs up during your call, you and Note the remaining caller stay connected. To answer a call, press any key except KEY, LEFT S.KEY, If you initiated the call and are the first to hang up, all three callers RIGHT S.KEY, KEY,... -
Page 15: Adjusting Volume
BASIC FUNCTIONS DURING A CALL ADJUSTING VOLUME MUTE (UNMUTE) Adjusts the volume of the ringer, key beep and earpiece. The caller cannot hear you or any sounds from your side but you can still hear them. Press OK KEY [MENU], then select “Settings & Tools” menu, Press LEFT S.KEY [MUTE]. -
Page 16: Location
DURING A CALL MAKING AN EMERGENCY CALL LOCATION The 911 feature puts the phone in the Emergency Call Mode when you dial the preprogrammed emergency number, 911. Enables the network to locate your current location through Global It also operates in the lock mode and out of the service area. Positioning System (GPS). -
Page 17: Chapter 3. Memory Function
CHAPTER 3 MEMO MEMORY FUNCTION CHAPTER 3 MEMORY FUNCTION This chapter addresses memory functions including: STORING A PHONE NUMBER ENTERING LETTERS, NUMBERS & SYMBOLS MAKING A CALL THROUGH THE PHONE BOOK... -
Page 18: Storing A Phone Number
ENTERING LETTERS, STORING A PHONE NUMBER NUMBERS & SYMBOLS The phone book stores up to 500 entries. The input mode (Alpha editor) will automatically be activated when necessary to enter letters and numbers. As shown below, there are 5 Enter phone # then press LEFT S.KEY [SAVE] then choose “Create available modes ;... -
Page 19: Standard Input Mode
ENTERING LETTERS, ENTERING LETTERS, NUMBERS & SYMBOLS NUMBERS & SYMBOLS STANDARD INPUT MODE ALPHA INPUT MODE Use the digit keys to enter letters, numbers and characters. The input mode incorporates a built-in-dictionary to determine a alpha based on the entered characters. A alpha can be entered more quickly Enter letters using the key pad, to change the input mode, by pressing a key once per character. -
Page 20: Numeric Mode
ENTERING LETTERS, MAKING A CALL THROUGH NUMBERS & SYMBOLS THE PHONE BOOK NUMERIC MODE ONE-TOUCH/TWO-TOUCH DIALING Allows you to enter numbers. Ideal for frequently dialed numbers, this feature allows phone book entries to be dialed via the keypad with only one or two key presses. Press LEFT S.KEY [Abc] and scroll to the input mode to changes to... -
Page 21: Chapter 4. Menu Function
CHAPTER 4 MEMO MENU FUNCTION CHAPTER 4 MENU FUNCTION This chapter addresses accessing the menu and using its functions and features to customize your phone. CONTACTS RECENT CALLS SETTINGS... -
Page 22: Contacts
CONTACTS CONTACTS Stores up to 500 entries, each of which can be assigned to a group. CONTACT LIST Entries can be retrieved by name or group. Retrieves an entry by name and calls by simply pressing SEND KEY. You can review all the entries stored in your phone book list or quickly NEW CONTACT find an entry by entering a name or its character string. -
Page 23: Groups
CONTACTS CONTACTS GROUPS CHANGE GROUP NAME Allows you to classify phone entries into groups. Press OK KEY [MENU], press 3 KEY “Groups”. Existing groups include No Group, Family, Friends, Work. Select an existing group name that you have added with the A maximum of 30 groups is allowed. -
Page 24: Speed Dials
CONTACTS RECENT CALLS MISSED ERASE GROUP Displays information about the 90 most recently missed calls. Press OK KEY [MENU], press 3 KEY “Groups”. Place a call to a missed call number by simply pressing SEND KEY. Select an existing group name with the Navigation Key. To see a list of the 90 most recently missed calls, press OK KEY To select “Erase”, press... -
Page 25: Received
RECENT CALLS RECENT CALLS RECEIVED DIALED Displays information about the 90 most recently answered calls. Place a Displays information about the 30 most recently dialed numbers. Place a call to a received call by simply pressing SEND KEY. call to a dialed call by simply pressing SEND KEY. -
Page 26: All
RECENT CALLS RECENT CALLS VIEW TIMERS Displays information about the most recent incoming, outgoing and Checks the usage time and manages your calls within the limit you set. The 11 timers include (Last Call, All Calls, Received Calls, Dialed Calls, missed calls. -
Page 27: Settings
SETTINGS SETTINGS Customizes your phone and optimizes performance through a variety of CALL SOUND settings. To select a ringer type for incoming calls: SOUND SETTINGS Call Ringtone Press OK KEY [MENU], then select “Settings & Tools” menu, MASTER VOUME press 2 KEY “Sound Settings”... - Page 28 SETTINGS SETTINGS ALERT SOUND Voicemail Msg When selected, this setting alerts you to the following handset changes: Press OK KEY [MENU], then select “Settings & Tools” menu, press 2 KEY “Sound Settings” then select 3 KEY “Alert Sound”, TXT Message press 2 KEY “Voicemail Msg”.
- Page 29 SETTINGS SETTINGS Minute Beep EARPIECE VOLUME Sounds an alert every minute during a call. To adjust earpiece volume: Press OK KEY [MENU], then select “Settings & Tools” menu, Press OK KEY [MENU], then select “Settings & Tools” menu, press press 2 KEY “Sound Settings”...
- Page 30 SETTINGS SETTINGS ALARM SOUND POWER ON/OFF To select a ringer type for alarm sound: Power On Allows you to activate/deactivate the power on tones. Tone Press OK KEY [MENU], then select “Settings & Tools” menu, Press OK KEY [MENU], then select “Settings & Tools” menu, press 2 KEY “Sound Settings”...
-
Page 31: Display Settings
SETTINGS SETTINGS DISPLAY SETTINGS BACKLIGHT Backlights the display and key pad for easy viewing in dark places. Allows you to customize the display. Display BANNER To input a personal/ERI banner greeting: Press OK KEY [MENU], then select “Settings & Tools” menu, press 3 KEY “Display Settings”... - Page 32 SETTINGS SETTINGS CONTRAST SCREENSAVER To adjust the display contrast: To adjust the display contrast: Press OK KEY [MENU], then select “Settings & Tools” menu, Press OK KEY [MENU], then select “Settings & Tools” menu, press 3 KEY “Display Settings” then select 3 KEY “Contrast”.
-
Page 33: Phone Settings
SETTINGS SETTINGS FONTS PHONE SETTINGS Press OK KEY [MENU], then select “Settings & Tools” menu, STANDALONE MODE press 3 KEY “Display Settings” then select 7 KEY “Fonts”. The device shall provide the ability for the user to turn off all radios in Select “Normal”... - Page 34 SETTINGS SETTINGS SECURITY LANGUAGE Selects the language in which letters are displayed on the screen. Prevents unauthorized use of your phone. The following settings can be restricted: Press OK KEY [MENU], then select “Settings & Tools” menu, press 4 KEY “Phone Settings”...
- Page 35 SETTINGS SETTINGS Erase Contacts Select “Device” or “Location” then select one of the following To erase all the names and phone numbers in your internal Phone Book: options with the Navigation Key. Press OK KEY [MENU], then select “Settings & Tools” menu, •...
-
Page 36: Call Settings
SETTINGS SETTINGS NAM SELECTION CALL SETTINGS Enables Auto NAM (Number Assignment Modules) or manually selects a ANSWER OPTIONS NAM. To select an answer mode: Auto NAM Press OK KEY [MENU], then select “Settings & Tools” menu, Automatically switches phone to proper NAM when you have multiple NAM registrations. - Page 37 SETTINGS SETTINGS TTY MODE CALL RESTRICTIONS Your phone is able to operate with a TTY (Teletypewriter) device in Press OK KEY [MENU], then select “Settings & Tools” menu, digital modes. This feature is system dependent and may not be press 5 KEY “Call Settings”...
-
Page 38: Memory
SETTINGS SETTINGS Port Speed MEMORY Choose the select data port speed for the usage of your phone. To display total or available memory usage. Press OK KEY [MENU], then select “Settings & Tools” menu, Press OK KEY [MENU], then select “Settings & Tools” menu, press 5 KEY “Call Settings”... -
Page 39: Phone Info
CHAPTER 5 SETTINGS PERSONAL ORGANIZER PHONE INFO Displays the information of your phone: MY NUMBER Displays the your phone number (MDN/MIN number): CHAPTER 5 Press OK KEY [MENU], then select “Settings & Tools” menu, PERSONAL press 7 KEY “Phone Info” then select 1 KEY “My Number”. -
Page 40: Tools
TOOLS TOOLS CALENDAR ALARM CLOCK Sets an event and reminds you of that event. Press OK KEY [MENU], then select “Settings & Tools” menu, press 1 KEY “Tools” then select 2 KEY “Alarm Clock”. ADD NEW CALENDAR Displays the your phone number (MDN/MIN number): Select one of the entries using the Navigation Key. -
Page 41: World Clock
TOOLS TOOLS WORLD CLOCK NOTEPAD Your phone includes an internal notepad that can be used to Press OK KEY [MENU], then select “Settings & Tools” menu, compose and store reminders and notes. press 1 KEY “Tools” then select 3 KEY “World Clock”. -
Page 42: Calculator
TOOLS TOOLS CALCULATOR STOPWATCH To access the calculator: Simultaneously times up to ten different events. To operate the stop watch: Press OK KEY [MENU], then select “Settings & Tools” menu, Press OK KEY [MENU], then select “Settings & Tools” menu, press 1 KEY “Tools”... -
Page 43: Fun & Games
CHAPTER 6 FUN & GAMES VOICE SIGNAL COMMANDS CUTY Press OK KEY [MENU], then select “Fun & Games” menu, press 1 KEY “Cuty”. CHAPTER 6 Game Menu • Start: Lets start “Cuty” game. VOICE SIGNAL • Easy/Normal/Hard: Select the desired difficulty. •... -
Page 44: Vr Settings
VOICE SIGNAL COMMANDS VOICE SIGNAL COMMANDS Voice Signal commands allow you to dial numbers, lookup contact VR SETTINGS information, and open applications using your voice. CHOICE LIST In standby mode, press NAVIGATION UP.KEY, After a brief The “Choice List” setting option will allow you to choose if the pause, “Please Say a Command”... - Page 45 VOICE SIGNAL COMMANDS VOICE SIGNAL COMMANDS TRAIN VOICE PROMPT Train Voice is the process of optimizing the voice recognition software The prompts settings, “Mode”, “Timeout’, and “Speed” settings will to your voice. Train Voice requires that you make recordings of your allow you to set how you are notified by the voice command system, voice, which are then used to customize the voice recognition system.
-
Page 46: Information
CHAPTER 7 VOICE SIGNAL COMMANDS MESSAGE CALL ALERT The “Call Alert” setting control how you are notified when receiving a call. “Name + Ring” will first announce the name and then play the set ring tone. “Ring only” will play the set ring tone only. “Name Repeat” continuously, states the name or number until the call is answered or incoming call alert ends. -
Page 47: New Msg
MESSAGE MESSAGE NEW MSG To save the TXT Message, press RIGHT S.KEY [OPTIONS], then select “Save As Draft”. To send a new txt message: Press RIGHT S.KEY [OPTIONS], then select “Priority Level”, select Press OK KEY [MENU], then select “Message” menu, press 1 KEY “High”... -
Page 48: Inbox
MESSAGE MESSAGE INBOX SENT The Inbox manages received TXT/Web Alert messages. Manages sent TXT messages waiting to be sent. To access: Press OK KEFY [MENU], then select “Message” menu, Press OK KEY [MENU], then select “Message” menu, press 3 KEY “Sent”... -
Page 49: Drafts
MESSAGE MESSAGE DRAFTS VOICEMAIL Draft Folder contains any draft messages or saved messages. Displays the number of voice mails and accesses them by pressing If message composition is interrupted by a voice call or other SEND KEY. interrupting event, the text of the current composition is automatically FIRST TIME USER saved in the drafts folder. -
Page 50: Erase All
MESSAGE MESSAGE ERASE ALL SETTINGS Manages messaging features through various features. Press OK KEY [MENU], then select “Messaging” menu, press RIGHT S.KEY [OPTIONS] or press LEFT S.KEY [MESSAGE], ALL MSG press RIGHT S.KEY [OPTIONS]. Auto.save To erase all the inbox messages, press 1 KEY [ERASE INBOX]. - Page 51 MESSAGE MESSAGE Voicemail # Press OK KEY to save it. Automatically erases inbox messages when new messages arrived. Quick.text Press OK KEY [MENU], then select “Messaging” menu, To edit the Quick Text message you have saved: press LEFT S.KEY [SETTINGS] or press LEFT S.KEY [MESSAGE], press...
-
Page 52: Settings
MESSAGE MESSAGE Callback # TXT MSG Edits a default callback number so that the recipient can callback or Auto view reply. If the “Auto View” is set to on, the user will be able to view the Press OK KEY [MENU], then select “Messaging”... -
Page 53: Chapter 8. Safety And Warranty
CHAPTER 8 MESSAGE SAFETY AND WARRANTY Block/unblock Press OK KEY [MENU], then select “Messaging” menu, press LEFT S.KEY [SETTINGS] or press LEFT S.KEY [MESSAGE], press LEFT S.KEY [SETTINGS], then select 2 KEY [TXT MSG]. CHAPTER 8 Press 2 KEY [BLOCK/UNBLOCK]. Select “Block”, “Unblock” or SAFETY AND “View List of Blocked Addresses”... -
Page 54: Safety Information For Wireless Handheld Phones
SAFETY AND WARRANTY SAFETY AND WARRANTY SAFETY INFORMATION FOR WIRELESS DRIVING SAFETY Talking on the phone while driving is extremely dangerous and is illegal HANDHELD PHONES in some states. Remember, safety comes first. Check the laws and Read This Information Before Using Your Handheld Portable regulations on the use of phones in the areas where you drive. - Page 55 SAFETY AND WARRANTY SAFETY AND WARRANTY PACEMAKERS AIRCRAFT The Health Industry Manufacturers Association recommends that a FCC and Transport Canada Regulations prohibit using your phone while minimum separation of six (6”) inches be maintained between a in the air. Turn your phone OFF before boarding an aircraft. handheld wireless phone and a pacemaker to avoid potential BLASTING AREAS interference with the pacemaker.
-
Page 56: Safety Information For Fcc Rf Exposure
SAFETY AND WARRANTY SAFETY AND WARRANTY PRECAUTIONS SAFETY INFORMATION FOR FCC RF Your Handheld Portable Telephone is a high quality piece of equipment. EXPOSURE Before operating, read all instructions and cautionary markings on (1) WARNING! Read this Information before using AC Adaptor (2) Battery and (3) Product Using Battery. -
Page 57: Sar Information
SAFETY AND WARRANTY SAFETY AND WARRANTY BODY-WORN OPERATION SAR INFORMATION This device was tested for typical body-worn operations with the back of THIS MODEL PHONE MEETS THE GOVERNMENT’S the phone kept 2.0 cm. from the body. To maintain compliance with REQUIREMENTS FOR EXPOSURE TO RADIO WAVES. -
Page 58: Fcc Hearing-Aid Compatibility (Hac) Regulations For Wireless
SAFETY AND WARRANTY SAFETY AND WARRANTY The tests are performed in positions and locations (e.g., at the ear and FCC HEARING-AID COMPATIBILITY (HAC) worn on the body) as required by the FCC for each model. The highest REGULATIONS FOR WIRELESS DEVICES SAR value for this model phone when tested for use at the ear is On July 10, 2003, the U.S. - Page 59 SAFETY AND WARRANTY SAFETY AND WARRANTY M-Ratings: Phones rated M3 or M4 meet FCC requirements and are For information about hearing aids and digital wireless phone: likely to generate less interference to hearing • Fcc Hearing Aid Compatibility and Volume Control devices than phones that are not labeled.
-
Page 60: Fda Consumer Update
SAFETY AND WARRANTY SAFETY AND WARRANTY FDA CONSUMER UPDATE Although the existing scientific data do not justify FDA regulatory actions, FDA has urged the wireless phone industry to take a number of U.S. Food and Drug Administration -Center for Devices and steps, including the following: Radiological Health Consumer Update on Wireless Phones •... - Page 61 SAFETY AND WARRANTY SAFETY AND WARRANTY The National Institutes of Health participates in some inter-agency 4. What are the results of the research done already? working group activities, as well. FDA shares regulatory responsibilities The research done thus far has produced conflicting results, and many for wireless phones with the Federal Communications Commission studies have suffered from flaws in their research methods.
- Page 62 SAFETY AND WARRANTY SAFETY AND WARRANTY 5. What research is needed to decide whether RF exposure from and the Cellular Telecommunications & Internet Association (CTIA) have wireless phones poses a health risk? a formal Cooperative Research and Development Agreement (CRADA) A combination of laboratory studies and epidemiological studies of to do research on wireless phone safety.
- Page 63 SAFETY AND WARRANTY SAFETY AND WARRANTY 8. What has FDA done to measure the radiofrequency energy • If you must conduct extended conversations by wireless phone every coming from wireless phones ? day, you could place more distance between your body and the source The Institute of Electrical and Electronic Engineers (IEEE) is developing a of the RF, since the exposure level drops off dramatically with distance.
- Page 64 SAFETY AND WARRANTY SAFETY AND WARRANTY 11.What about wireless phone interference with medical 12.Where can I find additional information? equipment? For additional information, please refer to the following resources: Radiofrequency energy (RF) from wireless phones can interact with • FDA web page on wireless phones some electronic devices.
-
Page 65: Manufacturer's Warranty
(12) as a whole. When sending your wireless device to UTStarcom Personal month period from the date of purchase, such defect(s) will be repaired Communications for repair or service, please note that any personal or replaced (with new or rebuilt parts) at the Company’s option, without... - Page 66 LIMITED TO THE REPAIR OR REPLACEMENT PROVIDED ABOVE AND, IN NO EVENT, SHALL THE COMPANY’S LAIBILITY EXCEED THE PURCHASE IN CANADA: UTStarcom Canada Company PRICE PAID BY PURCHASER FOR THE PRODUCT. 5535 Eglinton Avenue West ANY IMPLIED WARRANTIES, INCLUDING ANY IMPLIED WARRANTY OF...
Need help?
Do you have a question about the CDM-7025 and is the answer not in the manual?
Questions and answers