Table of Contents
Advertisement
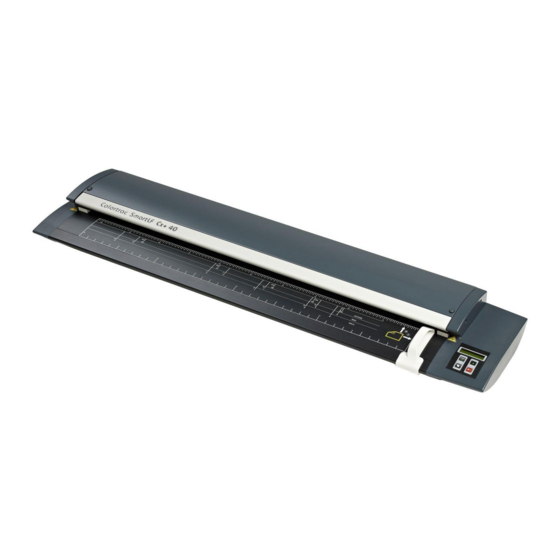
Cx+40IM
Version 3
S
m
a
r
t
L
S
m
a
r
t
PLEASE READ THESE INSTRUCTIONS FOR INSTALLATION OF THE BOARD.
Colortrac Ltd
Cx(+)40 Main Board Instructions
This is a confidential controlled document and is the property of Colortrac Ltd.
It is not to be copied or reproduced in part or whole. It is intended for staff to read.
F
C
x
/
C
L
F
C
x
/
C
P
0
0
P
0
0
M
a
i
n
B
M
a
i
n
B
x
+
4
0
S
x
+
4
0
S
2
0
4
1
A
2
0
4
1
A
o
a
r
d
F
R
U
o
a
r
d
F
R
U
V
3
V
3
NOTE:
Page 1 of 12
Date:02/08/12
c
a
n
n
e
r
s
c
a
n
n
e
r
s
Advertisement
Table of Contents

Related Manuals for Colortrac SmartLF Cx Series


Summary of Contents for Colortrac SmartLF Cx Series
- Page 1 Cx(+)40 Main Board Instructions Version 3 Date:02/08/12 This is a confidential controlled document and is the property of Colortrac Ltd. It is not to be copied or reproduced in part or whole. It is intended for staff to read. NOTE:...
- Page 2 Technical Support, Colortrac Ltd. Colortrac Ltd shall not be liable for any damages, errors, issues or events that result from the use of the equipment or this manual. Page 2 of 12...
-
Page 3: Table Of Contents
SmartLF Cx+40 Instruction Manual Content Main Board ..............................4 Tools Required........................... 4 Opening Access Panel........................4 Removing / Replacing The Main Board..................... 6 Utilities Program ............................9 Normalisation............................. 9 Firmware / Driver Installation......................10 Save .dat File ........................... 11 Cx(+)40 Restore Program ........................ -
Page 4: Main Board
“2.3 Save .dat File” page 11. Or record the Stitch Values, Motor Speed and X Resolution values by using the Utilities Program page 9. If the scanner is not functioning do save the dat file, please contact Colortrac Support for the original dat file. - Page 5 SmartLF Cx+40 Instruction Manual 2. Remove the 8 x M3 Pan Head screws holding the rear panel in place. Make sure you are holding the panel up as you remove the last screw. 3. Gently lower the panel down. The panel is hinged so will not need to be totally removed.
-
Page 6: Removing / Replacing The Main Board
SmartLF Cx+40 Instruction Manual Removing / Replacing The Main Board. 1. Open rear access panel as described in chapter “1.2 Opening Access Panel.” page 2. Disconnect CIS ribbon cables by first, carefully, releasing the locking slide and then sliding the cable out from the connector and out through the ferrite held on the panel. - Page 7 SmartLF Cx+40 Instruction Manual 5. Remove the ten M3 x 10mm screws and the two M4 x 6mm screws that hold the Main board on to the panel and gently remove from scanner. 6. Hold the replacement board up to the panel and insert the first M3 x 10 screw in the central hole at the top of the board to hold it in place, do not tighten...
- Page 8 “0 Cx(+)40 Restore Program 12. ” page 12. Or load the dat file send by Colortrac Support. Update the firmware to the latest as described on page 10, and then run the Normalisation program (page 9) after all processes are complete.
-
Page 9: Utilities Program
SmartLF Cx+40 Instruction Manual Utilities Program Normalisation. 1. Insert the white calibration target supplied with the scanner matt side faced down. 2. Click the ‘Full Normalisation’ button and allow it to run. This takes about 5 minutes, and the target will move through the scanner during this time. -
Page 10: Firmware / Driver Installation
To install the firmware manually, firstly save the latest firmware .cab file (making sure that it is for the Cx+ 40 scanner) which contains the latest firmware on to the PC attached to the scanner, this can be downloaded from: http://www.colortrac.com/support/support_downloads.htm 1. Click ‘Install New Firmware’ NOTE: ‘Install... -
Page 11: Save .Dat File
SmartLF Cx+40 Instruction Manual Save .dat File 1. Click the ‘Save Dat File’ button. 2. Select a location to save the file to (recommend the desktop for ease), enter the serial number of the scanner that you are taking the data from, e.g. ‘C2######.dat’. -
Page 12: Cx(+)40 Restore Program
SmartLF Cx+40 Instruction Manual Cx(+)40 Restore Program To load a saved dat file unique to the scanner being worked on, use the Cx(+)40 Restore Program, otherwise known as Cx40datwriter. The dat writer will only allow a file created from a scanner be loaded back into the same scanner, files from a different scanner will fail to load.
Need help?
Do you have a question about the SmartLF Cx Series and is the answer not in the manual?
Questions and answers