
Related Manuals for Icom IC-SAT100


Summary of Contents for Icom IC-SAT100
- Page 1 OPERATING MANUAL SATELLITE PTT INTRODUCTION iSAT100 1 ACCESSORIES ATTACHMENTS 2 PANEL DESCRIPTION 3 BATTERY CHARGING 4 BASIC OPERATION 5 OTHER FUNCTIONS 6 HEADSET CONNECTION 7 MENU SCREEN 8 SPECIFICATIONS AND OPTIONS 9 TROUBLESHOOTING...
-
Page 2: Table Of Contents
■ Using the Last Call Play function....9 Icom, Icom Inc. and the Icom logo are registered trademarks of Icom Incorporated (Japan) in Japan, the United States, the United Kingdom, Germany, France, Spain, Russia, Australia, New Zealand and/or other countries. -
Page 3: Accessories
ACCESSORIES Supplied accessories Antenna Battery pack Belt clip Power adapter* (with adapter plugs) Battery charger* * May not be supplied, or the shape may be different, depending on the transceiver version. Attaching accessories D Antenna Connect the supplied antenna to the antenna connector. - Page 4 ACCESSORIES Attaching accessories D Battery pack/Battery case CAUTION: DO NOT attach or detach the battery pack or the battery case when the transceiver is wet or soiled. This may result in water or dust getting into the transceiver, battery pack, or battery case and may damage them.
- Page 5 ACCESSORIES Attaching accessories D Belt clip To attach: 1. Detach the battery pack. 2. Slide the belt clip in the direction of the arrow until the belt clip is locked and makes a ‘click’ sound. 3. Attach the battery pack. To detach: 1.
-
Page 6: Panel Description
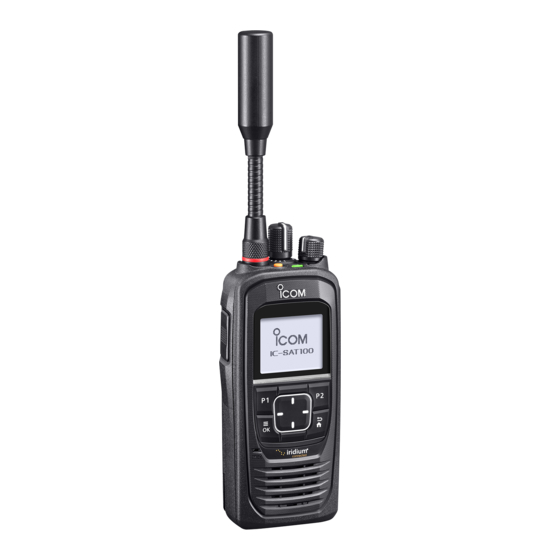
PANEL DESCRIPTION Front, top, and side panels Antenna Connector Micro USB Microphone Connector Speaker 1 EMERGENCY KEY [EMER] Hold down to transmit an Emergency call. (p. 8) 2 PTT SWITCH [PTT] Hold down to transmit, release to receive. (p. 7) 3 P1/P2 KEYS [P1]/[P2] Push to use the function assigned in the “Key Setup”... -
Page 7: Function Display
PANEL DESCRIPTION Function display Icon area 00:00 Text area Key display area Last Call Scan L The display is shown in English as an example. Select other languages on the Menu screen, if necessary. ([OK] > Display > Language) D Icon Area D Text Area Displays the status, preset transceiver name, and selected Talkgroup Name. -
Page 8: Battery Charging
BATTERY CHARGING Battery charger NOTE: Before attaching or detaching a battery pack, BE SURE to turn OFF the transceiver by rotating [VOL] fully counter clockwise until it makes a “click” sound. Otherwise, a transceiver malfunction could occur. D Supplied battery charger D Extend Battery Life function Charging time: The charger has the Extend Battery Life function... -
Page 9: Basic Operation
BASIC OPERATION Receiving and transmitting D Turning ON the transceiver D Transmitting z Rotate [VOL] to turn ON the transceiver. CAUTION: DO NOT transmit without an antenna. • The transceiver searches for a satellite. • When the transceiver is connected and registered to 1. -
Page 10: Other Functions
OTHER FUNCTIONS Using the Message function Using the Emergency mode The transceiver can receive and send short In the Emergency mode, the transceiver can transmit messages. an Emergency call, as shown below. L Confirm the transceiver is connected and registered to a D Receiving satellite. -
Page 11: Using The Surveillance Function
OTHER FUNCTIONS Using the Surveillance function When this function is turned ON, the beep is not heard and the backlight and the Status indicator do not light, even when a signal is received, or a key is pushed. 1. Assign the function to the [P1] key in the Menu screen. -
Page 12: Headset Connection
HEADSET CONNECTION Using a Bluetooth headset ® The transceiver can operate with Bluetooth headsets. 3. Pairing and connecting the Bluetooth headset The communication range of Bluetooth is 1. Select “Find Device,” and then push [OK]. approximately 10 meters (33 ft). [OK] >... -
Page 13: Menu Screen
MENU SCREEN Using the Menu screen You can use the Menu screen to set infrequently changed values or function settings. Menu The Menu screen is constructed in a tree structure. Talkgroup You can go to the next tree level by pushing [RIGHT] PTT Options or [OK], go back a level pushing [LEFT] or [BACK]. - Page 14 MENU SCREEN Menu items D Bluetooth PTT Beep (VS-3) Set the beep sound when pushing [PTT] on the optional VS-3 Bluetooth headset. Bluetooth ON/OFF • OFF: No beep sounds when pushing PTT. Turn the Bluetooth function ON or OFF. • ON: A beep sounds when pushing PTT.
- Page 15 MENU SCREEN Menu items D Functions D Clock Auto Key Lock Clock Display Turn the Auto Keypad Lock function ON or OFF. Select whether or not to display the clock on the Main • OFF: Turns OFF the function. screen. •...
- Page 16 MENU SCREEN Menu items D Beep/Vibration D Information Sets the transceiver’s beep level and select an option for vibration. Battery Info Displays the battery information such as voltage, TIP: When you set the beep level to between battery percentage, cycle count, and so on. “1 (Linked)”...
-
Page 17: Specifications And Options
SPECIFICATIONS AND OPTIONS Specifications (Measurements made without an antenna.) L All stated specifications are subject to change without notice or obligation. D General • Frequency range: 1616 ~ 1626.5 MHz • Number of channels: 240 Channels • Type of emission: 41K7Q7W •... -
Page 18: Options
About the third party Bluetooth ® headsets: Icom has checked the PTT operation with some 3M Peltor headsets such as the WS Headset XP, WS ProTac XP and WS Alert XP. (Compatibility not guaranteed.) • VS-5MC PTT SWITCH CABLE + HS-94, HS-95, HS-97 HEADSET VS-5MC: Used to connect a headset to a transceiver. -
Page 19: Troubleshooting
TROUBLESHOOTING Troubleshooting PROBLEM POSSIBLE CAUSE SOLUTION REF. The transceiver does • The battery is exhausted. • Recharge the battery pack. p. 6 not turn ON. • The battery pack is not correctly attached. • Correctly reattach the battery pack. p. 2 Little or no sound •... - Page 20 A7517-3EX 1-1-32 Kamiminami, Hirano-ku, Osaka 547-0003, Japan © 2019 Icom Inc. May 2019...
Need help?
Do you have a question about the IC-SAT100 and is the answer not in the manual?
Questions and answers