
Subscribe to Our Youtube Channel
Related Manuals for DAKOTA ULTRASONICS PVX-B


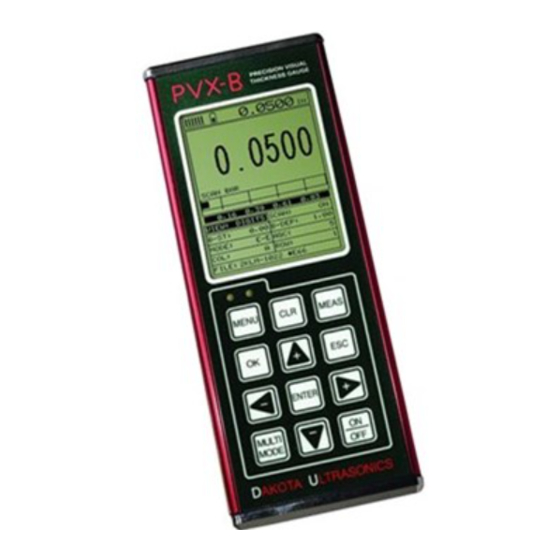
Summary of Contents for DAKOTA ULTRASONICS PVX-B
- Page 1 OPERATION MANUAL DAKOTA ULTRASONICS Precision Visual Thickness Gauge P/N P-195-0002 Rev 1.0, September 2014 GlobalTestSupply www. .com Find Quality Products Online at: sales@GlobalTestSupply.com...
-
Page 2: Table Of Contents
CHAPTER SEVEN USING THE DIGITS & B-SCAN DISPLAYS ...... 38 CHAPTER EIGHT THRU PAINT MEASUREMENT TECHNIQUE ....51 CHAPTER NINE ADDITIONAL FEATURES OF THE PVX-B ......52 CHAPTER TEN DATA STORAGE – SETUP, EDIT, & VIEW GRIDS ....57 CHAPTER ELEVEN SETUPS – CREATE, STORE, EDIT, & RECALL .... 74 ... -
Page 3: Chapter One Introduction
Dakota Ultrasonics Corporation 1.1 Disclaimer The PVX-B is a full-featured precision thickness gauge with a great deal of features and measurement modes allowing a great deal of control over the functionality and electronic performance of the instrument. As this provides the user greater control... -
Page 4: Chapter Two Quick Startup Guide
CHAPTER TWO QUICK STARTUP GUIDE Turn the PVX-B on and off using the switch located on the bottom right corner of the keypad. When PVX-B is initially turned on, a flash logo and blinking lights will be displayed prior to entering into the main measurement screen. Note: This section is primarily written as a basic startup guide only. - Page 5 ESC to cancel the selecting a setup. 2.2 Calibration The next step is to calibrate the PVX-B to the material and transducer being used. If a sound velocity is not known, the PVX-B can be calibrated to a known thickness sample.
- Page 6 Sometimes the sound velocity of a material is not known. In this case a sample with a known thickness can be used to determine the sound velocity. It would be very handy to carry a set of mechanical calipers to use in conjunction with the PVX-B for calibration in the field:...
- Page 7 PVX-B Precision Visual Thickness Gauge 1) Physically measure an exact sample of the material or a location directly on the material to be measured using a set of calipers or a digital micrometer. 2) Apply a drop of couplant on the transducer and place the transducer in steady contact with the sample or actual test material.
- Page 8 Dakota Ultrasonics 8) Press the OK key to calculate the velocity and return to the menu screen, or ESC to cancel entering the velocity. 9) Finally, press the MEAS key to return to the measurement screen and begin taking readings.
- Page 9 PVX-B Precision Visual Thickness Gauge Basic Material Type If the material velocity is unknown, and a sample thickness cannot be taken from the material, the user may opt to choose a basic material type from a list with approximate velocity numbers. It’s important to note that these velocities will not always be an exact representation of the material being tested.
- Page 10 Dakota Ultrasonics 2.3 Measure The PVX-B is now ready to measure. There are two different measurement view options, each with a specific purpose. The steps below outline how to toggle between the different view mode options: Selecting the Measurement View Option 1) Press the MENU key once to activate the menu items tab.
- Page 11 PVX-B Precision Visual Thickness Gauge Adjusting the Start (B-ST) & Depth (B-DEP) 1) Press the MEAS key once to activate the measure menu items. Press the MEAS key multiple times to move right and the ESC key multiple times to move left, until the either the B-ST or B-DEP cell is highlighted.
- Page 12 PVX-B makes 4 measurements a second. In scan mode, the PVX-B makes 32 measurements a second. When the PVX-B is idle, only the left vertical bar and the underline will be displayed. However, when the PVX-B is making a measurement, five or six of the bars should be displayed on the repeatability indicator.
-
Page 13: Chapter Three Keyboard, Menu, & Connector Reference
CHAPTER THREE KEYBOARD, MENU, & CONNECTOR REFERENCE 3.1 Menu Key (Operation & Sub Menus ) The Menu key activates the primary menu structure containing 9 menu tab groups. These tab groups then contain sub menu items, or functions. The sub menu items have been organized in tab groups according to how closely they are related to the individual tab group names. - Page 14 Zero: The PVX-B is zeroed in much the same way that a mechanical micrometer is zeroed. If the PVX-B is not zeroed correctly, all of the measurements made using the PVX-B may be in error by some fixed value. Refer to the section on page 29, for an explanation of this important procedure.
- Page 15 HR following the units, and offer an additional decimal place of overall resolution (i.e. IN = .001” and IN HR = .0001”). Velocity: Function to calibrate the PVX-B by setting the velocity to a known material velocity. Refer to page 31 for further info.
- Page 16 Refer to page 76 for further info. Default Setup: Loads a basic default setup. Use only as a last resort when the setups in the PVX-B have been corrupted and a computer is not accessible. Refer to page 79 for further info.
- Page 17 Backup File: Enables the user the ability to backup grids currently stored in the PVX-B to a PC via RS232 port. Refer the help section of the DakView software for a complete electronic manual.
- Page 18 3.10 MEAS (measurement mode) Key The MEAS key puts the PVX-B into it’s primary mode of operation. In this mode, the user has a complete view of the LCD, as well as control of the Hot Menu Functions.
- Page 19 PVX-B Precision Visual Thickness Gauge 1) Use the UP, DOWN, LEFT, and RIGHT arrow keys to increase and decrease the values of the hot function fields. 2) Repeat step 1 until the desired value has been achieved. Alternatively, the B-ST and B-DEP hot function fields can be changed using the Digit Edit Box as follows: 1) Press the ENTER key to display the Digits Edit Box.
- Page 20 5 minutes. All current settings are saved prior to powering off. 3.17 Top & Bottom End Caps The top & bottom end panels are where all connections are made to the PVX-B. The diagram above shows the layout and description of the connectors: GlobalTestSupply www.
- Page 21 Lemo connector. It is designed to connect directly from the PVX-B to a standard AT serial port on a PC. The cable supplied with the PVX-B is a Lemo to 9 pin serial cable. Note: This connector is also used to upgrade the PVX-B with the latest version of firmware.
-
Page 22: Chapter Four Principals Of Ultrasonic Measurement
CHAPTER FOUR PRINCIPALS OF ULTRASONIC MEASUREMENT 4.1 Time versus thickness relationship Ultrasonic thickness measurements depend on measuring the length of time it takes for sound to travel through the material being tested. The ratio of the thickness versus the time is known as the sound velocity. In order to make accurate measurements, a sound velocity must be determined and entered into the instrument. - Page 23 Pulse-echo mode measures from the initial pulse (sometimes referred to as an artificial zero) to the first echo (reflection). In this mode, the transducer is placed on a reference disk, located on top of the PVX-B, and a key is pressed to establish a zero point for the particular transducer.
- Page 24 The repetition rate is how often the PVX-B generates a burst of ultrasound. The PVX-B has a fixed repetition rate of 1 kHz, or 1000 times per second. The PVX- B updates the display 4 times per second in regular measurement mode and 32 times a second in hi speed scan mode.
-
Page 25: Chapter Five Selecting The Measurement Mode
SELECTING THE MEASUREMENT MODE 5.1 The setup library The PVX-B contains 18 factory setups and 46 user definable preset locations to store custom setups for easy recall. These setups can be optimized for the user’s specific application needs and can also be stored on a PC and transferred bi-directionally using Dakota’s PC interface software included with the instrument. - Page 26 Dakota Ultrasonics Plastics The PVX-B works extremely well on thin plastics using a delay line transducer and special graphite tip. Because the velocity of the standard acrylic tip has a similar velocity to most plastics, the PVX-B is unable to measure the material because it simply can't see it.
- Page 27 PVX-B Precision Visual Thickness Gauge 5.3 Factory Setup Chart Name Comment 1 Gn/AGC Velocity E-E DELAY LINE 3/8 0.2330 in/uSec I-E DELAY LINE 3/8 0.2330 in/uSec E-E DELAY LINE 1/2 0.2330 in/uSec I-E DELAY LINE 1/2 0.2330 in/uSec E-E GRAPHITE STEEL 0.2330 in/uSec...
-
Page 28: Chapter Six Making Measurements
In this case the reference disk mounted to the PVX-B is not used. This is called two- point calibration and is described on page 34. - Page 29 PVX-B Precision Visual Thickness Gauge 1) Press the MULTI MODE key once to activate the load setup list containing the transducer types and settings. 2) Use the UP and DOWN arrow keys to scroll through the setup list until the target setup is highlighted.
- Page 30 Dakota Ultrasonics 1) Alternately, the setups can be selected from the menu items manually. Press the MENU key once to activate the menu items tab. Press the MENU key multiple times to tab right and the ESC key multiple times to tab left until the SETUP menu is highlighted and displaying the submenu items.
- Page 31 The probe zero feature should only be used if a contact style transducer is connected to the PVX-B in pulse-echo mode. As noted in chapter 3, the probe zero function is a very important and necessary function that must done prior to calibration. It should also be done on a regular basis.
- Page 32 8) Press the MEAS key to return to the measurement screen. 6.3 Material Calibration In order for the PVX-B to make accurate measurements, it must be set to the correct sound velocity of the material being measured. Different types of materials have GlobalTestSupply www.
- Page 33 - optimizing linearity over large ranges. The Two Point calibration allows for greater accuracy over small ranges by calculating the probe zero and velocity. The PVX-B provides four simple methods for setting the sound-velocity outlined below: Calibration to a known velocity 1) Press the MENU key once to activate the menu items tab.
- Page 34 Dakota Ultrasonics 7) Press the OK key to set the velocity and return to the menu screen, or ESC to cancel entering the velocity. 8) Finally, press the MEAS key to return to the measurement screen and begin taking readings.
- Page 35 Note: It’s always best to calibrate on thickest location on the sample, rather than on the thinnest location, as the percentage error is much less with respect to the PVX-B’s resolution of +/- .0001” (0.001mm).
- Page 36 Dakota Ultrasonics 4) Press the ENTER key to display the Digits Edit Box. 5) Press the UP and DOWN arrow keys to scroll the highlighted value. 6) Press the LEFT and RIGHT arrow keys to scroll the digit locations. 7) Repeat steps 5 & 6 until the known thickness value is correctly displayed.
- Page 37 PVX-B Precision Visual Thickness Gauge Note: If the user opted to do a setup from scratch for interface-echo (I-E) mode, a two point calibration must be performed to set the probe zero. 1) Using a set of calipers, physically measure two known thickness locations on the sample of material.
- Page 38 Dakota Ultrasonics 9) Apply a drop of couplant on the transducer and place the transducer in steady contact with the sample or actual test material on the thinnest, or second known thickness location. Be sure that the reading is stable and the repeatability indicator, located in the top left corner of the display, is fully lit and stable.
- Page 39 PVX-B Precision Visual Thickness Gauge Built in Material Selection 1) Press the MENU key once to activate the menu items tab. Press the MENU key multiple times to tab right, and the ESC key multiple times to tab left, until the CAL menu is highlighted and displaying the submenu items.
-
Page 40: Chapter Seven Using The Digits & B-Scan Displays
We’ll take a better look at these options in this chapter. Note: In order to recall and use the new adjustments made to the PVX-B at a later time, the user must save the modified settings in one of the setup locations prior to powering off the unit. Refer page 74 for more information on setups. - Page 41 PVX-B Precision Visual Thickness Gauge 1) Press the MENU key once to activate the menu items tab. Press the MENU key multiple times to tab right, and the ESC key multiple times to tab left, until the DISP menu is highlighted and displaying the submenu items.
- Page 42 A) Stability of Reading Indicator – Indicates the stability of the return echo on a scale of 1 to 6 – the solid bars displayed in the figure above indicate a repeatable signal. If the PVX-B is displaying a reading from memory, the repeatability indicator will be replaced by the text “MEM”.
- Page 43 PVX-B Precision Visual Thickness Gauge display up into 5 segments, or quadrants. The measurement labels correspond to the measurement at each hash mark. G) Scan Bar – The scan bar corresponds directly with thickness represented by the horizontal labels on the on the display. As you can see from the diagram above, the filled horizontal bar is displayed at .500”.
- Page 44 A) Stability of Reading Indicator – Indicates the stability of the echo signal on a scale of 1 to 6 – the solid bars displayed in the figure above indicate a repeatable signal. If the PVX-B is displaying a reading from memory, the repeatability indicator will be replaced by the text “MEM”.
- Page 45 7.3 Adjusting the B-Scan Start (B-ST) & Depth (B-DEP) In order to use the B-Scan and Scan Bar features of the PVX-B effectively, the starting depth and overall depth must be setup correctly. This can be adjusted using the B-ST (start) and the B-DEP (depth) features of the PVX-B.
- Page 46 Dakota Ultrasonics 1) Press the MEAS key once to activate measure menu items. Press the MEAS key multiple times to move right and the ESC key multiple times to move left, until the B-DEP cell is highlighted. 2) Press the UP, DOWN, LEFT, and RIGHT arrow keys to scroll the highlighted value.
- Page 47 PVX-B Precision Visual Thickness Gauge 1) Press the MENU key once to activate the menu items tab. Press the MENU key multiple times to tab right, and the ESC key multiple times to tab left, until the DISP menu is highlighted and displaying the submenu items.
- Page 48 Dakota Ultrasonics The procedures to adjust the starting depth (B-ST) are outlined below: Adjusting the Starting Depth (B-ST) using the Hot Menus 1) Press the MEAS key once to activate measure menu items. Press the MEAS key multiple times to move right and the ESC key multiple times to move left, until the B-ST cell is highlighted.
- Page 49 PVX-B Precision Visual Thickness Gauge Adjusting the Starting Depth (B-ST) using the Tabbed Menus 1) Press the MENU key once to activate the menu items tab. Press the MENU key multiple times to tab right, and the ESC key multiple times to tab left, until the DISP menu is highlighted and displaying the submenu items.
- Page 50 PVX-B into a high gain setting. In any case, the selectable gain settings offer the user some additional options to resolve application issues.
- Page 51 PVX-B Precision Visual Thickness Gauge 1) Press the MEAS key once to activate measure menu items. Press the MEAS key multiple times to move right, and the ESC key multiple times to move left until the GAIN cell is highlighted.
- Page 52 Dakota Ultrasonics 3) Press the LEFT and RIGHT arrow keys to scroll the value. When the correct Gain is being displayed, proceed to step 8. 4) Alternatively, press the ENTER key to display the Digits Edit Box. 5) Press the UP and DOWN arrow keys to scroll the highlighted value.
-
Page 53: Chapter Eight Thru Paint Measurement Technique
The first thing to note in this section is that by selecting the transducer types labeled I-E & E-E from the factory setups stored in the PVX-B, a basic echo-echo thru paint configuration is recalled from memory. Each of the transducers in the setup list contain pre-configured interface-echo (I-E) and echo-echo (E-E) settings. -
Page 54: Chapter Nine Additional Features Of The Pvx-B
CHAPTER NINE ADDITIONAL FEATURES OF THE PVX-B 9.1 Language Selection The PVX-B is equipped with a multi language selection feature. This is an added feature for to accommodate everyone. The procedures are outlined below: Selecting the Language using the Tabbed Menus 1) Press the MENU key once to activate the menu items tab. - Page 55 Press the MEAS key to return to the measurement screen. 9.3 Alarm Mode The Alarm Mode feature of the PVX-B provides the user with a method of setting tolerances, or limits, for a particular application requirement. This feature may be used for incoming material inspections to verify the material received is within the manufacturer specifications.
- Page 56 Dakota Ultrasonics UTIL MENU – ALARM MODE Toggle Alarm Status (on/off) 1) Press the MENU key once to activate the menu items tab. Press the MENU key multiple times to tab right, and the ESC key multiple times to tab left, until the UTIL menu is highlighted and displaying the submenu items.
- Page 57 PVX-B Precision Visual Thickness Gauge Setting the Alarm LO Limit 1) Assuming the ALARM STATUS is ON, use the UP and DOWN arrow keys to scroll through the sub menu items until ALARM LO LIMIT is highlighted. 2) Press the LEFT and RIGHT arrow keys to scroll the value. When the correct alarm value is being displayed, proceed to step 7.
- Page 58 Dakota Ultrasonics Setting the Alarm HI Limit 1) Assuming the ALARM STATUS is ON, use the UP and DOWN arrow keys to scroll through the sub menu items until ALARM HI LIMIT is highlighted. 2) Press the LEFT and RIGHT arrow keys to scroll the value. When the correct alarm value is being displayed, proceed to step 8.
-
Page 59: Chapter Ten Data Storage - Setup, Edit, & View Grids
A to Z, then AA to ZZ giving a maximum of 52 possible columns. The largest grid that can be held in the PVX-B is limited by the total memory of the PVX-B. Multiple grids can be created and stored until the PVX-B’s memory is full. If... - Page 60 Dakota Ultrasonics 1) Press the MENU key once to activate the menu items tab. Press the MENU key multiple times to tab right, and the ESC key multiple times to tab left, until the DATA menu is highlighted and displaying the submenu items.
- Page 61 PVX-B Precision Visual Thickness Gauge Creating a Grid Note 1) Use the UP and DOWN arrow keys to scroll through the new Grid List Items until NOTE is highlighted. 2) Press the ENTER key to activate the Alpha Edit Box.
- Page 62 Dakota Ultrasonics 5) Use the CLR key to backspace if necessary. 6) Repeat steps 3 through 5 until the Grid Note is completed. 7) Press the OK key to save the Grid Note and return to the Grid List Items menu, or ESC to cancel entering the Grid Note.
- Page 63 PVX-B Precision Visual Thickness Gauge 3) Use the LEFT, & RIGHT arrow keys to scroll the Columns, and the UP, DOWN arrow keys to scroll the Rows. 4) Press the OK key to select the coordinate and return to the Grid List Items screen, or ESC to cancel the selection and return to the Grid List Items menu.
- Page 64 “NOT ENOUGH MEMORY“ will be displayed. Press the OK or ESC key to return to the Grid List Items menu. It may be necessary to free some memory in the PVX-B at this time. Refer to page 67 for more information on Deleting a Grid.
- Page 65 PVX-B Precision Visual Thickness Gauge Selecting the Auto Increment Direction The Auto Increment feature gives the user the ability to specify which direction to advance the cursor after storing a reading. 5) Use the UP and DOWN arrow keys to scroll through the new Grid List Items until INCR.
- Page 66 Dakota Ultrasonics Saving the Grid Once all the parameters are set, the user has the option of saving or canceling the new grid. 1) Use the UP and DOWN arrow keys to scroll through the new Grid List Items until CREATE NEW GRID? is highlighted.
- Page 67 PVX-B Precision Visual Thickness Gauge 4) Press the MEAS key to return to the measurement screen and begin storing readings. 10.3 Storing a reading Now that a grid has been created, it’s time to make some measurements and store the readings. The following procedures outline this process: Storing a Reading 1) Press the MEAS key once to activate measure menu items.
- Page 68 10.4 Viewing stored readings It is sometimes necessary to go back and view the stored readings and waveforms using the PVX-B without a PC. The following procedures outline this process: Viewing Stored Readings & B-Scans 1) Press the MEAS key once to activate measure menu items. Press the MEAS key multiple times to move right and the ESC key multiple times to move left until the COL or ROW cell is highlighted.
- Page 69 PVX-B Precision Visual Thickness Gauge 4) The user may opt to clear a specific reading and save a new one at any time. Press the CLR key in the appropriate cell location to clear the reading, take a new measurement, and press the OK key to save the new reading.
- Page 70 Dakota Ultrasonics 3) Press the ENTER key to display the Grid List Box. 4) Use the UP and DOWN arrow keys to scroll through the stored Grids until the target File to delete is highlighted. 5) Press the OK key to delete the Grid.
- Page 71 PVX-B Precision Visual Thickness Gauge 3) Press the ENTER key to activate the confirmation screen. 4) Press the OK key to delete All Files from memory, or the ESC key to abort. 5) Press the MEAS key to return to the measurement screen.
- Page 72 Dakota Ultrasonics 1) Press the MENU key once to activate the menu items tab. Press the MENU key multiple times to tab right and the ESC key multiple times to tab left until the DATA menu is highlighted and displaying the submenu items.
- Page 73 PVX-B Precision Visual Thickness Gauge 9) Repeat steps 6 - 8 until the Comments are completed. 10) Press the UP or DOWN arrow key to highlight SAVE CHANGES, and the OK key to activate the confirmation screen. 11) Press the OK to save the changes or the ESC key to cancel editing the grid parameters.
- Page 74 Dakota Ultrasonics The user may have transferred grid templates from a PC to the PVX-B, or setup grids using the PVX-B at an earlier time. The name of the currently active grid is always displayed at the bottom of the Hot Menu Items in measurement mode. It’s not only important to recognize what grid is currently active, but also be able to change the active grid at any time.
- Page 75 PVX-B Precision Visual Thickness Gauge 5) Press the ENTER key to activate the confirmation screen. 6) Press the OK key to load the grid from memory. 7) Press the MEAS key to return to the measure screen. GlobalTestSupply www. .com Find Quality Products Online at: sales@GlobalTestSupply.com...
-
Page 76: Chapter Eleven Setups - Create, Store, Edit, & Recall
11.2 Opening a Setup The PVX-B is loaded with a number of setups from the factory. These setups can be opened, edited, and saved to any one of 46 setup locations. The 18 factory setups are read only and can be opened and modified, but must be save to one of the 46 custom locations. - Page 77 PVX-B Precision Visual Thickness Gauge Opening a Setup Note: The setups can be loaded at any time by simply pressing the MULTI MODE key. 1) Press the MENU key once to activate the menu items tab. Press the MENU key multiple times to tab right and the ESC key multiple times to tab left until the SETUP menu is highlighted and displaying the submenu items.
- Page 78 7) Press the MEAS key to return to the measure screen. 11.3 Saving a Setup Once the PVX-B parameters and features have be adjusted for an application, the user may elect to save these setting to a specific setup location for future use. This can potentially save time and reduce error between users.
- Page 79 PVX-B Precision Visual Thickness Gauge Saving the Setup 1) Press the MENU key once to activate the menu items tab. Press the MENU key multiple times to tab right and the ESC key multiple times to tab left until the SETUP menu is highlighted and displaying the submenu items.
- Page 80 Dakota Ultrasonics 5) When the parameter to edit is highlighted, press the ENTER key to activate the Alpha Edit Box. 6) Use the UP, DOWN, LEFT, and RIGHT arrow keys to scroll through the characters, the ENTER key to select characters, and the CLR key to backspace through the characters, until the Name or Note fields have been edited.
- Page 81 Save Setup function can also be considered an Edit Function. 11.4 Using the Default Setup The default setup feature was added to the PVX-B to use, as a last resort, if there are no setups stored in the gauge –factory or otherwise. The only time this might...
- Page 82 Dakota Ultrasonics Important Note: Remember to perform a probe zero function prior to measuring. The default setup clears the probe zero value. Important Note: If interface-echo or echo-echo modes are being used, be sure to do a two-point calibration, which also sets the probe zero before measuring.
-
Page 83: Chapter Twelve Using The Utility Software
PVX-B Precision Visual Thickness Gauge CHAPTER TWELVE USING THE UTILITY SOFTWARE 12.1 Computer System Requirements DakView utility software will run on any Windows based or MAC OS 10.8-10.10 operating system, running Intel or AMD hardware. USB to Serial Converter Some newer laptop computers do not have standard serial ports. In this case it is possible to use a USB to Serial converter. -
Page 84: Appendix A - Velocity Table
APPENDIX A - VELOCITY TABLE Material sound velocity sound velocity in/us Aluminum 0.2510 6375 Beryllium 0.5080 12903 Brass 0.1730 4394 Bronze 0.1390 3531 Cadmium 0.1090 2769 Columbium 0.1940 4928 Copper 0.1830 4648 Glass (plate) 0.2270 5766 Glycerine 0.0760 1930 Gold 0.1280 3251 Inconel... - Page 85 PVX-B Precision Visual Thickness Gauge 0.1310 3327 Titanium 0.2400 6096 Tungsten 0.2040 5182 Uranium 0.1330 3378 Water 0.0580 1473 Zinc 0.1660 4216 Zirconium 0.1830 4648 GlobalTestSupply www. .com Find Quality Products Online at: sales@GlobalTestSupply.com...
-
Page 86: Appendix B - Setup Library
APPENDIX B - SETUP LIBRARY Name Comment 1 Gn/AGC Velocity E-E DELAY LINE 3/8 0.2330 in/uSec I-E DELAY LINE 3/8 0.2330 in/uSec E-E DELAY LINE 1/2 0.2330 in/uSec I-E DELAY LINE 1/2 0.2330 in/uSec E-E GRAPHITE STEEL 0.2330 in/uSec I-E GRAPHITE STEEL 0.2330 in/uSec I-E GRAPHITE PLASTIC 0.0920 in/uSec...
Need help?
Do you have a question about the PVX-B and is the answer not in the manual?
Questions and answers