
Subscribe to Our Youtube Channel
Related Manuals for Lamona HJA2480-1


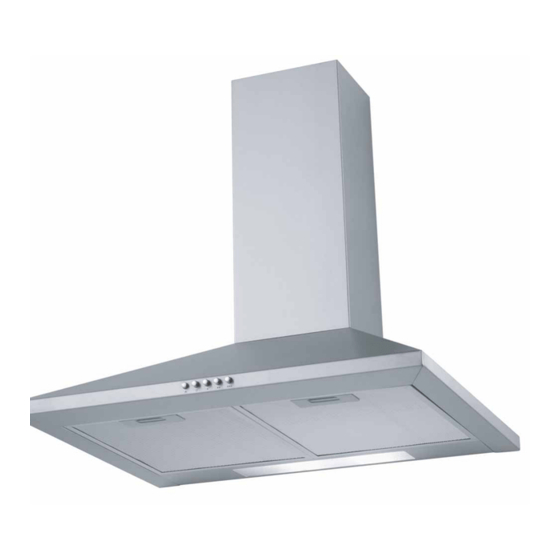
Summary of Contents for Lamona HJA2480-1
- Page 1 Chimney Extractor HJA2480-1 LAM2401-1 LAM2407/8 User & Installation Guide www.howdens.com/appliance-registration...
- Page 2 See back page for product serial number...
-
Page 3: Table Of Contents
Contents Environmental note Page 4 Condensation Page 4 IMPORTANT SAFETY INFORMATION Page 5 - 7 Parts Identifi cation Page 8 Using your extractor Page 9 Cleaning your extractor Page 10 Maintenance Page 11 - 13 Extractor cables Page 13 Installation Page 14 - 20 Trouble shooting Page 21... -
Page 4: Environmental Note
Environmental Note NOTE: Before discarding an old appliance, switch off and disconnect it from the power supply. Cut off and render any plug useless. Cut the cable off directly behind the appliance to prevent misuse. This should be undertaken by a competent person. Please discard all packaging material with due regard for the environment. -
Page 5: Important Safety Information
Important Safety Information • Your safety is of the utmost importance. Please make sure that you read this instruction booklet before attempting to install or use the appliance. IMPORTANT: Any installation work must be carried out by a qualifi ed electrician or competent person. •... - Page 6 Important Safety Information • Please dispose of the packing material carefully – children are especially vulnerable to it. • If the room where the extractor is to be used contains a fuel burning appliance such as a central heating boiler then its fl...
- Page 7 Important Safety Information • Do not connect the ducting system of this appliance to any existing ventilation system which is being used for any other purpose. • Do not install above a cooker with a high level grill. • Never leave frying pans unattended during use as overheated fats and oils might catch fi...
-
Page 8: Parts Identifi Cation
Parts Identifi cation On opening your box you will fi nd the extractor body, a two-piece telescopic decorative chimney, two fi xing brackets, outlet reducer, six chimney fi xing screws, eight wall screws and eight rawl plugs and a cable grid. 1. -
Page 9: Using Your Extractor
Using Your Extractor IMPORTANT: THIS PROCESS MUST BE FOLLOWED BEFORE THE EXTRAC- TOR IS USED FOR THE FIRST TIME. • You should use a good quality stainless steel cleaner and polish on ALL of the stainless steel areas of your extractor, before it is used for the fi rst time. -
Page 10: Cleaning Your Extractor
Cleaning Your Extractor IMPORTANT: BEFORE CLEANING, ALWAYS ENSURE THAT YOU HAVE SWITCHED YOUR EXTRACTOR OFF AT THE ISOLATION SWITCH, (FUSED SPUR) ON THE WALL. • Clean the external parts of your extractor with mild liquid detergent and a new damp cloth. •... -
Page 11: Maintenance
Maintenance Removing and cleaning the grease fIlters* Press clip down & pull to remove • First remove the grease fi lters by pulling down on the handle and pulling them away from the extractor. • Soak the grease fi lters in hot water and washing up liquid for about an hour. - Page 12 Maintenance Fitting the carbon Filters • If the appliance is being used to be used in recirculation mode then it is necessary to fi t carbon fi lters. This will help to absorb unpleasant odours caused by cooking. IMPORTANT: BEFORE ATTEMPTING TO FIT OR REMOVE THE CARBON FILTERS, YOU MUST ENSURE THAT YOU HAVE DISCONNECTED THE EXTRAC- TOR FROM YOUR MAINS SUPPLY.
-
Page 13: Extractor Cables
Maintenance Changing a light bulb IMPORTANT: BEFORE ATTEMPTING TO CHANGE A LIGHT BULB, YOU MUST ENSURE THAT YOU HAVE DISCONNECTED THE EXTRACTOR FROM YOUR MAINS SUPPLY. • Remove the grease fi lters (as described on page 11). • Prior to touching the light bulbs ensure they are cooled down. •... -
Page 14: Installation
Installation IMPORTANT: Before installation and usage read all the instructions and make sure that the voltage (V) and the frequency (Hz) indicated on the rating plate are exactly the same as the voltage and frequency in your home. The rating plate can be found behind the grease fi lter. The manufacturer declines all responsibility in the event of the installer failing to observe all the accident prevention regulations in force, which are necessary for normal use and the regular operation of the electric system. - Page 15 Installation ENSURE POWER CABLE DOES NOT FALL BACK INTO THE FAN CHAMBER (MAY TRAP THE FAN BLADE). As the colours of the wires in the appliance’s mains lead may not correspond with the coloured markings identifying the terminals in your spur box, please proceed as follows: •...
- Page 16 Installation • Check inside the product and insure that there is no transit packaging or any other materials, such as packets of screws, guarantees etc. These should be removed and kept for future use. • If possible, disconnect and move freestanding or slot-in cookers from their position, to provide easier access to the rear wall and ceiling.
- Page 17 Installation 3) Using a drill bit with a 6mm diameter, make holes in the wall on the positions that you have marked in step 2. 4) Insert rawl plugs into all of the holes that you have drilled. 5) Fasten the support screws halfway in, leaving them 10mm out of the wall. 6) Hang the extractor onto the support screws.
- Page 18 Installation Connecting to external ducting 8) Connect a 125/150mm ducting hose to the outlet (please note that the ducting hose is not supplied with the appliance) using coupler if desired. • The other end of the ducting hose should be connected to a discharge outlet that is suitable for cooking vapours.
- Page 19 Installation (F) Upper Chimney Bracket (E) Lower Chimney Brace (D) Upper Chimney Ducting hose to be attached for external ducting (C) Lower Chimney For non-vented extraction fit the grid 12) Rest chimney sections on body. Secure lower chimney section to body using chimney screws. 13) Lift chimney section (D) up to the ceiling and secure it to the L shaped bracket using the chimney screws.
- Page 20 Installation Completing the installation • If you are setting the appliance to recirculation mode, then you should now fi t the two carbon fi lters. See the “Fitting the carbon fi lters” section on page 12. • The electrical connection must correspond to the electrical requirement noted on the rating plate;...
-
Page 21: Trouble Shooting
Trouble Shooting IMPORTANT: If your extractor appears not to be operating properly, please refer to the checklist below. My extractor will not start • Check that the extractor is connected to the electricity supply • Check that the fan speed control is set correctly. My extractor is not working effectively •... -
Page 22: Your Guarantee
Call the Depot number on your Proof of Purchase Document sup- plied with the product / kitchen. Or Call the LAMONA Service Line on 0845 00 60 006 * Product installed within a domestic kitchen or non-domestic kitchen where 8 or fewer people are using the appliance. -
Page 23: Performance Information
Performance Information Symbol Value Unit HJA2480-1 Model identification LAM2401-1 Annual Energy Consumption 76,5 kWh/a hood Time increase factor Fluid Dynamic Efficiency hood Energy Efficiency Index 98,4 hood Measured airflow rate at the best 190,8 efficiency Measured air pressure at best efficiency... - Page 24 Symbol Value Unit Model identification LAM2407 Annual Energy Consumption 77,0 kWh/a hood Time increase factor Fluid Dynamic Efficiency hood Energy Efficiency Index 98,6 hood Measured airflow rate at the best 191,8 efficiency Measured air pressure at best efficiency point Maximum airflow 333,7 Measured electric power input at best 58,2...
- Page 25 Symbol Value Unit Model identification LAM2408 Annual Energy Consumption 77,0 kWh/a hood Time increase factor Fluid Dynamic Efficiency hood Energy Efficiency Index 98,6 hood Measured airflow rate at the best 191,8 efficiency Measured air pressure at best efficiency point Maximum airflow 333,7 Measured electric power input at best 58,2...
- Page 26 Product serial number (Place sticker here) Issue v1 030517...
Need help?
Do you have a question about the HJA2480-1 and is the answer not in the manual?
Questions and answers