Table of Contents
Advertisement
Advertisement
Table of Contents

Related Manuals for Lamona LAM2950


Summary of Contents for Lamona LAM2950
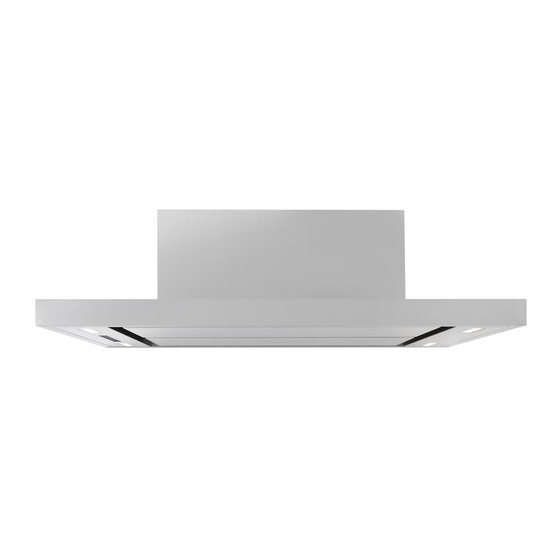
- Page 1 INSTALLATION & USER MANUAL LAM2950 LAMONA CEILING HOOD WWW.HOWDENS.COM...
- Page 2 See back page for product serial number...
- Page 3 Dear Customer, Congratulations on your choice of Lamona Ceiling Hood. The user manual will help you use your product quickly and safely. • Please read this user manual before installing and using the hood. • Always follow the safety instructions.
-
Page 4: Table Of Contents
Contents Before using the hood Surface Mounted Recirculating installation Safety Electrical Connections Fire safety Fitting Carbon Filters Ventilation Connecting the Remote Control Inportant safety information Installation Electrical safety Recessed ducted installation General Information & Operation Void Requirements Ceiling Hood Layout Electrical connections Control Panel Layout Ducting Connections... -
Page 5: Before Using The Hood
Before using the Ceiling Hood • Make sure that you have removed all packaging, wrappings, stickers and films from the Hood. • It is recommended that you clean the hood’s surface before using for the first time. Safety • The Ceiling Hood must be installed in accordance with the instructions Important! and all measurements followed. -
Page 6: Fire Safety
Important Safety Information Fire Safety • When in extraction mode, air in the room is being removed by the • Do not leave frying pans Ceiling Hood. Please make sure that unattended during use because proper ventilation measures are overheated fats or oils might catch being observed. -
Page 7: Inportant Safety Information
Important Safety Information Using lids on pans can help reduce • Do not use high level grills or BBQ the amount of steam being released type products under this Ceiling Hood. and subsequent condensation. Induction hobs offer a powerful, • Do not operate the ceiling hood more efficient heating process but with the access flaps in the open do not generate the higher levels of... -
Page 8: General Information & Operation
General Information & Operation Hood Contents Reducer Cable Grid Fixings Remote Control Hood and (1 X CR2025 Battery Supplied) Décor Panels 2x Installation Chains Control Panel Layout Timer Light Display Speed on/off Touch the on/off button to switch the Touch the light button, to turn the hood on or put it in standby mode. -
Page 9: Using Your Ceiling Hood
Using Your Ceiling Hood Make sure that it has been installed by a suitably qualified person, as per the installation instructions. Ideally you should turn on your hood ten minutes before you start to cook, or at the very least when you begin cooking. You should also run your hood for ten minutes after you have finished cooking. -
Page 10: Battery
Battery The remote control requires a CR2025 battery. The battery can be accessed fromthe bottom, as shown in the below picture. Carefully release the tab and pull the battery tray out. +ve side faces the bottom of the remote Connecting The Remote Control A new remote control has to estabish a connection to the Ceiling Hood when used for the first time. -
Page 11: Care And Maintenance
Care and Maintenance Before cleaning or attempting any type of maintenance, always make sure that the electricity supply is disconnected. To avoid the possibility of fire, adhere strictly to all of the recommendations included in this booklet, paying particular attention to the grease filters to ensure grease deposits do not build up The manufacturer declines all liability in cases where the instructions for the appropriate installation, maintenance and use of the Ceiling Hood are not observed. -
Page 12: Carbon Filters
Connect the power supply to the wall socket. NOTE: Carbon filters will reduce the suction power of the appliance, they are designed to remove smells and cooking odours, they will not remove moisture or condensation from the air. LAM2950 Uses Carbon Filter HJA2906 (2Pk) Page_12 www.howdens.com... -
Page 13: Replacing The Lamps
Connect the new lamp unit to the terminal and push it back into place being careful not to trap the cable . Please see the Lamona warranty information page at the rear of this booklet for more information on obtaining spares. -
Page 14: Installation
Installation Methods of Extraction The very best method of clearing the kitchen of unwanted odours is by connecting the appliance to an exhaust duct and venting to the outside atmosphere via the ceiling. Surface Mounted Recirculating Semi Recessed Ducted Fully Recessed Ducted Page_14 www.howdens.com... -
Page 15: Before Beginning Installation
Before Begining Installation Check that the product purchased is of a Protect any hob already installed below with a suitable size for the chosen installation area. blanket or cardboard etc, to prevent possible In addition check whether there is an electrical damage. - Page 16 Surface mounted installation (Recirculating) 1) Unscrew 8 pcs M4*12mm screws from the mounting plate and keep them to one side. Remove the mounting plate noting the orientation of the plate and the holes. The Ceiling Hood should be positioned at a distance of no more than 1500mm from the cooking surface otherwise performance may be reduced.
-
Page 17: Electrical Connections
IMPORTANT: Ensure that the electricity supply is switched off before connecting. 4) Your appliance must be connected via the use of a double pole switched fused spur with at least 3mm contact separation, the isolation switch must be accessible after installation. Additional protection measures such as RCD devices are recommended. -
Page 18: Fitting Carbon Filters
Fitting the Carbon Filters (recirculation only) Before attempting to change or fit the charcoal filters ensure power to the extracor is switched off. Carbon filters only required for recirculation mode. 6) Open the access flaps and remove the grease filters. Fit the carbon filters (Supplied separately) to the fan motor inlet by locating on the central spigot and rotating to lock into place. -
Page 19: Recessed Ducted Installation
Semi and Fully Recessed Installation (Ducted) This method can be used to install the product with the false ceiling already erected. If the false ceiling is to be erected afterwards, follow the installation guide for surface mounting. Note: the chimney décor panels must be removed in all ducted installations Semi recessed = 230mm void from Fully recessed = 290mm void from the original ceiling height. -
Page 20: Installation
3) Using the mounting plate as a template place it on the ceiling and mark and drill the Φ8mm holes, use either the anchor bolts or the ST6*40mm screws & wall plugs supplied in the fixings pack to mount the plate to the original ceiling. -
Page 21: Ducting Connections
Electrical Connections The terminology DOUBLE POLE -/+ means that both the live and neutral supplies are switched and disconnected at the same time. The terminations labelled SUPPLY are the connections for the internal house wiring and the terminations labelled LOAD are for connection to the appliance. -
Page 22: Technical Specifications
Technical Specification TROUBLESHOOTING GUIDE Dimensions: Total Wattage: 388W Voltage: 220V - 240V 50Hz Width: 1100mm Depth: 700mm Fuse Rating: 3A Fused Spur Your Ceiling Hood is fitted with: Single motor 380W Touch control with remote control 2 Speeds + Boost x4 LED lamps (DSS-1.5/30-S-120/33 12V 1.5W) x4 Aluminium grease filters Optional Extras:... -
Page 23: Your Guarantee
Call the Depot number on your Proof of Purchase Document supplied with the product / kitchen. Call the LAMONA Service Line on 0344 460 0006 *Product installed within a domestic kitchen or a non-domestic kitchen where 8 or fewer people are using the appliance. - Page 24 Product serial number (Place sticker here) Issue v1 050220...
Need help?
Do you have a question about the LAM2950 and is the answer not in the manual?
Questions and answers