
Related Manuals for Advantech LEO-D Series


Summary of Contents for Advantech LEO-D Series
- Page 1 LEO-D ePaper Display Solution (電子紙顯示器) LEO-D31/LEO-D51 Installation and User Guide Confidential and Proprietary...
-
Page 2: Table Of Contents
Table of Contents LEO-D Application Installation - Overview ..........5 System Hardware Components and Features ........6 Shipping Inventory ......................6 Access Point ........................7 2.2.1 Status Indicators and Assembly ................7 Router ..........................9 2.3.1 Status Indicators and Assembly ................9 Tag(s) ........................... - Page 3 APPENDIX A – ELSA-M Icons ..............402 APPENDIX B - Changing User Password and Account Creation ....44 Confidential and Proprietary...
- Page 4 Using This Documentation This installation guide explains how to set-up and install the LEO-D ePaper Display Solution. This document is written for technicians, system administrators, authorized service providers, and users who have limited computer experience. Confidential and Proprietary...
-
Page 5: Leo-D Application Installation - Overview
LEO-D Application Installation - Overview The following task-list needs to be completed for a full LEO-D ePaper Display Solution installation. Confirm that you have received all the items you ordered, Attach power and data cable to Access Point, ... -
Page 6: System Hardware Components And Features
System Hardware Components and Features This section describes the components, indicators and connectors for the system. 2.1 Shipping Inventory Inspect the shipping cartons for evidence of physical damage. If a shipping carton appears damaged, request that the carrier’s agent be present when the carton is opened. Keep all contents and packing material for the agent’s inspection. -
Page 7: Access Point
2.2 Access Point(USM-D62) The Access Point has a wired connection to the base station (computer) and communicates wirelessly with the Router(s) via the proprietary Platanus protocol. The Access Point supports up to a total of 15 Routers and has an operating range from 0m to 100m;... - Page 8 Access Point - Network Port GREEN network activity indicator—turns on when a cable connects the port to another Gigabit Ethernet port YELLOW activity indicator—Flashes to indicate network activity over that port Attach included Antenna Plug one end of the supplied Cat 5E cable into the Access Point, the other end should be plugged into your computer.
-
Page 9: Router
2.3 Router(USM-D64) The Router(s) operate wirelessly, via the proprietary Platanus protocol, with the Access Point and ESL Tags. Each Router supports up to a total of 1000 ESL Tags and has an operating range up to 100m; please refer to Section 2.6 System Hardware Deployment for guidance on the correct positioning of your Router. -
Page 10: Tags
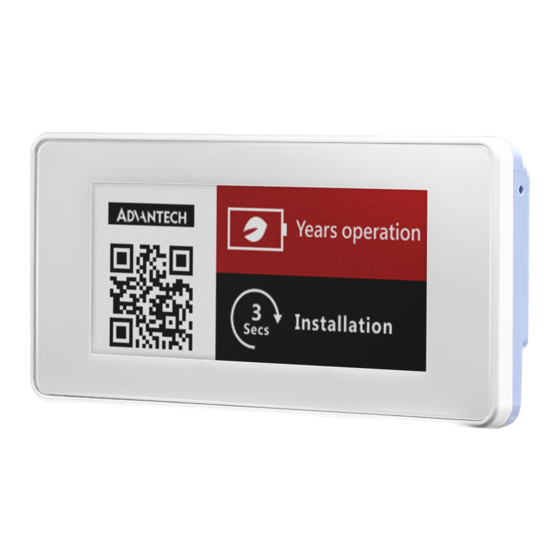
When connecting to a network and under average RSSI qualification by Daemon When the Router reaches its maximum carrying capacity, e.g. connection with 1,000 tags When connected to network but the RSSI falls below -80dBm Will flash quickly when the Router loses connection with the network, duration 30 minutes Attach included Antenna Connect the included AC power adaptor as shown. - Page 11 2.4 Tag(s) LEO-D31 2.9” ePaper Display Size (W x H x T): 92.6mm x 45mm x 10.3mm Active display area (W x H): 66.9mm x 29.06mm LEO-D51 5.65” ePaper Display Size (W x H x T): 140.8mm x 114mm x 16.5mm Active display area (W x H): 114.9mm x 85.8mm Confidential and Proprietary...
-
Page 12: Preparing For Installation
2.5 Preparing for Installation This section provides the information you need to prepare for the application installation. 2.5.1 Equipment Needed for Installation The LEO-D Device Manager utilizes a Web-based Configuration Utility for optimum performance we recommend the following; Desktop/Tower computer o Windows OS (Windows 7, 8, 10 or Windows Server 2012) o Microsoft .NET Framework version 3.5 or later o CPU x86 64-bit 2.3GHz... -
Page 13: System Hardware Deployment
2.6 System Hardware Deployment 2.6.1 Positioning your Access Point and Router(s) The access point and routers together form the wireless network through which your wireless ESL tags will operate; correct placement is essential to ensure that you stay within the operating range of the access point and router(s). - Page 14 Actual operating range is subject to WIRELESS ROUTER MAX 100m adherence with positioning (Sub-GHz) guidelines given in previous section Confidential and Proprietary...
-
Page 15: Ip Address Configuration (Static Ip)
2.7 Computer Configuration for LEO-D ePaper Display Soultion Installation It can be seen in the diagram below that the system architecture consists of several key components; a single or multiple Access Points, several Routers, multiple End Devices (LEO-D tags) and the Platanus Daemon program running on a desktop. This LEO-D Device Manager installation is designed to use either a static IP address for a single Access Point or a dynamic IP address when multiple Access Points are installed. -
Page 16: Ip Address Configuration (Dynamic Ip)
On your computer open the Control Panel – Network and Internet – Network and Sharing Center Using your computer mouse, click on Ethernet Select Properties Select Internet Protocol Version 4 (TCP/IPv4), and select Properties Check Use the following IP address and enter information shown above. Select OK to apply new settings (All open windows can now be closed) 2.7.2 IP Address Configuration (Dynamic IP) For installations that contain multiple Access Points an external TCP/IP Ethernet hub is required;... -
Page 17: Web-Based Elsa-M Installation
Web-based ELSA-M Installation 3.1 Software Installation On your computer go to the Windows Downloads folder and locate the ELSA-M executable file, (Please note; filename shown is an example, actual build number 1.0 (594) maybe different). Double-click file to begin the installation. You may be asked for permission to allow the program to make changes to your computer;... - Page 18 Click Next> to continue Click Next> to continue Confidential and Proprietary...
- Page 19 Creation of a desktop icon is optional; Click Next> to continue Click Install to continue Confidential and Proprietary...
- Page 20 During this stage of the installation it is highly likely that your computer screen may change color (Blue) and that a new dialogue pop-up box will appear. DON’T PANIC! Whilst extracting the files required for the installation the ELSA-M program checks your computer to ensure that it has the core Python 2.7 libraries and modules installed, if it does not find them it will automatically redirect you to the Python 2.7 install page (That’s the blue screen you maybe currently seeing).
- Page 21 Nothing to do here please be patient. Click Next> to continue Confidential and Proprietary...
- Page 22 It is necessary for you to check I accept the agreement before the Next> button becomes active. Click Next> to continue wxPython3.0-py27 is the additional software that works with the core Python2.7 program. Please accept the default folder location for your Python installation, and then click Next> to continue Confidential and Proprietary...
- Page 23 Please accept the dialogue box recommendations as shown above Click Next> to continue Almost done please be patient. Confidential and Proprietary...
- Page 24 It is not necessary to view the README.win32.txt file, but we add the option here for IT and System Administrators who wish to review it. For most users this can be un-checked. Leave the other two boxes checked as these are required by the installation Click Finish to exit Python set-up and continue to the final stage of ELSA-M installation Click Finish to exit setup Confidential and Proprietary...
- Page 25 The ELSA-M Demo Web Portal has now been installed on your computer and you should now be able to locate this icon (for launching the application) on your computer screen. You are now ready to launch the ELSA-M Demo Web application. Confidential and Proprietary...
-
Page 26: Setting Up The Elsa-M Web Portal
Setting Up the ELSA-M Web Portal Ensure that your ELSA-M Access Point is connected to your computer that the Router(s) and tags are installed throughout your premises and are powered on. NOTE: All tags must be “awake” prior to starting the ELSA-M web portal for the first time. 4.1 ELSA-M Start-Up Tasks On your desktop double-click on the ELSA-M icon to launch the application service. - Page 27 Please check the box for Private networks and then “Allow access” On your computer desktop locate the hidden icons on your Windows task bar, (the up arrow in the bottom right corner of your screen) Locate the M2C ESL Web System icon Using your mouse, right click the icon and select Open in browser (http://localhost:88/dashboard/), the ELSA-M web browser login page will now appear on your screen.
-
Page 28: Elsa-M Web Portal Login
4.2 ELSA-M Web Portal Login ELSA-M has three user profiles available for granting or restricting access to areas of the application. Super Admin Default Username: sa Default Password: passw0rd We recommend that the username and password be changed as soon as possible after logging into the system, for details on how to change username and password refer to Changing Your Password (APPENDIX-B) of this manual Admin... - Page 29 The following table shows the default privileges of each of the three user profiles. Super Admin User Admin System Commands User account creation and/or password change Maintenance Database Backup ...
- Page 30 The web portal will open in your browser; default page is System Overview as shown below; The ELSA-M Access Point, Router(s) and Tags will auto-connect with the web portal and are shown under Network Summary. For detailed information of the hardware select the ESL Management tab.
- Page 31 For the purposes of this guide we have created an ELSA-M system that comprises; 1x AP (Access Point) 1x Router 2x ED (End Devices or Tags) At this time no product has been associated with the tags, this will be covered in the next section.
-
Page 32: Manage Elsa-M Tag Product Display
Manage ELSA-M Tag Product Display 5.1 Tag/Product Association Before we can load any information to your ESL tags each one needs to have its MAC address individually associated with the product barcode of the item you want to display on the tag. At this stage it is assumed that your ESL tags have been deployed throughout your premises (placed with products). -
Page 33: Tag/Product Association Import
The successful associations will also be shown within the ESL Management page of the web portal (if the new product data is not shown then please refresh the browser window). 5.1.3 Tag/Product Association Import Tag/Product association can also be carried out by importing a suitable file from your computer’s hard drive or other source. - Page 34 Choose Import to continue NOTE: The imported Tag/Product association file must be in a .csv file format and should contain the following information; A .csv file can be created using a text editor application such as Windows Notepad and using the Save As option;...
-
Page 35: Tag/Product Association Manual Input
5.1.4 Tag/Product Association Manual Input If you have already imported or created an Inventory for the ELSA-M system then manual association of a tag with a product can be accomplished from within the ESL Management page by double-clicking on an entry in the ESL list will open a window that allows the user to dynamically change the product displayed on the tag. -
Page 36: Creating An Inventory List
Creating an inventory list A simple inventory list can be created from within the ELSA-M web portal via the Inventory/New Product icon. New Product: Pop-up window for the manual creation of a new product in ELSA-M that is not currently listed within your Inventory/Stock list (.csv file). Can be used in conjunction with the Backup to file icon below to add the new product to your inventory Example ELSA-M web portal display... -
Page 37: Enabling Esl Tag Display
Notes on column headings; A) This is a default setting, M should be entered against all products B) Product/Stock part number C) Product barcode D) The layout format in which you want your ESL tag to display product information E) Description of product that you want to see displayed on your ESL tag F) Warehouse or storage facility location When you have a complete inventory list it needs to be saved as .csv file Select Save As, Other Formats, when the pop-up window appears give your file a name (for this... -
Page 38: Esl Tag Layout Profiles
A new window will open asking you to choose the file you want to import, click Choose File and navigate to the .csv file created in Section 6 above, select the file and click Open You have the option here of selecting whether or not the data should be pushed directly to your tags, check the box if you want to push, leave unchecked if you want to push data later. -
Page 39: National Regulatory Warning
National regulatory warning NCC 標示在使用手冊: 低功率電波輻射性電機管理辦法 第十二條 經型式認證合格之低功率射頻電機,非經許可,公司、商號或使用者均不得擅自變更頻率、加大功率或變 更原設計之特性及功能。 第十四條 低功率射頻電機之使用不得影響飛航安全及干擾合法通信;經發現有干擾現象時,應立即停用,並改善至 無干擾時方得繼續使用。 前項合法通信,指依電信法規定作業之無線電通信。 低功率射頻電機須忍受合法通信或工業、科學及醫療用電波輻射性電機設備之干擾。 Federal Communications Commission Statement : This device complies with FCC Rules Part 15. Operation is subject to the following two conditions: • This device may not cause harmful interference. •... - Page 40 APPENDIX A – ELSA-M Icons Icon Function Reference System Overview Maintenance contains the debugging and reporting Refer to Figure 1 functions required by the technical support team to below assist in resolving customer issues. Not available in this release System Overview - Maintenance Show barcode on all tags Refresh all tag displays Shuts down all tags...
- Page 41 Sends a manual query ping to a selected hardware device to check its status, the selected item will temporarily appear ‘Inactive’ in the ESL Management page and in the Device Status (main menu side bar). If no issues are discovered then device will automatically revert to ‘Active’...
- Page 42 This function will cause the selected tag to display its unique barcode, when deploying or swapping out pre- registered tags this is useful for product association, select the tag(s) you want and then click the Show barcode icon. Deletes selected hardware device, select the item(s) you want and then click the Delete icon.
- Page 43 Figure 1: System Maintenance Confidential and Proprietary...
- Page 44 APPENDIX B - Changing User Password and Account Creation Super Admin Only CHANGING A USER PASSWORD From the ELSA-M Web Portal System Overview select Maintenance In the top right of your screen select Follow the on-screen instructions When finished select Change my password Select Home to return to ESL administration, Site administration page Confidential and Proprietary...
- Page 45 ACCOUNT CREATION Against Users select +Add Follow the on-screen instructions to add new user(s) and when finished select Save You now have the option of adding some personal details about the new user(s) you have created; this is not an essential task but is a useful method for associating a username to a person.
- Page 46 Select the profile you wish to give the new user(s) and click on the right arrow to apply; this will assign all the default privileges for the chosen profile to the new user(s), for details on the default privileges please refer to Section 4.2 If you want to assign additional privileges to the new user(s) you can select these from the supplied list, after each selection click on the right arrow to apply them.
- Page 47 If you want or need to change any of the user(s) accounts you can do that here If not then select View site from the top right hand side of your screen to return to the ELSA-E dashboard. Confidential and Proprietary...
Need help?
Do you have a question about the LEO-D Series and is the answer not in the manual?
Questions and answers