Table of Contents
Advertisement
Available languages
Available languages
Quick Links
Advertisement
Table of Contents

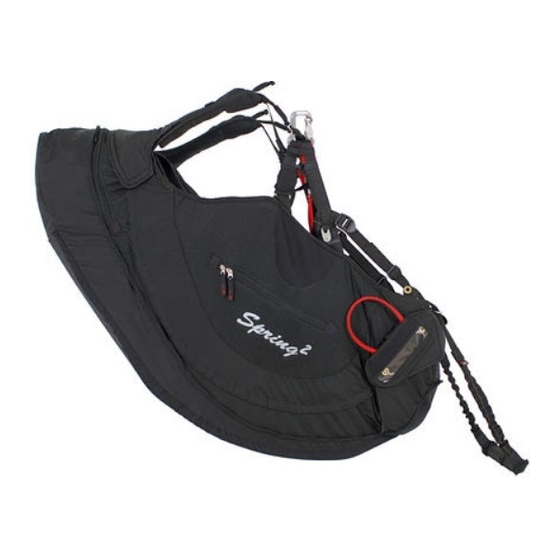
Related Manuals for SOL paragliders Spring 2


Summary of Contents for SOL paragliders Spring 2
- Page 1 Manual da Selete Easy 3 Spring 2 Spring 2 Airbag V. 04/2014...
-
Page 2: Table Of Contents
Protetor lateral ................10 Protetor dorsal ................10 Instalação dos mosquetões ............11 Ajuste de posição ................11 Easy 3, Spring 2, Spring 2 airbag..........12 Posição de voo ................12 Abertura dos mosquetões ............13 Instalação do paraquedas reserva ..........13 Compartimento do paraquedas reserva .........17 Instalação do Airbag..............18... -
Page 3: Bem Vindo À Família Sol
BEM VINDO À FAMÍLIA SOL! Obrigado por escolher a SOL Paragliders, você acaba de adquirir um produto da mais alta qualidade, confeccionado dentro dos mais rígidos padrões estabelecidos pelo exigente mercado mundial. Esperamos que sua Selete SOL lhe traga muitos momentos felizes de sua vida. -
Page 4: Introdução
Como em todos os produtos SOL, os materiais utilizados são cuidadosamente No início de 2004 a SOL Paragliders foi certificada pelo DHV, o mais escolhidos, garantindo uma grande durabilidade e alto nível de segurança. -
Page 5: Filosofia
-Compartimento para identificação pessoal; assim uma maior precisão no projeto. -Protetor de coluna de 18 cm; -Proteção lateral (Spring 2 e Spring 2 Airbag); -Marcação de referência na fita do peitoral. AJUSTES E INSTALAÇÕES PRÉ-VOO As Seletes SOL oferecem uma grande possibilidade de ajustes, para que o piloto encontre sua posição ideal de voo. -
Page 6: Instalação Das Proteções
-Nunca carregue instrumentos que possam perfurar as costas da selete em caso de impacto! INSTALAÇÃO DAS PROTEÇÕES Protetor Lateral (Spring 2 - Spring 2 airbag) AJUSTE DE POSIÇÃO Sugerimos que o piloto, antes do primeiro voo, simule sua posição de voo pendurando a selete em um provador de selete, sentando na Selete SOL e buscando o melhor ajuste de posição. -
Page 7: Easy 3, Spring 2, Spring 2 Airbag
EASY 3, SPRING 2 E SPRING 2 AIRBAG Abertura dos Mosquetões Dependendo de cada tamanho de parapente, existe uma medida da Visualize os detalhes de como ajustar a Selete para o voo: abertura dos mosquetões da qual o parapente foi projetado e testado. Nos parapentes SOL você... - Page 8 6 6 6 7 7 7 - - - - Atenção - - - - Atenção: Imagem 5 e 11:Puxe os bridles firmemente, para impedir uma abertura involuntária, evitando uma fricção perigosa na abertura do reserva.
-
Page 9: Compartimento Do Paraquedas Reserva
-O tamanho do container leva em conta o tamanho de reserva que seria natural para o peso do piloto x tamanho da selete pode ocorrer de reservas grandes não serem adequados para este espaço em seletes menores. Tenha muita atenção no sentido que você... -
Page 10: Instalação Do Airbag
INSTALAÇÃO DO AIRBAG (Spring 2 airbag) INSTALAÇÃO DO ACELERADOR DE PÉ A selete Spring 2 Airbag tem o airbag instalado através de zipper possibilitando a remoção do airbag As polias necessárias para se caso o piloto opte por voar sem o... -
Page 11: Apoio De Pé
Voo Duplo: Apoio de Pé: As seletes EASY 3, SPRING 2 / SPRING 2 Airbag não foram projetadas para uso em voo duplo. Seletes SOL com outras marcas de parapentes: A Selete Easy 3, Spring 2 As Seletes SOL não tem nenhuma restrição para uso com outras marcas e Spring 2 Airbag possuem de parapente, consulte também o manual do seu parapente. -
Page 12: Ajustes Finais
Zipper: AJUSTES FINAIS O zíper deve abrir e fechar macio com o Antes de iniciar o voo em sua Selete SOL, faça uma checagem minuciosa cursor deslizando suavemente. Se houver dos seguintes aspectos: dificuldade em movimentar o cursor deve ser aplicado parafina ou "spray" lubrificante nos dentes, para diminuir o atrito entre os 1º) Se todos os bolsos estão fechados corretamente;... -
Page 13: Limpeza
Limpeza: Para limpar sua Selete SOL use a água e sabão neutro, evitando esfregar sobre costuras. POUSANDO NA ÁGUA Normalmente cursos de segurança são efetuados em cima da água ou o -Caso você venha a molhar seu equipamento , procure secá-lo no menor pouso mal calculado leva você... -
Page 14: Palavras Finais
é nos mantermos saudáveis e que a cada pouso estejamos um pouco mais felizes. Voamos para nos sentirmos mais vivos. Spring 2 Desejamos bons e seguros voos com o sua nova Selete SOL. Spring 2... -
Page 15: Dados
18cm Back protector 18cm Potection dorsale 18cm Protetor Dorsal 18cm Rücken Protektor 18cm ( Inclui: Protetor de coluna, Spring 2 airbag (Kg) tábua do assento) Airbag Cygnus Airbag Cygnus Airbag Cygnus Airbag Cygnus ( Inclui: Protetor de coluna,... - Page 16 Harness Manual Easy 3 Spring 2 Spring 2 Airbag 04/2014...
- Page 17 PLEASE READ THIS MANUAL CAREFULLY AND NOTE THE FOLLOWING DETAILS HIS HARNESS MEETS AT THE TIME OF DELIVERY THE REQUIREMENTS OF THE LTF (LUFTTÜCHTIGKEITSFORDERUNGEN) CERTIFICATION OR THE EN 926 (EURO NORM) OR THE AFNOR SHV AND AEROTESTS). ANY ALTERATIONS TO THE HARNESS WILL RENDER ITS CERTIFICATION NULL AND VOID! THE USE OF THIS HARNESS IS SOLELY AT THE USER'S OWN RISK! MANUFACTURER AND DISTRIBUTOR DO NOT ACCEPT ANY LIABILITY.
- Page 18 Installing the protectors...............41 Side protectors ................41 Back protector ................41 Installing the carabiners..............42 Position adjustments ..............42 Spring 2 Spring 2 Airbag..............43 Flight position................43 Distance measure between carabiners ..........44 Installing the rescue parachute ............44 Rescue parachute compartment ...........48 Water Ballast Compartment............49 Installing the airbag..............49...
- Page 19 Be welcome to the SOL Team of pilots. In early 2004 SOL Paragliders became certified by DHV, which is the most respected regulating body of free-flying worldwide. Its mandate is to make sure its members have the capacity to reproduce faithfully the certified equipment on an industrial scale.
- Page 20 PHILOSOPHY INTRODUCTION SOL’s philosophy is to introduce products that are considerably better than current ones, in order to guarantee significant advancements in four aspects: Safety, Performance, Ease of Operation and Innovation. Safety: The new product has to offer a level of safety that is at par or better than the one it is replacing;...
- Page 21 Foot stirrup; Spacious side pocket; Water compartment; 18 cm foam back protector; Side foam protection (Spring 2 and Spring 2 Airbag); Personal Identification Compartment; Passage for PTT radio; Reference measure marked on the chest webbing; Easy check measure tape to set exact distance between the carabiners.
- Page 22 INSTALLING THE CARABINERS EASY 3, SPRING 2 AND SPRING 2 AIRBAG Observe the details how to adjust the harness for flight : POSITION ADJUSTMENTS Before the first flight, we suggest the pilot to simulate the flying position hanging the harness on a harness tester, sitting on SOL Harness and trying to find the best position adjustment.
- Page 23 DISTANCE MEASURE BETWEEN CARABINERS Depending on the paraglider size, there is a recommended carabiner distance to which the paraglider was designed and tested. With SOL paragliders you must fly within these measures. In case you are outside of them, the behaivior of the paraglider may not correspond to the certification.
- Page 24 The Harness features a rescue parachute installation system with easy access and visible rescue handle. The closure flaps maintain the rescue parachute in the right position - - - - Pay Attention - - - - and protect it from dust and humidity (Figure 19) In case of a water landing, the rescue parachute need to be removed from the harness, be dried and re-packed before it is installed back...
- Page 25 Pay special attention to the fact that you must pull your reserve in order to throw it out. INSTALLING THE AIRBAG (Spring 2 airbag) RESCUE PARACHUTE COMPARTMENT The reserve parachute compartment of your harness was designed for most The Spring 2 Airbag harness is of the parachute models in the market.
- Page 26 SPEED SYSTEM INSTALLATION Foot Support: The Easy 3, Spring2 and Spring2 Airbag feature feet support. 9 9 9 All necessary buckles to adjust 8 8 8 the speed system are found on the harness' body. The cables 7 7 7 must be fed initially through the 6 6 6 pulleys in front f the seat.
- Page 27 Tandem Flight Before any take-off with your new SOL Harness, make sure to perform the following inspection in detail: EASY 3, SPRING 2 / SPRING 2 Airbag H arnesses were not designed for Tandem flights, neither for pilots nor for passengers.
- Page 28 Zipper Cleaning: Use water and neutral soap to clean your SOL Harness, avoiding scrubbing The zipper should open and close softly over the sewn areas. and the slider should travel through its path easily. If you experience any trouble with the slider, you should apply wax or lubricant spray to minimize the friction between the WATER LANDING...
- Page 29 FINAL WORDS Safety is the major theme of our sport. In order to fly safely, pilots must train, study, practice and be alert to the dangers around us. In order to achieve excellent safety levels, we must fly regularly as much as possible, don't go beyond our limitations and avoid exposing ourselves to unnecessary dangers.
- Page 30 Technical Data Harness Easy 3 Spring 2 Spring 2 Airbag 04/2014...
- Page 31 31,5 Seat length (cm) Height of connection point (cm) (Including: Back Protector Spring 2 (Kg) and wooden seat). (Including: Back Protector Spring 2 airbag (Kg) and wooden seat). (Including: Back Protector Easy 3 (Kg) and wooden seat). Size Table :...
- Page 32 Features: Easy 3 Legend: English Français Português Deutsch 14cm Back protector 14cm Potection dorsale 14cm Protetor Dorsal 14cm Rücken Protektor 14cm 18cm Back protector 18cm Potection dorsale 18cm Protetor Dorsal 18cm Rücken Protektor 18cm Airbag Cygnus Airbag Cygnus Airbag Cygnus Airbag Cygnus Side protector Protection latérale...
Need help?
Do you have a question about the Spring 2 and is the answer not in the manual?
Questions and answers