Table of Contents
Advertisement
Quick Links
Advertisement
Table of Contents

Related Manuals for Accton Technology Fast EtherHub 3500 Series


Summary of Contents for Accton Technology Fast EtherHub 3500 Series
- Page 1 Fast EtherHub 3500 System ♦ ♦...
- Page 2 Installation and User’s Guide Fast EtherHub 3500 System Intelligent Fast Ethernet Stackable Hub with 12 100BASE-TX Ports; including SNMP Management Support...
-
Page 3: Safety Compliance
BBS: 886-3-5770-654 FAST FAX: 408-452-8811 Internet: support@accton.com.tw Accton, EtherHub, SmartWatch, SmartExtender and AccView and are trademarks or registered trademarks of Accton Technology Corporation. Other trademarks or brand names mentioned herein are trademarks or registered trademarks of their respective companies. EH3512I-TX EH3512M-TX... - Page 4 Package Contents Carefully unpack the contents of the package and verify them against the checklist given below. This checklist applies to all the Fast EtherHub 3500 Series models unless otherwise specified. Package Checklist Fast EtherHub-12i Intelligent Fast Ethernet Stackable Hub with 12 100BASE-TX Ports (Model No.
-
Page 5: Rj-45 Port
Quick Installation Accton’s Fast EtherHub 3500 models each contain 12 Fast Ethernet (100BASE-TX) RJ-45 ports, one MDI daisy-chain port, and one slot for an optional connection using 100BASE-TX (10BASE-T), 100BASE-T4 or 100BASE-FX. The smart design built into the front display panel and configure options provide a friendly interface that simplifies installation and network troubleshooting. - Page 6 Fast EtherHub 3500 System User’s Guide Attach each hub to one of the 6. Connect each hub to one of the 3 Fast Ethernet segments backplane segments embedded in the backplane bus using either on-board configuration (Chapter 4) or optional network management software (e.g., AccView/Open).
- Page 7 Fast EtherHub 3500 System User’s Guide Or attach to the extended 10. If an optional SmartExtender Module is installed in the network via the SmartExtender expansion port, it can be used to make a bridged connection Module from this hub to another network device using 100BASE-TX The SmartExtender Module can (10BASE-T), 100BASE-T4 or 100BASE-FX media types.
- Page 8 Fast EtherHub 3500 System User’s Guide Difference in connecting to the The Fast EtherHub 3500 stack can be connected to a larger extended network via the daisy- network using any device such as a switch, bridge or router. chain port or SmartExtenter Module Depending on your network configuration, you may attain better performance by making a direct connection from the daisy-chain port (or a station port) on this hub to an...
-
Page 9: Product Specifications
About this Guide This guide is designed for the experienced network installer. It describes how to install and operate Accton’s Fast EtherHub 3500 system. After reading this manual, you should be able to use the front display panel and configure options to manage all your network connections. -
Page 10: Table Of Contents
Contents Chapter 1: Product Overview Introduction to Fast Ethernet Brief Description of the Fast EtherHub 3500 System Distinguishing Factors of Fast EtherHub 3500 System Basic Features of Fast EtherHub 3500 System Data Switching with the SmartExtender Modules Switching Technology Configuration Options for the SmartExtender Modules Switching Methods 1-10 Chapter 2: Installing the System... - Page 11 Fast EtherHub 3500 System User’s Guide Chapter 3: Setting up Network Connections Special Architecture Used for the Fast EtherHub 3500 Stack Multi-Segment Architecture FlexBus Management Link Hub ID Setting Using Management Agents Port Backup Function Security Features Sample Network Configurations Attaching the Stack to One Segment Attaching the Stack to Multiple Segments Isolating Specific Hub Connections...
- Page 12 Fast EtherHub 3500 System User’s Guide System Configuration Program for the 12mi and Stack 4-11 Exiting the Configuration Program 4-12 Restarting the Agent 4-13 Displaying System Information 4-14 Configuring the SNMP Agent 4-15 Configuring SNMP Communities 4-16 Configuring IP Trap Managers 4-17 Configuring IPX Trap Managers 4-18...
- Page 13 Fast EtherHub 3500 System User’s Guide Network Connections 5-13 Station Ports 5-13 Daisy-Chain Port 5-13 Serial Port 5-14 Rear Panel Components 5-15 Power Supply Modules 5-15 FlexBus Ports 5-16 5-16 5-16 Appendix A: Troubleshooting Diagnosing Hub Indicators System Diagnostics Power and Cooling Problems Installation Physical Configuration System Integrity...
- Page 14 Fast EtherHub 3500 System User’s Guide Underwriters Laboratories Compliance Statement Sicherheitshinweise Appendix E: Product Support Services Product Registration Problem Report Hardware Repair Service Software Update and Upgrade Service Bulletin Board Service (BBS) Interactive Fast Fax (U.S.A. office) Technical Support Limited Warranty Customer Remedies Return Process Accton Offices...
- Page 15 Fast EtherHub 3500 System User’s Guide List of Figures Figure 2-1 Stacking Hubs without a Rack Figure 2-2 Mounting Hubs Using a Mounting Rack Figure 3-1 Attaching All Hubs in Stack to One Segment Figure 3-2 Attaching Hubs in Stack to Three Segments Figure 3-3 Linking Part of the Stacked Hubs to a Segment Figure 3-4 Stacked Hubs Not Linked to a Segment Figure 3-5 Linking Stacked Hubs to Unmanaged Hubs...
- Page 16 Fast EtherHub 3500 System User’s Guide Figure 4-25 Hub Statistics: Hub Selection Menu 4-38 Figure 4-26 Hub Statistics Window 4-38 Figure 4-27 Port Statistics: Port Selection Menu 4-39 Figure 4-28 Port Statistics Menu 4-40 Figure 4-29 SEM Port Statistics Menu 4-42 Figure 5-1 Front Panel of EtherHub-12mi Figure 5-2 Indicators for EtherHub-12mi...
- Page 17 Fast EtherHub 3500 System User’s Guide Table 4.22 SEM Port Statistics Menu 4-42 Table 5.1 Power Indicator Table 5.2 SmartExtender Module Indicator Table 5.3 SmartExtender Module Indicators Table 5.4 Interhub Indicator Table 5.5 SNMP Indicator Table 5.6 Management Agent Indicators Table 5.7 Hub Indicators Table 5.8...
-
Page 18: Chapter 1: Product Overview
Chapter 1: Product Overview Introduction to Fast Ethernet Standard 10 Mbps Ethernet has served well for past generations of 80286 and 80386 machines performing simple file transfers. However, with the inevitable growth in corporate network size and the introduction of fully-functional 32-bit PC architectures, and operating systems running complex applications, 10 Mbps Ethernet has become a serious bottleneck. -
Page 19: Serial
Fast EtherHub 3500 System User’s Guide Moreover, the Fast EtherHub 3500 System provides advanced network security features including “Intrusion Protection” which ensures that only designated workstations are able to transmit packets onto the network. Management access via the out-of-band serial port or in-band via telnet is also password protected. - Page 20 Fast EtherHub 3500 System User’s Guide This hub can be used in a stand-alone configuration to form a simple Fast Ethernet LAN networking 2 to 12 computers using the RJ-45 station ports. Further network expansion can be achieved using the embedded tri-segment backplane, the MDI daisy-chain port, or one of the optional SmartExtender Modules.
-
Page 21: Network Connection
Fast EtherHub 3500 System User’s Guide via auto-sensing. Transmission mode for 100BASE-T4 is fixed at half duplex. • 100BASE-FX (EM3551-FX-SC or EM3551-FX-ST) Provides two SC or ST type connectors for 100BASE-FX connection. Transmission mode is automatically set to half or full duplex via auto-negotiation. Transmission speed is fixed at 100 Mbps. -
Page 22: Distinguishing Factors Of Fast Etherhub 3500 System
Fast EtherHub 3500 System User’s Guide Distinguishing Factors of Fast EtherHub 3500 System This system provides the following key features: • Provides multi-segment architecture allowing the network to be split into three segments • Supports fault-tolerant configuration by allowing port link backup and agent backup •... -
Page 23: Basic Features Of Fast Etherhub 3500 System
Fast EtherHub 3500 System User’s Guide Basic Features of Fast EtherHub 3500 System In addition to all the features mentioned above, the system provides: • Repeats all incoming frames to the connected segment Basic Repeater Functions • Automatically partitions and reconnects devices which experience excessive collisions •... -
Page 24: Terminator
Fast EtherHub 3500 System User’s Guide • Firmware update supported for the Fast EtherHub-12mi models via out-of-band Xmodem file transfer through the serial port, or in-band TFTP file transfer over the network • One slot supports optional slide-in network extender Networking Flexibility (via SmartExtender Modules) modules for connection to 10BASE-T, 100BASE-TX,... - Page 25 Fast EtherHub 3500 System User’s Guide • Adapts to universal wide range voltage power (i.e., 100V AC to 240V AC 10%, 50~60 3Hz) • Provides a slot for an optional backup power supply • Conforms to IEEE 802.3u Class I repeater specification Complete Standards Conformance and 100BASE-TX standard (i.e., 100 Mbps Fast Ethernet)
-
Page 26: Data Switching With The Smartextender Modules
Fast EtherHub 3500 System User’s Guide Data Switching with the SmartExtender Modules Switching Technology The SmartExtender Modules that plug into the expansion slot on the front panel of the Fast Ethernet 3500 series use advanced switching techniques to provide a high-speed network backbone. -
Page 27: Switching Methods
Fast EtherHub 3500 System User’s Guide As a device functioning on the media access control (MAC) layer, the extender modules are protocol independent, and therefore compatible with IEEE802.3, IEEE802.3u, TCP/IP, NetWare, DECnet and XNS protocols. They can provide a connection between conventional 10BASE-T and high-speed 100BASE-TX networks;... - Page 28 Fast EtherHub 3500 System User’s Guide flawless performance. To ensure that you can manage any kind of network load, the extender modules provide adaptive cut- through switching based on Accton’s smart algorithm. This method dynamically changes the way it handles data based on the current error rate.
-
Page 29: Chapter 2: Installing The System
Chapter 2: Installing the System This chapter describes how to install the Fast EtherHub unit and establish network connections. You may install this hub on any level surface (e.g., a table or shelf) or in a standard equipment rack. However, please take note of the following minimum site requirements before you begin. -
Page 30: Hardware Installation
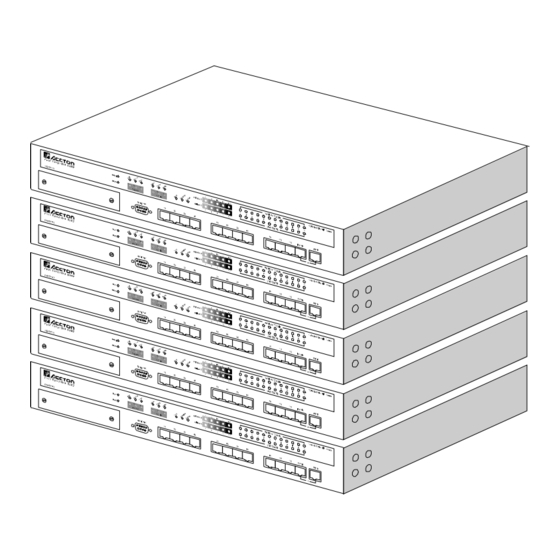
Fast EtherHub 3500 System User’s Guide Hardware Installation This hub is suitable for desktop or rack-mount installation. A good location is at the center of all the devices you want to link, close to a collapsed backbone, and near a power outlet. These hubs can be stacked with other hubs using a mounting rack or directly on top of one another. -
Page 31: Mounting Hubs In A Rack
Fast EtherHub 3500 System User’s Guide Mounting Hubs in a Rack If you need to install a Please comply with the following instructions to ensure that redundant power module, your hub is securely mounted in the rack. refer to Installing a Backup Power Supply on page 2-11, 1. -
Page 32: Connecting The Hub System
Fast EtherHub 3500 System User’s Guide Connecting the Hub System Remember to label all your The Fast EtherHub has 12 RJ-45 shielded ports (i.e., connections at both ends of the 100BASE-TX) that support connections to 100 Mbps Fast cable to facilitate troubleshooting Ethernet. -
Page 33: Connecting To The Stack's Backplane
Fast EtherHub 3500 System User’s Guide 2. Connect one end of the cable to the RJ-45 port of the network interface card, and the other end to any available (MDI-X) station port on the hub. Just remember that if you use Port , the daisy-chain port ( ) cannot be used. -
Page 34: Making A Connection Via The Mdi Daisy-Chain Port
Fast EtherHub 3500 System User’s Guide Making a Connection via the MDI Daisy-Chain Port Stackable Fast Ethernet hubs are generally restricted to Class I repeater types due to the timing requirements for passing traffic The Fast EtherHub 3500 hubs are Class I repeaters. Class I and management data across the stack’s backplane. - Page 35 Fast EtherHub 3500 System User’s Guide - EM3551-TX SmartExtender Module 10BASE-T - EM3551-TX SmartExtender Module 100BASE-TX - EM3551-T4 SmartExtender Module 100BASE-T4 - EM3551-FX-ST SmartExtender Module 100BASE-FX EM3551-FX-SC SmartExtender Module Note: The EM3551-TX automatically adjusts to 10 or 100 Mbps using auto-sensing.
-
Page 36: Table 2.1 Calculating The Power Budget For Fiber Optics
Fast EtherHub 3500 System User’s Guide connect one end of the cable to the MDI port on the extender module, and the other end to the MDI-X port on the target device (or vice versa). When inserting an RJ-45 plug, be sure the tab on the plug clicks into position to ensure that it is properly seated. -
Page 37: Table 2.2 Power Budget For Common Guage Fiber Optics
Fast EtherHub 3500 System User’s Guide Note: To determine the power loss incurred by intervening devices and specific cable type, inquire with the manufacturer. The power budget depends on the gauge of cable as shown below. Gauge of Fiber Cable Power Budget 9.2 dB 50/125... - Page 38 Fast EtherHub 3500 System User’s Guide - The 100BASE-TX and Setting the Communication Mode 100BASE-FX SmartExtender Modules both support half and full-duplex communications. The hub uses auto-negotiation to determine the transmission mode for any new connection made to these modules. However, if a connected device does not also support auto-negotiation, and a link cannot be established using half duplex (i.e., the last state tested by auto-negotiation), then you must manually set the transmission mode for the concerned...
-
Page 39: Installing A Backup Power Supply
Fast EtherHub 3500 System User’s Guide Hubs can be completely Interconnecting Stack Segments - isolated from the stack, or can be attached to any of the three available segments embedded in the backplane. When attached to a segment (i.e., common collision domian), the hub can communicate with all other devices attached to that segment. -
Page 40: Powering On The Hub
Fast EtherHub 3500 System User’s Guide Powering on the Hub 1. Plug one end of the power cord into a power outlet, and the other end into the power socket at the rear of the hub (in that order for reasons of safety). Then plug in the backup power module if you purchased this option. -
Page 41: Hot Remove
Fast EtherHub 3500 System User’s Guide The following table shows the components to be tested. Test Function/Component Fast EtherHub-12i Fast EtherHub-12mi Boot ROM All tests listed for Fast EtherHub-12i Hub Configuration EEPROM and then the following tests: RAM for Repeater Board CPU Console I/O Repeater Information Base SRAM Flash ROM for SNMP Firmware... -
Page 42: Configuring A Manageable Stack
Fast EtherHub 3500 System User’s Guide Configuring a Manageable Stack To manage the stack with the on-board configuration program or any optional network management software, the stack must include an EtherHub-12mi (i.e., a unit with an SNMP agent). Moreover, the network management station must be able to access the segment containing the management agent. -
Page 43: Verifying Port Status
Fast EtherHub 3500 System User’s Guide Verifying Port Status Check each connection by viewing the port status indicators listed below. (For a more detailed description on these indicators, refer to Chapter 5.) State Indication Link Port has established a valid network connection. Traffic Blinking Traffic is traversing the port. -
Page 44: Table 2.5 Maximum Cable Length
Fast EtherHub 3500 System User’s Guide • Verify that you have not exceeded the specified limits for any attached media type as summarized in the following table: Media Type Maximum Length (meters) Twisted Pair Fiber Opitc 412 (at half duplex) 2000 (at full duplex) Table 2.5 Maximum Cable Length •... -
Page 45: Chapter 3: Setting Up Network Connections
Chapter 3: Setting up Network Connections Special Architecture Used for the Fast EtherHub 3500 Stack Multi-Segment Architecture The Fast EtherHub 3500 system supports multi-segment configuration through the FlexBus cabling. Three Ethernet segments (i.e., separate collision domains) are embedded in the hub’s FlexBus port (i.e., the stack’s backplane). -
Page 46: Flexbus Management Link
Fast EtherHub 3500 System User’s Guide FlexBus 3500 Management Link The management link in a chain of cascaded hubs must be connected to manage the stack as a single unit. This means that only hubs connected using the FlexBus can be controlled by an SNMP management agent (i.e., Fast EtherHub-12mi). - Page 47 Fast EtherHub 3500 System User’s Guide Multiple Agents The on-board configuration You may include multiple agents in a stack. To provide a fail- program only provides access safe backup management agent, include it in the same segment to the private MIB. To gain full with the Master agent.
-
Page 48: Port Backup Function
Fast EtherHub 3500 System User’s Guide Port Backup Function The Fast EtherHub 3500 system supports a port backup function (i.e., a redundant link). A hub system can have up to 18 pairs of redundant links. These links are configurable using the in-band or out-of-band management program. -
Page 49: Sample Network Configurations
Fast EtherHub 3500 System User’s Guide Sample Network Configurations The Fast EtherHub 3500 series stackable hubs are designed to provide flexibility in configuring network connections. This hub can be used as a simple stand-alone hub or connected to other network interconnection devices in various configurations. -
Page 50: Attaching The Stack To Multiple Segments
Fast EtherHub 3500 System User’s Guide Attaching the Stack to Multiple Segments This example shows 3 independent Ethernet LANs in a stacked system. Hubs 1 and 2 are attached to segment 1, while hubs 3 and 4 are attached to segment 2, and hubs 5 and 6 are attached to segment 3. -
Page 51: Isolating Specific Hub Connections
Fast EtherHub 3500 System User’s Guide Isolating Specific Hub Connections You can interconnect or isolate the hubs in a stack using a multi-segment configuration. In a stacked system, some hubs may be connected to a segment while others are isolated (not attached to any segment). -
Page 52: Isolating Each Hub
Fast EtherHub 3500 System User’s Guide Isolating Each Hub In this example, each hub in the stack is an independent segment (i.e., isolated collision domain). Hubs 2 to 6 are not connected to any of the 3 segments embedded in the FlexBus 3500 cable. -
Page 53: Extending The Network With Alternate Connections
Fast EtherHub 3500 System User’s Guide Extending the Network with Alternate Connections You can extend your network by connecting any of the hubs in a stacked system to other compatible hubs via the SmartExtender Module. In the diagram below, a stand-alone hub is connected to hub 3 in the stacked system using the extender module. -
Page 54: Linking The Stack To A Management Station
Fast EtherHub 3500 System User’s Guide Linking the Stack to a Management Station In a stacked system, connect the in-band management workstation to the same segment that the management agent is attached to. In this example, the management agent is attached to segment 1. Thus, the in-band management workstation (e.g., a PC running AccView/Open) should also be connected to segment 1. -
Page 55: Interconnecting The Segments
Fast EtherHub 3500 System User’s Guide Interconnecting the Segments The 3 segments within a stacked system can be combined into an interconnected network using the SmartExtender Modules. For example, you can connect all the segments in the stack using just two extender modules as shown below. -
Page 56: Connecting Remote Stacks
Fast EtherHub 3500 System User’s Guide Connecting Remote Stacks Fast EtherHub stacks can be connected by using the SmartExtender Modules. For example, you can connect two stacks by running a cable from the extender module in one stack to any station port in a remote stack. When using twisted-pair cable, the maximum cable length is 100 meters. -
Page 57: Operating In The Novell Netware Ipx Environment
Fast EtherHub 3500 System User’s Guide Operating in the Novell NetWare IPX Environment If you’re using Novell NetWare server as your Network Operating System, you can have up to 3 LAN adapters installed in the File Server. With this type of setup, the network is perceived as logically divided into different collision domains, but the File Server is still accessible by all nodes. -
Page 58: Operating In The Tcp/Ip Environment
Fast EtherHub 3500 System User’s Guide Operating in the TCP/IP Environment In TCP/IP Internet environment, gateways are used to improve performance and regulate network traffic by confining most network activity to their respective local network, and still maintain communication links among LANs of the same or different architectures. -
Page 59: Connecting To The Network Backbone
Fast EtherHub 3500 System User’s Guide Connecting to the Network Backbone The stack can be connected to the network backbone by attaching it to a device such as a Fast Ethernet switch. The following figure shows a direct connection from the stack’s daisy-chain port to a 100BASE-TX switch which is serving as collapsed network backbone. -
Page 60: Figure 4-9 Ipx Trap Managers Menu
Fast EtherHub 3500 System User’s Guide Configuring IPX Trap Managers When the hub experiences an unusual event, a message is issued to all listed network managers. Networks compliant with Internetwork Packet Exchange (NetWare IPX) protocol can pass trap messages to IPX Trap Managers as shown below: IPX Trap Managers Return to Previous Panel IPX Address... -
Page 61: Figure 4-10 Segment Configuration Menu
Fast EtherHub 3500 System User’s Guide Changing the Segment Configuration When accessing the EtherHub system with in-band tools such as SNMP, Telnet or TFTP, you must configure the hub to use IP, IPX or SNMP over Ethernet protocols. Use the Segment Configuration menu to display the following screen: Segment Configuration Return to Previous Panel... -
Page 62: Table 4.9 Segment Configuration Menu
Fast EtherHub 3500 System User’s Guide Menu items are briefly described in the following table. Field Description Segment Name A name you can assign to the segment. IP Configuration The hub system may be run on SNMP protocol over UDP/IP transport protocol. In this environment, all systems on the Internet, such as network interconnection devices and Network Management Stations (e.g., the PC running AccView) are assigned an IP address. -
Page 63: Figure 4-11 Hub Configuration: Hub Selection Menu
Fast EtherHub 3500 System User’s Guide Configuring Hub Parameters Use the Hub Configuration menu under the Configuration Panel to configure any hub in the stack. This menu is used to configure the repeater and management modules. Use the following menu to select the required hub, or to change the numeric identifier for any hub in stack. -
Page 64: Figure 4-12 Hub Configuration Menu
Fast EtherHub 3500 System User’s Guide Hub Configuration To configure a hub, select it from the list shown above. The following Hub Configuration menu will appear, allowing you to set parameters for the base repeater unit or the network management module. Hub Configuration Return to Previous Panel Hub ID... -
Page 65: Table 4.10 Hub Configuration Menu
Fast EtherHub 3500 System User’s Guide Menu items are briefly described in the following table. Board Field Description (Repeater Unit) Hub ID Hub identifier within the stack. (Up to 6 hubs may be connected via the FlexBus management channel.) Name Any user-defined name for the selected hub. -
Page 66: Figure 4-13 Hub Id Configuration Menu
Fast EtherHub 3500 System User’s Guide Hub ID Configuration To change the numeric hub identifier, select Hub ID Configuration from the Hub Configuration: Hub Selection Menu shown above. The following Hub ID Configuration menu will appear. After changing a hub identifier, verify the change with the “Enable Above Settings”... -
Page 67: Figure 4-14 Port Configuration: Port Selection Menu
Fast EtherHub 3500 System User’s Guide Configuring Port Parameters Use the Port Configuration menu under the Configuration Panel to configure the ports for any hub in the stack. Select the port type for the required hub from the following menu. Port Configuration: Port Selection Menu Return to Previous Panel Select port to get configuration... -
Page 68: Figure 4-15 Port Configuration Menu
Fast EtherHub 3500 System User’s Guide Configuring Repeater Ports If you select the repeater port type (i.e., 1 through 12), the Port Configuration Menu will open. This menu displays the ID and stack position of the selected hub, and also allows you to enable/disable any repeater port in the selected hub. -
Page 69: Figure 4-16 Sem Port Configuration Menu
Fast EtherHub 3500 System User’s Guide Configuring the SmartExtender Module If you select the SmartExtender Module (i.e., SEM), the SEM Port Configuration Menu will open. This menu allows you to configure various communication parameters for this module. SEM Port Configuration Return to Previous Panel Hub ID : 1 Position : 1... -
Page 70: Table 4.12 Sem Port Configuration Menu
Fast EtherHub 3500 System User’s Guide Menu items are briefly described in the following table. Field Description Hub ID Hub identifier within the stack. Position The physical position in the stack (as determined by its position from the top of the FlexBus chain). Port ID Identifies this port as the SmartExtender Module. -
Page 71: Figure 4-17 Port Backups Menu
Fast EtherHub 3500 System User’s Guide Defining Backup Ports Use the Port Backups menu under the Configuration Panel to define up to 6 master/slave port pairs. If the connection to the master port fails, the slave port will automatically take over. For greater reliability, primary and secondary ports should be located on different hubs. -
Page 72: Figure 4-18 Port Intrusion Control: Hub Selection Menu
Fast EtherHub 3500 System User’s Guide Port Intrusion Control Use the Port Intrusion Control menu under the Configuration Panel to restrict access for any port to an authorized source address. Select the required hub from the following menu. Port Intrusion Control: Hub Selection Menu Return to Previous Panel Hub 1 Port Intrusion Control ... -
Page 73: Figure 4-19 Port Intrusion Control Menu
Fast EtherHub 3500 System User’s Guide Use the Port Intrusion Control Menu to define the MAC address for the device authorized to access a port, and set the response type, as shown in the following example. Port Intrusion Control Return to Previous Panel Hub ID : 1 Position : 1 Port ID... -
Page 74: Figure 4-20 Tftp Download Menu
Fast EtherHub 3500 System User’s Guide Downloading System Software via a TFTP Server Use the TFTP Download command under the Configuration Panel to download firmware updates into the hub. You may upgrade firmware from a server attached to the local network, or remotely via a serial link using TFTP over SLIP. - Page 75 Fast EtherHub 3500 System User’s Guide Menu items are briefly described in the following table. Field Description Download Server IP IP address of a TFTP server. (TFTP stands for Trivial File Transfer Protocol.) Download Filename The *.bin file to download. Download Mode You can download to permanent flash ROM or temporary storage in RAM (for test purposes).
-
Page 76: Figure 4-21 Xmodem Download Menu
Fast EtherHub 3500 System User’s Guide Xmodem Download Use the Xmodem Download menu under the Configuration Panel to download firmware to the hub. The Xmodem protocol is used to transfer binary files over a PC connection (i.e., using terminal emulation or modem access software). Specify the download mode and select Process Download. -
Page 77: Figure 4-22 User Passwords Menu
Fast EtherHub 3500 System User’s Guide Changing User Passwords The on-board configuration program includes two fixed user types, including Admin and Guest. The access privilege is Read/Write for administrator and Read Only for guest. The default user names are “admin” and “guest,” without passwords. The administrator is the only user with write access for agent parameters. -
Page 78: Figure 4-23 Console Lockout Menu
Fast EtherHub 3500 System User’s Guide Console Lockout This function instructs the configuration program to automatically lock the console if no keyboard input is detected for the defined delay time. The Console Lockout menu is shown below. Console Lockout Return to Previous Panel Status : ON Delay Time : 20 Minutes... -
Page 79: Figure 4-24 Segment Statistics Window
Fast EtherHub 3500 System User’s Guide Segment Statistics Displays statistics for the stack’s segments. These values can be used to indicate the approximate load balance in your stack. If the loading is severly unbalanced, you may consider adjusting your network connections or segment assignments. The Segment Statistics window is shown below. -
Page 80: Hub Statistics
Fast EtherHub 3500 System User’s Guide Hub Statistics Displays statistics for any hub in the stack. Select the required hub from the following menu. Hub Statistics: Hub Selection Menu Return to Previous Panel Hub 1 Statistics ... Hub 2 Statistics ... Hub 3 Statistics ... -
Page 81: Table 4.20 Hub Statistics Menu
Fast EtherHub 3500 System User’s Guide Displayed items are briefly described in the following table. Field Description Hub ID Hub identifier within the stack. Position The physical position in the stack (as determined by its position from the top of the FlexBus chain). Frames Number of frames passing through this device. -
Page 82: System Diagnostics
Fast EtherHub 3500 System User’s Guide Statistics for Repeater Ports Statistics for repeater ports covers a wide range of Ethernet variables. If any of the error indications are extremely high, there may be a problem with the port, the attached device, or the network cabling. -
Page 83: Table 4.21 Port Statistics Menu
Fast EtherHub 3500 System User’s Guide Displayed items are briefly described in the following table. Field Description Hub ID Hub identifier within the stack. Position The physical position in the stack (as determined by its position from the top of the FlexBus chain). Port ID Port identifier on the hub. - Page 84 Fast EtherHub 3500 System User’s Guide Statistics for SmartExtender Module Statistics for the SmartExtender Module includes the basic Ethernet variables shown below. Screen statistics are not SEM Port Statistics automatically refreshed from the Return to Previous Panel agent. Select Refresh Statistics to update the displayed values.
Need help?
Do you have a question about the Fast EtherHub 3500 Series and is the answer not in the manual?
Questions and answers