Table of Contents
Advertisement
Quick Links
See also:
Workshop Manual
GILERA WOULD LIKE TO THANK YOU
for choosing one of its products. We have prepared this booklet to help you to get the very best from your scooter. Please read it carefully before riding
the scooter for the first time. It contains information, tips and precautions for using your scooter. It also describes features, details and devices to assure
you that you have made the right choice. We believe that if you follow our suggestions, you will soon get to know your new vehicle and it will serve you
well for a long time to come. This booklet forms an integral part of the scooter; should the scooter be sold, it must be transferred to the new owner.
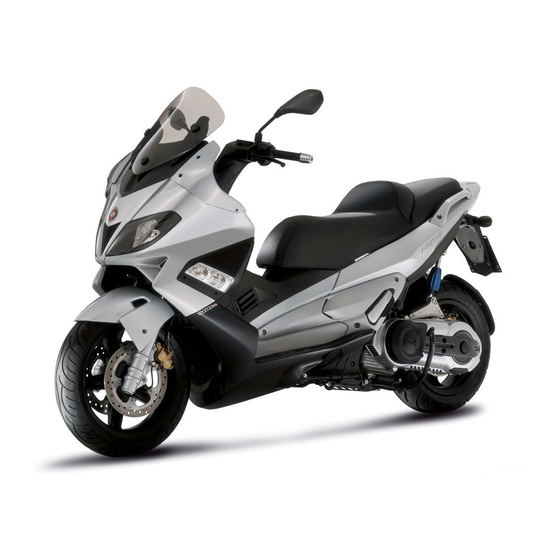
Nexus 500
Advertisement
Table of Contents

Related Manuals for Gilera Nexus 500


Summary of Contents for Gilera Nexus 500
- Page 1 GILERA WOULD LIKE TO THANK YOU for choosing one of its products. We have prepared this booklet to help you to get the very best from your scooter. Please read it carefully before riding the scooter for the first time. It contains information, tips and precautions for using your scooter. It also describes features, details and devices to assure you that you have made the right choice.
- Page 2 The instructions given in this manual are intended to provide a clear, simple guide to using your scooter; this booklet also details routine maintenance procedures and regular checks that should be carried out on the vehicle at an authorised Dealer or Service Centre. The booklet also contains instructions for simple repairs.
- Page 3 Personal safety Failure to completely observe these instructions will result in serious risk of personal injury. Safeguarding the environment Sections marked with this symbol indicate the correct use of the vehicle to prevent dam- aging the environment. Vehicle intactness The incomplete or non-observance of these regulations leads to the risk of serious damage to the vehicle and sometimes even the invalidity of the guarantee.
-
Page 5: Table Of Contents
INDEX VEHICLE..................USE....................35 Dashboard................Checks..................36 Instruments................11 Tyre pressure................37 Indicator unir................12 Shock absorbers adjustment............ 38 Clock..................13 Alignment adjustment............... 39 Digital lcd display..............14 Anti-overturning sensor............. 39 Maintenance icons..............15 Running in................. 40 Setting the total and trip odometers........15 Starting up the engine............... - Page 6 Headlight adjustment............. 74 Front direction indicators............75 Rear turn indicators..............75 Number plate light..............76 Helmet compartment lighting bulb..........76 Brake light................. 77 Rear-view mirrors..............78 Front and rear disc brake............79 Puncture..................80 Periods of inactivity..............81 Cleaning the vehicle..............81 TECHNICAL DATA..............
-
Page 7: Vehicle
Nexus 500 Chap. 01 Vehicle... - Page 8 01_01...
-
Page 9: Dashboard
01_02 Dashboard (01_02) A = Ignition key-switch B = Starter button C = Throttle control D = Front brake lever E = Digital instrument panel F = Turn signal switch G = Light switch H = Combined braking system control (front and rear) I = Horn button L = Emergency cut-off switch M = Emergency turn indicator activation switch (4 arrows) - Page 10 R = Passing 01_03...
-
Page 11: Instruments
01_04 Instruments (01_04) A = Twin scale speedometer (km/h and mph) B = Rpm indicator C = Engine control warning light and injection system failure warning light * D = Low fuel warning light M = Low oil pressure warning light F = Turn indicator warning light G = Antitheft device LED H = LCD Display... -
Page 12: Indicator Unir
01_05 Indicator unir (01_05) A = Emergency flashing light indicator (4 direction indicators) B = Light indicatorp C = Upper beam indicator D = Emergency stop light/side stand lowered... -
Page 13: Clock
Clock (01_06) Pressing the button«CLOCK» less than 1 second displays the following sequence: • TIME • DATE • TOTAL/PARTIAL To set the clock push and hold the «CLOCK» button for longer than 3 seconds. The numbers showing the hours will begin flashing. Set the hours with the «ODO/SET»... -
Page 14: Digital Lcd Display
Digital lcd display (01_07) A = «SERVICE» maintenance icon B = «BELT» maintenance icon C = Battery Icon D = Miles/gallons icon E = Fuel gauge F = 3-digit display G = Miles per hour icon H = Total odometer indicator I = Partial odometer indicator L = Km/h - Km/l indicator M = 5-digit display... -
Page 15: Maintenance Icons
Maintenance icons (01_08) The icons signal the user that scheduled maintenance operations should be carried out. A flashing «SERVICE» icon signals the need to carry out the scheduled mainte- nance service. A flashing «BELT» icon signals the driving belt needs replacing. In any case, vehicle maintenance must be carried out at the kilometre service intervals rec- ommended in this booklet. -
Page 16: Setting The Date Function
Setting the date function (01_09) Press the «CLOCK» button to set the «DATE» function. Press «CLOCK» for more than 3 seconds; the day digits will start to flash. Set the day using the «ODO/SET» button. Press the «CLOCK» button again and the month digits will start to flash. Set the month using the «ODO/SET»... -
Page 17: Key Switch
6. BATTERY VOLTAGE - The battery icon is displayed. Should voltage be ab- normal, the icon is displayed and flashes for 60 seconds. Pushing the «MODE» button longer than 3 seconds returns to function «1» MEAN SPEED N.B. MEAN SPEED IS CALCULATED ONLY WITH THE KEY SET TO «ON» AND WITH THE ENGINE ON. -
Page 18: Locking The Steering Wheel
Locking the steering wheel Turn the handlebar to the left as far as it will go, turn the key to position «LOCK» and remove the key. Releasing the steering wheel Reinsert the key and turn it to «OFF». CAUTION DO NOT TURN THE KEY TO «LOCK» OR «OFF» WHILE RIDING. Switch direction indicators (01_12) Lever towards "S"... -
Page 19: Horn Button
Horn button (01_13) Push the «C» button to sound the horn. 01_13 Light switch (01_14, 01_15) 0 = Dipped beam 1 = Upper beam E = Passing (flashing) 01_14 01_15... -
Page 20: Emergency Flashing Light Button
Emergency flashing light button (01_16) It starts the 4 direction indicators at the same time. The control can only be enabled with key «C» set to «ON», but once it has been enabled it remains on with key set to «OFF»,«LOCK», and «PARKING LIGHT»... -
Page 21: Engine Stop Button
- The emergency cut-off switch shifts from «OFF» to «ON». If the warning light remains fixedly on after the check period or lights up under normal use conditions, take your vehicle to an Authorised Piaggio- Gilera Service Centre to solve the problem. -
Page 22: Keys
Keys (01_20, 01_21, 01_22) Two types of key are supplied with the scooter. The red-handgrip key «A» is the «MASTER» key. Only a single copy of this key is supplied, which is necessary to program the codes for all your other keys and for your dealer to perform some main- tenance operations. -
Page 23: Immobilizerdevice Enabled Indicator Led
Contact an Authorised Piag- gio-Gilera Service Centre, bringing the red-handgrip key and all black keys you have. The codes of keys not submitted for the new storage procedure are deleted from the memory. -
Page 24: Programming The Immobilizer System
VIOLENT SHOCKS MAY AFFECT THE ELECTRONIC COMPONENTS OF THE KEY. IF OWNERSHIP OF THE VEHICLE IS TRANSFERRED, THE RED-HANDGRIP KEY (AS WELL AS THE OTHER KEYS) AND THE "CODE CARD" MUST ALSO BE TRANSFERRED TO THE NEW OWNER. Programming the immobilizer system The procedure for programming the «PIAGGIO IMMOBILIZER»... -
Page 25: Saddle Opening Remote Control
WARNING SHOULD THE ENGINE START WITH THE RED KEY (WITH TRANSPONDER OFF), OR IN THE EVENT OF WRONG OPERATION DURING PROGRAMMING, REPEAT THE PROCEDURE FROM THE BEGINNING. Saddle opening remote control (01_24, 01_25) The vehicle is fitted with a key operated via remote control to open the saddle. This remote control is supplied together with the «MASTER»... - Page 26 1. Insert the remote control key to be programmed in the steering lock key block. 2. Turn the key to «ON», press the button on the remote control, release the button, turn the key back to «OFF» from the «ON» position, all within 4 seconds. 3 Wait 1 to 8 seconds.
-
Page 27: Accessing The Fuel Tank
WARNING TO AVOID BATTERY DISCHARGE, THE SADDLE OPENING REMOTE CONTROL RADIO RECEIVER DEACTIVATES 7 DAYS AFTER THE LAST TIME THE VEHICLE WAS SHUT OFF. JUST TURN THE KEY TO «ON» TO REACTIVATE THE RECEIVER. Accessing the fuel tank (01_26, 01_27) To remove the fuel tank cover «A»... -
Page 28: Power Supply Socket
01_27 Power supply socket (01_28) There is a plug socket "D" inside the helmet compartment. The plug socket may be used for external consumers (mobile phone, inspection light, etc.). CAUTION PROLONGED USE OF THE PLUG SOCKET MAY RESULT IN PARTIAL DIS- CHARGE OF THE BATTERY Electric characteristic 01_28... -
Page 29: The Saddle
180 W The saddle (01_29, 01_30) To lift the saddle and get access to the helmet compartment, insert the key in the key switch «A». With the key set to «OFF», push it and turn it counterclockwise to the «SADDLE OPENING» position. 01_29 01_30 Opening the saddle to access the helmet compartment by... - Page 30 CAUTION OBJECTS INAPPROPRIATELY PLACED INSIDE THE HELMET COMPARTMENT MAY DEFORM THE SADDLE AND PREVENT THE COURTESY LIGHT FROM TURNING OFF, WHICH MAY RESULT IN BATTERY DISCHARGE. WARNING THE REMOTE CONTROL OPERATES WITHIN A DISTANCE OF ABOUT 3/5 ME- TRES WITH FULLY CHARGED BATTERIES. WHEN YOU ARE NEAR THE SCOOTER, HANDLE THE REMOTE CONTROL CAREFULLY SO AS TO AVOID UNINTENTIONAL OPENING OF THE SADDLE.
-
Page 31: Identification
Identification (01_31, 01_32) The identification registration numbers consist of a prefix stamped on the chassis and engine "B", followed by a number. These numbers must always be indicated on spare parts requests. To read the chassis number, remove the relevant port "A" in the helmet compartment. -
Page 32: Adjusting The Windscreen
Adjusting the windscreen (01_33, 01_34) The windshield can be adjusted to 3 positions «B», «C» and «D» according to the rider's needs. Unscrew the 3 screws «A», remove the windshield upper part and set it in the desired position. Tighten the 3 fixing screws again. WARNING CARRY OUT THIS OPERATION WITH EXTREME CARE SO AS NOT TO SCRATCH THE WINDSHIELD. - Page 33 01_34...
-
Page 35: Use
Nexus 500 Chap. 02... -
Page 36: Checks
Checks Before using the scooter for the first time check: 1. That the fuel tank is full. 2. Front brake and combined system fluid level. 3. That the tyres are properly inflated. 4. The correct functioning of the tail lights, the headlight, the turn indicators and the stop light. -
Page 37: Tyre Pressure
02_02 Tyre pressure (02_03) Check periodically (about every 500 km) the pressure and wear of the tyres. The tyres are equipped with wear indicators, according to which the tyres should be changed before these indicators come to the surface of the tread. Check also that the tyres do not have tears on their sides or an irregular pattern of wear on the tread;... -
Page 38: Shock Absorbers Adjustment
2.1 bar Rear tyre pressure 2.2 bar with driver only Rear tyre pressure 2.3 bar with passenger. Shock absorbers adjustment (02_04) Spring preloading can be adjusted to 7 positions with the supporting ring nut «A» with cams. It is necessary to lift the saddle for this adjustment. The positions can be changed using the specific spanner supplied together with the vehicle. -
Page 39: Alignment Adjustment
Alignment adjustment (02_05, 02_06) The vehicle is fitted with a special strut «B» connecting the engine and the chassis that allows changing the running angles in 15 positions. This can be done by operating the ring nut on the lower part of the strut. Rotating the ring nut modifies the rear sus- pension height. -
Page 40: Running In
WARNING THIS SYSTEM ACTIVATES WITH LATERAL TILTING OVER 65°. Running in (02_07) WARNING DURING THE FIRST 1000 KM DO NOT RIDE THE VEHICLE OVER 80% OF ITS MAXIMUM SPEED. AVOID TWISTING THE THROTTLE GRIP FULLY OR KEEP- ING A CONSTANT SPEED ALONG LONG SECTIONS OF ROAD. AFTER THE FIRST 1000 KM, GRADUALLY INCREASE SPEED UNTIL REACHING THE MAX- IMUM PERFORMANCE. - Page 41 1. Put the scooter on the centre stand "F", making sure the rear wheel is raised from the ground. 2. Keep the throttle grip «C» completely untwisted. 3. Insert the key into the ignition switch "A" and turn to position "ON". 4.
-
Page 42: Precautions
CAUTION DUE TO THE HIGH TEMPERATURES THE CATALYTIC CONVERTER CAN REACH, ALWAYS TAKE CARE, WHEN PARKING THE SCOOTER, THAT THE EXHAUST DOES NOT COME INTO CONTACT WITH FLAMMABLE MATERIALS, TO AVOID SERIOUS BURNS. CAUTION DO NOT SWITCH OFF THE ENGINE WHILE THE VEHICLE IS MOVING. UN- BURNED FUEL COULD ENTER THE CATALYTIC CONVERTER AND BURN, CAUSING IT TO OVERHEAT AND POSSIBLY DESTROYING IT. -
Page 43: Difficult Start Up
It is however necessary, once the engine is started, to take your vehicle to an Authorised Piaggio- Gilera Service Centre to determine the causes and to restore proper functioning of your vehicle. -
Page 44: Stand
02_12 Stand (02_12) CENTRE STAND Push with your foot on the centre stand's fork «F» while lifting the vehicle backward, holding onto the handlebar. - Page 45 02_13 Stand (02_13) SIDE Push with your foot on the stand's prong «L» until it releases into position, while low- ering the vehicle onto the stand. WARNING THE SIDE STAND CAUSES THE ENGINE TO CUT OUT EVERY TIME THAT IT IS LOWERED;...
-
Page 46: Automatic Transmission
Automatic transmission (02_14, 02_15) To ensure simple, pleasurable riding, the vehicle is equipped with automatic trans- mission with regulator and centrifugal clutch. The system is designed to provide the best performance (acceleration and consumption) while riding on both flat roads and uphill. - Page 47 3. After riding on a long stretch of wet road without using the brakes, the braking effect is initially lower. In these conditions, it is a good idea to apply the brakes from time to time. 4. Do not brake hard on wet, unsurfaced or slippery road surfaces. 5.
- Page 48 CAUTION DO NOT ADJUST THE MIRRORS WHILE RIDING. THIS COULD CAUSE YOU TO LOOSE CONTROL OF THE VEHICLE. CAUTION ANY CHANGES TO THE VEHICLE PERFORMANCE AS WELL AS ALTERATIONS TO ORIGINAL STRUCTURAL PARTS IS STRICTLY FORBIDDEN BY LAW, AND RENDERS THE VEHICLE NO LONGER CONFORMING TO THE APPROVED TYPE AND DANGEROUS FOR RIDING.
-
Page 49: Maintenance
Nexus 500 Chap. 03 Maintenance... -
Page 50: Engine Oil Level
Engine oil level In 4-stroke engines, engine oil is used to lubricate the distribution elements, the bush- es and the thermal group. An insufficient quantity of oil can cause serious damage to the engine.In all four-stroke engines, a loss of efficiency in oil performance and consumption should be considered normal. -
Page 51: Engine Oil Top-Up
MAX. level. Getting an oil level between the MIN and MAX index marks requires ~ 400 cc of oil. An oil check-up and top-up should be carried out every 3000 Km by authorised personnel at any Authorised Piaggio-Gilera Service Centre. Warning light (insufficient oil pressure) (03_03) The vehicle is fitted with a warning light «E»... -
Page 52: Engine Oil Change
The engine oil and filter must be replaced every 6,000 km at an Authorised Piaggio- Gilera Service Centre. The engine should be emptied by draining the oil via the drainage tap «B» of the mesh filter on the transmission side. In order to facilitate oil drainage, loosen the cap/dipstick «A». -
Page 53: Hub Oil Level
Lubricating oil for flexible shafts (throttle control) 03_06 Hub oil level (03_07) 1) Remove the dipstick. 2 ) Unscrew the oil drainage screw «B» and drain out all the oil. 3) Screw back the drainage screw and refill the hub using the recommended oil quan- tity and type. - Page 54 4) Pull out the dipstick and check that the oil level is between the MIN and MAX notches. If the oil level is below the MIN notch, top up the hub with the required amount of oil. 5) Screw the dipstick back in, checking that it is locked in place. N.B.
-
Page 55: Tyres
USING OILS OTHER THAN THOSE RECOMMENDED CAN SHORTEN THE LIFE OF THE ENGINE. Recommended products AGIP ROTRA 80W-90 Rear hub oil SAE 80W/90 Oil that exceeds the requirements of API GL3 specifications Characteristic Rear hub oil 250 cc Tyres (03_11) Check the tyre pressure and wear periodically (around every 500 km). - Page 56 CAUTION THE USE OF TYRES OTHER THAN THOSE INDICATED MAY CAUSE INSTABIL- ITY. IT IS HIGHLY ADVISABLE TO USE ORIGINAL PIAGGIO TYRES. Characteristic Front tyres Bridgestone 120/70-R15" Tubless 56H - Battlax TH01 Rear tyres Bridgestone 160/60-R14" Tubless 65H Battlax TH01 Tyre pressure (front wheel) Front wheel: 2.1 bar Tyre pressure (rear wheel)
-
Page 57: Spark Plug Dismantlement
Spark plug dismantlement (03_12, 03_13) Proceed as follows: 1. Remove the left side cover by the three screws «A»; 2. Disconnect the cap «B» of the spark plug HV wire; 3. Unscrew the spark plug, using the spanners supplied; 4. Upon re-assembly, insert the spark plug at the correct angle, screwing it in tightly by hand;... -
Page 58: Removing The Air Filter
The air filter needs to be checked and possibly blown down every 6000 km at an Authorized Piaggio-Gilera Service Center. Air blasts must directed from the inside towards the outside of the filter (i.e. the opposite direction of air flow during normal engine operation). - Page 59 03_15 03_16...
- Page 60 03_17 03_18...
-
Page 61: Cooling Fluid Level
9th line turns on, the icon and all lines start flashing; stop the engine, let it cool down and check the fluid level; if it is normal, turn to an Authorized Piaggio-Gilera Service Centre. The fluid inspection should be carried out every 6,000 km when the motor is cold,following the methods indicated below. -
Page 62: Checking The Brake Oil Level
A certain lowering of the level is caused by wear on the pads. Should the level appear to be below the minimum mark, please contact your nearest PIAGGIO-GILERA Deal- er or Authorised Service Centre in order to carry out a thorough inspection of the braking system. -
Page 63: Braking System Fluid Top Up
Under normal climatic conditions, the brake fluid must be replaced every 20,000 km or every two years, whichever comes first. This operation must be carried out by trained technicians, please contact your nearest Piaggio-Gilera Dealer or Author- ised Service Centre. -
Page 64: Battery
Battery (03_24, 03_25) To access the battery, proceed as follows: 1. Place the scooter on its centre stand; 2. Open the saddle following above instructions, see «Saddle» section; 3. Remove the piston ring «A» and take off the battery cover. The battery is the electrical device that requires the most frequent inspections and diligent maintenance. -
Page 65: Checking The Electrolyte Level
CAUTION DO NOT REVERSE THE POLARITY: RISK OF SHORT CIRCUIT AND DAMAGE TO THE ELECTRICAL SYSTEM. Checking the electrolyte level The electrolyte level must be checked frequently and must reach the maximum level. To restore such level, use only distilled water. If water refilling is required too fre- quently, check the vehicle electric system since the battery works overloaded and can be damaged very quickly. -
Page 66: Long Periods Of Inactivity
THE BATTERY MUST BE RECHARGED WITH A CURRENT LOAD EQUAL TO 1/10 OF THE BATTERY RATED CAPACITY AND FOR A PERIOD NOT LONGER THAN 10 HOURS. CONTACT AN AUTHORISED PIAGGIO-GILERA SERVICE CENTRE TO CARRY OUT THIS OPERATION SAFELY. WHEN INSTALLING THE BATTERY AGAIN, ENSURE THAT THE TERMINALS ARE CORRECTLY CONNECTED TO THE TERMINALS. -
Page 67: Fuses
Fuses (03_26, 03_27, 03_28, 03_29) The electrical system is equipped with: 1. Six fuses "A" located on the shield back plate 2. Five fuses "B" located in the helmet compartment 3. One fuse of 30A "D" (main fuse), located near the battery on the left-hand side, under which is also a replacement fuse. - Page 68 Locatio: Helmet compartment Saddle opening receiver power Tripping threshold: 4A supply Location: Helmet compartment Horn - Emergency stop warning Threshold of operation: 7.5A light - Instrument panel live supply Location: Helmet compartment - Turn indicator control Lighter - Helmet compartment light Tripping threchold: 15A Location: Helmet compartment Not used Tripping threshold: -...
- Page 69 Location: Counter-shield General - Main circuits Tripping threshold: 30A Locatio: Battery compartment 03_26 03_27...
- Page 70 03_28 03_29 BULBS High/low beam light bulb Type: Halogen (H7)
- Page 71 Power: 12V - 55W Quantity: 2 Front headlights bulb Type: ALL GLASS Power: 12V - 5W Quantity: 2 Direction indicator bulb Type: Spherical Power: 12V - 10W Quantity: 4 Tail light and stop light bulb Type: Spherical, double filament Power: 12V - 21/5W Quantity: 1 License plate light bulb Type: All glass...
-
Page 72: Front Light Group
Front light group (03_30, 03_31, 03_32, 03_33) In order to remove the light unit proceed as follows: 1. Remove the front shield connecting member by the three screws «A» 2. Remove the two screws «B». 3. Remove screw «C» located in the expansion tank plug compartment. 4. - Page 73 03_32 03_33...
-
Page 74: Headlight Adjustment
Headlight adjustment (03_34, 03_35) Proceed as follows: 1. Place the vehicle in riding condition and with the tyres correctly inflated on a flat piece of ground at a distance of 10 m from a white screen situated in a shaded area, making sure that the scooter is perpendicular to the screen;... -
Page 75: Front Direction Indicators
Front direction indicators (03_36) To replace the burnt light bulb, remove screw «E» on the left and right side, then remove the snap-in plastic part. WARNING HIGH AND LOW BEAM LIGHT ARE OF THE HALOGEN TYPE: DO NOT TOUCH WITH YOUR FINGERS TO AVOID DAMAGING THEIR FUNCTION. 03_36 Rear turn indicators (03_37) Insert a screwdriver into the slot to remove the plastic cover «C». -
Page 76: Number Plate Light
Number plate light (03_38) Loosen the two screws «D», remove the plastic cover behind the mudguard. Remove screw «E» from behind the mudguard. Remove the bulb socket. 03_38 Helmet compartment lighting bulb (03_39) Open the helmet compartment, take out the pressure mounted glass cover «F» and replace the bulb. -
Page 77: Brake Light
Brake light (03_40, 03_41) To remove the stop and position light, proceed as follows: 1. Open the saddle and remove the rear cover by the two screws «A». 2. Remove the four screws «B» to remove the stop lights plastic cover. 03_40 03_41... -
Page 78: Rear-View Mirrors
Rear-view mirrors (03_42, 03_43) Adjust the mirrors by applying slight pressure to the side of the mirror to move it to the desired position. The rear-view mirrors fold in when hit for enhanced safety. To set the mirror back to its position, operate manually as indicated. 03_42 03_43... -
Page 79: Front And Rear Disc Brake
ER, IN THE EVENT OF NOISES COMING FROM THE FRONT AND/OR REAR BRAKE SYSTEM DURING OPERATION, IT IS ADVISABLE TO HAVE THE BRAKE SYSTEM CHECKED BY A PIAGGIO-GILERA DEALER OR AUTHORISED SERV- ICE CENTRE. AFTER REPLACING THE BRAKE PADS DO NOT USE THE SCOOT-... -
Page 80: Puncture
«inflate and repair» spray. In order to repair a tyre completely, take your vehicle to a Piaggio-Gilera Dealer or Authorised Service Centre. The replacement of a type involves removing the wheel in question. Take your vehicle to a Piaggio-Gilera Dealer or Authorised Service Centre for these operations. -
Page 81: Periods Of Inactivity
Periods of inactivity (03_46) We recommend carrying out the following operations: 1. Clean the scooter thoroughly and then cover it with a canvas; 2. With the engine off and the piston in the bottom dead centre position, remove the spark plug, and pour into its hole 1 t0 2 cc of the recommended oil. Operate the starter button 1-2 times for roughly 1 second to turn the engine over slowly, then insert the spark plug again;... - Page 82 CAUTION DETERGENTS CAN POLLUTE WATER. THE VEHICLE MUST BE WASHED AT A WASH STATION EQUIPPED WITH A SPECIAL WATER PURIFICATION SYSTEM. IF YOU WASH THE ENGINE WITH A HIGH-PRESSURE WATER JET MACHINE: • ONLY USE THE FAN JET. • DO NOT PLACE THE WATER JET NOZZLE CLOSER THAN 60 CM. •...
- Page 83 START-UP DIFFICULTIES (SEE PARAGRAPH «SAFE DRIVING») Lack of fuel in tank. Refuelling Injection system failure Turn to an Authorized Piaggio- Gilera Service Centre Inefficient fuel pump Turn to an Authorized Piaggio- Gilera Service Centre Battery flat Recharge the battery. * IMPORTANT: DO NOT CONTINUE TO USE THE VEHICLE UNTIL THE FUEL RUNS OUT;...
- Page 84 IGNITION PROBLEM Faulty spark plug Contact an Authorised Piaggio- Gilera Service Centre Faulty ignition / injection control Contact an Authorised Piaggio- unit. Due to the presence of high Gilera Service Centre voltage, this element should only be checked by an expert.
- Page 85 INSUFFICIENT BRAKING Greasy disc. Worn pads. Faulty Contact an Authorised Piaggio- brake system. Presence of air in Gilera Service Centre the front and rear brake circuit. Presence of air in the front and rear Contact an Authorised Piaggio- brake circuit.
-
Page 87: Technical Data
Nexus 500 Chap. 04 Technical data... - Page 88 DATA Version Engine Single-cylinder, four-stroke, four valves, single overhead camshaft, chain driven on the flywheel side Bore x stroke 92 X 69 mm Cubic capacity 460 cm³ Compression ratio 10.5: 1 Ignition advance (before TDC) Variable advance controlled by the injection control unit Fuel supply 38 Ø...
- Page 89 Height 1045 mm Saddle height 780 mm Wheelbase 1515 mm Fuel supply Electronic injection with electric fuel pump. Exhaust muffler absorption-type exhaust muffler with catalytic converter. Electronic ignition inductive, high efficiency integrated with the injection system, with variable timing and separate HV coil.
- Page 90 handlebar. The system is controlled by a distribution pressure valve. front wheel 15"x3.50' alloy rim rear wheel 14"x4.50'' alloy rim Tyres Without inner tube Front tyres Bridgestone 120/70-R15" Tubless 56H - Battlax TH01 Rear tyres Bridgestone 160/60-R14" Tubless 65H Battlax TH01 Front suspension Hydraulic telescopic fork with Ø...
- Page 91 Engine oil (at oil and filter change) 1.5 lt. Rear hub oil Capacity approximately 250 cc Cooling system approx. 1.8 l...
- Page 92 04_01...
-
Page 93: Kit Equipment
Kit equipment One socket wrench; a lever for the socket wrench; one double screwdriver; one hex- agonal wrench (mm 6); a special spanner to adjust rear shock absorber, a pair of pliers to extract fuses. The tools are arranged in the helmet compartment. -
Page 95: Spare Parts And Accessories
Nexus 500 Chap. 05 Spare parts and accessories... - Page 96 05_01...
-
Page 97: Programmed Maintenance
Nexus 500 Chap. 06 Programmed maintenance... -
Page 98: Scheduled Maintenance Table
It is a good rule to point out any small function anomalies to an Authorized Piaggio- Gilera Dealer or Service Centre at once, without waiting until the next time your vehicle is serviced, in order to remedy them as soon as possible. - Page 99 AFTER 1,000 KM OR 4 MONTHS Engine oil - replacement Hub oil - change Carburetion - check/adjust Seals/injection system hoses - visual check Base vent - check Steering - adjustment Brake control levers - greasing Brake fluid level - check Safety locks - check Electrical system and battery - check Vehicle and brake test - road test...
- Page 100 Variable speed rollers - replacement Driving belt - checking Coolant level - check Brake fluid level - check Electrical system and battery - check Tyre inflation and wear - Check Vehicle and brake test - road test AT 12000 KM OR 24 MONTHS AND 60000 KM Engine oil - replacement Hub oil - level check Spark plug / electrode gap - replacement...
- Page 101 Steering - adjustment Brake control levers - greasing Transmissions - lubricate Brake fluid level - check Safety locks - check Suspensions - check Electrical system and battery - check Headlight - adjustment Tyre inflation and wear - Check Vehicle and brake test - road test AT 18000 KM AND AT 54000 KM Engine oil - replacement Hub oil - level check...
- Page 102 Coolant level - check Radiator - external cleaning/ check Brake fluid level - check Electrical system and battery - check Tyre inflation and wear - Check Vehicle and brake test - road test AT 24000 KM Engine oil - replacement Hub oil - change Spark plug / electrode gap - replacement Air filter - clean...
- Page 103 Coolant level - check Steering - adjustment Brake control levers - greasing Transmission elements - lubrication Brake fluid level - check Safety locks - check Suspensions - check Electrical system and battery - check Headlight - adjustment Tyre inflation and wear - Check Vehicle and brake test - road test AT 30000 KM, 42000 KM AND 66000 KM Engine oil - replacement...
- Page 104 Coolant level - check Brake fluid level - check Electrical system and battery - check Tyre inflation and wear - Check Vehicle and brake test - road test AT 36000 Engine oil - replacement Hub oil - level check Spark plug / electrode gap - replacement Air filter - change Engine oil - change Valve clearance - check...
- Page 105 Steering - adjustment Brake control levers - greasing Flexible brake tubes - replacement Transmission elements - lubrication Brake fluid level - check Safety locks - check Suspensions - check Electrical system and battery - check Headlight - adjustment Tyre inflation and wear - Check Vehicle and brake test - road test AT 48000 K Engine oil - replacement...
- Page 106 Base vent - check Variable speed rollers - replacement Roller support sliding blocks - check/change Driven pulley bushing - check / grease Driving belt - replacement Coolant level - check Steering - adjustment Brake control levers - greasing Transmission elements - lubrication Brake fluid level - check Safety locks - check Suspensions - check...
- Page 107 Air filter - change Engine oil - change Fuel filter - check Valve clearance - check Carburetion - check/adjust Seals/injection system hoses - visual check Base vent - check Variable speed rollers - replacement Roller support sliding blocks - check/change Driven pulley bushing - check / grease Driving belt - replacement Coolant level - check...
- Page 108 Vehicle and brake test - road test RECOMMENDED PRODUCTS TABLE Product Description Specifications AGIP GEAR 80W-90 Oil for speed gearbox SAE 80W-90, API GL-4 mineral multigrade oil AGIP CITY HI TEC 4T Oil to lubricate flexible transmissions (throttle Oil for 4-stroke engines control) AGIP GP 330 Grease for brake levers, throttle...
- Page 109 TABLE OF CONTENTS Air filter: 58 Fuel: 27 Maintenance: 15, 49, 97, 98 Fuses: 67 Mirrors: 78 Battery: 64 Brake: 62, 77, 79 Headlight: 74 Saddle: 25, 29 Horn: 19 Scheduled maintenance: 98 Hub oil: 53 Shock absorbers: 38 Spark plug: 57 Stand: 44, 45 Clock: 13 Start-up: 20...
- Page 110 The descriptions and illustrations given in this publication are not binding. While the basic specifications as described and illustrated in this manual remain unchanged, PIAGGIO-GILERA reserves the right, at any time and without being required to update this publication beforehand, to make any changes to components, parts or accessories, which it considers necessary to improve the product or which are required for manufacturing or con- struction reasons.
Need help?
Do you have a question about the Nexus 500 and is the answer not in the manual?
Questions and answers