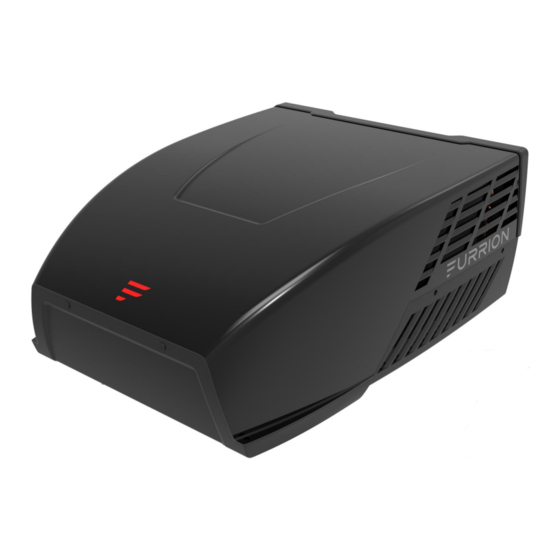
Welcome Thank you for purchasing this Furrion Rooftop Air Conditioner. Before operating ® your new product, please read these instructions carefully. This instruction manual contains information for safe use, installation and maintenance of the product. Please keep this instruction manual in a safe place for future reference. This will ensure safe use and reduce the risk of injury.
Installation ..................11 Installing the Rooftop Unit ..................11 Installing the Wall Thermostat (model: FACW12SA-BL/FACW12PA-BL/ FACW12ZA-BL, sold separately) ................11 Installing the Air Distribution Box (for FACT12LA-PS/FACT12LA-BL/FACT12SA- PS/FACT12SA-BL models only, same for both ducted and non-ducted models, sold separately) .......................12 Troubleshooting ................16 Cleaning and Maintenance ..............
– Electric shock not use water to extinguish fires. – Fire hazards – Injury ● All Furrion product referenced in this manual is to be installed in accordance with local and national codes, including the latest editions of the following standards: USA: –...
Important Safety Instructions Handling Electrical Cables CAUTION ● The rooftop air conditioner must be WARNING installed securely so that it cannot fall down. The electrical power supply must only ● Only operate the rooftop air be connected by a qualified electrician. conditioner if you are certain that the housing and the cables are not CAUTION...
Before Installing ● Filter x 2 Read this installation manual completely ● Decoration Plate x 1 before installing the rooftop air ● Self-tapping Screws x 6 conditioner. ● Instruction Manual x 1 The following tips and instructions must ● Warranty Card x 1 be observed while installing the rooftop air conditioner.
Page 7
Before Installing the RV is parked on a level surface. 19 ⁄ ” (500mm) NOTE: A 15° slant to either side or front to back is acceptable for all units. If the roof exceeds 15° please use an exterior 2 ⁄ ” (70mm) leveling shim to make air conditioner level.
3.5” (90mm) to accordance with NFPA Standard 501C 6” (152mm). For other thickness, please Section 2.7.2. contact Furrion or Furrion authorized 1. Mark a 141/4” x 141/4” (+1/2”) square on service agent. the roof and carefully cut an opening.
Before Installing NOTE: Make sure ductwork will NOT 2. Using the roof opening as a guide, cut a matching hole in the ceiling. bend or collapse during and after NOTE: Maintain structural integrity. installation, and that it is correctly Otherwise damage to product and/or insulated and sealed.
NOTE: Alternate configurations and TOP VIEW methods may be used which will allow (BACK OF RV) the unit to operate properly, however, these alternate configurations and methods MUST be approved by Furrion Frame in writing. Duct Duct ● Duct size Roof ●...
Before Installing Laying the Connecting Cables 1. Refer to the applicable electric code guidelines for sizing the appropriate wire gauge, length and type. The rooftop air conditioner must be 2. Route a 115VAC supply wire with connected to an electric circuit which is ground wire from the time delay fuse able to supply the required power supply or circuit breaker box to the roof...
Installation Installing the Rooftop Unit Installing the Wall Thermostat (model: CAUTION FACW12SA-BL/FACW12PA- BL/FACW12ZA-BL, ● The rooftop unit weighs approximately 100 pounds (45 sold separately) kg). To prevent back injury, use a mechanical hoist when lifting or There are 3 types of wall thermostat for moving the unit.
Installation Installing the Air Distribution 3. Install the assembled mounting frame and the lower duct divider into Box (for FACT12LA-PS/ the rooftop opening. Make sure the FACT12LA-BL/FACT12SA-PS/ “THIS WAY FRONT” mark is facing front (the direction of the vehicle) FACT12SA-BL models only, while installing.
Page 14
Installation 5. Stick the upper duct divider into the assembled mounting frame. NOTE: Make sure the upper duct divider is compressing the top foam on the base of the unit, and compress to doubled sided tape on the lower duct divider to ensure a positive retention.
Page 15
Installation – 115VAC Power Cord: Connect to wires up out of the way. Tighten the cover with screw. (Fig. 10) 115VAC power source Rooftop Unit Cable 115VAC Power Cord Furnace(±) Cable Analog Cable Fig. 10 Freeze Sensor Cable Wall Thermostat Cable Room Sensor Cable Control Cables from 12V DC Power Cable...
Page 16
Installation 15. Install the control box into the 19. Align the filter tabs with mating mounting frame and fix with 2 self- notches and push to snap the filters tapping screws (one piece each side). into the ADB shroud. (Fig. 17) (Fig.
Freeze sensor has tripped. Outer temperature is too low or all air nozzles are closed. Abnormal shutdown Contact an authorized service agent or Furrion (see the Refrigerant leakage detail contact info at the back page of this manual). The rooftop air conditioner is not Set the rooftop air conditioner to cooling.
Replacement return air filters can be 1. Remove the decoration plate from the ordered directly from Furrion. air conditioning system by pushing the side tabs to release. (Fig. 20) Fig. 20 2. Remove the filters by pushing the...
Specifications Specification PERFORMANCE FACR13SA-PS FACR14SA-PS FACR15SA-PS Model Number FACR13SA-BL FACR14SA-BL FACR15SA-BL Cooling Capacity (Btu/h) 13,500 14,500 15,500 Dehumidification (pint/h) Applicable vehicle length (feet) Refrigerant R410A R410A R410A Charge (Oz) 15.9 19.8 23.1 Roof top Unit Dimensions (L x W x H) 347/8 x 275/8 x 135/8 347/8 x 275/8 x 135/8 347/8 x 275/8 x 135/8...
Wiring Diagram DANGER Electrical Shock Hazard ● Disconnect power before servicing. Failure to obey this warning could result in death or serious injury. ● Provide grounding in compliance with all applicable electrical codes. Failure to obey this warning could result in death or serious injury. COMPRESSOR GRN/YEL INDOOR...
115VAC Input Air Conditioner Rear Unit Four Conductor Communication Cable Furnace 2 Wires 12VDC Input 2 Breaker Box Wires Air Conditioner Four Conductor Communication Cable Furrion Thermostat Indoor Temperature Sensor Room Sensor 12VDC Input 2 Wires 115VAC Input Front Unit...
Page 25
Replacement Parts List Item Part# Description C-FACT12SA-001A Electronic Control Box (Single Zone) C-FACT12SA-001B Electronic Control Box (Multi Zone) C-FACT12SA-PS-006 ADB shroud (White) C-FACT12SA-BL-006 ADB shroud (Black) C-FACT12SA-004 LED Strip For Electronic Trim kit (Right) C-FACT12SA-005 LED Strip For Electronic Trim kit (Left) C-FACT12SA-003 LED CLIP For Electronic Trim kit C-FACT12SA-PS-007...
LIMITED WARRANTY, ALL SUCH WARRANTIES, INCLUDING WARRANTIES OF MERCHANTABILITY AND FITNESS FOR A PARTICULAR PURPOSE ARE LIMITED TO THE DURATION OF THIS WARRANTY. No Furrion reseller, agent, or employee is authorized to make any modification, extension, or addition to this warranty.
Page 27
TO LOST PROFITS, DOWNTIME, GOODWILL, DAMAGE TO OR REPLACEMENT OF ANY EQUIPMENT OR PROPERTY, ANY COSTS OF RECOVERING, REPROGRAMMING, OR REPRODUCING ANY PROGRAM OR DATA STORED IN OR USED WITH FURRION PRODUCTS. FURRION’S TOTAL LIABILITY IS LIMITED TO THE REPAIR OR REPLACEMENT OF THIS PRODUCT PURSUANT TO THE TERMS OF THIS WARRANTY.
Need help?
Do you have a question about the FACT12LA-PS and is the answer not in the manual?
Questions and answers