Table of Contents
Advertisement
Quick Links
Advertisement
Table of Contents

Summary of Contents for Renishaw Equator Gauge Checker
- Page 1 User’s guide - Equator Gauge Checker H-5925-8600-01-B Equator™ Gauge Checker...
- Page 2 CONTENT. RENISHAW EXCLUDES LIABILITY, HOWSOEVER ARISING, FOR ANY INACCURACIES IN THIS DOCUMENT. Trademarks RENISHAW® and the probe emblem used in the RENISHAW logo are registered trademarks of Renishaw plc in the UK and other countries. apply innovation is a trademark of Renishaw plc.
- Page 3 Equator™ Gauge Checker Installation and user’s guide...
- Page 4 Prior consent must be obtained in instances where Renishaw equipment is to be substituted or omitted. Failure to comply with this requirement will invalidate the warranty.
- Page 5 It should be lifted from its storage box using the base. If the artefact is dropped or receives an impact, it must be assumed that it is not suitable for use and Renishaw should be contacted with reference to a replacement.
- Page 6 This page intentionally left blank...
-
Page 7: Table Of Contents
Contents Contents Introduction ..............Product description ............. Hardware ..............Software ..............Product operation ............Assembling the Gauge Checker artefact ....How to use ............... Interpreting the results ..........Technical data ............Gauge checker test limits .......... Compare procedure ..........Help ................ -
Page 8: Introduction
Introduction Introduction Gauge Checker has been specifically designed as an aid to your Equator gauging system. Unlike a CMM, the Equator does not need to be re-calibrated at periodic intervals, to ensure accuracy across the working volume. Equator is regularly ‘re-calibrated’ by nature of the mastering process which continually re-establishes an error map based on measurement of a known master part. -
Page 9: Product Description
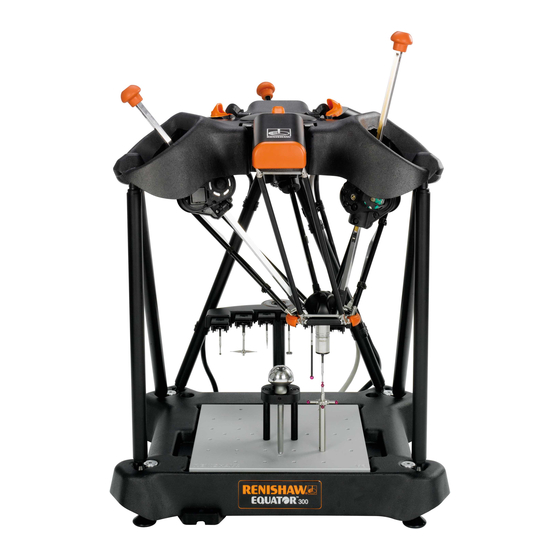
Product description Product description Hardware Item Description 55 mm artefact adapter Thread adapter (M6, M8, 1/4-UNC) Gauge Checker artefact Scanning stylus (A-5003-5061) & (A-2237-0180) Wrench Hex Key 3 mm A/F Ni PI Touch Trigger stylus (A-5003-0040) -
Page 10: Software
Product description Software Included as part of the Gauge Checker kit, is the Gauge Checker wizard. This wizard guides the user through the Gauge Checker process. To start the Gauge Checker wizard: • Navigate to Diagnostics within Equator Manager. • Click on the Gauge Checker icon and the wizard will appear. -
Page 11: Product Operation
Product operation Product operation Assembling the Gauge Checker artefact To assemble the Gauge Checker artefact, please see the steps below. - Page 12 Product operation...
-
Page 13: How To Use
Product operation How to use • Store the Gauge Checker artefact in the provided case when not in use. • Use gloves when handling the Gauge Checker artefact. • Remove the Gauge Checker artefact from the storage case for two hours prior to use. This ensures that the Gauge Checker artefact is at ambient temperature. -
Page 14: Interpreting The Results
Clean the Gauge Checker artefact and stylus and run the test again. If the test fails a second time, contact your local Renishaw distributor. Multiple measure cycles - When performing multiple measure cycles, it is possible that thermal effects could give rise to larger deviations. -
Page 15: Technical Data
Technical data Technical data Gauge Checker test limits The test limits set for the Gauge Checker have been derived from the performance specifications quoted for the Equator and the measurement uncertainty evaluated for the inspection of the † Gauge Checker (to a 95% confidence interval). •... -
Page 16: Compare Procedure
) + 3(2 ) = ± 4.899 µm Form error (non-freeform curves): test limits evaluated using empirical measurements (for further information, please contact Renishaw). Freeform curve deviation: test limits evaluated using empirical measurements (for further information, please contact Renishaw). Measurement uncertainty is defined in the GUM (Guide to the †... - Page 17 Technical data...
- Page 18 Technical data...
-
Page 19: Help
Help Help Please contact Renishaw for help. For worldwide contact details, please visit our main website at www.renishaw.com/contact... - Page 20 Renishaw plc +44 (0)1453 524524 +44 (0)1453 524901 New Mills, Wotton-under-Edge, uk@renishaw.com Gloucestershire, GL12 8JR United Kingdom www.renishaw.com For worldwide contact details, please visit our main website at www.renishaw.com/contact *H-5925-8600-01-B*...


Need help?
Do you have a question about the Equator Gauge Checker and is the answer not in the manual?
Questions and answers