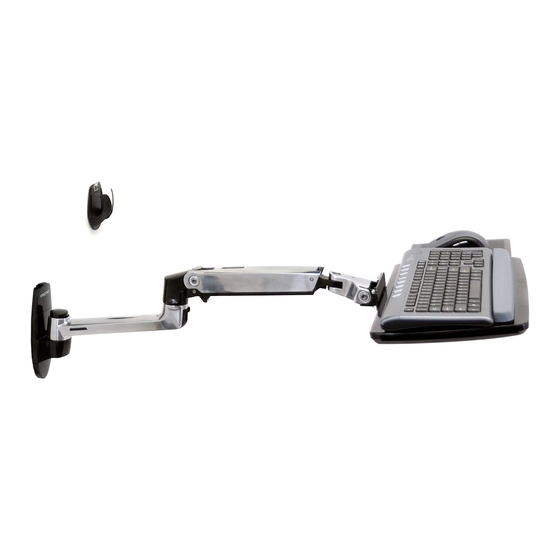
Ergotron LX Manual
Wall mount keyboard arm
Hide thumbs
Also See for LX:
- Assembly instructions manual (28 pages) ,
- User manual (20 pages) ,
- Manual (2 pages)
Advertisement
Quick Links
LX Wall Mount Keyboard Arm
English
For the latest User Installation Guide please visit: www.ergotron.com
English, Español, Français, Deutsch, Nederlands, Italiano, Svenska, 日本語, 汉语
www.ergotron.com |
|
|
|
USA: 1-800-888-8458
Europe: +31 (0)33-45 45 600
China: 400-120-3051
Japan: japansupport@ergotron.com
888-45-047-W-05 rev.U • 12/18
1 of 12
Advertisement

Summary of Contents for Ergotron LX
- Page 1 LX Wall Mount Keyboard Arm English For the latest User Installation Guide please visit: www.ergotron.com English, Español, Français, Deutsch, Nederlands, Italiano, Svenska, 日本語, 汉语 www.ergotron.com | USA: 1-800-888-8458 Europe: +31 (0)33-45 45 600 China: 400-120-3051 Japan: japansupport@ergotron.com 888-45-047-W-05 rev.U • 12/18...
-
Page 2: Tools Needed
0 - 5 lbs (0 - 2.3 kg) 180° 3° 3° 13" (330 mm) 360° 90° 180° 5° Components M8 x 80mm M4 x 8mm 2.5mm 1/8" 10-24 x 1/2" M4 x 14mm Tools Needed Concrete Wall Mounting Ø 3/8” (10mm) Stud Finder Wood Stud Mounting Ø... -
Page 3: Determine Mounting Location
Mounting Height for Ergonomic Workstation This mounting height is a recommendation for an ergonomic workstation that accommodates user heights of 5'0"-6'4" (152-185cm) when set up for standing . If user heights are diff erent than this, you should change mounting height to accommodate user heights. (Change mount- ing height one inch for every one inch diff erence in user heights). - Page 4 CAUTION: Make sure the wall mount bracket is level, To Floor fl ush and snug to the wall surface. DO NOT OVERTIGHT- EN THE BOLTS. Optional locking feature (customer supplied lock) Ergotron product Wood Concrete 10-24 x 1/2" 1/8" 4 of 12...
- Page 5 Ergotron product 1/8" NOTE: Wall Track and Brackets sold separately. NOTE: Fasteners may unwind due to vibration caused by move- ment of mounting solution over time. Inspect mounting solution for loose fasteners on a routine basis. If desired, apply a light duty thread locking adhesive to fasteners before installation to prevent back-out.
- Page 6 Wood Stud Mounting Ø 3/16" (5 mm) Stud Finder M8 x 80mm 13 mm 6 of 12 888-45-047-W-05 rev.U • 12/18...
- Page 7 Concrete Wall Mounting M8 x 80mm 3-1/8" (80 mm) Ø 3/8" (10 mm) 13 mm WARNING: Mounting holes must be at least 3-1/8” (80mm) deep and must be located within solid concrete, not mortar or covering material. If you drill into an area of concrete that is not solid, reposition mounting holes until both anchors can be fully inserted into solid concrete! WARNING: Anchors that are not fully set in solid concrete will not support the applied load resulting in an unstable, unsafe condition which...
- Page 8 M4 x 8mm WARNING WARNING! Stored Energy Hazard: The arm mechanism is under tension and will move up rapidly, on its own, as soon as attached equipment is removed. For this reason, DO NOT remove equipment unless the arm has been moved to the highest position! Failure to follow this instruction may result in serious personal injury and/or equipment damage! 8 of 12...
- Page 9 CABLE ROUTING Leave Slack in cable 888-45-047-W-05 rev.U • 12/18 9 of 12...
- Page 10 Adjustment Step Important! You will need to adjust this product after installation is complete. Make sure all your equipment is properly installed on the product before attempting adjustments. This product should move smoothly and easily through the full range of motion and stay where you set it. If movements are too easy or diffi cult or if product does not stay in desired positions, follow the adjustment instructions to create smooth and easy movements.
- Page 11 How to remove this tilting feature: 3° 3° Save these screws incase you want to add this feature later. M4 x 14mm 888-45-047-W-05 rev.U • 12/18 11 of 12...
- Page 12 Break • 2 to 3 minutes every 20 minutes • 15 to 20 minutes every 2 hours. For Warranty visit: www.ergotron.com/warranty For Service visit: www.ergotron.com For local customer care phone numbers visit: http://contact.ergotron.com NOTE: When contacting customer service, reference the serial number. www.ergotron.com | USA: 1-800-888-8458...


Need help?
Do you have a question about the LX and is the answer not in the manual?
Questions and answers