Table of Contents
Advertisement
Quick Links
Advertisement
Table of Contents

Subscribe to Our Youtube Channel
Related Manuals for EverFocus EQN22 Series


Summary of Contents for EverFocus EQN22 Series
- Page 1 EQN2200 User’s Manual Copyright © EverFocus Electronics Corp, Release: Mar. 2010...
- Page 2 EQN2200 Product Name: EQN2200 EverFocus Network Cameras Model Number(s): EQN2200 Federal Communication Commission Interference Statement This equipment has been tested and found to comply with the limits for a Class A digital device, pursuant to Part 15 of the FCC Rules. These limits are designed to provide reasonable protection against harmful interference when the equipment is operated in a commercial environment.
- Page 3 EQN2200 EverFocus Electronics Corp. 12F, No. 79, Sec. 1, Shin-Tai Wu Rd., His-Chi, Taipei Hsien, Taiwan, R.O.C. EQN2200 complies with CE and FCC rules.
- Page 4 EQN2200 About this document All the safety and operating instructions should be read and followed before the unit is operated. This manual should be retained for future reference. The information in this manual was current when published. The manufacturer reserves the right to revise and improve its products.
- Page 5 Sun Microsystems, Inc. in the United States and other countries. Support If the unit ever needs repair service, the customer should contact the nearest EverFocus Electronics Corp. Service Center for return authorization and shipping instruction. About this AC Adaptor...
-
Page 6: Table Of Contents
EQN2200 TABLE OF CONTENTS 1. INTRODUCTION....................7 2. FEATURES ......................7 3. SPECIFICATIONS....................8 4. ACCESSING THE CAMERA MENU ..............9 5. SETTING........................12 4.1 S ......................12 YSTEM 4.1.1 Information Tab...................12 4.1.2 Log Tab .......................13 4.2 U ......................14 ONFIG 4.3 N ......................16 ETWORK 4.3.1 Network.......................16 4.3.2 DDNS......................19 4.3.3 Bandwidth ....................20 4.3.4 SMTP/FTP ....................21... -
Page 7: Introduction
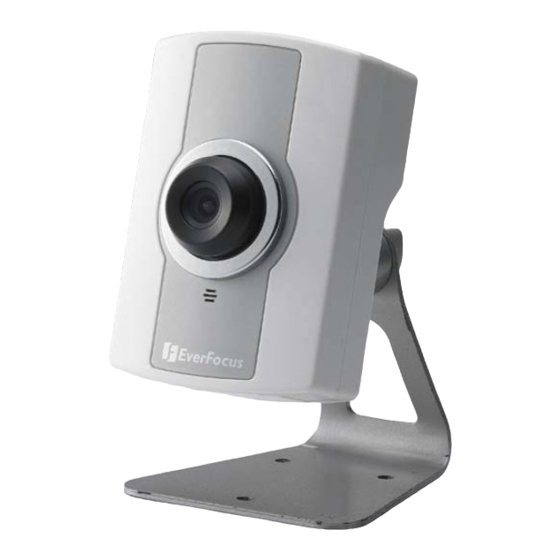
EQN2200 1. INTRODUCTION EQN22 series Q-cam is an entry-level network camera which provides competitive price but superior image quality with up to 30fps in 720p (1280x720) resolution. For easy and flexible installation, EQN2200 and EQN2200W offer the choice of either a wireless or a wired connection to the network. -
Page 8: Specifications
EQN2200 3. SPECIFICATIONS MODEL EQN2200: wired interface EQN2200W: wired and wireless interface EQN2230: wired interface and PIR sensor, White LED CAMERA Pickup Device 1/3" progressive scan CMOS sensor, 2 Megapixel Lens 4.3mm/F=1.8 Sensitivity 0.5Lux /F=1.8 VIDEO STREAMING Video Compression H.264M-JPEG (Hisilicon platform) Video Resolution 1600x1200 to 160x120 Frame Rate... -
Page 9: Accessing The Camera Menu
EQN2200 4. ACCESSING THE CAMERA MENU Step 1.Start an Internet Explorer browser session. Step 2. Enter the IP address or host name of the camera in the Location/Address field of your Internet Explorer browser in the form http://nn.nn.nn.nn:port, or http://ddnsname.everfocusddns.com. (Please refer to EQN2200 Installation Guide for how to find the IP address by using the IP Finder) Step 3. - Page 10 EQN2200 Press button to close the EQN2200 network page. ○ Video Stream ○ Select the desired Video Stream from Stream 1 / Stream 2, Stream 3 and Stream 4 stream must be enabled in camera Setting menu). Please refer to "Section 4.4.1 Multi Streaming”...
- Page 11 EQN2200 ~ ○ Play Audio/Transmit Audio ○ Click the “Play Audio” and “Transmit Audio” buttons to switch the sound off and on for the audio input and output, respectively. Manual Control – Trigger Event ○ Press “Trigger Event” button to trigger an event directly from the live view page, and event actions will be initiated if they have been set up in the “Event”...
-
Page 12: Setting
EQN2200 5. SETTING Click this button to display the camera setup menu. 4.1 System Info System information and system log events can be accessed on this page via 2 tabs: [Information] tab and [Log] tab. 4.1.1 Information Tab System Information: Firmware version, MAC address, Video Type, Model number. (this data may not be changed in this page and is for reference only) -
Page 13: Log Tab
EQN2200 4.1.2 Log Tab System Log: Date/Time: displays date and time of the log event. Log message: all information and event message, including login, user’s IP, reboot, firmware upgrade, load factory default, configuration reset and event detected. System will keep the newest 256 records. -
Page 14: User Config
EQN2200 Press button to export the system log into a “.txt” file and select the location where the exported log file will be saved. 4.2 User Config The configuration and operation of the Live View screen can be changed based on the login user ID. - Page 15 EQN2200 Press Apply to apply the setting changes or Reset to reset without saving the changes. Date/Time Format Used in Text Select Date/Time Format from the following options: * day of week, Month, date, year Time Format: choose between 24 Hours or 12 Hours. Press Apply to apply the setting changes or Reset to reset without saving the change.
-
Page 16: Network
EQN2200 Note: 1. A maximum five languages can be in the language list. 2. Uploading a new language file will reboot the system automatically. Please reconnect to the IP camera after reboot. Press Apply to apply the setting changes or Reset to reset without saving the change. - Page 17 EQN2200 • IP Type • IP address • Subnet mask • Gateway (when using the gateway server/router) • Primary DNS, Secondary DNS (when using DNS) IP Type DHCP: Configure the DHCP server not to assign the same IP addresses used for the other network cameras and PCs whose IP address is unique.
- Page 18 EQN2200 An IP address of DNS server that is provided by ISP. This address may be assigned automatically if DHCP is used. A correct DNS IP is essential if DDNS will be used. Secondary DNS If your ISP provides you an IP address secondary DNS, please set it here. Username Enter User name of the account (used only for PPPoE).
-
Page 19: Ddns
○ www.no-ip.com ○ Enable: Check the box to enable DDNS setting. Service ISP: If you choose EverFocus DDNS server, you can easily register a DDNS name and obtain free DDNS services from EverFocus at ” ww.everfocusddns.com”. Enter an IP Cam Account Name: .everfocusddns.com... -
Page 20: Bandwidth
EQN2200 necessary to configure Record ID, FQDN, Username and password and register in advance for DDNS services. Refer to the web site for further information about the DDNS provider. Press Apply to apply the setting changes or Reset to reset without saving the change. -
Page 21: Smtp/Ftp
EQN2200 4.3.4 SMTP/FTP Set SMTP The settings relating to the mail server used to send the e-mail notification from the camera to predefined addresses via SMTP can be configured. SMTP Server: Enter the IP address or the host name of the SMTP server used to send e-mails SMTP Port: Enter the port number for SMTP. - Page 22 EQN2200 Sender Address: Input sender’s e-mail address, so that receiver can recognize the sender when an event message is sent out. Send Test Mail: Press button to send a test e-mail to the designated address. Set FTP The settings relating to an FTP server to be used to receive alarm images can be configured.
-
Page 23: Network Alarm (Reserved For Powercon)
EQN2200 4.3.5 Network Alarm (reserved for PowerCon) Set Network Alarm This function is reserved for PowerCon software, for the details regarding these settings please refer to the documentation for the PowerCon network alarm protocol. 4.4 Video The settings relating video such as streaming, camera OSD can be configured on this page. -
Page 24: Multi Streaming
EQN2200 4.4.1 Multi Streaming Stream Setting The system can output 4 video streams simultaneously. For each of them, the user can set compression format, resolution, quality and frame rate individually. Stream 1 is always enabled for live view. Check “Enable” box to enable other streams. Format: Select compression format from H.264, MPEG4 and MJPEG. -
Page 25: Camera
EQN2200 Note: Total frame rate cannot exceed 60 fps. System performance may be influenced if user enables 4 video streams simultaneously. Press Apply to apply the setting changes or Reset to reset without saving the change. Video Recording Setting User can set video recording by selecting one of the enabled video streams. This will allow users to view live images while also recording video from another video stream. - Page 26 EQN2200 configured using the operation buttons on this tab. OSD setting: Use the following buttons on the operation panel to operate the "Camera OSD setting" remotely from a PC. (Please refer to Section 4.4.2.1 for a detailed guide to the Camera OSD Setting menu) [SET] button: Click this button to select choices or to bring up the menu and submenus.
-
Page 27: Audio
EQN2200 4.5 Audio The EQN2200 camera can transmit audio to client PCs by connecting an external source (line-in), and can play audio received from clients PCs (line-out) into amplified speakers. This section describes how to configure the basic audio settings. Audio Check Enable Audio box to enable audio function. -
Page 28: User
EQN2200 4.6 USER User Information Maximum 10 user IDs can be created to access the IP camera. The user information screen displays the authorized IDs. Access levels are: • Supervisor/Administrator –a supervisor/administrator has unrestricted access to the Setting menus and can determine the registration of all other users. However, an administrator is not allowed to change a supervisor’s account and password. -
Page 29: Event
EQN2200 4.7 EVENT An event in the camera is when an Event Type is activated and causes certain actions to be performed. The event type is the set of conditions that specifies how and when which actions will be performed. This table describes how to setup action types and event type. -
Page 30: Event
EQN2200 4.7.1 Event The settings relating to event occurrences such as settings for motion, alarms time mask can be configured on this page. The "Event" page has 4 tabs: [Event] tab, [Motion] tab, [Alarm] tab and [Time Mask] tab. Press button to add an event condition. - Page 31 EQN2200 button to change the priority of events. The event that has highest priority will be activated first. Press Apply to apply the setting changes or Reset to reset without saving the change. This example describes how to set the camera to upload images to an FTP site when someone press Manual trigger button: 1.
-
Page 32: Motion
EQN2200 post alarm buffer setting, please refer to “4.7.3 Alarm”. 6. Check “Enable This Event”. 7. Select “Always” for time mask. For detail about Time Mask, please refer to “4.7.4 Time Mask”. 8. Click to save this event in event list. 4.7.2 Motion Motion Detection Users can define the motion areas to be detected by left clicking the mouse to draw... -
Page 33: Alarm
EQN2200 There are 5 possible motion trigger areas, which can be distinguished by 5 different colors. Check the Enable checkbox to enable event actions related to that area. For each area, you can set the event action in response to motion detection in that area. -
Page 34: Time Mask
EQN2200 motion detection ceases. Pre-Alarm Buffer: Image saved internally in the camera from the time immediately preceding the trigger. Input the desired length of pre-trigger buffer time. It can be set up to 120 seconds. Post-Alarm Buffer: Image saved internally in the camera from the time immediately after the trigger condition has ceased/been reset. - Page 35 EQN2200 Time Mask Setting Time mask setting allows you to schedule the times when the system will respond to event actions. Select Always for event action to be taken continuously. Press button to add new time period. Mask name: Input a mask name for the new time period. Check the check box for the day to be scheduled: Sun, Mon, Tue, Wed, Thu, Fri &...
-
Page 36: System
EQN2200 4.8 SYSTEM Date/Time, Daylight Saving, SD card and Maintenance settings can be accessed on this page. The "System" page has 4 tabs: [Date/Time] tab, [Daylight Saving] tab, [SD card] tab and [Maintenance] tab. 4.8.1 Date/Time Machine Name Setting Machine Name: Enter the name for the camera. The entered name will be displayed in the status display area, and used to label any recoding and/or snapshot folders created on a user’s PC. - Page 37 EQN2200 Set Date/Time Manually Date: Click the calendar and pick the date. Press << to go previous year, < to go previous month, > to go next month and >> to go next year. Time: Click on Hour, Minute, Seconds, am/pm; then use up arrow to increase value and down arrow to decrease value.
-
Page 38: Daylight Saving
EQN2200 4.8.2 Daylight Saving Set Daylight Saving Check Enable Daylight Saving checkbox to enable daylight saving. Set the start time for daylight saving time. Set the start week for daylight saving time: 1 / Last Set the start day of the week for daylight saving time: Sunday / Monday / Tuesday / Wednesday / Thursday / Friday / Saturday Set the start month for daylight saving time: January / February / March / April /... -
Page 39: Sd Card
EQN2200 Press Apply to apply the setting changes or Reset to reset without saving the change. 4.8.3 SD Card Setup SD Card NEED A DIAGRAM SHOWING WHERE/HOW TO INSERT THE CARD (it’s displaying in installation guide) Notification: Notification will be made via e-mail when the remaining space of the SD memory card reached the value selected from the following. - Page 40 EQN2200 connection to the FTP server is unavailable. Normal: Follows the event action settings you have made in the “Event” menu to record event video to the SD card. Overwrite: Select ON for overwriting older data when the SD card memory is full. Select OFF for not overwriting the SD card data.
-
Page 41: Maintenance
EQN2200 Note: - It is impossible to access the SD memory card in the process of formatting. - All data saved on the SD memory card will be deleted when the SD memory card is formatted. - Do not turn the power of the camera off in the process of formatting. 4.8.4 Maintenance Maintenance Tab Reboot: The unit is rebooted without changing any of the settings. - Page 42 EQN2200 To take a backup of all of the settings in the current configuration, press Save to save the configuration to a config. file. Once saved, it is then possible to return to the previous settings if/when desired. To return to a previously saved configuration, press the Browse button to locate and select the saved config.
- Page 43 EQN2200...
- Page 44 EQN2200 EverFocus Electronics Corp.
Need help?
Do you have a question about the EQN22 Series and is the answer not in the manual?
Questions and answers