
Related Manuals for EverFocus EQH5202


Summary of Contents for EverFocus EQH5202
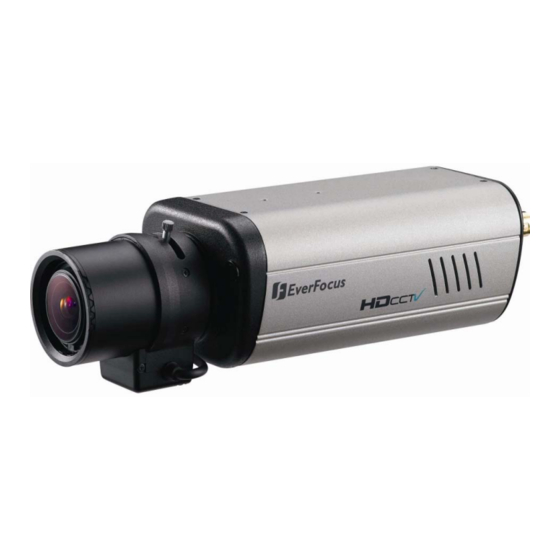
- Page 1 EQH5202 Box Camera User’s Manual ** Lens not included. Copyright © EverFocus Electronics Corp, Release Date: May, 2012...
- Page 2 Cautions Please read this manual first to ensure correct installation and operation. This manual should be retained for future reference. The information in this manual was current when published. The manufacturer reserves the right to revise and improve its products. All specifications are therefore subject to change without notice.
- Page 3 This Product is RoHS compliant. Your EverFocus product is designed and manufactured with high quality materials and components which can be recycled and reused. This symbol means that electrical and electronic equipment, at their end-of-life, should be disposed of separately from your household waste.
-
Page 4: Table Of Contents
Contents 1. INTRODUCTION ..................1 1.1 P ACKING ......................2 1.2 F EATURES ........................2 2. OVERVIEW ....................3 3. INSTALLATION ..................4 3.1 O PTIONAL CCESSORIES ....................4 3.2 L NSTALLATION AND DJUSTMENT ................5 3.3 T OTTOM OUNT .................... -
Page 5: Introduction
BNC connectors. The EQH5202 allows flexible choices of megapixel manual & DC iris control lenses with C / CS mount for outstanding coverage in a wide range of demanding surveillance environments while delivering... -
Page 6: Packing List
EQH5202 Box Camera Packing List Camera body x 1 Accessory Pack x 1 - C‐mount lens adapter x 1 Video Test Cable x 1 - Mounting Bracket (with two screws) x 1 Power Cable x 1 - Hex Wrench x 1 (46 x 15.5 mm; for set screw Power Pigtail Cable x 1 which secures the back focus ring) ND Filter x 1 User Manual x 1 1.2 Features Real time HDcctv 1920x1080 HD video over coax for superlative image detail ... -
Page 7: Overview
EQH5202 Box Camera 2. Overview No. Name Descriptions 1 Back Focus Set Screw Secures the Back Focus Adjustment Ring. 2 Back Focus Adjustment Ring Adjusts the back focus. Detects lights. Note Do Not obstruct the opening with the 3 Light Sensor body of the lens. If the varifocal lens is in use, plug the iris control cable to 4 DC Auto Iris Lens Connector the connector. Connects to a HD device using a 75 Ohm BNC‐type coaxial 5 HDcctv Output cable. 6 Power LED Glows red then power is present. 7 Power Terminal Block Connects to a 12V DC / 24V AC power source. Connects to a SD monitor for setting image aim and ... -
Page 8: Installation
EQH5202 Box Camera 3. Installation 3.1 Optional Accessories The EQH5202 box camera is supplied without a lens. You can purchase various megapixel lenses from EverFocus (not all items are available in all countries. Please consult your local EverFocus Sales office). -
Page 9: Lens Installation And Adjustment
EQH5202 Box Camera 3.2 Lens Installation and Adjustment You can install either a CS‐mount or a C‐mount lens into the camera. It is recommended to use a lens with aperture ratio of F/1.2 or lower. Please refer to the following reference steps. Focus Screw Zoom Screw C-Mount Lens Adapter DC Auto Iris Lens Connector CS‐Mount Lens: Remove the cover cap from the camera body. Install the lens into the camera body. Adjust the lens using the Focus / Zoom Screws. If you are using a DC Auto Iris lens: Remove the cover cap from the camera body. Install the lens into the camera body. Connect the DC cable to the DC Auto Iris Lens Connector. When making final focus adjustment, place and hold the supplied ND filter in front of the lens to force the lens iris to open, and then adjust the lens using the Focus / Zoom Screws. Note: To use the ND filter, remove the protective sheets from both sides of the ND filter. ... -
Page 10: Top / Bottom -Mount
EQH5202 Box Camera C‐Mount Lens: Remove the cover cap from the camera body. Install the lens into the camera body using the supplied C‐mount lens adapter. Adjust the lens using the Focus / Zoom Screws. Warning: Installing a C‐mount lens without the C‐mount lens adapter may damage the camera sensor. 3.3 Top / Bottom‐Mount You can use the supplied mounting bracket and screw it on the top of the camera body to suspend the camera, or on the bottom of the camera body to support the camera. Top Mount Bottom Mount ... -
Page 11: Basic Connection
EQH5202 Box Camera 4. Basic Connection Connect the camera to an HD device, such as an HDcctv DVR, to display the image. Connect the camera to a 12V DC / 24V AC power source using the supplied Power Cable. You can optionally use the supplied Power Pigtail Cable or a power adapter to connect the Power Cable to the power source. The power LED will be lit in red. Connect the camera to a CVBS portable monitor for setting image aim and focus before mounting the camera. ... -
Page 12: Configuration In The Osd Menu
EQH5202 Box Camera 5. Configuration in the OSD Menu You can use the Joystick on the rear panel of the camera to configure camera settings in the OSD menu. For details on the OSD menu structure, see OSD Menu Structure in Appendix. -
Page 13: Osd Menu
EQH5202 Box Camera 5.2 OSD Menu Press the Enter / Confirm button on the Joystick. The Setup Menu in the OSD appears. 5.2.1 Lens You can select the type of the lens. Two types are available: Manual and DC. By default, the DC type lens is selected. 5.2.2 Exposure Press the Enter / Confirm button to enter the submenu. Shutter Use the and buttons to adjust the shutter speed. The options include: 1/30 ~ 1/50000, x2 ~ x60, FLK, and AUTO. Any selection other than AUTO and 1/30 will disable the SENS‐UP function. AGC (Auto Gain Control) The higher the AGC value, the brighter the screen, but the level of noise will also be increased. The options include: Middle, High and Low. ... - Page 14 Brightness Use the and buttons to increase or decrease the screen brightness from 0 to 100. ETR ( EverFocus Tone Reproduction) ETR is an advanced form of electronic wide dynamic range expansion used to deliver properly exposed images despite bright light sources, deep shadows and/or unbalanced lighting in the same scene.
-
Page 15: White Balance
EQH5202 Box Camera • HSBLC (Highlight Suppression BLC): Select – Select an area block to set up the HSBLC value. The area block will start flashing when you select it. Four area blocks are available. Display – Select OFF to disable the HSBLC function, or select ON to enable the HSBLC ... -
Page 16: Day And Night
EQH5202 Box Camera Indoor Select this mode when the color temperature of the video image is similar to that found in indoor environments (around 5100 to 5300°K). Outdoor Select this mode when the color temperature of the video image is similar to that found in outdoor environments (around 3,000°K to 3,200°K). -
Page 17: Noise Reduction (Nr)
EQH5202 Box Camera B/W This mode is ideal for nighttime. In this mode, the camera is forced to deliver a B&W feed during daytime and nighttime. Color This mode is ideal for daytime. In this mode, the camera is forced to deliver a Color feed during daytime and nighttime. External This mode switches to a B&W feed in low light conditions and then switches back to a Color feed in the daytime. It is based on the camera’s external light sensor at the front of the camera body. 5.2.5 Noise Reduction (NR) The Noise Reduction function is designed to reduce digital recording size by reducing the video noises. 2D NR Switch to On / Off to enable / disable noise reduction on static recordings. 3D NR Switch to On / Off to enable / disable noise reduction on dynamic recordings. You can further set up the AGC level in the submenu to automatically start / stop the 3D NR function. S‐Level: Set up the AGC level to automatically start the 3D NR function. E‐Level: Set up the AGC level to automatically stop the 3D NR function. Level Increase or decrease the NR level. The higher the level, the more noise is filtered out. ... -
Page 18: Special
EQH5202 Box Camera EFALCORN (Everfocus Adaptive Luminance compensated Optimized Noise Reduction) This function can reduce noises in low light scenes while maximizing the image luminance and clarity. 5.2.6 Special In this section, you can configure a variety of special settings. CAM Title Switch to On and then enter the submenu to set up a camera name displayed on the screen. : Press to move the on‐screen cursor left or right for setting up the letters, numbers or symbols. CLR: Press to clean the letters. POS: Press to place the name on the screen. END: Press to confirm the camera name and exit. D‐Effect Enter the submenu to set up the following options: Freeze: Turn it on to freeze the image. This will enable the Mirror function below. ... - Page 19 EQH5202 Box Camera Mirror: Turn it on to reverse, rotate or flip the image. D-Zoom: Turn it on to set up the PIP view, zoom level, and the pan / tilt directions. Note: The D-Zoom setting is not functional on the SD test-out mode. If you connect an SD monitor to the test-out port on the rear panel of the camera and then turn on the D-Zoom setting in the OSD menu, the OSD menu will be turned off on the SD monitor.
-
Page 20: Adjust
EQH5202 Box Camera Level: Press to set up the Live DPC level. Static DPC: Turn it on to enable Static DPC. Start: Press to start the DPC actions configured above. Level: Press to set up the Static DPC level. SENS‐UP: Press to increase or decrease the sensitivity. Version Press to display the firmware version of the camera. 5.2.7 Adjust Enter the submenu to set up the following options: Sharpness Enter the submenu to set up the following options: Sharpness: Turn it on to set up the sharpness level. Resolution: Turn it on to automatically raise the resolution. Monitor Enter the submenu to fine‐tune the signal sent to the selected monitor type. LCD: Press to set up the Gamma rate, blue gain and red gain for your LCD monitor. CRT: Press to set up the backlight, blue gain and red gain for your CRT monitor. OSD Press to set up the text color or outline the text displayed on the OSD. LSC (Lens Shading Compensation) Turn it on to correct the phenomenon where the image gets darkened or blurred on the periphery. ... -
Page 21: Reset
EQH5202 Box Camera NTSC / PAL Press to select a video format for your connected monitor. 5.2.8 Reset Enter to the submenu to reset all the OSD functions to the default settings. 5.2.9 Exit Press to save all the settings and exit the OSD menu. -
Page 22: Specifications
EQH5202 Box Camera 6. Specifications Camera Image Sensor 1/3” Panasonic 2.1 megapixel Color Progressive CMOS Image Pixels (H x V) 1920 x 1080 with 2.75µ x 2.75µ pixel size HDcctv Image Area Dimensions 5.28 mm x 2.97 mm; ø 6.06 mm area diagonal... -
Page 23: Appendix
EQH5202 Box Camera 7. Appendix 7.1 OSD Menu Structure The default value is marked with a star “*”. No. Main Sub Menu Sub Menu / Function LENS MANUAL 1/30, 1/60*, FLK, 1/250, 1/500, 1/1000, 1/2000, 1/5000, 1/10000, SHUTTER 1/500000, x2, x4, x6, x8, x10, x15, x20, x30, x60... - Page 24 EQH5202 Box Camera No. Main Sub Menu Sub Menu / Function DELAY 0~60 DN (AGC) 0~100 AUTO ND (AGC) 0~100 DAY & RETURN RET, END NIGHT COLOR BURST RETURN RET, END EXT* 2DNR OFF*, ON S-LEVEL 0~100 3DNR E-LEVEL 0~100...
- Page 25 EQH5202 Box Camera No. Main Sub Menu Sub Menu / Function OFF* SELECT AREA1, AREA2, AREA3 POSITION DISPLAY SIZE MOTION RET AGAIN SENSITIVITY 0~60 MOTION VIEW OFF, ON DEFALT RETURN OFF* SELECT AREA1~AREA8 POSITION SPECIAL DISPLAY PRIVACY SIZE RET AGAIN...
- Page 26 EQH5202 Box Camera No. Main Sub Menu Sub Menu / Function BLACK LEVEL -30~+30 BLUE GAIN 0~100 RED GAIN 0~100 RETURN MONITOR 5, 0.80, 0.85, 0.90, GAMMA 0.95, 1.00 LCD* BLUE GAIN 0~100 ADJUST RED GAIN 0~100 TEXT COLOR 1~8 (default = 1)
- Page 27 EverFocus USA - California: EverFocus USA - New York: 1801 Highland Avenue, Unit A, Duarte, CA 91010, 415 Oser Avenue, Unit S, Hauppauge, NY 11788, USA TEL: +1 631 436 5070 TEL: +1 626 844 8888...
Need help?
Do you have a question about the EQH5202 and is the answer not in the manual?
Questions and answers