Table of Contents

Related Manuals for EverFocus EQ600 WDII


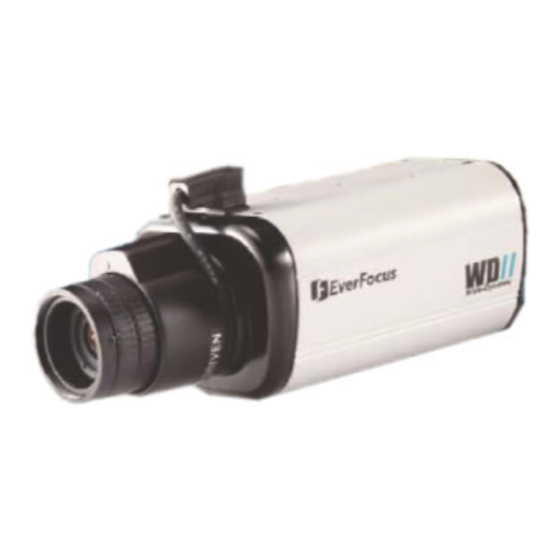
Summary of Contents for EverFocus EQ600 WDII
- Page 1 INSTRUCTION MANUAL 1/3” W-Dynamic High Resolution Color Camera EQ600 WDII Version 1.0 About this manual Before installing and using this camera, please read this manual carefully. Be sure to keep it handy for later reference.
-
Page 2: Safety Warning
Read manual carefully before installing the unit. Please read this manual first for correct installation and operation. Never install the camera on a ceiling that cannot hold its weight The product may fall down to cause damages. 3. Do not install the camera near electric or magnetic fields. Installed the camera away from TV, radio transmitter, magnet, electric motor, transformer, audio speakers because the magnetic fields generate from above devices will distort the video image. -
Page 3: Table Of Contents
1. Product Overview……….………………..……………..………………………….…….…2 1.1 Main Features.…..…………..………………………………………………..…………2 1.2 Content List………………………………………………………………………………2 1.3 Specifications……………..……….……………………………………………………..3 2. Back Panel Connections………………………….………………………….…………….4 3. Operation………………………………………………………..………………..……..…5~6 3.1 Setup Buttons…...………………………………………………………………..……...5 3.2 Display/Close the user setup menu screen…..………………………………………6 4. Main Menu Flow……..…………..………..…………………………………………………7 5. Preset Mode……………..……………………………..…….………………………………8~9 5.1 User Setup Menu Flow….…………………………………………………………..….8 5.2 User Setup……………………………………………………………………………….9 6. -
Page 4: Product Overview
1. Product Overview By utilizing Digital Pixel System improves the performance of surveillance camera in extreme lighting conditions. Where traditional CCD cameras have difficulty processing images in strong backlighting, the EQ600WDII processes each pixel independently, correcting for the variations and providing the best possible image under the lighting conditions. -
Page 5: Specifications
1.3 Specifications Pickup Device 1/3” Color DPS sensor 720(H) × 540(V) Picture Element Horizontal Resolution >480 TV lines Sensitivity 1.0 Lux/ F=1.2 (50IRE color) Low Speed shutter Up to 32x(2,4,8,16,32) S/N Ratio >48dB Auto exposure: Auto White Balance Yes, 2500K ~9500K Back light compensation Auto IRIS Video Outputs... -
Page 6: Back Panel Connections
2. Back panel connections (1)S-Video / RS-232 port: Connect Mini Din Male Connector to S-Video / RS-232 port for better video output quality or communication. Please refer to the pin assignment of the S-Video/ RS-232 port as below: (2)AC24V/DC12V Compatible Input Terminal: This power terminal is for connecting the AC24V/DC12V power supply cord (3)Video Output Connector: Connect the video output of the camera to a color monitor or other video devices through a 75 Ohm type coaxial cable with BNC female connector at backside of... -
Page 7: Operation
3.Camera Setup Operations This camera utilizes an On Screen Display (OSD) user setup menu. 3.1 Setup Buttons: To set items on the user setup menu, use the following buttons on the back panel. ④ ④ ④ ④ Left Button ① ① ① ① Up Button: This button is used to move the cursor upwards. Use this button to select an item or adjust the parameters. -
Page 8: Display/Close The User Setup Menu Screen
3.2 Display/Close the user setup menu screen Butto The Cursor Buttons & the SET Button Press the SET button for 2 second The menu screen will appear on the monitor as the block shown above. Using the cursor button Use the cursor button to adjust the mode or parameter of settings. -
Page 9: Main Menu Flow
4. MAIN MENU FLOW EWD600 MAIN MENU > PRESETMODE INDOOR… CAMERA ID ADVANCED SETUP… SAVE/RESTORE… EXIT MENU EWD600 MAIN MENU >PRESET MODE… <INDOOR…> <OUTDOOR…> <FLUOR. ….> <BACKLIGHT…> <USER…> EWD600 MAIN MENU >CAMERA ID… < OFF> <ON…> ADVANCED SETUP > AUTO IRIS… WHITE BALANCE…... -
Page 10: Preset Mode
5. PRESET MODE EWD600 MAIN MENU >PRESET MODE <INDOOR…> <OUTDOOR…> <FLUOR. ….> <BACKLIGHT…> <USER…> 5.1 USER SETUP Menu Flow USER SETUP >CAMERAVIEW SHADOW SLOW SHUTTER WDR MODE AUTO… METER MODE NORMAL… PREVIOUS PAGE Select the suitable settings, such as INDOOR, OUTDOOR, BACKLIGHT based on the installation environment. -
Page 11: User Setup
5.2 USER SETUP CAMERA VIEW: The lighting conditions of the area where the camera views. SHADOW or HIGHLIGHT SLOW SHUTTER: When the setting is OFF, it is only operate with AGC in low light condition and keep the color image.. When select “ON”... - Page 12 Select “ BACKLIGHT” in the strong backlight environment, for example, the lighting condition of building lobby. Set a suitable location or size of the frame by using the same setting procedures as “ NORMAL”. PREVIOUS PAGE: Return to the previous page by selecting PREVIOUS PAGE.
-
Page 13: Camera Id
6. CAMERA ID EWD600 MAIN MENU >CAMERA ID < OFF> <ON…> 6.1 CAMERA ID: The camera ID can be turned “ON” to be displayed on the screen, or “OFF”. The default camera ID is “OFF”. When “ON” is selected, user can set the Camera ID up to 12 characters. Please refer to Appendix A for detail character patterns. -
Page 14: Id Color
6.2 ID POSITION: There are four positions can be chosen to show the CAMERA ID on the screen. Choose an ID position that will not cover the import/critical part of images. ID SETUP CAMERA ID ___________ > ID POSITION UP-LEFT ID COLOR WHITE ID BACKGROUND NONE... -
Page 15: Advanced Setup
7. ADVANCED SETUP 7.1 AUTO IRIS ADVANCED SETUP > AUTO IRIS… WHITE BALANCE… LINELOCK… VIEWING… PREVIOUS PAGE I.GAIN: Use DC GAIN, the more sensitive the camera will be. II.AI THRESHOLD: Use III.AI CORRECTION: Use AUTO IRIS > GAIN AI THRESHOLD ++++++++++++ AI CORRECTION +++++++++++ PREVIOUS PAGE…... -
Page 16: White Balance
7.2 WHITE BALANCE ADVANCED SETUP AUTO IRIS > WHITE BALANCE… LINELOCK… VIEWING… PREVIOUS PAGE I.ATW: Auto Tracking White Balance. User can shift the ATW converge color temperature by “COLOR TEMP ” setting from -2000~2000 ˚ K. Then Select “SPEED” to adjust the tracking speed of auto white balance from 1~100. -
Page 17: Linelock
7.3LINELOCK ADVANCED SETUP AUTO IRIS… WHITE BALANCE… > LINELOCK… VIEWING… PREVIOUS PAGE I.AUTO: Set as AUTO LINELOCK mode,it will auto sense the line signal to decision whether runnig LINELOCK function or not. And press SET user can into the adjustment manual of V PHASE use button from 0~624. - Page 18 VIEWING SETUP BRIGHTNESS 100IRE CHROMA ++++++++++ GAMMA MODE AUTO > SHARPNESS… MIRROR COLORBAR PREVIOURS PAGE… IV. SHARPNESS: Adjust the SHARPNESS level of full screen by setting the “GAIN” level from -8 ~8. Select “ HORIZONTAL” for adjusting H. SHARPNESS only. In the high light environment, select “ HIGH LIGHT APTURE”, then set “ON”...
-
Page 19: Save/Restore
8. SAVE/RESTORE EWD600 MAIN MENU PRESETMODE INDOOR… CAMERA ID ADVANCED SETUP… > SAVE/RESTORE… EXIT MENU I. RESTOER USER SETTINGS Restore the previous user settings from memory. Press SET button to restore user setting. II. SAVE USER SETTINGS Save USER SETTINGS into the camera memory. Press SET button to save user setting. - Page 20 Appendix-A CAMERA ID Character patterns...
- Page 21 FACTORY SETTINGS CHART PRESET MODE INDOOR WDR MODE METER MODE CAMERA ID ADVANCED SETUP AUTO IRIS WHITE BALANCE LINELOCK VIEWING SHARPNESS CAMERA VIEW SLOW SHUTTER AUTO NORMAL GAIN THRESHOLD COLOR TEMP SPEED AUTO V.PHASE BRIGHTNESS CHROMA GAMMA GAIN HORIZOTAL HIGH LIGHT APTURE MIRROR COLOR BAR Appendix-B...
- Page 22 EverFocus Electronics Corp. Head Office 12F, No.79, Sec.1, Shin-Tai Wu Road, Hsi-Chi, Taipei Hsien, Taiwan Tel:886-2-26982334 Fax:886-2-26982380 e-mail: marketing@everfocus.com.tw Website: http://www.everfocus.com.tw USA Office 2445 Huntington Drive, San Marino, CA 91108, U.S.A. Tel: (626)844-8888 Fax:(626)844-8838 e-mail: info@everfocus.com Website: http://www.everfocus.com Germany Office...
Need help?
Do you have a question about the EQ600 WDII and is the answer not in the manual?
Questions and answers