
Related Manuals for ehang Falcon-B410


Summary of Contents for ehang Falcon-B410
- Page 1 Falcon-B410 User Manual Please read carefully this user guide and keep it well for further reference if necessary.
- Page 2 (+86)020-29028899. www.ehang.com www.twitter.com/ehang www.facebook.com/theghostdrone www.instagram.com/ehang.official/ forum.ehang.com Thank you, and enjoy your Falcon-B410! www.ehang.com Business Hour: (GMT+8)9:00am-6:00pm,Monday to Friday Customer Service Phone: (+86)020-29028899 Customer Service Email: service@ehang.com Guangzhou EHang Intelligent Technology Co., Ltd. reserves the right to interpret this Operating Manual.
-
Page 3: Table Of Contents
Communication Box Use and Charging Diagram -------------------------------------------------------------------11 How to Use ---------------------------------------------------------------11 Charging ------------------------------------------------------------------11 Maintenance Propeller Maintenance -------------------------------------------------12 Battery Storage and Maintenance ----------------------------------12 Landing Gear Maintenance ------------------------------------------13 Tablet Model and Specs ------------------------------------------------------ 14 EHANG Pro Installation ---------------------------------------------- 14 SIM Card Installation -------------------------------------------------- 15... - Page 4 EHANG Pro Configuration and Application Acquiring Registration Code ---------------------------------------- 16 Connecting Devices --------------------------------------------------- 16 WiFi Mode --------------------------------------------------------------- 16 SIM Card 4G Mode ---------------------------------------------------- 16 Flight Control Interfaces Interfaces Introduction ---------------------------------------------- 20 Flight Settings ----------------------------------------------------------- 22 Acquiring Image Transmission ------------------------------------- 23...
-
Page 5: Know Before You Fly
Laws & Regulations With a curb weight of 4-15 kg and a takeoff weight of 7-25 kg, Falcon-B410 is categorized into the Ⅲ class of civil UAV. It is governed and bound by the Civil Aviation Law (2015 Amendment) of the People’s Republic of China amended and issued by the NPC Standing Committee on April 24th,... -
Page 6: Warnings
Warnings Please note the following warnings Before flying, please read carefully relevant documents issued by the International Civil Aviation Organization (ICAO) and local aviation authorities regarding the management of local air space and unmanned aircraft operation. Users are liable for any actions against the national laws due to the violation of relevant regulations and any personal injuries or property damages caused by noncompliance with the instructions and warnings of this manual, and all ensuing legal liability is solely theirs. -
Page 7: Aircraft Introduction
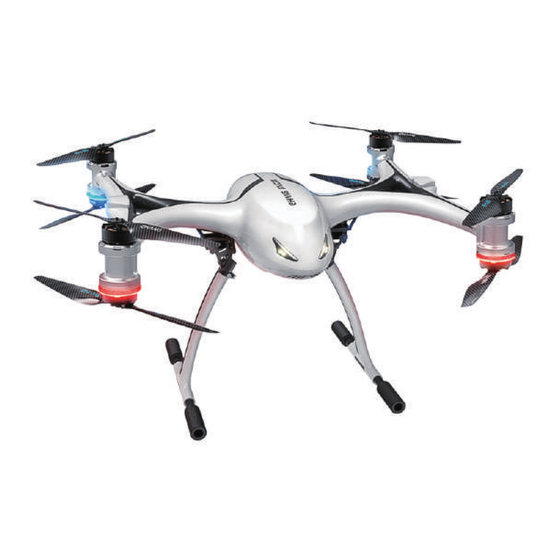
Aircraft Introduction Specially designed for industrial applications, Falcon-B410 is a high-performance drone that can be used in multiple scenarios including inspections, mapping, forest firefighting, transportation and professional aerial shooting. With 4 axes and 8 propellers, the drone’s airframe is made up of carbon fiber materials of extremely high specific strength, ensuring its strength and stiffness while reducing the weight to a maximum extent. - Page 8 Aircraft Introduction 用户手册 天鹰-B400 实名 登记 指引 USB cable*1 Lubricant*1 Real-name Registration User Guide*1 Guide*1 Accessory Kit*1 Fireproof Box*1 A4 Adhesive Label*1 The accessory kit includes: USB cable*1, Hex key*1, 2mm screw*10, 2-M4*25, screw*4, round gasket*8. The USB cable can be used to charge the ground station. Each drone comes with one tablet.
-
Page 9: Propeller Installation And Removal
Falcon-B410 uses dual-blade 19-inch carbon fiber propellers, each drone comes with 8 dual-blade propellers. Signs The propellers are distinguished by the silver and blue “EHANG” logo. The propellers with silver “EHANG” rotate clockwise, while those with blue “EHANG” rotate anticlockwise. -
Page 10: Battery Charging And Use
The smart flight battery uses 12S lithium polymer battery with a capacity of 15000 mAh and a voltage of 44.4 V. Charging of the flight battery must use the proprietary EHANG power adapter. Battery Diagram... -
Page 11: How To Use
Battery Charging and Use Step 1: Connecting Use the power adaptor to connect the battery with the power source. Press twice and hold the button to turn on the battery. Step 2: Turning on the battery Press the mode selection button shortly to select the charging mode (Storage Step 3: Select charging mode charging mode is not applicable for batteries with voltages above 46V). -
Page 12: Unfolding
Unfolding and Folding the Landing Gear Unfolding Loosen the two straps and pull the landing gear downward to the maximum extent, then lock the clamp. Folding 1. Unlock the clamp and pull upward to fold landing 2. In case the two landing gears are unbalanced, gear, then tighten the strap. -
Page 13: Gimbal Installation And Removal
Gimbal Installation and Removal Diagram The gimbal and the communication module are mounted on the bottom of the drone. Unfold the antennas as shown below when flying the drone. Communication Module Gimbal Installation 2. Match the gimbal grooves to the screws as 1. -
Page 14: Removal
Gimbal Installation and Removal Removal 3. As shown below, follow the arrow direction to push and tighten the gimbal to the drone. 1. Untie the cables that connect the gimbal respectively with the drone and the communica- tion module. 4. Turn clockwise and tighten the screws on the two sides of the gimbal. -
Page 15: Communication Box Use And Charging
Communication Box Use and Charging Communication Box is the communication device that transmits signals for EHANG Falcon B-410, and it connects EHANG Pro with the Falcon via Wi-Fi. It is recommended to keep it within 3 meters from the tablet to ensure optimum signals. -
Page 16: Maintenance
EHANG power adaptor. batteries. 2. DO NOT use any non-EHANG batteries. EHANG 5. Please maintain the battery level at 50%-60% bears no liability for any incident caused by using when the battery is to be left unused for a long non-EHANG batteries. -
Page 17: Landing Gear Maintenance
Maintenance Maintenance of Landing Gears Maintenance is required as the foldable parts of the landing gears are connected by axes. Adding lubricants is the main maintenance method. Lubrication process: 1. Add a small amount of lubricants to the positions marked below as well as to the axes joints. 2. -
Page 18: Tablet
Note: The default installation directory is C:\Program Files (x86)\ EHANG Pro. 1. Tap “next” until the software is successfully installed, then tap “OK”, a EHANG Pro icon will appear on the desktop and the software will start running in default. -
Page 19: Sim Card Installation
Tablet 2. When running EHANG Pro for the first time, you’ll see a popup window where you can type in the registra- tion code. 3. Type in the registration code and tap “OK”, when successfully verified, the page will automatically redirect to the main interface. -
Page 20: Ehang Pro Configuration And Application
EHANG Pro Software Configuration and Application Acquire Registration Code The registration codes are provided by EHANG, also applicable for registration in computers. Each registra- tion code can only be used for limited times, please keep your code well. Connect Devices There are two ways to connect a drone with the software. - Page 21 EHANG Pro Software Configuration and Application 5. Tap “+” to connect drone as indicated. 8. After successfully connected, the page will redirect to the main interface. 6. Tap the Dropdown icon as indicated. 9. Back to the main interface, check whether the...
- Page 22 EHANG Pro Software Configuration and Application Falcon+ Software 4G Connection Falcon EHANG Pro 1. Turn on the drone: Place the drone on a flat 3. Open the software: Tap the software icon to open surface. Press twice and hold the power button until the software.
- Page 23 Check whether the GPS positioning aligns with 6. To use 4G connection mode, tap “Customer IP”, the drone's current position. enter the IP address provided by EHANG in the new interface, tap “OK”, then tap “Connect”, wait for several seconds until it automatically finishes...
-
Page 24: Interfaces Introduction
Flight Control Interface Introduction Interfaces Introduction 1 2 2 Drone 1 27 28 21 22 26 25 24 23 Software Version Camera image transmission and map switching button The Ribbon 2 Small Icons Status Bar Download map Load offline map Add Drone Locate laptop position Drone position... - Page 25 Flight Control Interface Introduction Flight distance from the takeoff point Unlock button: tap to check whether the propellers 22 26 are functioning normally. Roll angle; Pitch angle 23 Gimbal yaw slide bar: slide leftward/rightward to 27 adjust yaw angle (auto reset to default) Maintain the initial flight altitude 24 Add current flight position to favorite waypoint...
-
Page 26: Flight Settings
Flight Parameters Settings Tap to unfold the “Flight Settings” on the right, set the flight parameters based on your requirements. 1. Strategy of Lost Contact: the drone’ s next move after losing connection. Recommend to select “Return”. 2. Takeoff Height: The altitude to which the drone ascends after takeoff. It will hover at that altitude to wait for the next command. -
Page 27: Acquiring Image Transmission
Acquire Image Transmission Type in Image Transmission Address Tap “Image Transmission Address” and type in the image transmission address. There are two kinds of image transmission addresses for Falcon-B400. WIFI Mode The image transmission IP address of the zoom camera is: ehc://192.168.43.11/2, click “Connect” to acquire image transmission. -
Page 28: Unlocking To Take Off
Unlock to Take off Before unlocking, make sure the surrounding environment is safe and spacious without interferences, and more than 14 satellites can be detected. Tap the “Unlock” button, the propellers and motors will start spinning. Check whether the motors/propel- lers are rotating in correct directions and normal speed. -
Page 29: Touch-To-Go Flight
Touch-to-Go Mode Adjust the flight altitude via the altitude adjustment bar at the bottom right corner, then select (single tap the map) the flight destination on the map, tap the “Go” that appears on your selected point, the drone will fly towards the destination. The blue line represents the preset flight path, and the white line represents the route already covered by the drone. - Page 30 Touch-to-Go Mode If you want to modify the flight path during flight, tap the “Hover” button first, then tap the new destina- tion on the map and tap “Go”.
-
Page 31: Flight Plan
Flight Plan Step 1: Tap “+” to create new flight paths. Step 4: Unfold the “Property” tab and set the flight missions at the waypoint based on your needs. Step 2: Tap “Rename” on the top right corner to change the Step 5: Tap “+”... - Page 32 Flight Plan Step 7: If the flight path involves three waypoints, you need to Add Favorite Waypoints add a fourth waypoint. Tap to adjust its “Properties” by setting Select the waypoint to be replaced, tap “Import Favorite Way- this waypoint as a flight mission, such as “Return”. point”...
-
Page 33: Favorite Waypoints
Flight Plan Favorite Waypoints (3) Tap “+” or double tap on the map to add new waypoints. You can save the frequently-used waypoints or import the saved waypoints to your flight plan. (1) Tap “Favorite Waypoints” on the flight control interface, tap “Add”... -
Page 34: Photos And Videos
Photography and Recording Select photography/recording mode Photo/Video: Select “Photo” mode and tap the “Photo” button to take photos. Select “Video” mode and tap “Video” to record videos, to stop recording, just tap the button again. Note: Slide the slide bar to adjust the gimbal angle when taking photos or recording videos. Gimbal yaw slide bar: slide leftward or rightward to modify the yaw angle (automatically reset to default);... - Page 35 Check the Album Tap the icon as indicated to enter the Album. The photos exported via the “Album” function will be tagged with relevant information such as GPS positioning and time.
-
Page 36: Renaming Aircraft
Renaming the Drone and Compass Calibration Renaming the Drone to enter the Rename interface, edit the name, then tap “OK”. Compass Calibration Step 1: To ensure safety, please remove all the propel- lers. drone nose drone nose To ensure the safety of personnel and the aircraft from damage, please remove the paddles before calibration. - Page 37 Renaming the Drone and Compass Calibration Step 4: You’ll see either of the following two results after Step 2: As shown in the picture, hold the drone horizon- calibration. tally with its nose pointing away from you, spin with the drone until the grey circle is filled with blue dots, then Result 1: “Verify successful”...
-
Page 38: Settings
Settings Below are basic settings of software/system. Please refer to the “Flight Control” section for settings of flight parameters. Legends: “PTZ slider for yaw auto to middle” On. “PTZ Language: Simplified Chinese/English. slider for pitch auto to middle” Off. Latitude and longitude format: select the display format of longitude/latitude based on your personal needs. -
Page 39: Pre-Flight Check And Flight Tips
Pre-flight Check and Flight Tips Pre-flight Check 1. Check whether the battery level suffices the flight. 2. Check whether any propeller is damaged. 3. Check the gimbal is properly connected. 4. The drone should be placed on a flat surface with a distance above 50m from any obstacle. 5. -
Page 40: Aircraft
Technical Specifications Falcon Communication Box Exterior Dimensions 134*92*34 mm Drone Body Materials Weight Carbon-fiber composite 300 g Height 506 mm Communication 4G + WiFi Width 770 mm Length Voltage 680 mm 3.7 V LiPo Battery Type 912 mm Shaft Distance 3400 mAh Operating Environment Capacity... -
Page 41: Thermal Imaging Camera
Technical Specifications Infrared thermal imaging camera & gimbal Infrared thermal imaging camera Weight <65g or 45g (excluding lens, including lens mount) Effective Pixels 640×480 Storage Function Support TF memory card storage of infrared images/videos and infrared data Operating Voltage DC 5~12V Operating Temperature -40℃~+60℃... -
Page 42: Tablet
Technical Specifications Tablets Chipset Intel Lynx Point Intel Haswell ULX Y series CPU Processor Type Memory Capacity 4 GB / 8 GB Communication Network Adaptor WLAN, LTE, HSPA+ LCD Screen Size 10.8-inch HD Dimension 250.20*149.25 mm Diagonal:239.04 mm 1920 x 1080 Pixels Max Resolution Front Camera OV 2722 (2 Megapixels) - Page 43 w w w . e h a n g . c o m E N T E R P R I S E S T A N D A R D : Q / E H T 0 0 1 - 2 0 1 7 G u a n g z h o u E H a n g I n t e l l i g e n t T e c h n o l o g y C o .
Need help?
Do you have a question about the Falcon-B410 and is the answer not in the manual?
Questions and answers