Clear-Com Eclipse HX User Manual
Hide thumbs
Also See for Eclipse HX:
- Installation manual (86 pages) ,
- Upgrade manual supplement (16 pages) ,
- Quick start manual (4 pages)
Table of Contents
Advertisement
Quick Links
Download this manual
See also:
Installation Manual
Advertisement
Table of Contents

Subscribe to Our Youtube Channel
Related Manuals for Clear-Com Eclipse HX


Summary of Contents for Clear-Com Eclipse HX
- Page 1 User Guide Eclipse ® Upgrade Guide Part Number:399G282 Rev A Date:06 February 2019 Page 1...
- Page 2 Legal Disclaimers Copyright © 2019 HME Clear-Com Ltd. All rights reserved. Clear-Com and the Clear-Com logo are trademarks or registered trademarks of HM Electronics, Inc. The software described in this document is furnished under a license agreement and may be used only in accordance with the terms of the agreement.
-
Page 3: Table Of Contents
Mains power cord ..................8 Introduction ............... 9 Planning the upgrade to Eclipse HX ............9 Quick reference: Upgrading to Eclipse HX v11.0 ....18 Upgrading from 5.2.5 ................. 18 Upgrading from 7.0 ................22 Upgrading from 7.1 ................25 Upgrading from 7.5 ................ - Page 4 Upgrading the Eclipse HX-PiCo MVX code..........111 Checking the Eclipse HX-PiCo app code and MVX code versions ..... 119 Upgrading the Eclipse HX-PiCo CPLD and FPGA code with Xilinx tools ..120 Download a test configuration into the Eclipse HX-PiCo using EHX ..123 Forcing the Eclipse HX-PiCo to the factory default IP address ....
- Page 5 Appendix A: CPU card layout ..........226 Appendix B: CPU card DIP switches ........227 Appendix C: PiCo card layout ..........229 Appendix D: Eclipse HX-PiCo CPU DIP switches ....230 Appendix E: Hitachi Renesas Flash Development Tool ..232 Appendix F: TFTPUtil ............238 Appendix G: Tera Term ............
- Page 6 Eclipse | Upgrade Guide Appendix I: i-Station converter cable wiring and rear panel layouts Appendix J: Xilinx tools ............249 Appendix K: Clear-Com End User Software License ... 250 ® Page 6...
-
Page 7: Important Safety Instructions
Eclipse | Upgrade Guide Important Safety Instructions Read these instructions. Keep these instructions. Heed all warnings. Follow all instructions. Do not use this apparatus near water. Clean only with dry cloth. Do not block any ventilation openings. Install in accordance with the manufacturer’s instructions. -
Page 8: Safety Symbols
Figure 1-1: Safety symbols Mains power cord Eclipse HX matrices are powered by an internal power supply. The cord to connect the internal power supply to the mains supply must conform to the following: The mains power cord shall have an IEC C13 connector at one end and a •... -
Page 9: Introduction
Eclipse | Upgrade Guide Introduction This guide describes how to upgrade from ECS v5.2.5 to Eclipse HX v11.0, a software release for the Clear-Com Eclipse HX™ digital matrix system (standalone or networked). This guide additionally identifies the simpler upgrade from v7.x/v8.x/v9.x/v10.x to v11.0. - Page 10 Once both cards are upgraded insert both cards and re-download the frame configuration. • Great care must be taken when opening the lid of the Eclipse HX-PiCo matrix to upgrade components. This may invalidate UL status.
- Page 11 Temporary roll back strategy If you want to roll back to the previously running version for a temporary period only, before making another attempt to upgrade to Eclipse HX v11.0, then you may implement the following temporary roll back strategy: Leave all cards and panels at Eclipse HX v11.0...
- Page 12 System Drivers Upgrade Media The System Drivers upgrade media contains the latest firmware for your Eclipse HX devices, including Boot PROM and FPGA / CPLD code files for Eclipse HX matrices, interface cards, interface modules and supported panels (i-Station and V-Series panels).
- Page 13 Eclipse | Upgrade Guide To replace the Eclipse branded door with the Eclipse HX door: Remove the two screws securing the Eclipse door (and hinge) unit to the Eclipse matrix. Retain the screws. Figure 2-1: Screws securing the Eclipse door (and hinge) unit Remove the four screws securing the hinge to the existing door unit.
- Page 14 Eclipse HX door). Latch-mount surface Figure 2-4: Latch-mount surface, inside the Eclipse HX door To attach the Eclipse HX door to the matrix, secure the hinge to the matrix using the two screws retained from Step 1. Page 14...
- Page 15 Eclipse | Upgrade Guide Figure 2-5: Attaching the Eclipse HX door to the matrix Open the door. Insert the latch (a separate item from the door unit) into the latch receptacle on the chassis. The latch receptacle is located to the bottom left of the area enclosed by the door.
- Page 16 Close the door. Press down firmly on the bottom left of the door, so that the latch adheres firmly to the latch-mount surface inside the door. Open the door again and remove the white plastic protector from the latch. The Eclipse HX door has now been fitted to the matrix. Page 16...
- Page 17 Clear-Com Technical Support • (http://www.clearcom.com/contact/support-contacts). • Your Clear-Com sales representative, to arrange for an engineer to visit your site and assist you with the upgrade. See page 2 of this guide for contact email addresses, or go to http://www.clearcom.com/contact/sales-contacts. Page 17...
-
Page 18: Quick Reference: Upgrading To Eclipse Hx V11.0
The table lists the procedures in the order in which they must be carried out. To go to a procedure, click the cross-reference / link. Important note: If you are upgrading to Eclipse HX 11.0 and are using an E-IPA-HX card, see the FreeSpeak II IP Transceiver Quick Start Guide for information about IP setup and configuration. - Page 19 Eclipse | Upgrade Guide Order System component Upgrade procedure(s) Notes 11.4 Upgrading the E-MADI64 FPGA using the Xilinx tool set (Note – if the E-MADI64 card is upgraded before the CPU Card then there is no E-MADI card LED activity during the upgrade.
- Page 20 6.4.4 Upgrading the Eclipse HX-PiCo main application code using factory only upgrade. EHX with Ethernet 6.5.2 Upgrading the Eclipse HX-PiCo MVX boot and/or app code using the Renesas FDT 6.7 Upgrading the Eclipse HX-PiCo CPLD and FPGA code with Xilinx tools AES-6 No upgrade required. EHX configuration / 4.1 Backing up your ECS v5.2.5 configurations...
- Page 21 This section details how to install the Dynam- EC client only on a machine i.e. where only the dynamic online matrix audio monitoring and control is required. Table 3-1: Procedures for upgrading from ECS v5.2.5 to Eclipse HX v11.0 Page 21...
-
Page 22: Upgrading From 7.0
The table lists the procedures in the order in which they must be carried out. To go to a procedure, click the cross-reference / link. Important note: If you are upgrading to Eclipse HX 11.0 and are using an E-IPA-HX card, see the FreeSpeak II IP Transceiver Quick Start Guide for information about IP setup and configuration. - Page 23 Splitter MVX-A16 card 7.2.2 Upgrading the MVX-A16 boot and app code using the Renesas Clear-Com recommends upgrading the MVX boot and application code using the 7.4 Upgrading the MVX-A16 MK I or MK II card FPGA with Xilinx combined MVX boot and tools application code file.
- Page 24 Dynam- EC client only on a machine i.e. where only the dynamic online matrix audio monitoring and control is required. Table 3-2: Procedures for upgrading from Eclipse HX v7.0 to Eclipse HX v11.0 Page 24...
-
Page 25: Upgrading From 7.1
The table lists the procedures in the order in which they must be carried out. To go to a procedure, click the cross-reference / link. Important note: If you are upgrading to Eclipse HX 11.0 and are using an E-IPA-HX card, see the FreeSpeak II IP Transceiver Quick Start Guide for information about IP setup and configuration. - Page 26 Splitter MVX-A16 card 7.2.2 Upgrading the MVX-A16 boot and app code using the Renesas Clear-Com recommends upgrading the MVX boot and application code using the 7.4 Upgrading the MVX-A16 MK I or MK II card FPGA with Xilinx combined MVX boot and tools application code file.
- Page 27 Dynam- EC client only on a machine i.e. where only the dynamic online matrix audio monitoring and control is required. Table 3-3: Procedures for upgrading from Eclipse HX v7.1 to Eclipse HX v11.0 Page 27...
-
Page 28: Upgrading From 7.5
The table lists the procedures in the order in which they must be carried out. To go to a procedure, click the cross-reference / link. Important note: If you are upgrading to Eclipse HX 11.0 and are using an E-IPA-HX card, see the FreeSpeak II IP Transceiver Quick Start Guide for information about IP setup and configuration. - Page 29 Beltpack / Antenna / Splitter MVX-A16 card 7.2.2 Upgrading the MVX-A16 boot and app code using the Renesas Clear-Com recommends upgrading the MVX boot and application code using the 7.4 Upgrading the MVX-A16 MK I or MK II card FPGA with Xilinx...
-
Page 30: Upgrading From 7.6
Table 3-4: Procedures for upgrading from Eclipse HX v7.5 to Eclipse HX v11.0 Upgrading from 7.6 The following table lists the procedures that you will require to upgrade from Eclipse HX v7.6 to Eclipse HX v11.0. Important note: Page 30... - Page 31 The table lists the procedures in the order in which they must be carried out. To go to a procedure, click the cross-reference / link. Important note: If you are upgrading to Eclipse HX 11.0 and are using an E-IPA-HX card, see the FreeSpeak II IP Transceiver Quick Start Guide for information about IP setup and configuration.
- Page 32 See the Drivers USB. MK II (Blue) card only Eclipse HX-PiCo 6.4.1 Upgrading the Eclipse HX-PiCo secondary bootloader code 6.4.4 Upgrading the Eclipse HX-PiCo main application code using EHX with Ethernet AES-6 No upgrade required. Page 32...
-
Page 33: Upgrading From 8.0
Table 3-5: Procedures for upgrading from Eclipse HX v7.6 to Eclipse HX v11.0 Upgrading from 8.0 The following table lists the procedures that you will require to upgrade from Eclipse HX v8.0 to Eclipse HX v11.0. Important note: The table lists the procedures in the order in which they must be carried out. To go to a procedure, click the cross-reference / link. - Page 34 Eclipse | Upgrade Guide Important note: If you are upgrading to Eclipse HX 11.0 and are using an E-IPA-HX card, see the FreeSpeak II IP Transceiver Quick Start Guide for information about IP setup and configuration. Order System component Upgrade procedure(s)
- Page 35 7.4 Upgrading the MVX-A16 MK I or MK II card FPGA with Xilinx MK II (Blue) card only tools Eclipse HX-PiCo 6.4.1 Upgrading the Eclipse HX-PiCo secondary bootloader code 6.4.4 Upgrading the Eclipse HX-PiCo main application code using EHX with Ethernet AES-6 No upgrade required. EHX configuration / 4.2 Backing up your EHX 7.x/8.x/9.x/10.x configurations...
-
Page 36: Upgrading From 8.5
The table lists the procedures in the order in which they must be carried out. To go to a procedure, click the cross-reference / link. Important note: If you are upgrading to Eclipse HX 11.0 and are using an E-IPA-HX card, see the FreeSpeak II IP Transceiver Quick Start Guide for information about IP setup and configuration. - Page 37 E-QUE card 9.1 Identifying MK1 and MK2 E-QUE cards The procedures used to upgrade IVC-32 card E-QUE cards to Eclipse HX v11.0 LMC-64 card 9.2 Upgrading the E-QUE card (MK1 and MK2) via EHX can also be used to upgrade IVC- 32 and LMC-64 cards.
- Page 38 7.4 Upgrading the MVX-A16 MK I or MK II card FPGA with Xilinx MK II (Blue) card only tools Eclipse HX-PiCo 6.4.1 Upgrading the Eclipse HX-PiCo secondary bootloader code 6.4.4 Upgrading the Eclipse HX-PiCo main application code using EHX with Ethernet AES-6 No upgrade required. EHX configuration / 4.2 Backing up your EHX 7.x/8.x/9.x/10.x configurations...
-
Page 39: Upgrading From 8.5.1
The table lists the procedures in the order in which they must be carried out. To go to a procedure, click the cross-reference / link. Important note: If you are upgrading to Eclipse HX 11.0 and are using an E-IPA-HX card, see the FreeSpeak II IP Transceiver Quick Start Guide for information about IP setup and configuration. - Page 40 Eclipse | Upgrade Guide Order System component Upgrade procedure(s) Notes E-MADI64 card 11.3 Upgrading the E-MADI64 application, DSP and FPGA code MADI FPGA upgrade only using EHX 11.4 Upgrading the E-MADI64 FPGA using the Xilinx tool set E-FIB card No upgrade required. Uboot V-Series 15.4 Manually upgrading V-Series Panels...
- Page 41 System component Upgrade procedure(s) Notes Eclipse HX-PiCo 6.4.1 Upgrading the Eclipse HX-PiCo secondary bootloader code 6.4.4 Upgrading the Eclipse HX-PiCo main application code using EHX with Ethernet AES-6 No upgrade required. EHX configuration / 4.2 Backing up your EHX 7.x/8.x/9.x/10.x configurations Dynam-EC software 4.3 Installing EHX and Dynam-EC Clients...
-
Page 42: Upgrading From 8.5.2
The table lists the procedures in the order in which they must be carried out. To go to a procedure, click the cross-reference / link. Important note: If you are upgrading to Eclipse HX 11.0 and are using an E-IPA-HX card, see the FreeSpeak II IP Transceiver Quick Start Guide for information about IP setup and configuration. - Page 43 Eclipse | Upgrade Guide Order System component Upgrade procedure(s) Notes E-FIB card No upgrade required. Uboot V-Series 15.4 Manually upgrading V-Series Panels panels Kernel Root file system App code 15.4 Manually upgrading V-Series Panels Display 15.1 Upgrading panels using EHX module i-Station No upgrade required.
- Page 44 EC client only on a machine i.e. where only the dynamic online matrix audio monitoring and control is required. FreeSpeak II Beltpack, 18 Upgrading FreeSpeak II™ wireless systems Antenna Transceiver Table 3-9: Procedures for upgrading from Eclipse HX v8.5.2 to Eclipse HX v11.0 Page 44...
-
Page 45: Upgrading From 8.7
The table lists the procedures in the order in which they must be carried out. To go to a procedure, click the cross-reference / link. Important note: If you are upgrading to Eclipse HX 11.0 and are using an E-IPA-HX card, see the FreeSpeak II IP Transceiver Quick Start Guide for information about IP setup and configuration. - Page 46 Splitter MVX-A16 card No upgrade required. Eclipse HX-PiCo 6.4.1 Upgrading the Eclipse HX-PiCo secondary bootloader code 6.4.4 Upgrading the Eclipse HX-PiCo main application code using EHX with Ethernet AES-6 No upgrade required. EHX configuration / 4.2 Backing up your EHX 7.x/8.x/9.x/10.x configurations Dynam-EC software 4.3 Installing EHX and Dynam-EC Clients...
- Page 47 EC client only on a machine i.e. where only the dynamic online matrix audio monitoring and control is required. FreeSpeak II Beltpack, 18 Upgrading FreeSpeak II™ wireless systems Antenna Transceiver Table 3-10: Procedures for upgrading from Eclipse HX v8.7 to Eclipse HX v11.0 Page 47...
-
Page 48: Upgrading From 8.8
The table lists the procedures in the order in which they must be carried out. To go to a procedure, click the cross-reference / link. Important note: If you are upgrading to Eclipse HX 11.0 and are using an E-IPA-HX card, see the FreeSpeak II IP Transceiver Quick Start Guide for information about IP setup and configuration. - Page 49 Splitter MVX-A16 card No upgrade required. Eclipse HX-PiCo 6.4.1 Upgrading the Eclipse HX-PiCo secondary bootloader code 6.4.4 Upgrading the Eclipse HX-PiCo main application code using EHX with Ethernet AES-6 No upgrade required. EHX configuration / 4.2 Backing up your EHX 7.x/8.x/9.x/10.x configurations Dynam-EC software 4.3 Installing EHX and Dynam-EC Clients...
- Page 50 FreeSpeak II Beltpack, 18 Upgrading FreeSpeak II™ wireless systems Antenna Transceiver E-DANTE64-HX Card 12 Upgrading E-DANTE64-HX cards FPGA and Module upgrade only. Table 3-11: Procedures for upgrading from Eclipse HX v8.8 to Eclipse HX v11.0 Page 50...
-
Page 51: Upgrading From 9.0
The table lists the procedures in the order in which they must be carried out. To go to a procedure, click the cross-reference / link. Important note: If you are upgrading to Eclipse HX 11.0 and are using an E-IPA-HX card, see the FreeSpeak II IP Transceiver Quick Start Guide for information about IP setup and configuration. - Page 52 No upgrade required. Beltpack / Antenna / Splitter MVX-A16 card No upgrade required. Eclipse HX-PiCo 6.4.1 Upgrading the Eclipse HX-PiCo secondary bootloader code 6.4.4 Upgrading the Eclipse HX-PiCo main application code using EHX with Ethernet AES-6 No upgrade required. Page 52...
- Page 53 Upgrading FreeSpeak II™ wireless systems FreeSpeak II Beltpack, Antenna Transceiver E-DANTE64-HX Card 12 Upgrading E-DANTE64-HX cards FPGA and Module upgrade only. Table 3-11: Procedures for upgrading from Eclipse HX v8.8 to Eclipse HX v11.0 Page 53...
-
Page 54: Upgrading From 9.1
The table lists the procedures in the order in which they must be carried out. To go to a procedure, click the cross-reference / link. Important note: If you are upgrading to Eclipse HX 11.0 and are using an E-IPA-HX card, see the FreeSpeak II IP Transceiver Quick Start Guide for information about IP setup and configuration. - Page 55 No upgrade required. Beltpack / Antenna / Splitter MVX-A16 card No upgrade required. Eclipse HX-PiCo 6.4.1 Upgrading the Eclipse HX-PiCo secondary bootloader code 6.4.4 Upgrading the Eclipse HX-PiCo main application code using EHX with Ethernet AES-6 No upgrade required. Page 55...
- Page 56 Eclipse | Upgrade Guide Order System component Upgrade procedure(s) Notes EHX configuration / 4.2 Backing up your EHX 7.x/8.x/9.x/10.x configurations Dynam-EC software 4.3 Installing EHX and Dynam-EC Clients 4.4 Importing your configurations into EHX CPU card 5.4 Upgrading the CPU card secondary bootloader and application code Dynam-EC 4.5 Updating Dynam-EC...
-
Page 57: Upgrading From 10.0
The table lists the procedures in the order in which they must be carried out. To go to a procedure, click the cross-reference / link. Important note: If you are upgrading to Eclipse HX 11.0 and are using an E-IPA-HX card, see the FreeSpeak II IP Transceiver Quick Start Guide for information about IP setup and configuration. - Page 58 Splitter MVX-A16 card No upgrade required. E-IPA card 14 Upgrading E-IPA-HX cards Eclipse HX-PiCo 6.4.4 Upgrading the Eclipse HX-PiCo main application code using EHX with Ethernet AES-6 No upgrade required. EHX configuration / 4.2 Backing up your EHX 7.x/8.x/9.x/10.x configurations Dynam-EC software 4.3 Installing EHX and Dynam-EC Clients...
- Page 59 Eclipse | Upgrade Guide Order System component Upgrade procedure(s) Notes CPU card 5.4 Upgrading the CPU card secondary bootloader and application Application code only. code Dynam-EC Updating Dynam-EC is also installed as part of the EHX/Dynam-EC combined installer. This section details how to install the Dynam- EC client only on a machine i.e.
-
Page 60: Upgrading To Eclipse Hx V11.0
Eclipse | Upgrade Guide Upgrading to Eclipse HX v11.0 This chapter describes the files you require to install Eclipse HX v11.0. It also describes how to back up your ECS 5.2.5 configurations and import them into Eclipse HX v11.0 Important notes: This guide is laid out in the order in which you must upgrade your Eclipse software and hardware devices to Eclipse 11.x. -
Page 61: Importing Your Configurations Into Ehx
The installer for the server version of EHX (both 32 and 64 bit machines). The EHX Server enables multiple EHX clients to work together when configuring an Eclipse HX system. Table 4-1: Installing EHX Note: If you are required to uninstall and re-install EHX for any reason, ensure to save your configurations for re-importing into EHX (see section below). -
Page 62: Updating Dynam-Ec
Browse. To continue, click Next. The Choose Start Menu Folder dialog is displayed. The default Start Menu folder is Clear-Com\Dynam-EC. To select an alternative folder either: Select from the list of existing Start Menu folders. Use the dialog scroll bar •... -
Page 63: Upgrading The Cpu Cards
Eclipse HX-Omega and Eclipse HX-Delta matrices. Note: This guide is laid out in the order in which you must upgrade your Eclipse HX software and hardware devices. For a quick reference to upgrading your system, see 3Quick reference: Upgrading to Eclipse HX. -
Page 64: Changing The Cpu Card Ram
To change the CPU card RAM (from 128Mb to 256Mb): Ensure that you have the replacement 256Mb CPU card RAM to hand. Remove the CPU card from the Eclipse HX-Median, Eclipse HX-Omega or Eclipse HX-Delta matrix. The cassette that holds the CPU card RAM daughter board is located towards the... -
Page 65: Changing The Cpu Card Dip Switches
Return the CPU card to the Eclipse HX-Median, Eclipse HX-Omega or Eclipse HX- Delta matrix. Changing the CPU card DIP switches To change the CPU card DIP switches to the appropriate Eclipse HX v11.0 settings, see either: • Appendix B: CPU card DIP switches •... - Page 66 In EHX, select File > Import project. Navigate to the configuration file (*.ccn or *.hxn format) and click Open to import the file. Select System > Layout. In the work area, right click the Eclipse HX-Median / Eclipse HX-Omega / Eclipse HX-Delta matrix.
- Page 67 Next again. In the next dialog, click Browse and navigate to the required *.fwr file for the Eclipse HX-Omega / Eclipse HX-Median / Eclipse HX-Delta CPU card application: a. Go to Software USB > SOFTWARE - EHX.xxx > SOFTWARE - EHX.xxx >...
- Page 68 You can upgrade the CPU card secondary bootloader with EHX using a serial link, whether or not there is a valid configuration (map) on the Eclipse HX-Median / Eclipse HX-Omega matrix / Eclipse HX-Delta. Both CPU cards may remain inserted during the upgrade.
- Page 69 Note: EHX can open *.ccn format files as well as its own *.hxn format configuration files. Select System > Layout. In the work area, right click the Eclipse HX-Median / Eclipse HX-Omega / Eclipse HX-Delta matrix. From the menu, select Firmware > Update Firmware.
- Page 70 While the update is in progress, check that the S1 LED on the front of the CPU card(s) is flashing rapidly. Rapid flashes indicate communication with the PC. The Eclipse HX-Median / Eclipse HX-Omega / Eclipse HX-Delta (matrix) matrix reboots. The CPU card(s) is reset.
- Page 71 D-Type) Tera Term installation Tera Term must be configured and operational. You can find the Tera Term application on both of the Eclipse HX upgrade media: Software USB > SOFTWARE - EHX.xxx > SOFTWARE - EHX.xxx > 3rd_Party_Software > Teraterm Drivers USB >...
- Page 72 Eclipse | Upgrade Guide Figure 5-5: Tera Term: selecting serial connection Figure 5-6: Tera Term: selecting Serial port From the Setup menu, select the Serial port… entry. The Serial port configuration dialog is displayed. Configure the serial port as follows: Field Data (to enter / select) Port...
- Page 73 To save and recall the relevant com port settings in Tera Term, select the Setup / Save or Restore settings options. Connect the PC serial port to the RS232 port on the rear of the Eclipse HX- Median / Eclipse HX-Omega / Eclipse HX-Delta matrix, using the RS232 cable.
- Page 74 CPU card as follows: Figure 5-9: Tera Term: DIP switches, serial download mode b. Insert the CPU card into the Eclipse HX-Median / Eclipse HX-Omega / Eclipse HX-Delta matrix. The LED on the front of the matrix should flash LD AP.
- Page 75 Eclipse | Upgrade Guide i. Go to Software USB > SOFTWARE - EHX.xxx > SOFTWARE - EHX.xxx > Eclipse HX-Omega-Median-Delta > xxxxxx – Config Card Secondary Bootloader (where xxxxxx represents the product number). The folder contains the *.fwr file and a Read Me file (*.txt) with version information.
- Page 76 Eclipse | Upgrade Guide g. Remove the upgraded CPU card and set the DIP switches to normal running (watchdog) mode: Figure 5-11: Tera Term: DIP switches in normal running (watchdog) mode h. Repeat the above procedure for the second CPU card, if present. Reinsert both of the upgraded CPU cards into the matrix.
- Page 77 In EHX, select File > Import project. Navigate to the configuration file (*.ccn or *.hxn format) and click Open to import the file. Select System > Layout. In the work area, right click the Eclipse HX-Median / Eclipse HX-Omega / Eclipse HX-Delta matrix.
- Page 78 The CPU card uses a default configuration that is embedded in the download application (even though the CPU DOT matrix display shows zero (0)). The default configuration helps with the initial hardware configuration and testing of the Eclipse HX-Median / Eclipse HX-Omega / Eclipse HX-Delta matrix by providing usable functionality to each of the MVX-A16 cards fitted to the matrix.
- Page 79 You can upgrade the CPU card with EHX using a serial link, whether or not there is a valid configuration (map) on the Eclipse HX-Median / Eclipse HX-Omega matrix / Eclipse HX-Delta. Both CPU cards may remain inserted during the upgrade. You may choose to...
- Page 80 Note: EHX can open *.ccn format files as well as its own *.hxn format configuration files. Select System > Layout. In the work area, right click the Eclipse HX-Median / Eclipse HX-Omega / Eclipse HX-Delta matrix. From the menu, select Firmware > Update Firmware.
-
Page 81: Setting The Matrix Type
CPU card(s) is flashing rapidly. Rapid flashes indicate communication with the PC. Note: If you are upgrading from v5.2.5 to Eclipse HX v11.0, the download dialog does not automatically finish. This is due to a messaging change between the two system architectures. - Page 82 Eclipse | Upgrade Guide Click Request info. In the dialog (see Figure 5-14: Setting the matrix type), enter the following custom command: Custom 145.1.12096. <2 == Eclipse HX-Median, 3 == Eclipse HX-Omega, 4 == Eclipse HX-Delta> Click Send. Figure 5-14: Setting the matrix type Note: If the Event Log does not display, stop and restart the EHX software.
-
Page 83: Checking The Cpu Card Application Code Version
Eclipse | Upgrade Guide Checking the CPU card application code version To check the CPU card application code version: In EHX, select Diagnostics > Event Log. In the Matrix Event Log tab, Click the Play icon [ Click Request info. In the dialog, select Matrix Overview and click Send. Look for the line that displays the application code (firmware) version. - Page 84 Eclipse | Upgrade Guide Re-insert the CPU card into the matrix. If the CPLD image requires upgrading this will be performed and the CPU card will reset on completion to action the image in the CPLD device. When the CPU card initializes (or re-initializes as a result of step 2.) and determines that the CPLD image is up to date it will output the following message via the LED front panel “CPLD Upgrades Enabled”.
-
Page 85: Upgrading Cpu Card U1 Cpld
Eclipse | Upgrade Guide Upgrading CPU Card U1 CPLD The U1 image is embedded in the CPU card firmware image (for upgrade purposes). The U1 upgrade can be performed any time after the v10 CPU card main application firmware image has been loaded into the card. The U1 firmware image is embedded in the CPLD upgrader CPU card main application firmware image and therefore no additional download from EHX is required. -
Page 86: Upgrading The Cpu Card U53 Cpld Code With Xilinx Tools
Eclipse | Upgrade Guide Pin reset the CPU card and wait for 5 seconds. Release the ‘Config’ button. . If the CPLD image requires upgrading this will be performed and the CPU card will reset on completion to action the image in the CPLD device. - Page 87 Eclipse | Upgrade Guide Power up the CPU card and start the iMPACT programming tool. In Load Project, select Cancel. Hold the CPU card in reset by inserting a suitable tool into the Reset pin at the top of the card. You must press and hold the reset pin during the whole upgrade process.
-
Page 88: Upgrading The Cpu Card U1 Cpld Code With Xilinx Tools
Eclipse | Upgrade Guide Figure 5-17: Example Xilinx chip chain The Assign New Configuration File dialog asks you to select the CPLD code for the first device in the chain or to bypass that device. Select the first device in the chain. For this (first) device, select the U53 CPLD code. - Page 89 Eclipse | Upgrade Guide Check that you have the latest version of Xilinx tools installed. Tip: Upgrading the CPU card(s) CPLD code using Xilinx tools requires specialized equipment. For more information about installing Xilinx programming tools, see Appendix J:Xilinx tools. Connect the USB connector of the download cable (Xilinx HW-USB-II-G or Digilent 6003-410-011) to the USB port of the PC.
- Page 90 Eclipse | Upgrade Guide Figure 5-19: Example Xilinx chip chain The Assign New Configuration File dialog asks you to select the CPLD code for the first device in the chain or to bypass that device. Bypass the first device. For the second device, select the U1 CPLD code. The U1 CPLD code for the CPU card is available from the Drivers USB: Drivers USB >...
-
Page 91: Downloading A Test Configuration To The Cpu Card Using Ehx
Power down the CPU card. 5.11 Downloading a test configuration to the CPU card using EHX After you have upgraded your Eclipse HX-Median / Eclipse HX-Omega / Eclipse HX-Delta matrix CPU cards, Clear-Com recommends downloading a test configuration from EHX to the CPU cards. - Page 92 1. When the CPU card OK LED starts to flash, release both the ENG and FULL RESET buttons. Tip: For help with selecting the other procedures you require for upgrading to EHX, see the quick reference procedures tables in 3 Quick reference: Upgrading to Eclipse HX Page 92...
-
Page 93: Upgrading The Eclipse Hx-Pico
Note: This guide is laid out in the order in which you must upgrade your Eclipse HX software and hardware devices. For a quick reference to upgrading your system, see 3Quick reference: Upgrading to Eclipse HX. - Page 94 PROM device. Confirm that the checksum of the programmed device matches that given in the Eclipse HX Release Notes (for this documentation, see the Eclipse HX v11.0 software USB). Remove the existing PROM device from the main board.
-
Page 95: Changing The Eclipse Hx-Pico Ram
Eclipse | Upgrade Guide Changing the Eclipse HX-PiCo RAM Note: When you change the Eclipse HX-PiCo RAM (from 128Mb RAM to 256Mb RAM), you must also change the Eclipse HX-PiCo PROM. See 6.1 Changing the Eclipse HX-PiCo PROM above. To change the Eclipse HX-PiCo RAM (from 128Mb to 256Mb): Ensure that: The Eclipse HX-PiCo is powered off. -
Page 96: Changing The Eclipse Hx-Pico Dip Switches
Return the CPU card to the Eclipse HX-Median, Eclipse HX-Omega or Eclipse HX- Delta matrix. Changing the Eclipse HX-PiCo DIP switches To change the Eclipse HX-PiCo DIP switches to the appropriate Eclipse HX v11.0 settings, see either: • Appendix D:Eclipse HX-PiCo CPU DIP switches •... - Page 97 Table 6-2: Required equipment Start EHX. Select File > Matrix Connection. In the Matrix Connection dialog, select the Ethernet communications option. Connect the PC with the Eclipse HX-PiCo, using the LAN port on the rear of the matrix. Do one of the following: •...
- Page 98 Eclipse | Upgrade Guide In EHX, select System > Layout. In the work area, right click the Eclipse HX- PiCo. From the menu, select Firmware > Update Firmware. Figure 6-4: Upgrading app code: Matrix firmware update In the Firmware update wizard, click Next. Ensure that Matrix is selected in the following dialog, then click Next again.
- Page 99 Upgrading the Eclipse HX-PiCo app code using EHX with serial link You can upgrade the Eclipse HX-PiCo secondary bootloader code using EHX with a serial link, whether or not there is a valid configuration (map) on the matrix. With EHX, it is...
- Page 100 In the next dialog, click Browse and navigate to the required *.fwr file for the Eclipse HX-PiCo secondary bootloader: a. Go to Software USB > SOFTWARE - EHX.xxx > Eclipse HX-PiCo > xxxxxx – Secondary Bootloader (where xxxxxx represents the part number).
- Page 101 If the upgrade fails, check the cabling and repeat the procedure. If the procedure still fails, use Tera Term to upgrade the Eclipse HX-PiCo firmware (see below). If there was no previous configuration loaded in the matrix, download a basic configuration file to the Eclipse HX-PiCo matrix using EHX.
- Page 102 Description / comments Tera Term installation Tera Term must be configured and operational. You can find the Tera Term application on both of the Eclipse HX 11.0 upgrade media: Software USB > SOFTWARE - EHX.xxx > 3rd_Party_Software > Teraterm Drivers USB > ECLIPSE DRIVERS >...
- Page 103 You can save and recall the relevant com port settings in Tera Term by selecting the Setup / Save or Restore settings options. Connect the PC serial port to the RS232 port to the front of the Eclipse HX-PiCo matrix.
- Page 104 Place the CPU in TEST mode. c. Set the DIP switches on the CPU as follows: Figure 6-8: Eclipse HX-PiCo dip switches in Test mode d. To bring the DIP switch changes into effect, power cycle or reset the matrix.
- Page 105 CPU as follows: Figure 6-10: Tera Term: DIP switches, serial download mode b. Power cycle or reset the Eclipse HX-PiCo to bring the DIP switch changes into effect. c. In Tera Term, open File and select Send file… Ensure that the BINARY option box is selected.
- Page 106 LED starts to flash with a narrow 1Hz pulse e. Set the DIP switches to normal running mode (watchdogs enabled): Figure 6-12: DIP switches set to normal running mode (watchdogs enabled) Power cycle the Eclipse HX-PiCo so the DIP switch changes come into effect. Note: If the download fails the matrix OK LED displays a long flash/ off rate.
- Page 107 Table 6-6: Required equipment Start EHX. Select File > Matrix Connection. In the Matrix Connection dialog, select the Ethernet communications option. Connect the PC with the Eclipse HX-PiCo, using the LAN port on the rear of the matrix. Do one of the following: •...
- Page 108 The update will take approximately 2 minutes. Tip: While the update is in progress, check that the LED on the front of the Eclipse HX-PiCo is flashing rapidly. Rapid flashes indicate communication with the Note: If you are upgrading from v5.2.5 to Eclipse HX v11.0, the download dialog does not automatically finish.
- Page 109 Upgrading the Eclipse HX-PiCo main application code using EHX with serial link You can upgrade the Eclipse HX-PiCo main application code using EHX with a serial link, whether or not there is a valid configuration (map) on the matrix. With EHX, it is...
- Page 110 In the next dialog, click Browse and navigate to the required *.fwr file for the Eclipse HX-PiCo application: Go to Software USB > SOFTWARE - EHX.xxx > Eclipse HX-PiCo > xxxxxx – Application Code (where xxxxxx represents the part number).
-
Page 111: Upgrading The Eclipse Hx-Pico Mvx Code
Ethernet LAN. Upgrading the Eclipse HX-PiCo MVX code The Eclipse HX-PiCo has two MVX cards (or sections) on the same PCB, both of which require upgrading. If you are upgrading from ECS v5.2.5, Clear-Com recommends upgrading the Eclipse HX-PiCo with the combined MVX boot and application code file (*.mot), using the... - Page 112 Clear-Com recommends that you monitor the MVX application code upgrade using the Event Log in EHX. The upgrade process is complete when the Event Log reports the Eclipse HX-PiCo’s MVXs are absent and then present again. To check that the upgrade has been successful, run a firmware report.
- Page 113 Because of small differences in PCB layout, it may not be possible to complete the upgrade of the MVX application code on a small number of Eclipse HX-PiCo units, using EHX. If the upgrade fails, you can still upgrade the MVX application code using Renesas FDT (which is suitable for all Eclipse HX-PiCo units).
- Page 114 For more information about installing and configuring the Renesas FDT, see Appendix E: Hitachi Renesas Flash Development Tool. To upgrade the Eclipse HX-PiCo MVX code (MVX boot code or combined MVX boot and application code): Ensure that you have the following equipment:...
- Page 115 Eclipse | Upgrade Guide combined MVX boot and Where xxxxxx represents the product number. application code file ) Table 6-10: Required equipment Install the Renesas Flash Development Toolkit 3.4 Basic (FDT). Accept the default install settings. Start the Renesas Flash Development Toolkit 3.4 (FDT) from Programs, selecting the basic Startup option.
- Page 116 Eclipse | Upgrade Guide Select ‘…’ for the User area and select the appropriate MVX code file from the Eclipse HX v11.0 software USB. According to your requirements, select one of the following: Drivers USB > ECLIPSE DRIVERS > PiCo-HX_PiCo_E-32 > xxxxxx- •...
- Page 117 Eclipse | Upgrade Guide For the location of connectors, jumpers and reset switch positions on the Eclipse HX-PiCo, see Figure 6-16: Eclipse HX-PiCo main board. Note: If the MVX card fails to upgrade, press the Reset button, located near the H8FP1 (JP11) connector and select Program Flash from the FDT again.
- Page 118 Eclipse | Upgrade Guide Figure 6-16: Eclipse HX-PiCo main board Page 118...
-
Page 119: Checking The Eclipse Hx-Pico App Code And Mvx Code Versions
Select Firmware > Firmware report. To check the Eclipse PiCo MVX code version only using Tera Term: Install Tera Term. Tera Term is available to install from both of the Eclipse HX 11.0 upgrade media: • Software USB > SOFTWARE - EHX.xxx > 3rd_Party_Software > Teraterm •... -
Page 120: Upgrading The Eclipse Hx-Pico Cpld And Fpga Code With Xilinx Tools
Repeat the procedure with the second MVX card / section. Upgrading the Eclipse HX-PiCo CPLD and FPGA code with Xilinx tools To upgrade either the Eclipse HX-PiCo U1 CPLD code or FPGA code with Xilinx tools: Ensure that the latest version of the Xilinx programming tools has been installed. - Page 121 Eclipse | Upgrade Guide Figure 6-17: Example iMPACT Boundary Scan 1. If the cable is connected correctly, the application will connect and a Xilinx chip chain will be shown. If the cable is not connected correctly, a cable connection warning is given. The full chain should show two devices, as shown in the example figure below.
- Page 122 Eclipse | Upgrade Guide 2. The Assign New Configuration File dialog asks you to select the code for the first device in the chain or to bypass that device. In this example procedure, the first device will be bypassed and either the U1 CPLD or FPGA code will be assigned to the second device.
-
Page 123: Download A Test Configuration Into The Eclipse Hx-Pico Using Ehx
1. Set your PC Ethernet IP address to DCHP mode. Directly connect the PC to the matrix using an Ethernet crossover cable. 2. To gain access to the internal reset switches, remove the lid of the Eclipse HX- PiCo. The device is live (powered). Observe all electrical shock hazard warning and precautions for handling electrostatic sensitive devices. - Page 124 Eclipse | Upgrade Guide Figure 6-20: Eclipse HX-PiCo: resetting to the factory default IP address 3. To reset the IP address, press and hold the two rightmost switches simultaneously (the IP Reset switch and the Full Reset switch), then press and release RESET on the front of the matrix.
-
Page 125: Upgrading The Mvx-A16 Card
Eclipse HX-Median, Eclipse HX-Omega and Eclipse HX-Delta matrices. Note: This guide is laid out in the order in which you must upgrade your Eclipse HX software and hardware devices. For a quick reference to upgrading your system, see 3 Quick reference: Upgrading to Eclipse HX. - Page 126 7.2.1 Upgrading the MVX-A16 card app code using EHX You can upgrade the MVX-A16 application code (*.fwc) using EHX and an Eclipse HX matrix. For Ethernet connections, an EHX configuration is required with the correct IP address configured. The application code is available from the Eclipse HX v11.0 software USB.
- Page 127 Eclipse | Upgrade Guide 4. Open the EHX configuration map within EHX. Select System > Layout. 5. Right click the matrix and then select Firmware> Update Firmware. 6. The Update Firmware wizard dialog is displayed. Click Next. In the Select Hardware Type screen, ensure that the Card radio button is selected.
- Page 128 (Clear-Com part Figure 28: MVX-A16 Serial upgrade cable. CAB-MVX-48Z) The appropriate MVX code You can find the Eclipse HX-PiCo MVX code files file (*.fwc format for the on the Eclipse drivers USB: separate MVX boot file, Drivers USB > ECLIPSE DRIVERS > Omega- *.mot format for the...
- Page 129 The Download File radio button is selected. • 6. Select ‘…’ for the User area and select the appropriate MVX code file from the Eclipse HX v11.0 software USB. According to your requirements, select either: Drivers USB > ECLIPSE DRIVERS > Omega-Median-Delta > xxxxxx- •...
- Page 130 Eclipse | Upgrade Guide b. On the MVX card, ensure that jumper JP1 is made. Insert the MVX card into the frame and verify that all LEDs are now on. d. Select Program Flash from the Flash Development Toolkit (FDT) program.
-
Page 131: Checking The Mvx-A16 Mk I Or Mk Ii Boot And Application Code Version
3. Select Firmware > Firmware report. To check the firmware version using Tera Term: 1. Install Tera Term. Tera Term is available to install from both of the Eclipse HX 11.0 upgrade media: Software USB > SOFTWARE - EHX.xxx > 3rd_Party_Software >... -
Page 132: Upgrading The Mvx-A16 Mk I Or Mk Ii Card Fpga With Xilinx Tools
Table 7-5: Tera Term port settings 3. Remove the MVX-A16 card to be checked from the Eclipse HX-Median / Eclipse HX-Omega / Eclipse HX-Delta matrix. 4. Connect the MVX serial cable (CAB-MVX-48Z) to the CON8 connector on the MVX- A16 card and to the PC (see Figure 7-2: MVX-A16 MK I card: J1, CON8 and CON12). - Page 133 Eclipse | Upgrade Guide Change Part Number from 0101000000110110 to 0101000000100110 in the file. Save the file, then close and open impact. After doing this the prom is accessible from impact. Example File location: C:\Xilinx\14.5\LabTools\LabTools\xc18v00\data You can use the Firmware report tool in EHX to confirm the firmware version of H8 application and FPGA code.
- Page 134 Eclipse | Upgrade Guide Figure 7-4: Example iMPACT Boundary Scan 7. If the cable is connected correctly, the application will connect and a Xilinx chip chain will be shown. If the cable is not connected correctly, a cable connection warning is given. The full chain should show two devices, as shown in the example figure below.
- Page 135 Eclipse | Upgrade Guide In this example procedure, the first device will be bypassed and an FPGA image will be assigned to the second device. For the first device, press Bypass. • For the second device, select the FPGA image (*.mcs format). The FPGA file is •...
- Page 136 Eclipse | Upgrade Guide 2. Connect the USB connector of the download cable (Xilinx HW-USB-II-G or Digilent 6003-410-011) to the USB port of the PC. 3. Connect the 14way IDC header to CON12 (see Figure 7-2: MVX-A16 MK I card: J1, CON). 4.
- Page 137 Eclipse | Upgrade Guide 9. Double click on "Boundary Scan" on the right of the window. Page 137...
- Page 138 Eclipse | Upgrade Guide 10. In the Boundary Scan window, right click in the display and select "Initialise Chain" 11. When asked whether to "Continue and assign configuration file(s)?" a. Select "No" 12. "Cancel" the next pop up window. 13. On the device shown on the diagram, right click on the "SPI/BPI" on top of the device.
- Page 139 Eclipse | Upgrade Guide 17. Right click on the SPI/BPI device, it should show GREEN with the word "FLASH". Select Program 18. A message "Device Programming Properties" appears. Select Device1(Attached Flash, S25FL032P), then click OK. 19. A message "Executing command.." appears to show the progress. 20.
- Page 140 Eclipse | Upgrade Guide 21. Power down the MVX-A16 card and remove the Xilinx programming tool. Page 140...
-
Page 141: Upgrading E-Fib Cards
Eclipse HX-Median, Eclipse HX-Omega and Eclipse HX-Delta matrices. Note: This guide is laid out in the order in which you must upgrade your Eclipse HX software and hardware devices. For a quick reference to upgrading your system, see 3Quick reference: Upgrading to Eclipse HX. - Page 142 Eclipse | Upgrade Guide Figure 8-1: Example iMPACT Boundary Scan 7. If the cable is connected correctly, the application will connect and a Xilinx chip chain will be shown. If the cable is not connected correctly, a cable connection warning is given. If only one of the cards (the front or the rear) is being upgraded, only the first two or last two devices in the above chain are displayed.
- Page 143 Eclipse | Upgrade Guide c. Select the FPGA image for the fourth device, the networking FPGA Flash. Go to Drivers USB > ECLIPSE DRIVERS > Omega-Median-Delta > xxxxxx-Fibre Networking (rear) FPGA (where xxxxxx represents the product number). The folder contains the FPGA file (*.mcs format) and a Read Me file (*.txt), which contains version information.
-
Page 144: Upgrading E-Que Cards
The following chapter describes how to upgrade E-QUE cards (both MK1 and MK2). Note: This guide is laid out in the order in which you must upgrade your Eclipse HX software and hardware devices. For a quick reference to upgrading your system, see 3 Quick reference: Upgrading to Eclipse HX. -
Page 145: Upgrading The E-Que Card (Mk1 And Mk2) Via Ehx
Eclipse | Upgrade Guide Upgrading the E-QUE card (MK1 and MK2) via You can now upgrade the IVC/LMC64/EQue cards via EHX and an integrated TFTP server. Previously a card upgrade would have to be started via the serial port and performed on each card individually. -
Page 146: Upgrading The E-Que Card (Mk1) Via Serial Cable And Third-Party Tftp Tools
Eclipse | Upgrade Guide Progress will be reported in the Event Log. Do not reset the matrix until the update is complete. Upgrading the E-QUE card (MK1) via serial cable and third-party TFTP tools You must upgrade the E-QUE card (MK1) in the following order: 1. - Page 147 Tera Term software Tera Term must be configured and operational. You can find the Tera Term application on both of the Eclipse HX 11.0 upgrade media: Software USB > SOFTWARE - EHX.xxx > 3rd_Party_Software > Teraterm Drivers USB > ECLIPSE DRIVERS >...
- Page 148 Eclipse | Upgrade Guide Figure 9-4: MVX-A16 serial cable (CAB-MVX-48Z) 2. Install Tera-Term. Third party software is available from either of the Eclipse HX 11.0 upgrade media: Software USB > SOFTWARE - EHX.xxx > 3rd_Party_Software > • Teraterm Drivers USB > ECLIPSE DRIVERS > 3rd_Party_Software > Teraterm •...
- Page 149 Eclipse | Upgrade Guide Open the folder. Copy the E-QUE software file (*.image format file) into the c:\tftp directory. 6. From the same folder, copy the Tera Term macro file combined_eque_upgrade.ttl to the c:\tftp directory. 7. Start Tera Term. Open the Setup menu and select Serial Port…. Figure 9-5: Tera Term: selecting Serial Port 8.
- Page 150 11. Connect the MVX serial cable (CAB-MVX-48Z) between the PC serial port and the E-QUE card CON-200. Reinsert the E-QUE card into the rack. Figure 9-7: E-QUE MK1 card serial connector 12. If it is not already powered up, power up the Eclipse HX-Median / Eclipse HX-Omega / Eclipse HX-Delta matrix. Page 150...
-
Page 151: Upgrading The E-Que Card (Mk2) Via Serial Cable And Third-Party Tftp Tools
Eclipse | Upgrade Guide 13. Ensure that the E-QUE card and the PC are both connected to the Ethernet network in some way, or are connected using a crossover Ethernet cable. The LAN connector on the E-QUE card is the highest RJ-45 socket on the back panel. When the E-QUE card is connected to the PC or to the network, check that the LAN LEDs (the yellow green... - Page 152 Tera Term software Tera Term (version 4.3 or later) must be configured and operational. You can find the Tera Term application on both of the Eclipse HX 11.0 upgrade media: Software USB > SOFTWARE - EHX.xxx > 3rd_Party_Software > Teraterm Drivers USB >...
- Page 153 Eclipse | Upgrade Guide Figure 9-9: MVX-A16 serial cable (CAB-MVX-48Z) 2. Install Tera-Term. Third party software is available from either of the Eclipse HX 11.0 upgrade media: • Software USB > SOFTWARE - EHX.xxx > 3rd_Party_Software > Teraterm Drivers USB > ECLIPSE DRIVERS > 3rd_Party_Software > Teraterm •...
- Page 154 Eclipse | Upgrade Guide Drivers USB > ECLIPSE DRIVERS > Omega-Median-Delta > xxxxxx - E-Que • application MK-I & MK-II (where xxxxxx represents the product number) Open the folder. Copy the E-QUE firmware file (*.image format file) into the c:\tftp directory. Tip: The folder also contains a Read Me file (*.txt), which includes the procedure for upgrading the E-QUE firmware file.
- Page 155 Eclipse | Upgrade Guide 10. Navigate to the c:\tftp directory. To open the TFTP Server command window, double click the application tftpsrv.exe. Figure 9-11: TFTP Server Window Note: The TFTP application can only access files in the same folder as the TFTP application. The E-QUE firmware file must be in the same directory as the tftpsrv.exe program.
- Page 156 Eclipse | Upgrade Guide Figure 9-12: E-QUE card (MK2) serial connector 12. Power up the Eclipse HX-Median / Eclipse HX-Omega / Eclipse HX-Delta matrix (if not already powered up). 13. Ensure that the E-QUE card (MK2) and the PC are either: Connected to your Ethernet network.
- Page 157 Eclipse | Upgrade Guide Figure 9-13: E-QUE (MK2) successful reset dialog To continue, click OK. Note: If the reset and reboot is not successful, the following error message is displayed: Figure 9-14: E-QUE (MK2) reset error message If you receive this message, you are advised to repeat the procedure from Step 6. 16.
-
Page 158: Upgrading The E-Que Card (Mk1 And Mk2) Fpga With Xilinx Tools
Eclipse | Upgrade Guide Figure 9-15: Successful download dialog To exit the macro, click OK. Note: If the download was not successful, the following error dialog is displayed by Tera Term: Figure 9-16: Failed download dialog If you receive this message, you are advised to repeat the procedure from Step 6. Upgrading the E-QUE card (MK1 and MK2) FPGA with Xilinx tools Note:... - Page 159 Eclipse | Upgrade Guide Figure 9-17: iMPACT Boundary Scan 7. If the cable is connected correctly, the application will connect and a Xilinx chip chain will be shown. If the cable is not connected correctly, a cable connection warning is given. Figure 9-18: Example Xilinx chip chain 8.
-
Page 160: Upgrading The E-Que Card (Mk1) Boot Rom
Eclipse | Upgrade Guide For the first device, press Bypass. • • For the second device, select the FPGA image (*.mcs) from the Drivers USB: Drivers USB > ECLIPSE DRIVERS > Omega-Median-Delta > xxxxxx – EQUE FPGA (where xxxxxx represents the product number). A summary dialog is presented. -
Page 161: Upgrading The E-Que Card (Mk2) Boot Rom
Tera Term software Tera Term must be configured and operational. You can find the Tera Term application on both of the Eclipse HX 11.0 upgrade media: Software USB > SOFTWARE - EHX.xxx > 3rd_Party_Software > Teraterm Drivers USB > ECLIPSE DRIVERS >... - Page 162 Eclipse | Upgrade Guide Required equipment Description / comments Small reset tool For example, a bent paper clip Table 9-5: Required equipment 2. Install Tera Term. Tip: For more information about installing Tera Term, see Appendix G: Tera Term 3. Create a directory on your PC called c:\tftp. 4.
- Page 163 Eclipse | Upgrade Guide Data 8 bit Parity None Stop 1 bit Flow control none Transmit delay 0 msec/char. If the E-QUE card fails to load correctly, change this value to 50ms. Table 9-6: Tera Term port settings 9. Set the IP address of your PC to a fixed / static address (any IP address of your choice is suitable).
- Page 164 Figure 9-22: E-QUE card (MK2) serial connector 12. Reinsert the E-QUE card (MK2) into the rack. 13. Power up the Eclipse HX-Median / Eclipse HX-Omega matrix / Eclipse HX-Delta matrix (if it is not already powered up). 14. Ensure that the E-QUE card (MK2) and the PC are either: Connected to your Ethernet network.
- Page 165 Eclipse | Upgrade Guide interrupt the boot process. 16. If the reset is successful, the following dialog is displayed: Figure 9-23: E-QUE (MK2) successful reset dialog To continue, click OK. Note: If the reset and reboot is not successful, the following error message is displayed: Figure 9-24: E-QUE (MK2) reset error message If you receive this message, you are advised to repeat the procedure from Step 6.
- Page 166 Eclipse | Upgrade Guide Figure 9-25: Successful download dialog To exit the macro, click OK. Note: If the download was not successful, the following error dialog is displayed by Tera Term: Figure 9-26: Failed download dialog If you receive this message, you are advised to repeat the procedure from Step 6. Page 166...
-
Page 167: Upgrading Ivc-32 And Lmc-64 Cards
At EHX v11.0, the application code for all 3 cards (E-QUE, IVC-32 and LMC-64 cards) is the same. Note: This guide is laid out in the order in which you must upgrade your Eclipse HX software and hardware devices. For a quick reference to upgrading your system, see 3 Quick reference: Upgrading to Eclipse HX. - Page 168 Eclipse | Upgrade Guide Figure 10-2: IVC-32/LMC-64 MK2 card detail Page 168...
-
Page 169: Upgrading E-Madi64 Cards
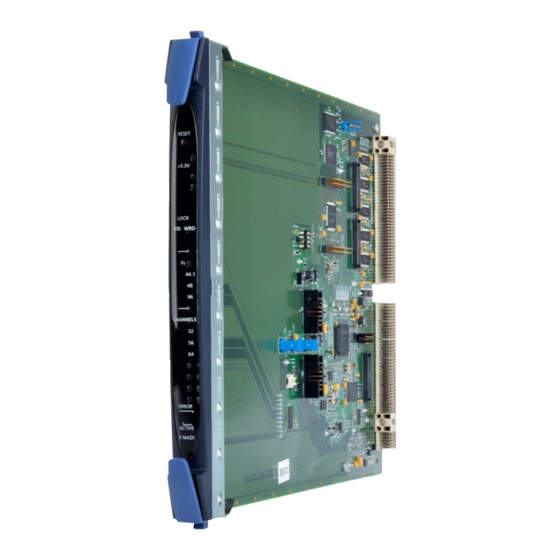
• software. Note: This guide is laid out in the order in which you must upgrade your Eclipse HX software and hardware devices. For a quick reference to upgrading your system, see 3 Quick reference: Upgrading to Eclipse HX. 11.1 Identifying MK1 and MK2 E-MADI64 cards Note: this chapter only describes how to update MK1 E-MADI64 cards. -
Page 170: Upgrading The E-Madi64 Boot Code
Eclipse | Upgrade Guide The MK 1 E-MADI64 card is blue or green: Figure 11-1: MK 1 E-MADI64 card detail The MK2 E-QUE card is blue: Figure 11-2: MK 2 E-MADI64 card detail 11.2 Upgrading the E-MADI64 boot code To upgrade the E-MADI64 card H8 boot code: Page 170... - Page 171 (Where xxxxxx represents the product number). Table 11-1: Required equipment 2. Install the Renesas Flash Development Toolkit (FDT), which is available from either of the Eclipse HX v11.0 upgrade media: Software USB > SOFTWARE - EHX.xxx > 3rd_Party_Software > • RenesasFDT Drivers USB >...
- Page 172 Eclipse | Upgrade Guide Select Device H8S/2318F Select Port COM1 (Change to match a COM port present on the CPU Frequency 25.0 Mhz Connection Boot mode Recommended 38400 (Deselect the Use-Default option) Speed Protection Automatic Messaging Advanced User Area Selected (Checked) Readback verification Table 11-2: FDT settings...
- Page 173 Note: The E-MADI64 connection is polarized to ensure a correct connection. 9. Insert the E-MADI64 card into the Eclipse HX-Median / Eclipse HX-Omega / Eclipse HX-Delta matrix (having ensured that the matrix is powered on). 10. Select Program Flash from the FDT. Confirm that FDT reports the image has been written successfully.
-
Page 174: Upgrading The E-Madi64 Application, Dsp And Fpga Code Using Ehx
Tip: For help with selecting the other procedures you require for upgrading to Eclipse HX v11.0, see the quick reference procedures tables in 2 Selecting Upgrade Procedures. - Page 175 H8 application code, DSP The appropriate application code, DSP code and and FPGA code files FPGA code files (*.fwc format) are available from the Eclipse HX v11.0 upgrade media: Drivers USB > ECLIPSE DRIVERS > • Omega-Median-Delta > E-MADI Application Drivers USB >...
- Page 176 7. Click Next and then browse to the E-MADI64 code file (application, DSP or FPGA code files (*.fwc)). Tip: See Step 1 for the location of the .fwc files on the Eclipse HX v11.0 USB. 8. Click Next and confirm that the details displayed are correct. Click Next and confirm that the download commences.
-
Page 177: Upgrading The E-Madi64 Fpga Using The Xilinx Tool Set
Eclipse | Upgrade Guide 11.4 Upgrading the E-MADI64 FPGA using the Xilinx tool set Note: Upgrading the E-QUE card FPGA using Xilinx tools requires specialized equipment. For more information about the Xilinx programming tools, see Appendix J:Xilinx tools. Note: Ensure that the Xilinx tool set is Version 11 or later. To upgrade the Xilinx FPGAs on an E-MADI64 card: 1. - Page 178 Eclipse | Upgrade Guide Figure 11-5: Example iMPACT Boundary Scan 9. If the cable is connected correctly, the application will connect and a Xilinx chip chain will be shown. If the cable is not connected correctly, a cable connection warning is given. Figure 11-6: Example Xilinx chip chain 10.
- Page 179 Eclipse | Upgrade Guide In this example procedure, the first device will be bypassed and an FPGA image will be assigned to the second device. For the first device, press Bypass. • • For the second device, select the FPGA image: Drivers USB >...
-
Page 180: Upgrading E-Dante64-Hx Cards
The upgrade process for each of the two modules on the card (EHX and Dante) is different. The two processes are outlined below. Note: When upgrading your E-Dante64 card, only use the Clear-Com supplied upgrade files for both (A: EHX) ClearCom - App, Boot, DSP, FPGA: xxxxxx.FWC files (B: Dante) ClearCom [Brooklyn]: xxxxxx.dnt file. - Page 181 Eclipse | Upgrade Guide Upgrade file type Approximate upgrade time/notes App.FWC 2 min. This is the most common file to upgrade and is usually labeled ‘Clearcom’. Boot.FWC 1 min. DSP.FWC 3 min. Reset card on front panel after upgrade. FPGA.FWC 16 mins.
- Page 182 Eclipse | Upgrade Guide Note: Disable any firewalls before upgrading the E-Dante combined Brooklyn file via Dante Firmware Update Manager. Note: When upgrading firmware for the Dante component, the status light on the front of the E-Dante64 card will not change. Note: An upgrade guide for the *.dnt file is available at https://dev.audinate.com/GA/firmware-update-manager/userguide/latest/AUD-MAN-...
-
Page 183: Upgrading Cellcom®/Freespeak® Wireless Systems
For FreeSpeak II firmware upgrades see 18 Upgrading FreeSpeak II™ wireless systems Note: This guide is laid out in the order in which you must upgrade your Eclipse HX software and hardware devices. For a quick reference to upgrading your system, see 3Quick reference: Upgrading to Eclipse HX. -
Page 184: Upgrading E-Ipa-Hx Cards
Eclipse | Upgrade Guide Upgrading E-IPA-HX cards The Admin LAN port of the E-IPA card must be on the same subnet as the PC hosting the EHX software. Example E-IPA firmware version x.y.63.z.tar.gz Note: the upgrade process from the PC to the EIPA card takes about 2.5 mins however depending on what sub-system on the EIPA card requires upgrading the whole process for the card may take up to five minutes. - Page 185 Eclipse | Upgrade Guide Erasing flash (~ 10 minutes) Writing preloader, u- boot and ( < 1 minute) Writing zImage ( < 1 minute) Writing FPGA image ( 1 minute) Fetching rootfs (~ 10 seconds) Writing rootfs ( < 5 minutes) All done! Check the firmware report to make sure that the upgrade has completed successfully.
-
Page 186: Upgrading Panels
Eclipse HX matrix. Note: This guide is laid out in the order in which you must upgrade your Eclipse HX software and hardware devices. For a quick reference to upgrading your system, see 3 Quick reference: Upgrading to Eclipse HX. - Page 187 Eclipse | Upgrade Guide To upgrade panel application code using EHX: 1. Ensure that you have the following equipment: Required equipment Description / comments PC with an Ethernet or serial communications port EHX software EHX must be installed and configured. EHX configuration file / Ethernet or serial cable for the PC-to-matrix...
- Page 188 Drivers USB > ECLIPSE DRIVERS > Panel_Software > i- Station > xxxxxx-i-Station App (where xxxxxx represents the product number) Note: Clear-Com recommends that you upgrade Expansion panels first before upgrading the main i-Station. E-Station Drivers USB > ECLIPSE DRIVERS > Panel Software > E- Station >...
-
Page 189: Upgrading V-Series Iris Panels By Usb
Where xxxxxx represents a product number. Table 15-2: Locating Panel *.fwp files Tip: For help with selecting the other procedures you require for upgrading to Eclipse HX v11.0, see the quick reference procedures tables in 2 Selecting Upgrade Procedures. 15.1.2 V-Series upgrades You cannot upgrade any other panels during a V-Series panel upgrade. - Page 190 Observe all electrical shock hazard warning and precautions for handling electrostatic sensitive devices Tip: For help with selecting the other procedures you require for upgrading to Eclipse HX v11.0 see the quick reference procedures tables in 2 Selecting Upgrade Procedures. Cabling for i-Station upgrades 15.3.1 Manually upgrading i-Station &...
- Page 191 Eclipse | Upgrade Guide Figure 15-1: Example converter cable Figure 15-2 shows an example wiring scheme for serial programming an i-Station panel: Figure 15-2: Example wiring scheme for i-Station serial programming Figure 15-3 shows an alternative cabling scheme that does not require the use of the RS-422 converter module: Figure 15-3: Alternate example wiring scheme for i-Station serial programming Note:...
- Page 192 Press All Buttons 3X). To manually upgrade the i-Station panel application code: 1. Install Tera Term. Third party software is available from either of the Eclipse HX 11.0 upgrade media: Software USB > SOFTWARE - EHX.xxx > 3rd_Party_Software > Teraterm •...
- Page 193 Eclipse | Upgrade Guide Figure 15-4: i-Station manual upgrade 3. Start Tera Term. Configure Tera Term for the appropriate COM port on the PC, as shown in the following figure. Select the Serial radio button and then the correct COM port setting for the PC from the Port drop-down menu.
- Page 194 Eclipse | Upgrade Guide Click OK. 5. Power up the i-Station panel into maintenance mode by first holding in the recessed button found on the rear panel during a simultaneous AC power up. The reset button must be held in until all front panel keys turn bright red the front panel display modules show the message Display Module Test’, Press All Buttons 3x.
- Page 195 Eclipse | Upgrade Guide 6. The following Tera-Term boot up message is displayed. Note: Do not proceed until you see the boot up message. If you do not see the boot up message, check your wiring connections and software settings. Repeat steps 1 – Figure 15-7: Boot up message 7.
- Page 196 Note: When the reset process is underway, the display modules briefly display the updated firmware version. If the i-Station is re-connected to an Eclipse HX matrix with a valid configuration press keypad button 9 to access the updated firmware/rack code version.
- Page 197 Download the i-Station firmware upgrade to the Eclipse / Eclipse HX matrix from ECS / EHX. Provided that the Panel Prompt option is set, the i-Station panel displays the...
- Page 198 Eclipse | Upgrade Guide a. Presses the YES key (left-hand flashing). The i-Station panel displays the following: ARE YOU SURE nnnnn YES NO. Each word corresponds to a key on the panel, and nnnnn represents the firmware upgrade number. b. If the user selects the NO key, the upgrade is cancelled and will not be offered again until a black reset (reset and clear all memory) is performed on the matrix.
- Page 199 Eclipse | Upgrade Guide Figure 15-12: Tera Term: COM port setting 3. From the Tera Term main screen select Setup > Serial port…. The serial port setup screen should now be visible. Select the following settings to configure Tera Term for updating the E-station: Field Setting Baud...
- Page 200 Eclipse | Upgrade Guide Figure 15-13: Module display message Note: Do not proceed until you see the boot up message. If you do not see the boot up message, check your wiring connections and software settings. Repeat steps 1 – Figure 15-14: Tera Term boot up message 5.
- Page 201 Eclipse | Upgrade Guide Figure 15-15: Erasing Flash ROM 6. In File, select the Send File. This prompts the user to browse for the correct E- Station *.s19 file for download to the unit undergoing the firmware upgrade: Drivers USB > ECLIPSE DRIVERS > Panel Software > E-Station > xxxxxx-E-Station App Where xxxxxx represents the product number.
-
Page 202: Manually Upgrading V-Series Panels
15.4 Manually upgrading V-Series panels Before attempting to upgrade V-Series panels, ensure that anti-static precautions are taken, as the Eclipse HX items are sensitive to static discharges. Observe all electrical shock hazard warning and precautions for handling electrostatic sensitive devices V-Series panels can be manually upgraded using a PC directly connected to the panel. - Page 203 (servers, utilities, etc). Application Files Direct or EHX The Clear-com software which actually runs in the panel and is used by the system to operate the panel. Display module Boot Each bank of six displays forms a single...
- Page 204 Eclipse | Upgrade Guide c. Copy the following files from the software USB to the C:\TFTP\Release directory: Drivers USB > ECLIPSE DRIVERS > Panel_Software > V-Series • > Main_Board > xxxxxx- Root File System > rootfs.cramfs Drivers USB > ECLIPSE DRIVERS > Panel_Software > V-Series •...
- Page 205 Eclipse | Upgrade Guide 6. Start the TFTP server application. 7. Click the options icon (spanner) to display the options window. Check that the C:\TFTP\ folder is set as the path. Figure 15-19: TFTPUtil Options 8. Select the icon with two blue cogs on the left hand side of the window. Check the settings as below.
- Page 206 Eclipse | Upgrade Guide Figure 15-21: Checking the PC IP address 11. Connect an Ethernet cross-over cable from the PC to the Ethernet port at the back of the V-series panel and disconnect the cable that connects to the matrix. Your PC is now ready to act as a file server to a V-series panel and the panel is now ready to be told which files to upload.
- Page 207 Eclipse | Upgrade Guide Note: As the upload proceeds, the AUX and MAIN lights on the panel will gradually change from green amber and then red. This process may take a few minutes. c. When the upload is complete, the panel will reset itself, completing the procedure.
- Page 208 Eclipse | Upgrade Guide Drivers USB > ECLIPSE DRIVERS > Panel_Software > V-Series > Display_Module > • xxxxxx-Display PIC Application Code Where xxxxxx represents a product number. For more information, see 15.1.1 Locating Panel *.fwp files on the software USB. Page 208...
-
Page 209: Upgrading The Tel-14 Module
Update TEL-14 firmware. • Note: This guide is laid out in the order in which you must upgrade your Eclipse HX software and hardware devices. For a quick reference to upgrading your system, see 3 Quick reference: Upgrading to Eclipse HX. -
Page 210: Upgrading The Tel-14 Firmware
Eclipse | Upgrade Guide Figure 16-1: original IC20 in position 4. Replace the old processor with the new processor module, ensuring that it is correctly positioned. Tip: The blue serial connector should be farthest away from the front panel. Figure 16-2: replacement processor module in position 16.2 Upgrading the TEL-14 firmware To upgrade the TEL-14 firmware: Page 210... - Page 211 Figure 28: MVX-A16 Serial upgrade cable. CAB-MVX-48Z) Third party software is available from either of the Flash Magic Eclipse HX 11.0 upgrade media: Software USB > SOFTWARE - EHX.xxx > • 3rd_Party_Software > FlashMagic Drivers USB > ECLIPSE DRIVERS >...
- Page 212 Eclipse | Upgrade Guide 3. Power up the TEL-14. 4. Start Flash Magic. Configure the following settings for the 5 purple numbered boxes in the Flash Magic dialog: Setting(s) to enter The COM port to which you are connected. Baud Rate: 2400 Device: 89LPC935 Oscillator Frequency: 3.5795 MHz Select Erase blocks used by Hex File...
- Page 213 Eclipse | Upgrade Guide Figure 16-5: Start Bootloader dialog 6. Ensure that Send Break Condition is checked, then press Start Bootloader. 7. The configuration dialog is re-displayed after a few seconds. In box 5, press Start. Note: The status bar along the bottom displays Programming device, and the progress bar displays the state of the operation.
-
Page 214: Upgrading The Aes-6 Module
Note: This guide is laid out in the order in which you must upgrade your Eclipse HX software and hardware devices. For a quick reference to upgrading your system, see 3Quick reference: Upgrading to Eclipse HX. -
Page 215: Upgrading Aes-6 Fpga
Eclipse | Upgrade Guide 2. Fit the AES-6 card to either the IMF-3 interface frame or Eclipse HX-Median Matrix. If there is a jumper on J6, move the jumper to J3.Reset or power-cycle the card so the jumper change takes effect. - Page 216 Other_Software > xxxxxx - AES-6 FPGA (where xxxxxx represents the product number) Third party software is available from either of Tera Term terminal the Eclipse HX 11.0 upgrade media: software Software USB > SOFTWARE - EHX.xxx > 3rd_Party_Software > Teraterm Drivers USB >...
- Page 217 Eclipse | Upgrade Guide Serial setting Setting Baud rate 57600 Parity None Data Bits Stop Bits Flow Control None Table 17-4: Tera Term serial settings 4. Reset or power-cycle the module. 5. At this point, the procedure varies depending on whether or not an FPGA image is already present.
- Page 218 Eclipse | Upgrade Guide Type testmode into the Tera Term window and press Enter (return). The card enters test mode and displays the following menu: Figure 17-2: AES-6 main menu b. Select option 6, Download FPGA Image. c. You are prompted to delete the old FPGA image. Press Y. Note: Key entry is case sensitive, so Y must be a capital.
- Page 219 Eclipse | Upgrade Guide Figure 17-3: FPGA HEX file load Reset the card to complete the upgrade. If the FPGA image is not present: a. After the reset, the following output will be shown in the TeraTerm window: Figure 17-4: AES-6 FPGA HEX file load The card is ready to load the FPGA image.
- Page 220 Eclipse | Upgrade Guide Figure 17-5: FPGA upgrade completed c. Reset the card to complete the upgrade. Page 220...
-
Page 221: Upgrading Freespeak Ii™ Wireless Systems
EHX and an active Eclipse HX matrix, or via a USB connection from within EHX. Note: This guide is laid out in the order in which you must upgrade your Eclipse HX software and hardware devices. For a quick reference to upgrading your system, see 3 Quick reference: Upgrading to Eclipse HX. - Page 222 Eclipse | Upgrade Guide To upgrade FreeSpeak II beltpack or antenna application code using EHX: 1. Ensure that you have the following equipment: Required equipment Description / comments PC with an Ethernet or serial communications port EHX software EHX must be installed and configured. EHX configuration file / Ethernet or serial cable for the PC-to-matrix...
-
Page 223: Upgrading Freespeak Ii Beltpacks And Non-Ip Antennas Via Usb
Eclipse | Upgrade Guide In Options: Selecting Automatic mode forces beltpacks or antennas to upgrade • automatically. Selecting Prompted mode means that each beltpack user will be asked • to accept / decline the beltpack upgrade. If you select this option when upgrading an antenna, the matrix will function as in Automatic mode. - Page 224 USB. This must be placed in a location that is accessible by the installed EHX application. Note: The Eclipse HX v11.0 contains all the firmware files required for upgrading a FreeSpeak II beltpack or antenna. The download of a beltpack application requires: •...
- Page 225 Eclipse | Upgrade Guide 10. Confirm the updated firmware version using either: The local menu on the beltpack. • The EHX firmware report tool: • Connect the device to the matrix and allow it to connect. Go to EHX > System > layout. Right click the matrix icon.
-
Page 226: Appendix A: Cpu Card Layout
Eclipse | Upgrade Guide Appendix A: CPU card layout Figure 18-1: Eclipse HX-Median / Eclipse HX-Omega / Eclipse HX-Delta CPU card layout Page 226... -
Page 227: Appendix B: Cpu Card Dip Switches
Eclipse | Upgrade Guide Appendix B: CPU card DIP switches Test mode settings for CPU card DIP switches Serial download settings for CPU card DIP switches Page 227... - Page 228 Eclipse | Upgrade Guide Normal running (watchdog enabled) settings for CPU card DIP switches Page 228...
-
Page 229: Appendix C: Pico Card Layout
Eclipse | Upgrade Guide Appendix C: PiCo card layout Page 229... -
Page 230: Appendix D: Eclipse Hx-Pico Cpu Dip Switches
Eclipse | Upgrade Guide Appendix D: Eclipse HX-PiCo CPU DIP switches Figure 18-2: Test mode settings for Eclipse HX-PiCo DIP switches Figure 18-3: Serial download settings for Eclipse HX-PiCo DIP switches Page 230... - Page 231 Eclipse | Upgrade Guide Figure 18-4: Normal running (watchdog enabled) settings for Eclipse HX-PiCo DIP switches Page 231...
-
Page 232: Appendix E: Hitachi Renesas Flash Development Tool
Eclipse | Upgrade Guide Appendix E: Hitachi Renesas Flash Development Tool To install and configure the Hitachi Renesas Flash Development Tool (FDT): Navigate to the installation file on the Eclipse installation USB: USB\3 _Party_Software\Hitachi_FDT\fdt3_04.exe Double click to install. Note: Later versions can be downloaded from http://www.renesas.com/products/tools/flash_prom_programming/fdt/download_search_results.jsp# 2. - Page 233 Eclipse | Upgrade Guide Figure 18-6: Language selection Click Next. 4. Click Yes to accept the license conditions. The installer then displays the Select Components screen: Figure 18-7: Select Components Page 233...
- Page 234 Eclipse | Upgrade Guide Note: It may be advisable to uncheck the Microsoft System Files checkbox as the versions of system files in the installation may be older than those currently on the system. If these files are required then the software can be uninstalled and then reinstalled with the system files.
- Page 235 Eclipse | Upgrade Guide Figure 18-9: Kernels 1 Click Next. 7. The Kernels screen (Part 2) is displayed. Leave as is, unless you want to reduce the amount of disk space used by reducing the number of kernels installed. Figure 18-10: Kernels 2 Click Next.
- Page 236 Figure 18-11: Select Destination Click Next. 9. The Select Start Menu Group screen is displayed. The default menu can be used or the programmer can be added to the Clear-Com menu. Figure 18-12: Select Start Menu Group Page 236...
- Page 237 Eclipse | Upgrade Guide Click Next. 10. The Ready to Install screen is displayed. Click Install. The files will be installed in the selected directory. Figure 18-13: Ready to install 11. When the installation is complete a completion screen is displayed: Figure 18-14: Installation completed To exit the installer, click Finish.
-
Page 238: Appendix F: Tftputil
Eclipse | Upgrade Guide Appendix F: TFTPUtil To install the TFTPUtil tool: Navigate to the installation file on the Eclipse installation USB. USB\3rd_Party_Software\V-Panel TFTO Server App\TFTPUtil_GUI_Version_1.3.0_Installer.exe 2. When the installation file is run, the installer will display a series of setup screens to configure the installation. - Page 239 Eclipse | Upgrade Guide Figure 18-16: Components 4. The Installation Folder destination screen is displayed. Accept the default destination folder unless it clashes with other system setups. Click Install. Figure 18-17: Installation Folder destination screen 5. When the installation is completed, click Close to exit the installer. If the defaults were accepted the TFTPUtil server can be run from Programs under TFTPUtil.
- Page 240 C:\TFTP folder as described above. Win Agents TFTP server The server is available from either of the Eclipse HX v11.0 upgrade media: Software USB \3rd_Party_Software > V-Panel TFTP Server App > tftpserver- setup.exe Drivers USB \3rd_Party_Software >...
-
Page 241: Appendix G: Tera Term
Eclipse | Upgrade Guide Appendix G: Tera Term To install Tera Term: Navigate to the installation file on the Eclipse installation USB: USB\3rd_Party_Software\Teraterm\tterm23.zip 2. Open the file with WinZip and execute Setup.exe to start the Tera Term installation. The language options screen will be displayed. Figure 18-18: Language selection Select the required language mode and click Continue. - Page 242 Eclipse | Upgrade Guide The Installation complete screen is displayed. To exit the installer, click OK. Figure 18-20: Installation complete The Tera Term application is used for many of the Eclipse system upgrade TIP: processes. You can save and recall the relevant com port settings by selecting the Setup / Save or restore settings options.
-
Page 243: Appendix H: Flash Magic
Eclipse | Upgrade Guide Appendix H: Flash Magic To install Flash Magic: Navigate to the installation file on the Eclipse installation USB. USB\3rd_Party_Software\FlashMagic\FlashMagic.exe 2. Execute the file to start the installation. The Flash Magic Setup Wizard welcome screen is displayed. Click Next. Figure 18-21: Welcome screen (installer) 3. - Page 244 Eclipse | Upgrade Guide Figure 18-22: Select Destination Location 5. The Select Start Menu Folder is displayed. Select the Start menu folder for Flash Magic; (normally the default is accepted). Click Next. Figure 18-23: Select Start Menu Folder 6. The Select Additional Tasks screen is displayed. Select Create a Desktop icon and / or Quick Launch icon, if desired.
- Page 245 Eclipse | Upgrade Guide Figure 18-24: Select Additional Tasks 7. The Ready to Install screen is displayed. Click Install. Figure 18-25: Ready to Install 8. When the installation is complete, the completion screen is displayed. Page 245...
- Page 246 Eclipse | Upgrade Guide Figure 18-26 Completion screen Click Finish to exit the installer. Page 246...
-
Page 247: Layouts
Eclipse | Upgrade Guide Appendix I: i-Station converter cable wiring and rear panel layouts Figure 18-27: Converter cable wiring example for i-Station serial programming Page 247... - Page 248 Eclipse | Upgrade Guide RESET BUTTON Figure 18-28: i-Station rear panel layout RESET BUTTON Figure 18-29: E-Station rear panel layout Page 248...
- Page 249 A number of Found new hardware dialogs will display when the programming device is plugged into the USB port of the PC or laptop. Clear-Com recommends installing the software (which also installs the necessary drivers) before you plug in the device, to reduce the number of dialogs.
- Page 250 License to use the Software on the following terms. Any new revision or update of the Software provided by CLEAR-COM to Customer under this License shall be governed by the terms and conditions of this License. SOFTWARE LICENSE AGREEMENT END USER LICENSE AGREEMENT PLEASE READ THIS END USER LICENSE AGREEMENT (“Agreement”).
- Page 251 Eclipse | Upgrade Guide 1.3. “Effective Date” means the date that Licensee installs or otherwise uses any Software or Hardware, as may be updated from time to time. 1.4. “Exclusions” is defined in Section 5.4 (Exclusions). 1.5. “Evaluation Software” means any Software provided to Licensee for evaluation purposes or otherwise designated by Licensor as evaluation software, as may be provided by Licensor from time to time in Licensor’s sole discretion and as specified in a separate written agreement between Licensor and Licensee.
- Page 252 Eclipse | Upgrade Guide 2.1. License. As of the Effective Date, subject to the terms and conditions of this Agreement (including payment and Section 2.3 (License Restrictions)) and irrespective of whether Hardware is sold to or rented by Licensee, Licensor grants Licensee a non- exclusive, non-transferable, non-assignable, non-sublicensable and limited license, only in object code form, to (a) the number of copies of Software, whether downloaded or installed Software or embedded on a component or system of Hardware, purchased by...
- Page 253 Eclipse | Upgrade Guide 2.4. Export, Import and Government Restrictions. Licensee is advised that the Software may be subject to export laws and the laws of the country where it is delivered or used. Licensee shall abide by all applicable export laws and regulations. Under such laws and regulations, the Software may not be sold, leased or transferred to certain restricted countries, restricted end-users or for restricted end-uses.
- Page 254 Eclipse | Upgrade Guide 3.2. Transfer and Access to Machine Data. Machine Data may be transferred automatically or as facilitated by Licensor or Licensee’s representatives, from Hardware to Licensor, from time to time, and Licensee hereby acknowledges and agrees to such transfer of Machine Data.
- Page 255 Eclipse | Upgrade Guide 4.5. Payment Terms. Licensor shall have the right to require advance payment and require adequate assurance of payment in the event that Licensee fails to make payment within the time limits required hereunder or, as determined in Licensor’s sole discretion, it is advisable in view of Licensee’s financial condition.
- Page 256 Eclipse | Upgrade Guide 5.5. Warranty Disclaimer. THE FOREGOING LIMITED WARRANTIES AND REMEDIES PROVIDED BY LICENSOR ARE THE SOLE AND EXCLUSIVE REMEDIES FOR ANY BREACH OF WARRANTY. EXCEPT TO THE EXTENT EXPRESSLY SET FORTH ABOVE, LICENSOR DISCLAIMS ALL WARRANTIES, CONDITIONS, AND REPRESENTATIONS (EXPRESS OR IMPLIED, ORAL OR WRITTEN) WITH RESPECT TO THE SOFTWARE OR ANY SUPPORT RELATED THERETO (INCLUDING ANY AND ALL WARRANTIES OF MERCHANTABILITY, FITNESS FOR A PARTICULAR PURPOSE, NON INFRINGEMENT, NON INTERFERENCE,...
- Page 257 Eclipse | Upgrade Guide Term and Termination. 8.1. Term. Unless terminated earlier as set forth below, this Agreement shall become effective upon the Effective Date and shall continue for the license term stated by Licensor in writing on the Licensor website or in connection with Licensee’s order and/or receipt of the Software.
- Page 258 Eclipse | Upgrade Guide 9.3. Force Majeure. Nonperformance of any party (other than with respect to payment obligations) shall be excused to the extent that performance is rendered impossible by strike, fire, earthquake, flood, governmental acts or orders or restrictions, failure of suppliers or any other reason where failure to perform is beyond the reasonable control of the nonperforming party.
- Page 259 Eclipse | Upgrade Guide 9.8. Notices. All notices required or permitted under this Agreement shall be in writing and delivered by courier, overnight delivery service or by certified mail and in each instance shall be deemed given upon receipt. All notices shall to Licensor be sent to the addresses set forth below or to such other address as may be specified by Licensor on its website or otherwise in writing.
Need help?
Do you have a question about the Eclipse HX and is the answer not in the manual?
Questions and answers