Advertisement
Quick Links
SPARTAK ENTERPRISES, INC.
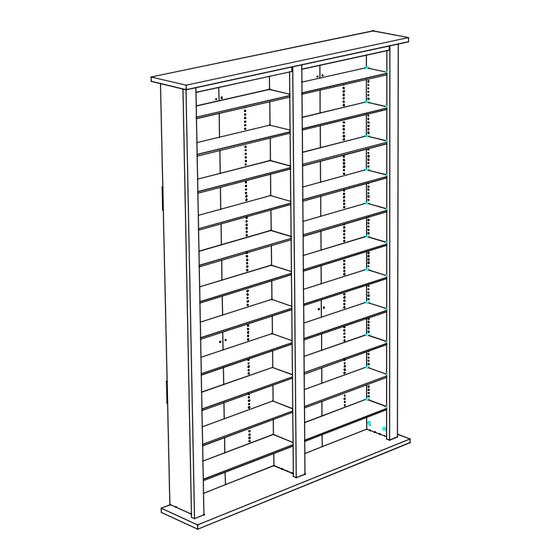
MEDIA STORAGE RACK DOUBLE
Model #2412-21BL
LOT #2496
IF PARTS ARE MISSING AND OR DEFECTIVE, IF INSTRUCTIONS ARE NOT CLEAR
OR IF YOU ARE EXPERIENCING PROBLEMS ASSEMBLING OUR PRODUCT.
BEFORE YOU RETURN THE PRODUCT TO THE STORE,
PLEASE CALL US TOLL FREE FOR CUSTOMER SERVICE ASSISTANCE
(888) 777-8250
OR SEND US EMAIL AT
help@spartakent.com
PLEASE HAVE ITEM NUMBER READY, AND A REPRESENTATIVE WILL GLADLY ASSIST YOU
Advertisement

Related Manuals for venture horizon 2412


Summary of Contents for venture horizon 2412
- Page 1 SPARTAK ENTERPRISES, INC. MEDIA STORAGE RACK DOUBLE Model #2412-21BL LOT #2496 IF PARTS ARE MISSING AND OR DEFECTIVE, IF INSTRUCTIONS ARE NOT CLEAR OR IF YOU ARE EXPERIENCING PROBLEMS ASSEMBLING OUR PRODUCT. BEFORE YOU RETURN THE PRODUCT TO THE STORE,...
- Page 2 NOTE: FIRST MAKE SURE THAT YOU HAVE ALL OF THE PARTS LISTED ON THIS SHEET. IF YOU ARE MISSING ANY PIECE(S), DO NOT ASSEMBLE THE UNIT. INSTEAD, CALL OUR CUSTOMER SERVICE NUMBER AT: (888) 777-8250. WE WILL BE HAPPY TO ASSIST YOU. 2402A-Top 2411F -Back Panel Left...
- Page 3 HARDWARE PART # DESCRIPTION WOOD SCREW SFH845A BRACKET ANGLE BM25 SPE610BL EURO SCREW BPXX54 SHELF SUPPORT DOWW525 WOOD DOWEL CAMLT12 CAMLOCK CAMBT16 BOLT SPB1016BL PAN HEAD SCREW CCPZXX CAMLOCK COVER CAP SHPL5 SHELF LOCK TOOL REQUIRED PHILLIPS SCREWDRIVER HAMMER...
- Page 4 DOWW525 CAMBT16 E & J Unlocked Position...
- Page 5 Make sure groove on parts E and J should be located at the bottom edge. If it's not- then you had installed it upside down. Turn camlocks clockwise using flat (preferred) or phillips screwdriver until full stop(slightly over 1 2 a turn to lock the bolt)
- Page 6 DOWW525 Turn camlocks clockwise using flat (preferred) or phillips screwdriver until full stop(slightly over 1 2 a turn to lock the bolt) Make sure the dowels go in as far possible. They should stick out no more than 3/8 of an inch. Do not use more than one drop of glue as it may cause board to split.
- Page 8 Attach part onto SPE610BL top A SPE610BL...
- Page 9 Use small screws on the back panel between Outer Sides(E) and dividers (J). SPB1016BL Use long screws only on the Outer Sides(E) and dividers (J). SFH845A...
- Page 10 Install Back Panels as shown, with unmarked edges facing down and blue or red marked being atop. Make sure the Blue is on the left side and Red is on the right side of each section. Otherwise you will have problem with leveling of the shelves, they will sag in the middle.
- Page 11 If you live in an earthquake zone, we recommend using the anti-toppling device provided to increase the safety in your home. Please follow the diagrams below. We provide two pilot holes in the back of the Top to attach a straps which you can secure to the wall. You can also, at your option secure unit through by screwing the back support (D) to the wall.
- Page 12 Do not tap with hammer onto shelf supports, instead twist them when inserting in. You will be using six shelf supports per shelf, two on each side and two in the back. Install shelves at desired locations.Use a case of CD or DVD as a template to locate postions for the shelves.
Need help?
Do you have a question about the 2412 and is the answer not in the manual?
Questions and answers