Trox Technik FKRS-EU Supplementary Installation Manual
Installation kit gl for flexible ceiling joint
Hide thumbs
Also See for FKRS-EU:
- Installation and operating manual (263 pages) ,
- Installation and operating manual (107 pages) ,
- Installation and operating manual (176 pages)

Related Manuals for Trox Technik FKRS-EU


Summary of Contents for Trox Technik FKRS-EU
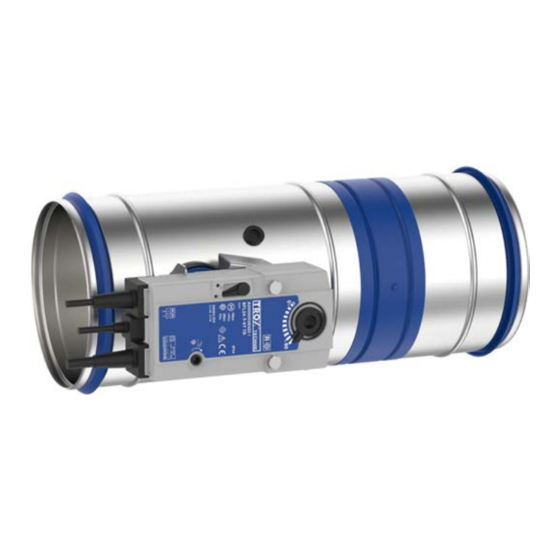
- Page 1 Supplementary installation manual GB/en Fire damper Type FKRS-EU Installation kit GL for flexible ceiling joint Read the instructions prior to performing any task!
- Page 2 TROX GmbH Heinrich-Trox-Platz 47504 Neukirchen-Vluyn, Germany Germany Phone: +49 (0) 2845 2020 Fax: +49 (0) 2845 202-265 E-mail: trox@trox.de Internet: http://www.troxtechnik.com Translation of the original A00000072713, 1, GB/en 01/2019 © 2019 Fire damper Type FKRS-EU...
-
Page 3: Supply Package
Installation kit GL Supply package Installation kit GL 1.1 Supply package Fig. 1: Supply package FKRS-EU with installation kit GL FKRS-EU with installation kit GL Installation side Bracket Operating side Installation kit-Dimensions Nominal size ÆDN ☐A Nominal size + 100 mm... - Page 4 UW profile 50 × 60 × 0,6 mm for subsidence of the ceiling slab a = 0 – 40 mm Fig. 2: Requirements Wall thickness, 100 – 235 mm W-2B Width of the support structure Cladding Subsidence of the ceiling slab, 0 – 40 mm Fire damper Type FKRS-EU...
-
Page 5: Installation Options
Fig. 5: Distance between two installation kits 2 - 5 mm to each other DA Distance installation kit to the ceiling, 0 – 180 mm optional Distance of the FKRS-EU to adjacent walls constructive ≥ 125 mm. Fire damper Type FKRS-EU... -
Page 6: Installation
Fig. 6: Installation – DA = 0 mm pre-drill with 4 mm (Pos. 7), with 3 mm (Pos. 8) Fig. 7: Installation – DA = 0 mm pre-drill with 4 mm (Pos. 7), with 3 mm (Pos. 8) drawn W = 175 mm Fire damper Type FKRS-EU... - Page 7 Fig. 8: Installation – DA = 0 mm pre-drill with 4 mm (Pos. 7), with 3 mm (Pos. 8) drawn W = 200 mm Fig. 9: Fixing the brackets to the installation kit GL pre-drill with 3 mm Fire damper Type FKRS-EU...
- Page 8 Installation DA = 0 mm Fig. 10: Fixing the fire-rated plasterboard to the installation kit GL drawn W = 175 mm drawn W = 200 mm Fire damper Type FKRS-EU...
- Page 9 Installation DA = 0 mm Fig. 11: Create an appropriate opening with DA = 0 mm at a = 40 mm (drawn) ** closed side for installation opening Fire damper Type FKRS-EU...
- Page 10 Installation DA = 0 mm Fig. 12: Installation with DA = 0 mm drawn W = 175 mm drawn W = 200 mm Fire damper Type FKRS-EU...
- Page 11 Note: The cladding of the wall can be done only after the installation of the fire damper. Fig. 14: Mount the wall cladding and screwing - Single installation kit ≥ 100 mm Fig. 15: Mount the wall cladding and screwing - Distance between two installation kits Fire damper Type FKRS-EU...
- Page 12 Installation DA = 0 mm Fig. 16: Mount the wall cladding and screwing - Distance between two installation kits 2 - 5 mm to each other optional Fire damper Type FKRS-EU...
- Page 13 Fig. 17: Installation – DA pre-drill with 4 mm (Pos. 7), with 3 mm (Pos. 8) ≤ 180 mm Fig. 18: Installation – DA pre-drill with 4 mm (Pos. 7), with 3 mm (Pos. 8) drawn W = 175 mm Fire damper Type FKRS-EU...
- Page 14 ≤ 180 mm Fig. 19: Installation – DA pre-drill with 4 mm (Pos. 7), with 3 mm (Pos. 8) drawn W = 200 mm Fig. 20: Fixing the brackets to the installation kit GL pre-drill with 3 mm Fire damper Type FKRS-EU...
- Page 15 Installation DA ≤ 180 mm Fig. 21: Fixing the fire-rated plasterboard to the installation kit GL drawn W = 175 mm drawn W = 200 mm Fire damper Type FKRS-EU...
- Page 16 Installation DA ≤ 180 mm Fig. 22: Create an appropriate opening with DA> 0 ... 180 mm at a = 40 mm (drawn) ** closed side for installation opening Fire damper Type FKRS-EU...
- Page 17 Installation DA ≤ 180 mm ≤ 180 mm Fig. 23: Installation with DA Fire damper Type FKRS-EU...
- Page 18 Installation DA ≤ 180 mm ≤ 180 mm Fig. 24: Installation with DA drawn W = 175 mm drawn W = 200 mm Fire damper Type FKRS-EU...
- Page 19 Note: The cladding of the wall can be done only after the installation of the fire damper. Fig. 26: Mount the wall cladding and screwing - Single installation kit ≥ 100 mm Fig. 27: Mount the wall cladding and screwing - Distance between two installation kits Fire damper Type FKRS-EU...
- Page 20 Installation DA ≤ 180 mm Fig. 28: Mount the wall cladding and screwing - Distance between two installation kits 2 - 5 mm to each other optional Fire damper Type FKRS-EU...
- Page 21 Supply package............3 Hammer-in fixing............4 UW section..............4 HUS anchor bolt ............4 Wall thickness......4, 8, 10, 11, 15, 17, 19 Installation kit-Dimensions........... 3 Width of the support structure........4 Installation kit GL............3, 4 Fire damper Type FKRS-EU...
- Page 22 Fire damper Type FKRS-EU...
- Page 23 Fire damper Type FKRS-EU...
- Page 24 Fire damper Type FKRS-EU...
Need help?
Do you have a question about the FKRS-EU and is the answer not in the manual?
Questions and answers