Table of Contents
Advertisement
Advertisement
Table of Contents
Troubleshooting

Related Manuals for Furuno MU-201C


Summary of Contents for Furuno MU-201C
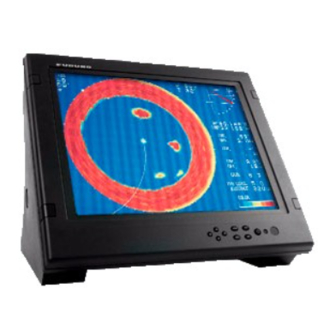
- Page 1 MULTI-PURPOSE LCD DISPLAY MU-201C...
- Page 2 • This manual is intended for use by native speakers of English. • FURUNO will assume no responsibility for the damage caused by improper use or modification of the equipment or claims of loss of profit by a third party.
- Page 3 Continued use of the equipment can cause fire or electrical shock. Contact a FURUNO agent for service. A warning label is attached to the CAUTION equipment. Do not remove the label.
-
Page 4: Table Of Contents
TABLE OF CONTENTS FOREWORD ......................iii SYSTEM CONFIGURATION................iv EQUIPMENT LISTS ....................v 1 MOUNTING ...................... 1 1.1 Display Unit ........................1 2 WIRING......................4 2.1 Wiring..........................4 3 ADJUSTMENTS ....................6 3.1 OSD Settings ........................6 4 OPERATION ....................10 5 MAINTENANCE, TROUBLESHOOTING............12 5.1 Maintenance........................12 5.2 Troubleshooting......................13 SPECIFICATIONS................... -
Page 5: Foreword
A Word to the Owner of the MU-201C FURUNO Electric Company thanks you for purchasing the MU-201C 20.1” Multi-Purpose LCD Display. We are confident you will discover why the FURUNO name has become synonymous with quality and reliability. For over 50 years FURUNO Electric Company has enjoyed an enviable reputation for quality and reliability throughout the world. -
Page 6: System Configuration
CI-68/88 *: SXGA: 1280x1024 dot, XGA: 1024x768 dot, VGA: 640x480 dot Note1: Portrait orientation equipment cannot be connected to the MU-201C. Note2: Non-VESA equipment cannot be connected to the MU-201C. Note3: When inputted signal differs in resolution, characters and lines are not shown clearly. -
Page 7: Equipment Lists
EQUIPMENT LISTS Standard supply Name Type Code No. Remarks LCD Display Unit MU-201C 000-083-166 AC specification Spare Parts SP03-14401 008-535-990 1 set Fuse FGMB (2A, 2 pcs.) Installation Crimp-on lug, FV2-4 CP19-00301 008-546-780 1 set Materials (2 pcs.) Cosmetic cap (4 pcs.), Panel hook (2 pcs.),... -
Page 8: Mounting
MOUNTING Refer to the outline drawing of this manual for mounting dimensions. Note: The face of the LCD monitor is made of glass. Handle it with care. Display Unit The display unit may be mounted on a desktop or flush mounted in a panel. When selecting a mounting location, keep in mind the following points: •... - Page 9 3. Attach the cosmetic cap (supplied as accessories) to the display unit at the locations shown in the drawing on page 1. Note: If necessary, fill gap between the mounting panel and the display unit chassis with sealing material. Desktop mounting The display unit can be mounted on a desktop, using the optional bracket kit (Type: FP03-09820, Code No.: 008-535-560).
- Page 10 Hanger L M10 bolts for fixing (Dockyard supply) Hanger stay Hanger R Cosmetic cap Flat washer (M10) Hex bolt (M6x25) Spring washer (M10) Hex bolt (M10x30) Hole plug Plastic rivet To remove this, insert fingernail in groove. Desktop mounting The optional handgrip assy. (Type: FP03-09840, Code No.: 008-535-570) is available for the desktop mount display unit.
-
Page 11: Wiring
Note 1: Even when the power switch is off, electric current flows slightly. Connect the power line via a double-contact breaker. Note 2: The MU-201C does not have a hot plug function. When the power switches of the MU-201C and the equipment connected are on, do not connect or disconnect... - Page 12 Fix the part peeled at step 4 Taping with cable clamp. Connecting FCV-1200L or CH-250/270/300 To connect the FCV-1200L or CH-250/270/300 to the MU-201C, the optional cable assembly 3COX-2P-6C (5 or 10 m) and the interface unit IF-8000 are required. Cable entrance Cable entrance...
-
Page 13: Adjustments
ADJUSTMENTS OSD Settings The OSD (On Screen Display) contains items for adjustment of the display. 1. Press the [MENU] key to show the OSD. Resolution 2. Press [◄] or [►] to select the mark at the main hierarchy you want to adjust, and then press [▼]. - Page 14 Contents of OSD menu item Main mark Sub mark Item Function All default Restores all default settings. Default Auto adjustment* Adjusts image timing automatically. Increases or decreases contrast level. Adjusts the gain of input signal together. Contrast After selecting the item, adjust the contrast on adjustment bar.
- Page 15 Main mark Sub mark Item Function Auto adjustment* Adjusts image timing automatically. Adjusts the number of pixels in the horizontal direction. If there is pixel count mismatch between analog signal and monitor, vertical Pixel adjustment* flicker and unclear text will result. After selecting the item, adjust the image on the bar.
- Page 16 When phase adjustment is completed, this mark is shown. (Press [▼] to erase this mark.) This message shows no signal is input. This message shows the input resolution signal is beyond the specification of the MU-201C. This message shows the input video signal is beyond the specification of the MU-201C.
-
Page 17: Operation
OPERATION Arrow keys Power key MENU DISP Brill key Key/LED Function Turns the power on/off. a) Adjusts the display brilliance (lowest: 0, highest: 10).* -: Decreases the display brilliance. +: Increases the display brilliance. b) Switches the display mode between full screen and fixed aspect ratio. Press [+] while pressing the [DISP] key: Full screen zoom Press [-] while pressing the [DISP] key: Fixed aspect ratio a) Opens/closes the OSD. - Page 18 *: When decreasing the display brilliance, unevenness of the brilliance may occur. This is normal symptom. **: Continuous pressing makes change faster. Note: Even if the power switch is off, a small amount of current flows through the equipment. If the equipment won’t be used for a long time, turn off the breaker switch at ship’s power distribution box to prevent battery consumption.
-
Page 19: Maintenance, Troubleshooting
MAINTENANCE, TROUBLESHOOTING WARNING ELECTRICAL SHOCK HAZARD Do not open the equipment. Only qualified personnel should work inside the equipment. Maintenance Routine maintenance Regular maintenance is important for good performance. Check the following on a regular basis to keep the equipment in good operating condition. •... -
Page 20: Troubleshooting
Battery voltage too high. Check battery voltage. Fuse has blown. Replace fuse on the rear of the display unit. Cable between MU-201C and external Refasten cable. equipment has loosened. Power cable has loosened. Refasten cable. The brilliance is too low. -
Page 21: Specifications
FURUNO MU-201C SPECIFICATIONS OF MULTI-PURPOSE LCD DISPLAY MU-201C GENERAL Display 20.1-inch SXGA color LCD, 400x320 mm Brightness 200 cd/m minimum Resolution SXGA (1,280x1,024), XGA (1,024x768), VGA (640x480) Viewing Angle up/down/left/right: 85° Input Signal RGB port: VESA (SXGA, XGA, VGA) (75Ω, 0.7 Vp-p, Synchronization: TTL level) - Page 25 FURUNO MU-201C 20.1 型カラーLCD 表示器 MU-201C 仕 様 1.総合 (1) 表示器 20.1 型 SXGA カラーLCD、400x320mm (2) 輝度 200cd/m (3) 解像度 SXGA(1280x1024)、XGA(1024x768)、VGA(640x480) (4) 視野角 上下左右各 85° (5) 入力信号 アナログ RGB 映像信号 VESA 規格(SXGA, XGA, VGA) (75Ω, 0.7Vp-p, 同期: TTL レベル) DVI 映像信号...
- Page 26 5章 保守点検 ふだんの保守点検 本機の性能を維持するために、定期的に次の項目 を点検してください。 背面パネルのコネクタが確実に接続されてい るか。 アース端子が錆びていないか、また、アース 線が確実に接地されているか。 表示器上にほこりや汚れはないか。ある場合 は柔らかい乾いた布でふき取る。 ヒューズの交換 電源ヒューズ(2A 250V)で過電流を遮断します。 もし、ヒューズが切れたら、交換する前に十分そ の原因を調べてください。 故障かなと思ったら 故障かなと思ったら、まず次のような点検を行ってください。また、サービスマンを呼ぶときに は、点検したことがらを詳しく報告していただくと、サービスが迅速になります。 • 映像が全く出ない。 原因 対策 • バッテリーがあがっている テスターでバッテリーの電圧をチェックする。 • 表示器のヒューズを交換する(本体の背面) 。 ヒューズが切れている • 機器間のケーブルが抜けている コネクタを正しく接続する。 • 電源コネクタが抜けている コネクタを正しく接続する。 • 輝度が低い 輝度を上げる。...
- Page 27 全画面拡大・アスペクト比固定 VGA 入力の場合、全画面拡大とアスペクト比(縦横比のこと)固定の切替えができます。XGA 入 力の場合は全画面拡大のみです。 表示切替え(VGA 入力機種のみ) 接続機種 全画面拡大 アスペクト比固定 FCV-1200L/1500L ○ ○ GD-280/380/680 × ○ CH-250/300 × ○ CI-68/88 × ○ レーダーやスキャニングソナーで VGA 信号を入力した場合、 表示器とのアスペクト比が異なるた め、円が楕円となることがあります。その場合は、画面の表示モードをアスペクト比固定にして 使用してください。画面の上下に余白ができますが、故障ではありません。...
- Page 28 4章 取扱い MENU DISP 表示器前面パネルの説明 キー/LED 説明 表示器の電源をオン/オフする。 ・画面輝度を調節する(11 段階)*1。 −: 輝度を下げる +: 輝度を上げる ・全画面拡大またはアスペクト比固定表示の切替えをする(次頁参照) 。 [DISP]キーを押しながら+: 全画面拡大 [DISP]キーを押しながら−: アスペクト比固定 MENU OSD をオン/オフする、および設定内容を保存する。 DISP 映像入力信号を切り替える(押す度に DVI/RGB が切り替わる) 。 ▲ OSD のメニュー項目階層において主階層に戻る、および設定内容を保存す る。 ▼ OSD のメニュー項目階層を副階層へ移動する、 および設定項目を決定する。 OSD のメニュー項目を選択(左へ)する、および項目決定後、各種調整、 ◄ *2 設定に使用する。...
- Page 29 主階層マーク 副階層マーク 項目 説明 キー操作がない場合の OSD が消える時 間を設定。 項目決定後、 次の 4 つのマークから時間 OSD タイムアウト時間 を選択。 設定 OSD 表示位置 OSD の画面上での表示位置を設定。 項目決定後、 次の 5 つのマークから位置 を選択。 OSD 表示位置 *: DVI 入力時には表示されません。 その他のマーク/メッセージ マーク/メッセージ 説明 選択して▼キーを押すと、設定値または自動調整値を保存して OSD をオフ。 選択して▼キーを押すと、設定値または自動調整値を破棄して OSD をオフ。 位置位相等自動調整を行った場合、 調整完了メッセージとして表示。 (▼キーを押すと、マークは消えます。...
- Page 30 設定項目の内容 主階層マーク 副階層マーク 項目 説明 全設定工場出荷時設定 すべての設定を工場出荷時設定に戻す。 画面表示位置、 ちらつきなどのタイミン 工場出荷時 位置位相等自動調整* グの自動調整。 設定 コントラスト調整。 入力信号のゲイン値を一括して調整。 コントラスト設定 項目決定後、 バーで調整。 暗(◄キー)↔ 明(►キー) コントラスト 黒色のコントラスト調整。 ・黒レベル 黒レベル設定 項目決定後、 バーで調整。 弱(◄キー)↔ 強(►キー) 赤緑青色などのコントラストを一括し 色調整リセット てリセットする。 赤緑青の各色のコントラストを調整。 項目決定後、各色のバーで調整。 赤緑青各色調整 弱(◄キー)↔ 強(►キー) 白色の色合いを数値的に示す。 項目決定後、 次の 4 つのマークから数値 色調整...
- Page 31 3章 装備後の設定 OSD 表示の設定 OSD(On Screen Display)を画面表示し、表示調整を行います。 1. [MENU]キーを押します。 OSD が表示されます。 2. ◄または►キーを押して、設定したい主階層マークを選択し、▼キーを押します。 選択されたマークは色付きで表示され、非選択のマークは灰色で表示されます。 3. ◄または►キーを押して、設定したい副階層マークを選択し、▼キーを押します。 4. ◄または►キーを押して、設定したい数値や位置マークを選択し、▼キーを押す、あるい は、バーで調整します。 選択されたマークは赤色で囲まれ、下に赤丸が表示されます。 5. [MENU]キーを押します。 OSD が閉じます。 6. 手順 2∼5 を繰り返して、設定したい項目をすべて調整します。...
- Page 32 電源ケーブル DPYC-2.5(現地手配)の端末処理 1. あじろ外装を 40mm 剥ぎます。 2. ビニールシースを約 35mm 切り取ります。 3. 芯線の先端より約 10mm 被覆を剥ぎ、圧着端子 (FV2-4、青・支給)を取り付けます。 4. 外装の先端から 40mm、ペンキを取り除きます。 5. 外装の先端にはビニールテープを巻いて、ペ ンキを取り除いた部分をケーブルクランプで 固定します。 FCV-1200L/1500L, CH-250 などで本来の表示器を本機に代替する場合 オプションのケーブル組品 3COX-2P-6C(5m または 10m)と、インターフェイス(IF-8000)が必 要です。 注2) ケーブル(06S4078)の D-sub コネクタの装備で、そのままでは大きすぎて配管などに 通らないときはコネクタカバーを外してください。 コネクタ端末配線部、 ゴムカバー をビニールテープ等で縛り外形を細くすることで、内径 30mm の穴に通すことができ ます。...
- Page 33 2章 結線 装置間の結線 次のイラストおよび本書の相互結線図を参照して接続してください。 装置間の接続ケーブルは両 端コネクタ付きで支給されます。 汎用のモニターとして本機を使う場合 オプションのケーブル組品 3COX-2P-6C(5m または 10m) 、または DVI-D/D SINGLELINK が必要で す。 注1) 本機は電源オフ時も筐体内に通電しています。保守用として全相切りのブレーカを設 けてください。 注2) ホットプラグ機能はありませんので、本機と接続機器が電源オンの時にコネクタの抜 き差しは行わないでください。破壊される恐れがあります。...
- Page 34 卓上装備の表示器には、オプションの取手(型名: FP03-09840, コード番号: 008-535-570)を 取り付けることができます。...
- Page 35 卓上装備 オプションのブラケットキット(型名: FP03-09820, コード番号: 008-535-560)を使用すると 卓上に装備できます。 ブラケットキットの内容 名 称 型 式 コード番号 数量 ハンガーL(20) 03-163-1111 100-305-141 ハンガーR(20) 03-163-1112 100-305-181 ハンガーササエ(20) 03-163-1113 100-305-191 ホールプラグ CP-30-HP-13 000-147-143 スナップボタン KB-13 用ボタン黒 000-570-276 六角セムス B M6x25 000-802-771 六角ボルト M10X30 000-802-182 バネ座金 000-864-261 平座金 000-864-131 1.
- Page 36 1章 取付け要領 本書の外寸図を参照してください。 注)LCD 管面は壊れやすいガラス素材でできているので、強い衝撃や圧力を加えないでくだ さい。 表示器 表示器は埋込み装備型と卓上装備型の 2 種類があります。 次の点を考慮して取付け位置を決めてください。 表示器の重さに耐えられる場所 直射日光の当たらない場所 漁場、船の周囲の状況を観察しながら機器の操作ができる見通しの良い場所 巻末の外寸図に示す保守・点検用のスペースが確保できる場所 水しぶきのかからない場所(表示器は前面、背面とも防水に対して無保護のため) 埋込み装備 1. 装備場所に穴を開けます。 2. 表示器を取付穴にはめ込みます。 3. 表示器本体の正面から+トラスタッピンネジ(6x30)4 本で固定します。 注)六角ボルトを使用する場合、壁から 10mm 突出する長さのボルトを使用してください。 埋込み装備 4. パネルカバーをはめ込みます。 注)埋込みパネル面の防滴を要求されるときは、パネル面と筐体とのすきまにシーリング材 を塗布してすきまを防いでください。...
- Page 37 構成表 標準 名 称 型 式 コード番号 数量 備 考 LCD 表示器 MU-201C 000-083-166 AC 仕様 予備品 SP03-14401 008-535-990 ヒューズ FGMB(2A, 2 個) 工事材料 CP19-00301 008-546-780 FV2-4 圧着端子(2 個) パネルカバー(4 個)、 パネルフック(2 個)、 付属品 FP03-09810 008-536-010 +トラスタッピンネジ(6x30, 4 本) オプション...
- Page 38 システム構成 対応機種 接続可能機種 解像度* 映像出力 FCV-30 SXGA, XGA FSV-24/30 SXGA FCV-1200L/1500L FR-2105 SXGA FAR-2117/2817 シリーズ SXGA GD-280/380/680 CH-250/300 CI-68/88 * 解像度 SXGA: 1280x1024 ピクセル、XGA: 1024x768 ピクセル、VGA: 640x480 ピクセル 注1) 縦型画面の機種は接続できません。 注2) 映像出力が VESA 規格仕様でない機種は接続できません。 注3) 解像度の違う信号を入力すると文字やラインが不鮮明となります。 注4) カラーLCD 表示器固有の問題として、ドット抜け、視野角の制限、画面のちらつきが あります。 注5) RGB と...
- Page 39 はじめに このたびは、 20.1 型カラーLCD 表示器 MU-201C をお買い求めいただき、 誠にありがとうございま す。本機は、各種の魚群探知機、スキャニングソナーやレーダーなどの表示器として使用できま す。性能、耐久性共に安心して使用していただけるように設計していますので、この説明書をよ くお読みいただき、本来の性能を十分発揮させていただきますようお願い申し上げます。 本機の特徴 様々な機種に対応(FCV-1200L, CH-250, FAR-2107/2807, GD-280/380/680 など) 高解像度表示[SXGA(1280x1024), XGA(1024x768), VGA(640x480)] 超広視野角(上下左右各 85°) 映像入力(RGB と DVI の 2 入力)...
- Page 40 目次 はじめに............. iv システム構成..........v 構成表............vi 取付け要領 ..........1 1.1 表示器 ..........1 結線 ............ 4 2.1 装置間の結線 ..........4 装備後の設定 ..........6 3.1 OSD 表示の設定 ........... 6 取扱い ..........9 保守点検 ..........11 5.1 ふだんの保守点検 ........11 5.2 故障かなと思ったら ........11 仕様...
- Page 42 安全にお使いいただくために [必ずお守りください] お使いになる人や他の人への危害、 財産への損害を未然に防止するため、 以下のことを必ずお守 りください。 表示内容を無視して誤った使い方をしたときに生じる危害や損害の程度を、 本書で は次の表示で区分し、説明していますので十分に気をつけてください。...
- Page 43 重要なお知らせ • 取扱説明書の一部または全部の転載、複写は著作権者である当社の許諾が必要です。無断転 載することを固くお断りします。 • 本書を紛失または汚損されたときは、お買い上げの販売店または最寄りの当社各支店・営業 所でお買い求めください。 • 製品の仕様ならびに取扱説明書の内容は予告なく変更することがあります。 • 画面に表示される内容は、システムの設定や動作状態によって異なります。したがって、本 書内に掲載してあるイラストは画面の表示と異なる場合があります。 • 本書は日本語を母国語とする方を対象に記載しています。 • 本機を、お客様が本書の内容に従わずに取り扱われたり、または当社および当社指定の者以 外の第三者により修正・変更されることに起因して生じる障害等については、当社は責任を 負いかねますのでご了承ください。...
- Page 44 20.1型カラーLCD表示器 MU-201C この取扱説明書には本機を安全に使用していただくために必要な 注意事項、使用方法が記載されています。 本機を使用する前に、この取扱説明書をよく読んで、十分に理解 したうえで使用してください。 また、これらの書類はいつでも参照できるところに大切に保管 し、使用方法がわからなくなったときにお読みください。 P U B . N O . O M C-20330-A (Elemental Chlorine Free) ( 0 5 0 1 , Y O T A ) M U-201C The paper used in this manual...
Need help?
Do you have a question about the MU-201C and is the answer not in the manual?
Questions and answers