Table of Contents
Advertisement
Quick Links
Advertisement
Table of Contents
Troubleshooting

Subscribe to Our Youtube Channel
Related Manuals for ITT Goulds Pumps API 3171


Summary of Contents for ITT Goulds Pumps API 3171
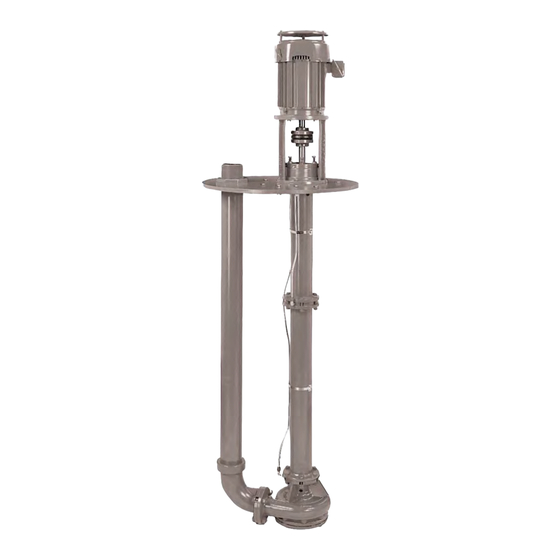
- Page 1 Installation, Operation, and Maintenance Manual Model API 3171...
-
Page 3: Table Of Contents
Table of Contents Table of Contents Introduction and Safety ......................3 Introduction ..........................3 Safety ............................3 Safety terminology and symbols ................... 4 Environmental safety ......................5 User safety ........................... 5 Ex-approved products ......................6 Product warranty ........................7 Transportation and Storage ....................8 Transportation and Storage .................... - Page 4 Cross-sectional diagram ....................... 55 Dimensional drawings ......................56 Parts list ..........................57 Other Relevant Documentation or Manuals ................ 59 Other Relevant Documentation or Manuals ................59 Local ITT Contacts ........................ 60 Regional offices ........................60 Model API 3171 Installation, Operation, and Maintenance Manual...
-
Page 5: Introduction And Safety
Prohibited methods include any modification to the equipment or use of parts not provided by ITT. If there is any uncertainty regarding the appropriate use of the equipment, please contact an ITT representative before proceeding. -
Page 6: Safety Terminology And Symbols
Risk of injury and/or property damage. Operating a pump in an inappropriate application can cause over pressurization, overheating, and/or unstable operation. Do not change the service application without the approval of an authorized ITT representative. Safety terminology and symbols About safety messages It is extremely important that you read, understand, and follow the safety messages and regulations carefully before handling the product. -
Page 7: Environmental Safety
WARNING: If the product has been contaminated in any way, such as from toxic chemicals or nuclear radiation, do NOT send the product to ITT unless it has been properly decontaminated. Electrical installation For electrical installation recycling requirements, consult your local electric utility. -
Page 8: Ex-Approved Products
These are the personnel requirements for Ex-approved products in potentially explosive atmospheres: • All work on the product must be carried out by certified electricians and ITT-authorized mechanics. Special rules apply to installations in explosive atmospheres. • All users must know about the risks of electric current and the chemical and physical characteristics of the gas, the vapor, or both present in hazardous areas. -
Page 9: Product Warranty
Compliance is fulfilled only when you operate the unit within its intended use. Do not change the conditions of the service without the approval of an ITT representative. When you install or maintain explosion proof products, always comply with the directive and applicable standards (for example, IEC/EN 60079–14). -
Page 10: Transportation And Storage
Transportation and Storage Transportation and Storage Transportation and Storage Inspect the delivery Inspect the package 1. Inspect the package for damaged or missing items upon delivery. 2. Note any damaged or missing items on the receipt and freight bill. 3. File a claim with the shipping company if anything is out of order. If the product has been picked up at a distributor, make a claim directly to the distributor. - Page 11 Transportation and Storage Examples Figure 1: Example of a proper lifting method Figure 2: Example of lifting motor properly with lifting lugs Figure 3: Example of lifting pump properly with sling Model API 3171 Installation, Operation, and Maintenance Manual...
- Page 12 Transportation and Storage Storage guidelines Pump storage requirements Requirements Vertical pumps require proper preparation for storage and regular maintenance during storage. The pump is considered in storage when it has been delivered to the job site and is awaiting installation. For specific requirements for storing motors, gearheads, and engines, contact the equipment manufacturer.
- Page 13 Transportation and Storage 3. If the unit is assembled, place an additional 0.5 kg | 1 lb in the discharge nozzle and securely fasten the nozzle to the discharge elbow. 4. Install a moisture indicator near the perimeter of the unit. 5.
-
Page 14: Product Description
Ensure that the code classifications on the pump are compatible with the specific environment in which the equipment is to be installed. If they are not compatible, do not operate the equipment and contact an ITT representative before proceeding. Casing The casing has these features: •... -
Page 15: Enclosed Lineshaft
Product Description Column pipe The column pipe has flanged connections that are machined in order to ensure true parallelism and to maintain steady bearings concentric with the shaft. Shaft The standard design uses a one-piece shaft in order to ensure accurate alignment. The shaft is precision-ground, polished, and straightened to keep vibration and deflection to a minimum. -
Page 16: Nameplate Information
Product Description Pressure differential (PSI) Approximate leak rate (GPM) 0.60 Standard materials of construction • Floating bushings are 18-8 stainless steel housing and spring with a glass-filled PTFE bushing. • Flush tubing is steel. Drawing Positive flow must be maintained at all times. 1. - Page 17 Product Description Nameplate on the pump casing using English units Figure 4: Nameplate on the pump casing using English units Table 1: Explanation of nameplate on the pump casing Nameplate field Explanation IMPLR. DIA. Impeller diameter, in inches MAX. DIA. Maximum impeller diameter, in inches Rated pump flow, in gallons per minute FT HD...
-
Page 18: Permissible Temperatures
NOTICE: The code classification marked on the equipment must be in accordance with the specified area where you plan to install the equipment. If it is not, contact your ITT representative before you proceed. Model API 3171 Installation, Operation, and Maintenance Manual... -
Page 19: Installation
• Electrical connections must be made by certified electricians in compliance with all international, national, state and local regulations. • Supervision by an authorized ITT representative is recommended to ensure proper installation. Improper installation may result in equipment damage or decreased perfor- mance. - Page 20 Installation Pump location guidelines Guideline Explanation/comment Make sure that the space around the This facilitates ventilation, inspection, maintenance, and ser- pump is sufficient. vice. If you require lifting equipment such as a This makes it easier to properly use the lifting equipment and hoist or tackle, make sure that there is safely remove and relocate the components to a safe location.
-
Page 21: Support Plate Installation
Installation 1. Hex nut 2. Washer 3. Support plate 4. 12.5 mm | 0.5 in. anchor bolt 5. Anchor bolt sleeve 6. Foundation (by customer) Figure 8: Example of a typical installation Support plate installation Install the support plate with a pit cover If access to the bottom of the pit cover is not possible during the installation process, you must assemble and install the pump (without the motor), support plate, and pit cover as a unit. -
Page 22: Stuffing Box Installation
Installation Support plate Action type Tank flange Install the supplied gasket between the two flanges. Make sure that the mating flange on the tank is level. Use gasket material between the flanges in order to make minor adjustments. Figure 9: Layout for a standard support plate with the vapor-proof option 4. -
Page 23: Install The Packed Stuffing Box
Installation 7. 3 in. (76.2 mm) NPT female connection 8. Pit cover 9. Gasket Install the packed stuffing box WARNING: Packed stuffing boxes are not allowed in an ATEX-classified environment. The stuffing box is packed at the factory. The packing is lubricated by a grease cup supplied with the pump. -
Page 24: Motor Installation And Coupling Alignment
Installation Motor installation and coupling alignment WARNING: • Misalignment can cause decreased performance, equipment damage, and even catas- trophic failure of frame-mounted units leading to serious injury. Proper alignment is the responsibility of the installer and the user of the unit. Check the alignment of all drive components prior to operating the unit. -
Page 25: Float Control Installation
4. Tighten all motor bolts. Float control installation ITT supplies several different float controls. Refer to the float control installation instructions provided with the controls for the proper installation procedure. This topic describes the Square D 9036 Simplex and Square D 9038 Duplex float controls. - Page 26 Installation How float controls work The on and off levels of the Square D 9036 simplex and the Square D 9038 duplex are controlled by adjusting the collars (335). As the liquid level rises, the float rises to contact the upper collar and the upward movement of the float rod causes the mechanical switch inside the control to close.
-
Page 27: Install The Square D 9036 Simplex And 9038 Duplex Float Controls
Installation Float ball switches Float balls are individual switches that are used in multiple configurations to control the pump circuit. The float balls are suspended in the sump to the desired control level. When the fluid level rises to the float ball, the switch begins to float. The float is either anchored to a pipe or weighted. -
Page 28: Piping Checklists
Installation You must maintain the radius (4) between the float switch column and the float. Figure 13: Radius between float switch column and float Piping checklists General piping checklist Precautions WARNING: • Risk of premature failure. Casing deformation can result in misalignment and contact with rotating parts, causing excess heat generation and sparks. - Page 29 Installation Check Explanation/comment Checked Check that only necessary fittings This helps to minimize friction losses. are used. Do not connect the piping to the — pump until: • The grout for the baseplate or sub-base becomes hard. • The grout for the pit cover becomes hard.
- Page 30 Installation Check Explanation/comment Chec For outside tank mount and dry This allows the line to be closed for pump inspection and pit applications, install an isola- maintenance. The isolation valve must be kept fully open during tion valve in the suction line at operation.
-
Page 31: Commissioning, Startup, Operation, And Shutdown
Commissioning, Startup, Operation, and Shutdown Commissioning, Startup, Operation, and Shutdown Preparation for startup WARNING: • Risk of serious physical injury or death. Exceeding any of the pump operating limits (e.g. - pressure, temperature, power, etc.) could result in equipment failure, such as explosion, seizure, or breach of containment. -
Page 32: Check The Rotation - Frame Mounted
Commissioning, Startup, Operation, and Shutdown • Run a new or rebuilt pump at a speed that provides enough flow to flush and cool the close-running surfaces of the stuffing-box bushing. • If temperatures of the pumped fluid will exceed 93°C | 200°F, then warm up the pump prior to operation. - Page 33 Commissioning, Startup, Operation, and Shutdown recommended oil for the oil mist is an ISO VG 100. See the table for recommended oil mist airflows. Follow the instructions from the oil mist system supplier. The oil mist system must be interconnected with the pump so that the pump will shut down if the mist system fails. Table 3: Recommended oil mist airflows This data is based on an oil/air ratio of 0.4 cubic inch (0.22 ounce) per hour per cfm.
- Page 34 Commissioning, Startup, Operation, and Shutdown threaded against the stem zerk fitting and the bottom of the wing nut rests on the cap of the grease cup, then the grease reservoir is empty and you must refill it. 1. Zerk fitting 2.
-
Page 35: Shaft Sealing With A Mechanical Seal
Commissioning, Startup, Operation, and Shutdown Shaft sealing with a mechanical seal Precautions WARNING: The mechanical seal used in an Ex-classified environment must be properly certified. NOTICE: • The mechanical seal must have an appropriate seal-flush system. Failure to do so will result in excess heat generation and seal failure. -
Page 36: Pump Priming
Commissioning, Startup, Operation, and Shutdown Pump priming WARNING: These pumps are not self priming and must be fully primed at all times during operation. Loss of prime can lead to excessive heat and severe damage to the pump and seal. CAUTION: Do not run the pump dry. -
Page 37: Start The Pump
Commissioning, Startup, Operation, and Shutdown Start the pump WARNING: Risk of equipment damage, seal failure and breach of containment. Ensure all flush and cooling systems are operating correctly prior to starting pump. NOTICE: • Risk of equipment damage due to dry operation. Immediately observe the pressure gauges. -
Page 38: Pump Operation Precautions
Commissioning, Startup, Operation, and Shutdown Pump operation precautions General considerations Operation at reduced capacity WARNING: • Risk of breach of containment and equipment damage. Excessive vibration levels can cause damage to bearings, stuffing box, seal chamber, and/or mechanical seal. Observe pump for vibration levels, bearing temperature, and excessive noise. -
Page 39: Make The Final Alignment Of The Pump And Driver
Commissioning, Startup, Operation, and Shutdown Make the final alignment of the pump and driver WARNING: • Failure to disconnect and lock out driver power may result in serious physical injury or death. Always disconnect and lock out power to the driver before performing any installation or maintenance tasks. -
Page 40: Maintenance
Maintenance Maintenance Maintenance Maintenance schedule Maintenance inspections A maintenance schedule includes these types of inspections: • Routine maintenance • Routine inspections • Three-month inspections • Annual inspections Shorten the inspection intervals appropriately if the pumped fluid is abrasive or corrosive or if the environment is classified as potentially explosive. -
Page 41: Bearing Maintenance
These bearing lubrication sections list different temperatures of the pumped fluid. If the pump is ATEX-certified and the temperature of the pumped fluid exceeds the permitted temperature values, then consult your ITT representative. Thrust bearings The pump comes with a grease-lubricated duplex thrust bearing. The bearing is pre-lubricated at the factory. -
Page 42: Shaft-Seal Maintenance
Maintenance Grease recommendations based on temperature Most pumps use Sunoco 2EP grease. High temperature units that can pump fluids with a temperature greater than 177°C | 350°F use Mobil SCH32. This table shows which brand of grease to use when lubricating the pump. Brand When temperature of pumped When temperature of pumped... - Page 43 Maintenance disengagement of the holding clips prior to operation, allowing the seal to slide into place. If the seal has been installed in the pump by ITT, these clips have already been disengaged. Other mechanical seal types For other types of mechanical seals, refer to the instructions provided by the seal manufacturer for installation and setting.
-
Page 44: Disassembly
Maintenance Disassembly Disassembly precautions WARNING: • Failure to disconnect and lock out driver power may result in serious physical injury or death. Always disconnect and lock out power to the driver before performing any installation or maintenance tasks. • Electrical connections must be made by certified electricians in compliance with all international, national, state, and local rules. -
Page 45: Drain The Pump
Maintenance Drain the pump CAUTION: • Risk of physical injury. Allow all system and pump components to cool before handling. • If the pumped fluid is non-conductive, drain and flush the pump with a conductive fluid under conditions that will not allow for a spark to be released to the atmosphere. 1. -
Page 46: Remove The Impeller
Maintenance 7. Remove the bolts (317N) in order to remove the strainer (187). Figure 17: Remove bolts to remove strainer 8. Remove the suction cover (182). 9. Remove the discharge elbow-casing bolts (370H). 10. Disconnect any steady bearing flush tubing (190). Remove the impeller CAUTION: Risk of physical injury from sharp edges. -
Page 47: Disassemble The Column
Maintenance 4. Remove the impeller key (178). Save the key for reassembly unless it is damaged. 5. For L group models only, do the following: a) Remove the casing (100) to adapter (108) bolts. b) Remove casing. Do not remove casing collar (155) at this time. c) Remove the adapter (108) to column bolts. -
Page 48: Preassembly Inspections
Maintenance 2. Remove the pump half coupling hub (233) and key. 3. Remove the locking bolts (370C) and then slide bearing shell (134) assembly with the shaft out through the motor support (240). CAUTION: Two people should handle any shaft over 9 feet long. Improper handling can bend the shaft. 4. - Page 49 Maintenance • Pitting that is greater than 3.2 mm | 1/8 in. deep Casing Casing collar Steady bearing • Check the I.D. of the casing collar (155) and steady bearing (197) per the dimensions in Bearing fits and tolerances (page 49). If the I.D. is greater than what is allowed, remove the snap ring (369) and use a suitable hydraulic press to remove these items for replacement.
-
Page 50: Shaft Replacement Guidelines
Maintenance Fasteners WARNING: Risk of serious personal injury or property damage. Fasteners such as bolts and nuts are critical to the safe and reliable operation of the product. Ensure appropriate use of fasteners during installation or reassembly of the unit. •... -
Page 51: Bearing Fits And Tolerances
Maintenance • Inspect the ball bearings to see if they are loose, rough, or noisy when you rotate them. • Investigate any bearing damage to determine the cause. If the cause is not normal wear, correct the issue before you return the pump to service. •... -
Page 52: Assemble The Rotating Element
Maintenance If ... Then... You use the stuffing box Attach the motor support (240) to the stuffing box with bolts (370J). You do not use the stuffing box Attach the motor support (240) to the support plate (189) with bolts (370J). 3. -
Page 53: Assemble The Column
Maintenance CAUTION: Risk of physical injury from hot bearings. Wear insulated gloves when using a bearing heater. 3. Install the lockwasher (382) on the shaft (122). Make sure that the tang of lockwasher is in the keyway of the shaft. 4. - Page 54 Maintenance 5. Check the axial travel of the impeller. If the travel is less than 0.762 mm | 0.030 in., then add extra gaskets (351) in order to obtain the minimum travel. 6. Install the discharge elbow gasket (351A) and the discharge elbow (315) using bolts (370H).
-
Page 55: Troubleshooting
Troubleshooting Troubleshooting Troubleshooting Operation troubleshooting Symptom Cause Remedy The pump is not delivering The pump is not primed. Make sure the pit is filled with liquid above the liquid. casing. On dry pit units, the casing and suction pipe must be completely filled. The discharge head it too high. -
Page 56: Assembly Troubleshooting
If this does not help, then contact your ITT representative. The liquid is heavier than expected. Check the specific gravity and viscosity. Rotating parts are rubbing against each other. Check the parts that are wearing for proper clearances. -
Page 57: Parts Listings And Cross-Sectionals
Parts Listings and Cross-Sectionals Parts Listings and Cross-Sectionals Cross-sectional diagram Main pump components B-B2 Upper stuffing box with me- Grease lube only chanical seal B-B1 Upper stuffing box with Detail of B-B1 M and MT groups only packing Model API 3171 Installation, Operation, and Maintenance Manual... -
Page 58: Dimensional Drawings
Parts Listings and Cross-Sectionals Dimensional drawings Exploded view A Exploded view B Model API 3171 Installation, Operation, and Maintenance Manual... -
Page 59: Parts List
Parts Listings and Cross-Sectionals Parts list Table 9: Parts list with materials of construction Item Quantity Part name S-1/S-4 A890 A890 A743 Grade Grade Casing A216 WCB (1212) CF8M (1203) (1360) (1361) A890 A890 A536 65- A436 A216 A487 A743 A743 Grade Grade... - Page 60 Parts Listings and Cross-Sectionals Item Quantity Part name S-1/S-4 Labyrinth seal, lower Bronze INPRO Gasket, suction cover to cas- Nitrile acrylic Gasket, discharge elbow to 351A Nitrile acrylic casing 361A Retaining ring, thrust bearing Steel 364A Stuffing box 1203 367B Gasket, stuffing box insert Nitrile acrylic 369A...
-
Page 61: Other Relevant Documentation Or Manuals
Other Relevant Documentation or Manuals Other Relevant Documentation or Manuals Other Relevant Documentation or Manuals For additional documentation For any other relevant documentation or manuals, contact your ITT representative. Model API 3171 Installation, Operation, and Maintenance Manual... -
Page 62: Local Itt Contacts
Local ITT Contacts Local ITT Contacts Regional offices Region Address Telephone North America (Headquarters) ITT - Goulds Pumps +1 315-568-2811 +1 315-568-2418 240 Fall Street Seneca Falls, NY 13148 Houston office 12510 Sugar Ridge Boulevard +1 281-504-6300 +1 281-504-6399 Stafford, TX 77477... - Page 64 Visit our website for the latest version of this document and more information: http://www.gouldspumps.com Goulds Pumps 240 Fall Street Seneca Falls, NY 13148 Form IOM.API3171.en-US.2018-12 © 2018 ITT Corporation The original instruction is in English. All non-English instructions are translations of the original instruction.
Need help?
Do you have a question about the Goulds Pumps API 3171 and is the answer not in the manual?
Questions and answers