Table of Contents
Advertisement
Quick Links
Advertisement
Table of Contents

Subscribe to Our Youtube Channel
Summary of Contents for ZeeVee HDbridge3000
- Page 1 HDbridge3000 C O N F I G U R A T I O N G U I D E...
- Page 2 I N S T R U C T I O N S P E R T A I N I N G T O A R I S K O F F I R E , E L E C T R I C S H O C K , O R I N J U R Y T O P E R S O N S Important Safety Instructions.
-
Page 3: Table Of Contents
Warranty ....15 1 x ZeeVee HDbridge3000 Chassis with Control Module and 2x hot-swappable power Contact ZeeVee ....16 supplies. Media Modules are sold separately. -
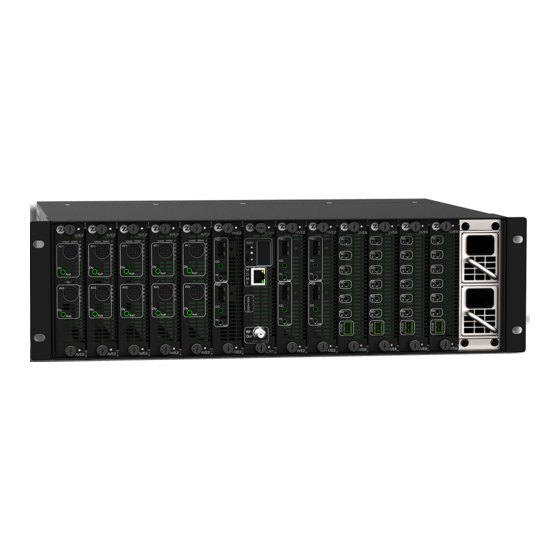
Page 4: Panel Layout
IP networks.* Power Supplies 100 - 240 V AC / 50 - 60 Hz, hot-swappable, dual-redundant power supplies. Both AC power cords (included) must be connected to the HDbridge3000 for proper operation. * Not all cards support IP out. - Page 5 Cooling Fans Hot-swappable, high-capacity cooling fans. Air is pulled in from these fans and expelled through the front panel. When installing the HDbridge3000, make sure that these fans are not blocked and clear from other heat- generating sources.
-
Page 6: Basic Installation
Basic Installation NOTE: Illustration shows HDbridge3000 with HDMI, Component/VGA, and Composite cards, which are sold separately. (Requires ZeeVee CAVC6 3.5mm plug to RCA (Requires ZeeVee CAVC6 3.5mm plug to RCA Component and/or VGA cable Composite AV cable) Composite AV cable) -
Page 7: Status Display
Status Display The HDbridge3000 has a small display, located on both the front and back panel of the unit. When the display is in "standby", the ZeeVee logo is displayed. Press the NAV wheel to display the IP address / port status of the HDbridge3000. To change the IP address of the HDbridge3000, use the Network tab in the Maestro web interface. -
Page 8: Maestro Configuration
HDbridge3000. Click on the RF Channel Plan tab. Connecting with Maestro Connect the HDbridge3000 to a LAN with a DHCP server or directly to a PC using a standard Ethernet cable. Do not use a crossover cable. -
Page 9: Map For Configuring Rf Channels And Virtual Channels
Map for configuring RF Cable TV Channels vs RF Frequency (MHz) Map channels and virtual channels The table, to the right, shows how RF Ch. Band (MHz) RF Ch. Band (MHz) RF Ch. Band (MHz) RF Ch. Band (MHz) RF Ch. Band (MHz) logical RF channels are matched with 54-60... -
Page 10: Using Auto Increment
Configuration dialog will be displayed. 11. Click the Close button to dismiss the dialog. NOTE: All saved settings are retained, even if the HDbridge3000 is powered-off. Card settings are automatically migrated when swapping cards of the same type. Page 10 H D b r i dg e30 0 0 Co n fi g u r a ti o n G u i d e w w w.z e ev e e.c om... -
Page 11: Using Other Maestro Tabs
Using other Maestro tabs Click on any other Maestro tab to configure your unit as needed. We provide brief information below. Please click on the Help button on each tab or refer to the Support section of our website for further detail on configuration options. AV Source tab Allows for specifying audio and video inputs and adjusting... - Page 12 Network tab Allows you to configure IP settings. By default the HDbridge3000 uses DHCP to obtain an IP address for the control module. To use an STB or EAS, an IP address must be assigned to each media module (card) using the Static or DHCP setting.
- Page 13 Admin tab Use this Admin tab to create user accounts and grant access to specific functions within the Maestro web interface. Maestro allows for a total of 10 custom user accounts, not including the "admin" account. Support tab Provides technical support contact information and allows you to send logs for troubleshooting.
-
Page 14: Troubleshooting
Maestro correct it, make sure your PC is not using a static IP address. The PC and the HDbridge3000 unit must be on the same IP subnet for them to communicate. For details on how to check for a static IP address, please see the FAQ section of our website. -
Page 15: Warranty
LIMITATION OF LIABILITY and in lieu of all other warranties, guarantees, or “back doors” will void these limited warranties. In no event will ZeeVee be liable for any amount agreements and similar obligations of ZeeVee. • Reception or transmission problems caused by... -
Page 16: Contact Zeevee
Contact ZeeVee Support For additional questions call +1(877) 4-ZEEVEE (1.877.493.3833) or e-mail support@zeevee.com. Representatives are available from 9:00 AM to 6:00 PM, Monday through Friday (Eastern Time). Sales North America: +1 (347) 851-7364 Phone sales@zeevee.com EMEA: +44 1494 956677 Phone EMEAsales@zeevee.com...


Need help?
Do you have a question about the HDbridge3000 and is the answer not in the manual?
Questions and answers