Table of Contents
Advertisement
Quick Links
WALL-MOUNTED CERAMIC FAN HEATERS
This product is only suitable for well insulated spaces or
occasional use.
Read the instructions carefully before operating the appliance or carrying out maintenance
operations.
Observe all the safety instructions; failure to observe the instructions may lead to accidents and/or
damage. Store these instructions.
V 06/18
OPERATING INSTRUCTIONS
EN
IPX2
12
Advertisement
Table of Contents

Related Manuals for Argo Sleek


Summary of Contents for Argo Sleek
- Page 1 WALL-MOUNTED CERAMIC FAN HEATERS IPX2 This product is only suitable for well insulated spaces or occasional use. OPERATING INSTRUCTIONS Read the instructions carefully before operating the appliance or carrying out maintenance operations. Observe all the safety instructions; failure to observe the instructions may lead to accidents and/or damage.
-
Page 2: General Safety Information
GENERAL SAFETY INFORMATION Use this fan heater only as outlined in this manual. Any other use not recommended by the manufacturer may cause fire, electric shock or injury to persons. Make sure that the type of mains power complies with the electrical requirements of the fan heater (220-240 V~50 Hz). - Page 3 Do not restrict the air inlet and outlet grilles. The appliance is equipped with an IPX2 degree of protection and can be used in private bathrooms in zone 2. The appliance must not be touched by people that use bath tubs and showers.
- Page 4 The most common cause of overheating is the build-up of dust in the appliance. Remove accumulated dust, after taking the plug out, by cleaning the grilles using a vacuum cleaner. Do not use any abrasive products to clean the appliance. Clean it using a damp (not wet) cloth rinsed in soapy water.
-
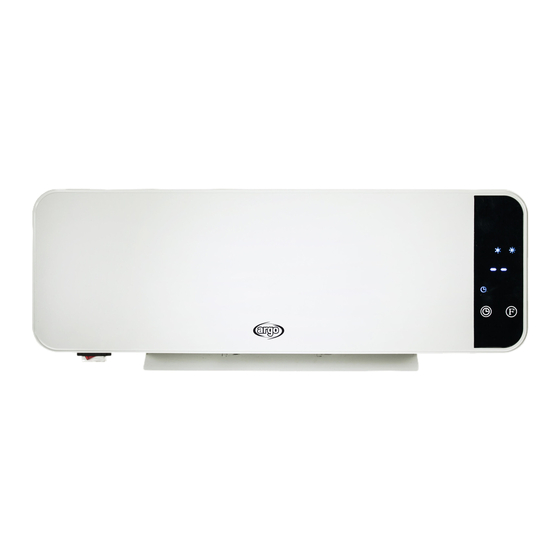
Page 5: Description Of Parts
WARNING: THE ON/OFF SWITCH IS NOT THE ONLY METHOD OF DISCONNECTING THE MAINS POWER. ALWAYS UNPLUG THE APPLIANCE DURING MAINTENANCE OPERATIONS, WHEN MOVING IT OR WHILE IT IS NOT IN USE. A fan heater contains parts that generate electrical arcs and sparks. It must not be used in potentially dangerous areas such as those subject to the risk of fire or explosion, or areas filled with chemical substances or humidity. - Page 6 Fischer Figure 1 Figure 2 Figure 3 3. Insert the Fischer screw plugs into the holes and tighten the screws provided. NOTE: Tighten the screws securely. Do not insert the screws into the Fischer plugs entirely - leave around 10 mm free. 4.
-
Page 7: Remote Control
REMOTE CONTROL 1. ON/OFF button - switching on/off from stand-by mode 2. SWING button - flap swivel setting TIMER button - setting daily timer ON/OFF (1-12h) SET button - set MODE button - fan mode setting cold, ECO, COMFORT Button - temperature regulation OK button - confirm weekly programmes + Button temperature regulation Open window function activation button... - Page 8 HOW TO USE THE FAN HEATER Connect the power cable to a suitable electric socket (220-240V~50Hz), as indicated in the data plate. SWITCHING THE FAN HEATER ON on the remote control Press the button on the appliance to switch the fan heater to stand-by mode. Press the to switch the appliance ON.
-
Page 9: Overheating Safety Device
TIME SETTING (Only from the remote control) Press the SET button to show the time on the display; press the + or – buttons to set the current hour (00-23); press the SET button again to set the minutes (00-59); press the SET button again to set the day of the week – if you press + or – the display will show the following abbreviations: d1, d2, d3,…... - Page 10 Tabel 2 - Annex II - Ecodesign requirements - Requirements for product information - COMMISSION REGULATION (EU) 2015/1188 of 28 April 2015 implementing Directive 2009/125/EC of the European Parliament and of the Council with regard to ecodesign requirements for local space heaters Model identifier(s): SLEEK Item Symbol...
- Page 11 INFORMATION ON THE CORRECT DISPOSAL OF THE PRODUCT pursuant to Art. 26 of (Italian) Legislative Decree no. 49 of 14/03/14, “IMPLEMENTATION OF DIRECTIVE 2012/19/EU ON WASTE ELECTRICAL AND ELECTRONIC EQUIPMENT” At the end of its useful life, this appliance must not be disposed of together with household waste. We call your attention to the crucial role played by the consumer in the reuse, recycling and other forms of recovery of such waste.
Need help?
Do you have a question about the Sleek and is the answer not in the manual?
Questions and answers