Advertisement
INSTALLATION INSTRUCTIONS FOR
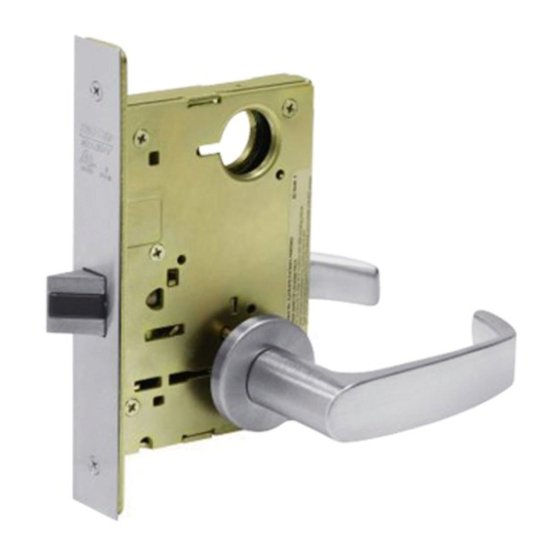
8200 Lever with Freewheeling Escutcheon Trim FE
FOR ASSISTANCE, CALL SARGENT AT 1-800-727-5477 or www.sargentlock.com
5
4
2
3
1
11
12
14
13
1
Install Lockbody
Insert lockbody into mortise
cutout. Hold loosely in place
with (2) lockbody screws.
Do not tighten screws fully
at this time.
Lockbody
Screws
Inside
of
Door
6
8
7
25 Function Shown — For hole locations of other functions, see template page 4
Outside
of
Door
9
2
Outside Escutcheon Assembly
A. With outside lever
horizontal, carefully insert
the mounting posts through
the door and lockbody.
Make sure the spindle is
properly engaged in the
lock. Outside escutcheon
assembly should be flush
with door surface.
If cylinder is not included in
this function, proceed to step 3.
B. Screw cylinder into
lockbody until flush with
escutcheon face.
Copyright© 2005, 2008, 2010, 2016, Sargent Manufacturing Company, an ASSA ABLOY
Group company. All rights reserved. Reproduction in whole or in part without the
express written permission of Sargent Manufacturing Company is prohibited.
Patent pending and/or patent
www.assaabloydss.com/patents
Parts List Description
1. Inside Lever
2. Spring
3. Set screw
4. Through-bolt Screws (2)
(1/4" - 20 x 1-3/4)
10
5. Inside Escutcheon Plate
6. Screws & Lockwashers (2)
(#8-32 x 5/8")
7. Adapter & Plate Assy.
8. Lever spindle
9. Outside Escutcheon
Assembly
10. Cylinder
11. Screws (2) (#8-32 x 1/4")
12. Front Plate
13. Lockbody screws (2)
(#12 x 1-1/4")
14. Lockbody
1
A7334G
Advertisement
Table of Contents

Subscribe to Our Youtube Channel
Related Manuals for Sargent 8200


Summary of Contents for Sargent 8200
- Page 1 Screws escutcheon face. Copyright© 2005, 2008, 2010, 2016, Sargent Manufacturing Company, an ASSA ABLOY Group company. All rights reserved. Reproduction in whole or in part without the A7334G express written permission of Sargent Manufacturing Company is prohibited.
- Page 2 Locking piece side of door slot Copyright© 2005, 2008, 2010, 2016, Sargent Manufacturing Company, an ASSA ABLOY Group company. All rights reserved. A7334G Reproduction in whole or in part without the express written permission of Sargent Manufacturing Company is prohibited.
- Page 3 R.H. L.H. R.H.R. L.H.R. R.H.R. L.H.R. Copyright© 2005, 2008, 2010, 2016, Sargent Manufacturing Company, an ASSA ABLOY Group company. All rights reserved. A7334G Reproduction in whole or in part without the express written permission of Sargent Manufacturing Company is prohibited.
- Page 4 A7334G...
Need help?
Do you have a question about the 8200 and is the answer not in the manual?
Questions and answers