
Related Manuals for EUFY RoboVac 11c+


Summary of Contents for EUFY RoboVac 11c+
- Page 1 Owner’s Manual eufy RoboVac 11c+ T2107 1. About Your RoboVac What's In the Box eufy RoboVac 11c+ Charging Base Remote Control ( AAA Battery ×2) Power Adapter...
-
Page 2: Robovac Anatomy
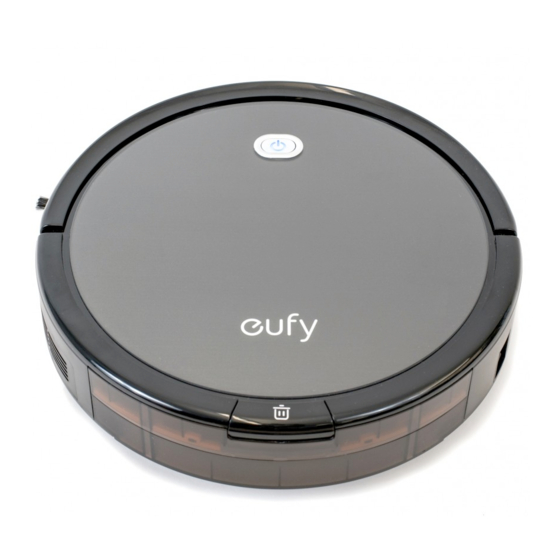
(×2) Additional Side Brushes Additional High-Performance Additional Foam Filter Filter Cleaning Tool Safety Leaflet Owner’s Manual Quick Start Guide RoboVac Anatomy Top & Side... - Page 3 1. Auto cleaning On/Off button 2. Bumper 3. Wi-Fi status light 4. Infrared sensor 5. Main power switch (On/Off) 6. Dust collector 7. Dust collector release button Bottom 1. Charging contact pins 2. Brush guard 3. Rolling brush 4. Drop sensors 5.
- Page 4 1. Filter cover 2. Foam filter High-performance filter Charging Base 1. Charging contact pins 2. Status light 3. Power socket Suction Inlet 1. Dust collector 2. Suction inlet...
- Page 5 Remote Control 1. Return RoboVac to the Charging Base 2. Start/Stop Auto cleaning 3. Adjust cleaning direction manually 4. Start Spot cleaning...
- Page 6 5. Start Edge cleaning 6. Start Single Room cleaning Install 2 AAA batteries before using the remote control for the first time Make sure the positive and negative ends are facing the correct polarity direction as marked in the battery compartment. 2.
- Page 7 ● Keep RoboVac away from wet areas. ● RoboVac may climb on top of objects less than 0.67 in/17 mm in height. Remove these objects if possible. ● Anti-drop sensors prevent RoboVac from tumbling down stairs and steep drops. They may work less effectively when they are dirty, or on reflective/dark-colored floors.
-
Page 8: Install The Charging Base
recommended to place a physical barrier to block off problem areas where the device may fall. Install the Charging Base 1. Place the Charging Base on a hard, level surface and against a wall. 2. Remove objects within 3 ft/1 m of the left and right side and within 6 ft/2 m of the front of the charging base. -
Page 9: Charge Your Robovac
3. Connect the round connector of the adapter into the power socket on the Charging Base and the other end into a wall outlet. - Install the Charging Base in a location that RoboVac can easily access. - Always keep the Charging Base plugged in, otherwise RoboVac will not automatically return to The LED indicator on the charging base is SOLID GREEN when RoboVac is not docked. - Page 10 Method 1: Attach RoboVac to the Charging Base by aligning its charging pins with the charging pins on the base. Method 2: Press on the remote control to return RoboVac to the Charging Base. Status Status Light Breathing blue Charging...
-
Page 11: Start / Stop Cleaning
Solid blue Standby / Cleaning / Returning to charging base Solid purplish-red Low power and returning to charging base Flashing / Solid red + RoboVac has an error Beeping ● RoboVac powers off. ● To save power, the light automatically turns off: ○... -
Page 12: Select A Cleaning Mode
Press on RoboVac or on the remote control to start cleaning in Auto Mode. 3. Stop cleaning Press on RoboVac or on the remote control to stop cleaning. Select a Cleaning Mode 1. Auto cleaning RoboVac automatically cleans in a back-and-forth, straight-line pattern. This is the most commonly used cleaning mode. - Page 13 - RoboVac will return to the Charging Base automatically when the power level becomes low or when RoboVac finishes cleaning. - By default, RoboVac starts in Auto cleaning mode when it is turned on. ● Power Boost Feature When the Power Boost feature is enabled, RoboVac will automatically increase the suction power if it detects stronger power is needed to ensure the best clean.
- Page 14 3. Edge cleaning RoboVac reduces its speed when it detects a wall and then follows the wall to ensure the edge is cleaned thoroughly. In Edge mode, RoboVac will clean for 20 minutes and return to the charging base. Press on the remote control to start cleaning in Edge Mode.
- Page 15 Press on the remote control to start cleaning in Single Room Mode. 5. Manual cleaning You can direct RoboVac to clean a particular area by using the directional buttons on the remote control. 1. Left 2. Backward 3. Right 4. Forward...
-
Page 16: Schedule Cleaning
Schedule Cleaning With the EufyHome app, you can schedule RoboVac to start cleaning at a specific time. ● You can set the time and customize the cleaning schedules from Sunday to Saturday the EufyHome app. Cleaning schedules can only be set using the EufyHome app. Use Your RoboVac with the EufyHome App To enjoy all available features, it is recommended to control your RoboVac via the EufyHome app. -
Page 17: Use Your Robovac With Amazon Alexa / The Google Assistant (Optional)
● RoboVac is connected with the EufyHome app. ● You have an Alexa-enabled device (i.e. Eufy Genie, Amazon Echo, Echo Dot and Amazon Tap) or a device enabled with the Google Assistant (i.e. Google Home). These devices are sold separately. - Page 18 1. Open the Amazon Alexa app and select “Skills” from the menu. On the Skills screen, search for “EufyHome - RoboVac”. 3. Once you have found the “EufyHome - RoboVac” skill, tap Enable. 4. Login with your EufyHome account so that Alexa can control your RoboVac. 5.
-
Page 19: Cleaning And Maintenance
● "Ok Google, ask RoboVac to go home" ● "Ok Google, ask RoboVac to find my robot" - For more information about how RoboVac works with Amazon Alexa / the Google Assistant, visit https://www.eufylife.com and go to PRODUCTS>Cleaning>RoboVac 11c+ for details. - The Amazon Alexa / Google Assistant service is currently available in English only. - Page 20 3. Separate the filter cover by pulling the hooks as shown. 4. Take out the foam filter and high-performance filter. 5. Clean the dust collector and filters with a vacuum cleaner or a cleaning brush. 6. Put the filters and filter cover back together in the dust collector.
-
Page 21: Clean The Rolling Brush
7. Push the dust collector back into the main unit. - It is recommended to empty the dust collector and clean the filter after every use. - You can wash the dust collector, filter cover and foam filter with water. Be sure to air-dry them thoroughly before reassembling. -
Page 22: Clean The Sensors And Charging Pins
Clean the Sensors and Charging Pins To maintain best performance, clean the drop sensors and charging pins regularly. ● Dust off the drop sensors and charging contact pins using a cloth or cleaning brush. Clean the Side Brushes Foreign substances, such as hair, can easily get tangled in the side brushes, and dirt may adhere to them. -
Page 23: Replace The Side Brushes
● Carefully unwind and pull off any hair or string that is wrapped between the main unit and the side brushes. ● Use a cloth dampened with warm water to remove dust from the brushes or to gently reshape them. Use the side brushes only when they are completely dry. - Page 24 Problem Solutions ● Make sure the main power switch is in RoboVac cannot be activated. the ON position. ● Make sure the battery is fully charged. ● Replace the batteries (2 AAA) in the remote control. ● Make sure the remote control is within range (less than 6 ft/3 m from RoboVac).
- Page 25 ● Check if any obstructions are blocking Suction power is weak. the suction inlet. ● Empty the dust collector. ● Clean the filter with a vacuum cleaner or a cleaning brush. ● Check if the Charging Base is plugged RoboVac cannot be charged. into the outlet.
-
Page 26: Error Tone
device and enabled “EufyHome - RoboVac” Skill in the Amazon Alexa app. For details, refer to this section “Use Your RoboVac with Amazon Alexa / the Google Assistant (Optional)”. ● Make sure you have an EufyHome account. ● Make sure you are using correct Alexa voice-commands. - Page 27 RoboVac’s drop sensors are dirty. One beep Clean the drop sensors gently with a dry cloth. Two beeps RoboVac’s power level is too low. Charge RoboVac for at least 5 hours. Three RoboVac is hanging over a ledge Turn off RoboVac and restart in a beeps or is trapped.
- Page 28 North America. Until then, use channels 1-11. If you cannot control RoboVac with your smartphone, try the solutions below to solve the problem. If the problem persists, contact the Eufy service center for help. Wi-Fi Status Light...
-
Page 29: Specifications
● Check if your router is Solid blue RoboVac has connected to your router, but cannot connected to the Internet. ● Check with your Internet access the Internet. provider to see if there is any Internet connection problem. ● Check if you have modified Rapidly flashing blue RoboVac cannot connect to your wireless router. -
Page 30: Customer Service
Battery Type DC 14.4 V Li-ion 2500 mAh Dust Collector Capacity 0.55 L Cleaning Time Max. 100 mins Charging Time 300 - 360 mins Input 19 V == 0.6 A Output 19 V == 0.6 A 6. Customer Service 12-month Limited Warranty Lifetime Technical Support support@eufylife.com For FAQs and more information, please visit www.eufylife.com. - Page 31 1. Important Safety Instructions To reduce the risk of injury or damage, read these safety instructions carefully and keep them at hand when setting up, using, and maintaining this device. WARNING SYMBOLS USED This is the safety alert symbol. This symbol alerts you to potential hazards that could result in property damage and/or serious bodily harm or death.
- Page 32 • If the room to be cleaned has a balcony, a physical barrier should be used to prevent access to the balcony and to ensure safe operation. • Do not place anything on top of this device. • Be aware that the device moves around on its own. Take care when walking in the area where the device is operated to avoid stepping on it.
- Page 33 This equipment generates, uses and can radiate radio frequency energy and, if not installed and used in accordance with the instructions, may cause harmful interference to radio communications. However, there is no guarantee that interference will not occur in a particular installation.
Need help?
Do you have a question about the RoboVac 11c+ and is the answer not in the manual?
Questions and answers